Small interior items can decorate and transform, change and update it. A lampshade on a table lamp or pendant lamp can refresh the design of the entire room, because not only the color and texture will change, but also the lighting.
Ideas for lamp shades are many and varied. These can be textile and plastic options, lace, paper and decorated with buttons. The materials at hand provide countless possibilities.
Brief overview of the article
What can a lampshade be made from?
Resourceful craftsmen use in their work:
- wooden clothespins;
- ice cream sticks;
- tubes from newspapers and magazines;
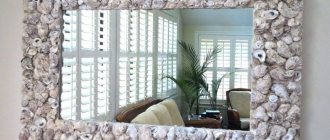
- shells and pebbles, both real and decorative for the aquarium;
- beads, bugles, beads;
- disposable drinking straws;
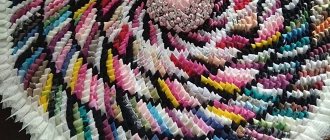
- twine, thread, yarn;
- plastic spoons and cups.
Decoration methods
You can update an old floor lamp using various decorative techniques. Here are some of them.
Artificial flowers
Table 8. Decorating with artificial flowers
| Illustration | Description of actions |
| Step 1 | If the old lampshade has a whole surface, then it can be decorated, thereby giving it a new look. |
| Step 2 | You can use acrylic paint for painting - after washing the product will retain its color. |
| Step 3 | If necessary, you can leave some decorative details, painting them in the desired color if they suit the chosen design. |
| Step 4 | Painting on the outside 2 times, and on the inside 1 time. |
| Step 5 | The paint is completely dry. |
| The frame is covered with fabric, using a hot glue gun to secure the edges. |
| Step 7 | Inflorescences of artificial flowers are used as decoration. The leg is cut off. |
| The part is lubricated with glue. |
| Step 9 | Press to the surface and hold until the glue cools completely. |
| Step 10 | Flowers are glued along the lower and upper diameter of the lampshade. |
| Step 11 | If desired, decorate the free space in the middle. |
Decorating an old floor lamp with artificial flowers
Decor “Night City”
You can make a simple floor lamp unique using a stencil.
A simple way to decorate
To work you will need adhesive tape, a needle and a printed drawing of a night city.
Necessary materials Use a needle to squeeze out the windows in the picture The blank is applied to the lampshade and the required height is marked The excess is cut off The blank is placed inside the lampshade
Nowadays, few people use incandescent light bulbs; they have been replaced by energy-saving and LED analogues. But they are still on sale, and are very inexpensive. And many people have accumulated a lot of old, burnt-out lamps of various types and sizes. If you like to create new interesting things from unnecessary trash and scrap materials, we suggest you see what you can make from them in a special article.
The frame is the basis of the work
Any master class on how to make a lampshade at home begins with designing and creating a wire frame. You will need wire cutters, a tape measure and round nose pliers.
Any wire will do:
- aluminum;
- steel;
- copper.
A simple design consists of two rings (larger and smaller diameter) and several jumpers between them. They form a figure in the shape of a truncated pyramid or cone. For the chandelier, the design is slightly modified - another ring on the fastenings is added inside.
An alternative option is to buy a ready-made frame at a hardware store.
Boho style lampshade
Let's start with a simple master class, as a result of which you will get a charming, very delicate chandelier. It will fit perfectly into Scandinavian or boho style.
Tools and materials
To make it you will need:
- frame (you can use a ready-made one or make it yourself from wire);
- cotton fabric;
- scissors;
- lace ribbons or any other decoration (beads, colored fabric);
- leg-split.
Step-by-step instruction
1. Take the fabric and make cuts at the same distance from each other. It is not necessary to cut the material with scissors - it is much easier to tear it with your hands.
2. You can determine the number of strips only after you secure them to the base. You can make a laconic or lush lampshade. There is no need to sew the ribbons together: just tie them in knots.
3. We continue to meditatively tie the frame, adding decorations: lace, ribbons or beads. The finished lampshade can be painted using the ombre technique - with a transition from dark to light areas. Next, you need to tie four ropes to the frame to secure the chandelier to the ceiling. It is better to use safe LED bulbs with warm light.
Fabric lampshade - an interior classic
The variety of fabrics also determines a wide range of finished works made from them. Fabric lampshades can be romantic and delicate, practical denim, or classic with a printed small pattern, as in the photo. How to make a lampshade is described below.
To work you will need:
- ready-made or homemade frame;
- two types of fabric;
- threads with a needle;
- scissors.
The first type of fabric is cut into strips. The length of the strips is equal to the height of the frame, taking into account allowances. Along the edges of the strips, a little thread is taken out to create a small fringe. Each strip is sewn to the top and bottom of the rim, overlapping the previous one.
Having covered the entire frame with stripes, the work is completed with another fabric. Its strips on double-sided tape are attached to the rims of the frame, hiding the seams.
Note!
- Do-it-yourself wardrobe: a review of ways and methods on how to build a stylish and original wardrobe (video and 145 photos)
Do-it-yourself furniture restoration - removing chips and scratches, restoring surfaces. Instructions with photos and video tips
- DIY ottoman: how to make it at home. The best ideas, master classes. Photo + video review of beautiful ottomans
Master class: painting under a stencil
A lampshade is an important home accessory. Using a ready-made base, you can create original lamps for interior decoration. In the photo you can see different decor options with the same items, but in different designs. The first version of the lampshade is made from a men's flannel shirt, and the second using the stencil technique.
To create a beautiful stencil design you will need a special spray adhesive. You also need to prepare a stencil. For painting, you can use acrylic or latex paints. You will also need special tape to secure the template.
The stencil is attached to the surface using tape. Then paint is applied. The stencil is used to paint the entire surface of the product. To complete the design, you can glue a beautiful blue ribbon. For this, fabric glue is used.
In accordance with the new style, you can also remodel the bedside table. A special spray paint is used for painting. It is better to spray outdoors.
The result should be a combination like this.
Other options for fabric lampshades
You can also make a lampshade from a single piece of fabric, simply wrapping it around the frame or draping it to suit your taste. You can decorate such a product with ribbons, braid, lace, embroidery and fabric painting.
Buttons, rhinestones and decorative stones can either complement the fabric or form an independent lampshade.
If you are decorating a table lamp for a schoolchild, you can add pockets to the product for stationery, paper clips, buttons and similar small items. For the needlewoman, compartments for scissors, tape measure, pins and other necessary things can be planned.
Additional tricks
To make a floor lamp with your own hands, you will have to find wood, plastic or metal pipes. But to create a cape, a variety of products and materials will do.
If only at least a little light was sifted through them:
- Wine or beer bottles;
- Iron cans for canned corn;
- Hoop for sifting flour;
- Cups with bowls;
- Kitchen graters.
It is very beneficial to arrange the listed products inside a kitchen or bar - several units in one row on a suspended platform in the form of a wooden board.
And if you need to beautifully illuminate a garage or workshop, then a do-it-yourself floor lamp with a shade in the spirit of steam punk would be an excellent solution. This style is achieved by wrapping a balloon with wire and then welding or gluing washers and gears onto this braid.
Once you've finished your lampshade, we recommend visiting a landscape lighting store.
Paper lampshade – fantasy with savings
Such a product will not require virtually any financial investment, except for the frame, since it can even be created from old newspaper or magazine pages. In addition to them, you can hire:
- notebooks (blank and written);
- notes;
- old unwanted books (for example, with torn or damaged pages);
- paper napkins;
- geographical maps and atlases;
- decoupage cards.
How to make a lampshade with your own hands from paper can be clearly seen in the step-by-step photos.
Homemade lampshades without frame
Many materials are rigid enough to hold their shape on their own, but at the same time they are flexible enough to make something interesting out of them. There are a lot of such homemade lampshades. And almost all of them are worth your attention. We will present here only part, the other part will go in the section with photos (see below).
From knitted lace doilies
Many people have crocheted napkins and they lie in “stashes”, because it’s a pity to throw them away and they don’t know how to use them. There is a very interesting idea - to make a lampshade from them for a hanging chandelier. In addition to napkins, you will need a large balloon or inflatable ball, glue for heavy wallpaper (vinyl, silk-screen printing, etc.), and a brush.
This beauty can be made from lace napkins
Soak the glue according to the instructions and wait until it swells. We inflate a balloon or take a ball and hang it up. When the glue is ready, lay out a napkin on some clean surface, coat it with glue, and place it on the ball.
Operating procedure
It must be laid out in such a way that there will be a hole in the center for the cartridge. We glue the napkins one by one. They need to be laid out so that the edges overlap slightly. When all the napkins are laid out, coat them with glue again and leave until dry. When the glue has dried, deflate the ball or ball (the ball can be pierced, if you don’t mind) and take it out through the hole. That's all, the lace lampshade is ready.
Final stages
In some cases, problems arise with how to hang the finished lampshade on the socket. The problem can be solved simply - take a transparent plastic bottle, cut off its neck, if necessary, expand the hole to the required size (so that it fits tightly onto the cartridge), then cut the plastic so that you get a ring 5-7 cm wide. Coat this ring with PVA glue , and glue it to the lampshade from the inside of the ball.
Round lampshades made of threads
Almost the same technology can be used to produce round and semicircular stylish lampshades. Choose threads of a suitable color. Their composition is absolutely unimportant - what matters is color, thickness and texture. They can be shaggy, smooth, twisted, thinner and thicker. The appearance depends on this. It is most convenient to work with cotton threads of medium thickness. They absorb glue well and then, after drying, keep their shape perfectly.
Need a ball, glue and thread
You will also need a ball or ball. This will be the base of the lampshade, which gives the shape. You can choose the dimensions of the base as desired. The threads will need to be glued together; for this you will need PVA glue. It is poured into a container and diluted with water in a 1:1 ratio.
You can use other glue. It is important that it becomes transparent after drying. This is WB-29 from TYTAN Professional and D2 glue for carpentry. If you use any of these types of glue, read the instructions.
On the ball or sphere we will draw a circle, which will be slightly smaller in size than the lamp socket. On the opposite side, draw a larger circle - this will be the lower edge of the lampshade. Now everything is ready, we can start.
We wind the thread soaked in glue, leaving holes
We coat the threads with glue and wind them around the ball in a chaotic manner. It’s more convenient to do this if the glue is poured into a container - you can put the whole skein in there and just pull the thread slowly. With glue in a tube, everything is not so comfortable: you have to coat sections up to a meter long, wrap it around, and coat it again. It takes much longer. This is if you do not use PVA. But the products turn out to be more rigid and do not sag or change shape over time, as can happen with PVA thread lampshades.
When winding threads around the ball, carefully go around the drawn circles. If you accidentally climbed into the “forbidden territory”, simply move the threads, forming a smooth (more or less smooth) edge. When the threads run out or you decide that the density is enough, the process can be stopped. We tuck the edge of the thread between the others. All. Next, coat the ball with wound threads again with glue (PVA can be poured over) and leave to dry (at least 2 days). To prevent the ball from rolling, we find a bowl or pan and use it as a stand.
Depending on the threads, we get lampshades for pendant lamps of different styles
The last stage is to deflate the ball or ball. If the ball has a nipple, press it with a thin wire, releasing the air. We take out the deflated ball. That's all, you can thread the lamp inside and test the lampshade.
The technology is the same, but the appearance is very different...
Using the technology described above, you can make not only round lampshades. Rectangular, triangular, trapezoidal. Choose a base that is easy to remove, wind threads soaked in glue, braid, even sticks, newspaper tubes, etc. After drying, remove the base and voila, you have made a lampshade with your own hands. A couple of examples in the photo below.
If you take a cord, coat it with glue, fold it into a snake and wait until it dries, you will get a completely different type of lampshade/shade. From thin plastic or cardboard wrapped in cling film, we make a cylindrical lampshade from threads. You can also use sticks…. Just wrap the ball in cling film too and use transparent carpenter’s glue rather than PVA glue. This is paste-like polymer clay in a tube, which was applied to a milk carton, then dried and the bag was removed...
Creative homemade shades for lamps, floor lamps and chandeliers
It’s simply amazing what people don’t make beautiful and unusual things out of. A lampshade made from a cup, a grater, a bottle, a beer or glass jar, metal parts and rings from beer cans... It seems that everything can be used...
Ideal for loft style
Lampshade made from an old sieve... stylish Do you have old slides and cameras? Make a unique lamp for a photographer! You can't think of anything better: shades for a kitchen chandelier made from cups Candlesticks turn into lamps... you can do it without lampshades Just saw off the bottoms and the exclusive shades for a stylish ceiling lamp are ready It would never have occurred to me that beer cans and bottles can be used as shades
Another option for a loft Cute and unusual Make shaped holes in thin plastic - a beautiful lampshade for a night light is ready. If you get bored, you can make another one
You can’t tell in real life, but these lampshades are made from hooks that are used to open metal cans for drinks and canned food... if you paint them, it will be even more interesting. Roll up paper tubes and fold them into a lampshade - a cool idea. Do you have cans made of colored glass? Make shades for the chandelier in the kitchen Who would have thought that it would look like this? Don’t know what to do with your grandmother’s crystal? Make lampshades out of it...
Lampshade made from disposable plates
This non-standard solution looks so advantageous that it has earned the respect of many needlewomen. To work you will need:
- sets of disposable plates;
- paper cylinder base;
- glue gun.
Step-by-step making of a lampshade with your own hands from paper plates involves sequential gluing of blanks bent in half to the base. The more tightly you glue the plates and the more you use them, the more attractive the result will be.
Sweater lamp
If you have a few old sweaters on hand, you can create an original design for a table lamp. Such decor will bring a cozy atmosphere to your home interior. A beautiful but unnecessary thing will turn into a magnificent decorative item.
A simple transformation is suitable for repurposing an old lampshade. If the surface becomes slightly dirty or has tears, it can be replaced. An unusual lampshade made of knitted fabric will perfectly match other products made of the same material. In the photo you can also see a pillow made from an old jacket.
To make a new design you will need:
- old lamp or floor lamp;
- sweater;
- scissors;
- glue gun
The master class includes the following stages:
The sweater is pulled over the lampshade.
The sleeves are then cut and can also be used for other homemade crafts.
The fabric is cut to fit the dimensions of the frame. In this case, you need to leave a small supply of material. If desired, the lower part can be made longer than the bottom of the frame. In this case, the edges of the material must be carefully processed - hemmed or glued.
The remaining edges are wrapped behind the surface of the lamp.
Hot glue is applied to the border and the material is glued to the back surface of the frame.
After the work done, the product will look like this. The color palette of the sweater can be any. But white color is more useful because it allows more light to pass through.
Various textile openwork accessories will help to complement the lamp. It is important to choose clothes with interesting designs and textures. Raised patterns on a knitted surface add more volume.
Lampshade-cocoon
It’s so easy to make such a lampshade for a lamp or lamp that you can involve children in the work. To work you need:
- a balloon of the shape and size you plan to make the lampshade;
- thread and needle;
- PVA glue.
Instructions on how to properly make a lampshade are posted below.
- Inflate the balloon to the desired size.
- Thread the needle and pierce the bottle of glue through, remove the needle from the thread (it is no longer needed).
- Wrap a thread soaked in glue around the inflated balloon. The degree of winding will affect the final appearance of the lampshade. You can get a completely airy product, or a dense one, as if woven on a machine.
- After winding the required amount of thread, let the workpiece dry; It's better to leave it overnight.
- Untie or burst the ball, remove it through the spaces between the threads.
- Cut a hole for the cartridge, if desired, give the workpiece the shape of a bud or plate.
- You can also decorate the lampshade with spray paints, beads, and ribbons.
The lampshade is ready.
To decorate a lamp
In this section, we will clearly demonstrate how to decorate an old lampshade using inexpensive improvised means that can be easily purchased at your local stationery store. To design the lampshade we will use the paper cutting method.
To create a three-dimensional structure made of corrugated paper, shown in the figure below, we will need:
- corrugated paper;
- a simple pencil;
- scissors;
- PVA glue;
- ruler;
- decorative tape to match the paper.
To decorate a small lampshade (shown in the picture), one roll of corrugated paper is enough. We use three shades for greater expressiveness.
First we need to cut strips of corrugated paper, and then squares measuring 5 cm square. The size of the squares is not important and depends on personal preference.
We unfold the roll, fold the sheets in half, then mark the paper every 5 cm. We draw parallel lines along which we will cut the paper into strips.
Cut equal strips.
We mark stripes every 5 cm to obtain identical squares.
Cut into squares.
To create a lampshade we will need about 200 squares. Don't be alarmed: corrugated paper cuts very easily and quickly.
The cutting technique is very simple: place the end of a simple pencil in the center of a paper square, crumple it and wrap it around an axis. Then we lightly lower the end part of the pencil, wrapped in paper, into a container with PVA glue and glue it to our lampshade. Hold the paper with a pencil for 5-10 seconds.
You should hold the paper with a pencil for 5-10 seconds, since the surface is vertical and there is a risk that the glue will not hold the paper.
We will try to glue the next square as close as possible to the previous one. Paste over the floor lamp according to the pattern from bottom to top.
This activity is not too complicated or tiring; on the contrary, it is suitable for those who want to relieve stress and calm the nervous system.
Accuracy and perseverance guarantee high-quality design of the lampshade using the trimming technique.
It will take at least 3 hours to cover the presented lampshade.
Finally, we tie a bow from a pre-prepared ribbon on the leg of the lampshade.
Other variations with threads
If you wind the thread not in straight turns (like a ball), but in loops, you can style the lampshade as lace. Dense threads or twine can be laid out in close rows. This completely modifies the idea of a cocoon.
Note!
- How to make a backlit mirror with your own hands: necessary materials, tools. Tips for choosing lamps and LED strips
- A simple and beautiful DIY bathroom shelf made of MDF, glass, plasterboard: straight and corner options. Photo instructions, tips, video master class
- How to make a computer desk with your own hands from wood or chipboard. Photo/video master class + description of models
Fluffy knitting yarn allows you to make lampshades that resemble light clouds or cute sheep. With appropriate design, you can create a cute lamp for a child's room.
Rules for creating safe homemade products
Any factory that produces floor lamps has technologists on staff. When creating a new model of a lighting fixture, such specialists calculate the permissible distance from the lampshade material to the light bulb. In this case, the degree of heat resistance of the component components of the product, the power of the lamps, as well as other factors must be taken into account.
It is better to screw in fluorescent or LED types of light bulbs into a homemade floor lamp. They do not heat up much and do not consume a lot of electricity
Lampshades made of fabric, paper or other flammable material should not be used together with incandescent lamps. Because they get very hot and can cause the lampshade to catch fire. We talked more about the types of light bulbs in this article.
If the choice fell on LED and fluorescent lamps, you need to pay attention to their base. It must be of high quality. Options made of metal or ceramics are optimal. Such light bulbs will cost more than conventional ones, but they have many advantages: long service life, practically do not heat up, do not consume a lot of electricity, produce a more even stream of light and do not flicker.
A lampshade made of paper, cotton or synthetic fabric, cardboard, woolen threads and other flammable materials must be at least 50-70 mm away from the lamp
When the lampshade for the floor lamp is completely ready and the entire structure is assembled, you need to turn on the lamp and watch it work for a while to check whether the walls are heating up. If the material feels hot to the touch, you need to change the bulb to a less powerful option.
Homemade lamps can be used in the bedroom, hallway or living room. They are not used in rooms with high humidity, as there is a risk of a short circuit.
By following these rules, you can create a beautiful and safe floor or table lamp that will last a long time.
Plastic lampshade made from spoons
Unlike fabric and thread ones, plastic lampshades are not afraid of moisture and are easy to clean. This means they are well suited for kitchens, open gazebos, and country interiors.
To work you need:
- plastic spoons in sets;
- five-liter plastic bottle;
- glue gun;
- scissors or nippers.
Procedure
- Cut off the bottom of the bottle.
- Carefully cut off the handles of the spoons.
- Glue the spoons in successive rows, starting from the bottom. They form a kind of “chain mail”.
- If desired, the lampshade can be painted with acrylic or spray paints.
In the same way, you can glue a lampshade from disposable forks or knives.
Beautiful examples for inspiration
The material for the lampshade can be anything: a metal basket, artificial plants. Turn a piece of chicken wire into a birdcage or decorate the frame with wooden beads.
The canvas looks original as a frame for a lamp. Decorate it with bright embroidery to get an exclusive decorative element. You can also create a lampshade from lace napkins using glue and a balloon, and decorate the finished table lamp with homemade flowers from light fabric.
The role of the lampshade in the interior cannot be underestimated: a single spectacular detail can set the tone for the entire setting, especially if the soul has been put into its creation.
Photos of DIY lampshades
https://www.youtube.com/watch?v=FIgwTEv5g1k