finishing the apartment with your own hands. Let's see how you can apply a matte design to glass.
- First of all, it is recommended to sand the edges of the mirror with fine sandpaper soaked in water. This way you won't cut yourself while working.
- Draw a stencil of the future design on self-adhesive paper, cut it out and stick it on the surface of the canvas.
- Very carefully transfer the stencil to the surface. To do this, you first need to secure the stencil with masking tape on one side, and on the other side of the stencil you need to bend or cut off part of the backing. Carefully glue the sticky end of the stencil into its place on the mirror, then peel off the opposite end of the stencil, fixed with tape. Having peeled off part of the backing and holding the paper stencil suspended with one hand, press it with the other hand to the glass with a roller. Try not to allow the film to skew so that air does not get under the stencil and bubbles do not form under the paper.
- Carefully remove the remaining backing and stick the stencil completely onto the canvas.
- After the paper is glued, you need to go over it with a roller again to smooth out bubbles and wrinkles.
- Seal with polyethylene, self-adhesive or waterproof paper all open areas of the mirror cloth that are not intended for matting.
- Next, you need to apply matting paste to the stencil film (not glass!!!). It should be placed next to the image.
Note! You need to apply the paste very carefully. Try not to spill a drop onto the open surfaces of the mirror, otherwise traces in the form of white spots will remain on it.
- Using a spatula, you need to very quickly distribute the matting paste over the entire pattern on the surface of the canvas.
- After 15 minutes, you can remove the paste layer and put it back into the box (it is reusable). The mirror itself must be washed with running water and a weak soap solution. Only after this can the film be removed from the stencil.
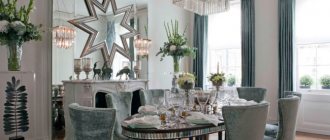
Variety of design methods
The photo of the mirror decor shows several options on how you can interestingly and quickly decorate an object of any size and shape.
The decoration technique appeared a long time ago, is a popular craft and is divided into two main areas:
- Glass decorations along the edge, right along the mirror. Accessories and jewelry are glued to the canvas, leaving free space for viewing. The design is applied with special paints along the rim, evenly or asymmetrically, and individual elements are drawn throughout the entire canvas;
- Decorating the substrate on which the mirror cloth is attached. It can be a flat or three-dimensional structure made of wood, plasterboard, plywood, thick paper;
- Drawing up an individual composition taking into account the design of the room, where the main part is taken by auxiliary materials.
Several wooden frames combined together and only one will contain glass, an installation made from scraps of plastic pipe with mirror mosaic elements.
Note: To make a mirror look harmonious in the interior, you need to choose the right size, take into account the color scheme of the room and style.
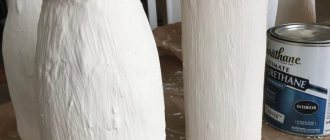
Stucco molding
The Baroque style is characterized by massive frames for mirrors. The master class on decorating a mirror with stucco is very simple. To do this, it is enough to purchase a wide flat frame (or make it yourself from MDF), white paint, silicone glue, gypsum mixture and silicone molds for stucco molding.
The frame must be painted white, and the plaster must be poured into the mold. Once the stucco molding is ready and the frame is completely dry, you can begin attaching the plaster elements using silicone glue. The finished frame can be decorated with gold or silver acrylic.
What can be used for crafts
Sometimes novice craftsmen ask the question of where to buy decor for a mirror and how to decorate the canvas. First of all, it depends on the method, the chosen material, and the complexity of the craft.
Absolutely any material is suitable to create a unique composition:
- Matches,
- Plastic bottles and broken glassware,
- New Year's balls,
- tubes,
- Textile,
- Natural material (shells, cones, twigs, flowers, eggshells),
- Pasta,
- Wire,
- Beads,
- Beads,
- Buttons,
- Rhinestones,
- Paints,
- Leg-split,
- Colored paper.
- For fixation and reliable fastening, use a glue gun, PVA, silicone, or superglue.
To give a glossy look, the product is coated with varnish with different effects (glitter, matte, tinted).
You can purchase the material at any hardware store, stationery, handicraft and creative shops, or find it yourself while on vacation at sea, in the park, or outside the city.
If there is a need for industrial decoration, engraving, etching, or enamel application, then you should contact a company providing such services.
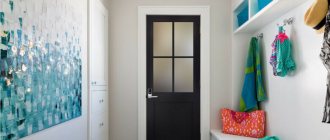
How to decorate a bathroom in an original way
At home, the most commonly used decor is a wall mirror. When decorating, it is important to consider where the item will be placed and its purpose.
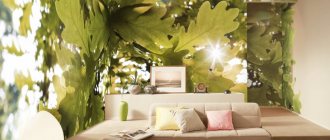
A discreet, classic style with a large view will suit the hallway; in the bedroom you can hang a mirror painted with floral patterns; in the nursery, a frame made from old toys and scraps would look appropriate.
To decorate a canvas in a marine style you will need:
- Wooden, flat baguette (slats) without patterns;
- Glue gun;
- Sinks;
- Leg-split;
- Scissors, ruler, pencil, brushes;
- Acrylic lacquer.
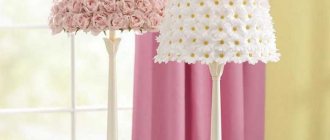
Flowers
For a shabby chic bedroom, you can make a mirror frame strewn with artificial flowers. For this purpose, you can either use flowers and petals purchased for this purpose or make them yourself.
Flowers made from foamiran or satin ribbons are well suited for this purpose. You can also decorate the mirror with a scattering of multi-colored or plain large beads.
Detailed master class on manufacturing
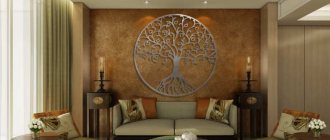
The decor of the mirror frame is carried out using natural materials, fits organically into the interior, does not get boring, and serves as a beautiful decoration.
- Decorate the frame separately, then insert the mirror. The baguette will be alternately covered with dense rows of rope and shells on top, followed by varnishing.
- Cover the table with newspaper and prepare all the necessary tools.
- To use seashells, they must first be cleaned, degreased, and selected by shape and size.
- The purchased material can be immediately used for crafts; the found ones need to be soaked overnight in a solution of bleach (1 tbsp of product per 1 liter of water), rinsed well, dried, and sharpened edges.
- Glue the twine to the frame starting from the inner edge, moving along the perimeter to the outside. The rows fit tightly together without gaps.
- Glue shells onto the dried frame. Lay out a pattern of shells on the table, take one at a time and attach it to the base from the center to the edges.
- The decor looks neat if small details are laid out in the center and large ones on the sides.
- Unusual elements (starfish, spiral shells) can be glued on top.
- Cover the composition with several layers of varnish, insert a mirror, and hang it on the wall.
The original design will refresh the interior and add comfort.
Where to hang it?
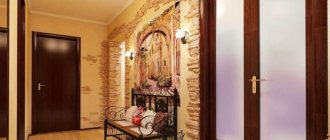
When choosing a place to hang a mirror in the hallway, you need to be guided by the following principles:
- If there is a window in the hallway, the mirror should be placed opposite it. Then the room will be much lighter.
- If the mirror is large, it should be hung so that you can see yourself entirely.
- If you follow the rules of Feng Shui, the mirror should not be hung opposite the door, because it will not let positive energy into the house. On the other hand, it is believed that a mirror located opposite the front door will reflect all negative external energy.
The mirror can be placed on the wall or on the walls of the wardrobe. The standard option is to hang it on the wall. Placing mirrors on the doors and walls of the wardrobe saves space.
Multiple mirrors can be used. If mirrors play a purely decorative role, they are placed accordingly, decorated in the style of the hallway interior.
Wall mirror panel
Mirrors of various shapes are used in everyday life: rectangular, square, round, diamond-shaped, polygonal. You can give the workpiece any shape using a glass cutter.
The decor of a round mirror is no different from the usual design. The same materials and tools are used.
Application technique
Sandblasting technology for processing a reflective surface uses sand that comes out under high air pressure, thanks to which a flat, three-dimensional or matte pattern can be created on the mirror surface.
The first mentions of sandblasting date back to the 19th century. Today, sandblasting technology is widely used for decoration :
- mirrors;
- glass;
- furniture;
- ceilings;
- for creating stained glass windows;
- for decorating tabletops.
Unique patterns and designs can turn an ordinary mirror into a real masterpiece that will delight you for many years.
Applying a pattern by sandblasting using abrasive particles under air pressure occurs by removing the top, thin layer from the mirror. At first glance, it seems that the process is quite simple, and anyone can handle it. But this opinion is erroneous, since sandblasting technology requires experience and certain skills .
To obtain a high-quality drawing that will delight you for many years, contact only qualified specialists who are privy to all the intricacies of this technology.
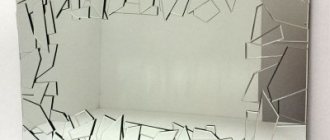
Mirrors are frosted using 2 methods:
- On a certain area of the mirror.
- All around the perimeter.
The matte effect is created on a reflective surface using a special template or stencil. The image can be applied in the form of a matte pattern on a glossy surface, or, conversely, a glossy pattern can be applied to a matte surface.
Sandblasting technology can be used on both sides of the mirror surface , it is divided into types such as:
- Surface treatment.
- Deep sandblasting.
- Double-sided sandblasting technology.
Drawings are applied to reflective surfaces using sand of different grain sizes. With the help of coarse sand, the image will become voluminous and embossed . Using fine-grained sand, you can accurately convey the design in the smallest detail, as well as make the image “velvety” to the touch.
How to make a frame with your own hands
You can make an original frame from the remains of a plastic pipe. The composition does not overload the design and does not look too cumbersome.
To complete the work you will need:
- glue gun,
- Acrylic paints,
- Tassels,
- Stationery knife,
- Sandpaper,
- PVC pipe with a diameter of 5-10 cm.
Operating procedure:
- Cut the prepared material into rings 1 cm wide.
- Paint the blanks with white paint outside and inside and let dry.
- Prepare a sketch of the assembly on paper, taking into account the dimensions of the glass. Assemble the ornament by connecting the rings with glue.
- Attach the mirror to the dried base. In one room you can install several similar objects on a similar basis.
- They will only emphasize the style of the room.
Handmade crafts are unique, look beautiful in the interior, create coziness, and can be wonderful souvenirs.
Develop creative skills and skills in working with tools.
Types of processing
Sandblasting can be divided into the following types:
- Deep (other names for the method are volumetric and figured) sandblasting .
Regardless of the chosen image for application, the design will look as if there is a white sculpture inside the mirror surface. Volumetric sandblasting technology can be used on both sides of the reflective surface. If the pattern is located on the amalgam side, it is applied using enamel of different colors. This type of sandblasting is used in the production of realistic paintings; this effect can be achieved using luminous, iridescent or multi-colored images. - Color processing . This type of technology is the most cost-effective and easiest to implement. The principle of this technology is a combination of classical processing using sandblasting and color painting;
- Printing sandblasting technology . Using this treatment of a reflective surface, you can create unique, picturesque masterpieces and beautiful drawings. Images applied using this method seem weightless, since a glossy and matte base is used to create them.
- Sandblasting engraving (cutting) .
This technology creates a bright and clear image, with detailed rendering of small details. This technique is ideal for those who want to decorate the interior with a mirror surface with a spectacular, three-dimensional and realistic image. To implement such an idea, you need to find a qualified craftsman in this field, since to perform such work well, you need to have the talent of an artist and be able to transfer a masterpiece to a mirror surface. - Photo printing on a mirror . This technique combines a combination of the first 3 technologies from the list.
Using mirror surfaces you can visually enlarge the space, and sandblasting will make such surfaces exclusive and give them special elegance.
Reflective surfaces with a printed photo are the most relevant and popular of all processing techniques.