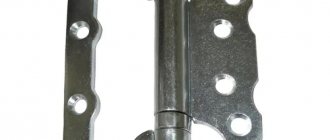
Furniture hinges are important elements of furniture, because the ease of use of structures, functionality and even aesthetics depend on them. Therefore, you should pay special attention to the choice of cabinet fittings, since there are different types and varieties of furniture hinges, and each variation will be more advantageous in different cases, when assembling different types of furniture. Today we will look at the most common types of hinges, features of their structure and installation.
Furniture hinges
What are furniture hinges?
Furniture hinges are mechanisms that are attached to the front part of the door and the wall, thanks to which they allow you to open and close the door. They all perform different functions - there are the simplest hinges that only hold the door, there are variations with a closer or a “soft closing” effect, without knocking.
Today, four-hinged furniture hinges are mainly used to install doors - such designs are easy to install and can serve for many years without any problems, even with frequent use of the furniture. The mechanism consists of the following elements:
- bar;
- bowl;
- shoulder.
An example of a hinge that ensures the door moves smoothly (the arrow indicates the closer).
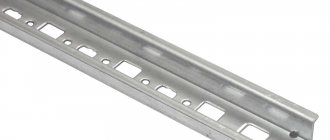
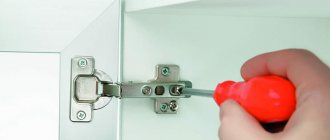
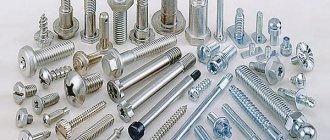
The hinge is fixed to the door itself with a cup, and is secured to the furniture frame with a strap. For such purposes, screws and screws are most often used. The shoulder in this case performs connecting functions, being between the bar and the cup. All elements are connected using a mechanism on four hinges. There is a special screw in the bar itself, thanks to which you can control the position of the door to the cabinet frame.
Installation of furniture hinges on kitchen cabinets
Types of loops
Depending on the method of fixing the door and the design of the hinge, furniture fittings have several types. In order to choose one model or another, you will need to familiarize yourself with the use of each.
Table 1. Types of furniture hinges
| View, illustration | Description |
| Overhead and semi-invoice | Hinges of this type on four hinges are very popular; most often they can be found on various cabinets with hinged doors. A distinctive feature is good strength, so they can be installed on doors of both large and small structures without any problems. Thanks to such hinges, the doors will easily open at the most right angle. They do not allow them to skew to one side and maintain them in a single position. Upon external examination, a person without relevant experience will not be able to find obvious differences in the design of overhead and semi-overlay hinges, but they still exist. So, if you look closely at them, you will find that the shoulder lever of the semi-overlay loop has a greater bend. This feature allows the door, when open, to obscure only half of the end of the wall. In the case of overhead hinges, the end remains closed. That is why they prefer to use semi-overlay hinges only for ceilings to which doors are fixed on both sides (in cabinets with three doors). |
| Piano | Such hinges have the form of plates made of metal, which are secured to each other with hinges. Usually they are fixed, completely covering one edge of the door structure, therefore, even if upon external inspection they look unreliable, in reality this is not entirely true. Hinges of this type allow you to securely hold even a large door. They were given a characteristic name for the reason that such fittings are traditionally attached to fix the piano lid. They are also called inverse, because they ensure full opening of the door. Hinges of this type can be secured both from the inside and at the end of the wall. In modern cabinets, such hinges are extremely rare. Basically, they were installed in products made in the USSR. It is worth noting that not only piano-type hinges are called inverse, but also other four-hinged hinges. Full opening occurs due to good curvature of the shoulder. |
| Card | They have a similar design to the previous type of hinges, but at the same time they are more reliable, so such hinges are not installed along the entire length of the door, but only in places. Card hinges are mainly used to install doors, entrance or interior. They can rarely be found in cabinets and other pieces of furniture (only in large-sized structures with massive doors). You can see card loops in old-style furniture, various retro chests, and heavy bedside tables. |
| Domestic | The use of internal hinges is advisable if there is a need to “recess” the sash into the cabinet structure. In this case, the open door will not obscure the wall. The total opening angle in this case will be more than 90 degrees. Similar hinges are again used for heavy doors and cabinets. |
| Corner | Corner loops come in two varieties: 1. Card loops. Their design allows for maximum door opening, so they are extremely rarely used for furniture. They differ in that they have a negative opening angle. 2. Furniture. Such hinges are already installed on various pieces of furniture, but most often on small kitchen cabinets. |
| Secretaries | They are a combination of overhead and card type hinges. Their main difference from similar species is their miniature size. They are ideal for sashes that open horizontally. Secret hinges are not just attached to screws, but also cut into the structure itself, just like four-hinged models. |
| Mezzanine | These hinges are also used for structures with horizontal opening, but have some differences from the previous type. The mechanism involves the presence of a lever and a closer - this allows you to open the door upward without any problems. |
| Adit | Such hinges are used in cases where there is a need to fix the door from a blind front part. They allow the door to open fully. |
| Card | These hinges are variations of the previous furniture hinges. Their main difference is only that they are installed in a structure according to the chopik principle. |
| Pendulum and heel | Such furniture hinges also suggest the possibility of opening the door 180 degrees. In their structure they resemble card loops. The only difference is that there are two hinged mechanisms that are fixed by a plate, thanks to which the door will open without any obstacles in each direction. Of course, such mechanisms can be found very rarely in ordinary pieces of furniture. Heel joints are also classified as pendulum joints. They are fixed in the corner, above and below the door. You can find them on small kitchen cabinet doors and glassware. |
| Carousel | Carousel furniture hinges are also sometimes called “crocodiles” - the reason for this is their unusual appearance. They are used for any folding doors, but most often such hinges can be found on kitchen sets. The peculiarity of their design is that one door opens without affecting the second. |
Various types of furniture hinges according to installation method
Furniture hinges are distinguished not only by their appearance and functionality, but also by the characteristics of their installation.
Table 2. Differences between hinges according to the method of installation to the bar
| View, illustration | Description |
| Slide-on | This design is a collapsible mechanism. The bar is installed on the door itself separately from the main part of the hinge and the lever is already bolted to it. If necessary, it will be possible to control its location relative to the bar. |
| Key-hol | The design of the furniture hinge is similar to the previous view. The only difference is that the place where the lever is fixed to the bar looks like a keyhole. Thanks to this feature, it becomes possible to put the lever on a screwed-in bolt. |
| Clip-on | In this case, the latch acts as a mechanism for connecting the lever to the bar. |
Important point! All of the above furniture hinges with four hinges can be either with or without a closer. At the same time, its presence greatly simplifies operation.
Operating principle of door closers
Other types of loops
We looked at the most common options for furniture hinges, but it is worth considering that there are other types of fittings that are less common. However, such hinges may come with furniture, and it would be nice to have an idea of their features.
Table 3. Rare types of furniture hinges
| View, illustration | Description |
| Framework | These hinges are only used for glass doors with a frame. They allow you to attach the frame to the base. |
| With overhead type fasteners | In the case of all the listed cup hinges on four hinges, it becomes necessary to make an opening using milling equipment directly in the facade. If this is not possible, then use hinges with an overhead type of fasteners. Their main disadvantage is the impossibility of adjusting the door relative to the base without dismantling the fasteners. |
| For glass | This includes the entire group of hinges that are used to fix doors with a glass or mirror surface. They can be internal or overhead. |
| Pin | In appearance they resemble standard type card hinges. In this case, instead of plates, special pins are used as fastenings. |
Video - Types of furniture hinges
Marking
Marking is an integral part of the cabinet layout for the correct installation of the door and the correct operation of its hinges. Mistakes made at this stage will, at a minimum, spoil the appearance of the product, and at maximum, make it impossible to correctly use the swing door mechanism. During the marking process, you will need a pencil or marker to mark the areas for creating holes for the cups of the mechanisms. Therefore, it’s worth starting with the main points of the markup instructions:
- Depending on the weight and size of the door leaf, the number of hinges installed can vary from two to five.
- You should not install the mechanism cup on the very edge of the door facade. It is recommended to maintain a margin of 2–2.2 cm.
- The average distance between hinges on a meter-long door leaf is at least 50 cm. In this case, you need to take into account its weight, which may require a larger number of fastening mechanisms.
Make sure that the areas for installing hinged awnings on the façade are not opposite the cabinet shelves. Otherwise, there is a risk that the door will not close completely due to the fact that the body rests on the shelf platform.
Materials for manufacturing accessories
In the manufacture of furniture hinges, various metals are used, but the main condition for manufacturers is their ability to hold their shape and not deform, reliability and resistance to long-term use. When choosing hinges, it is necessary to take into account not only functional features, but also the quality of the material.
The most popular are hinges made of steel or brass. They have a long service life, they are almost impossible to break or disable when used for their intended purpose. In addition, such products are not subject to corrosion and deformation.
Steel furniture hinges
Hole preparation
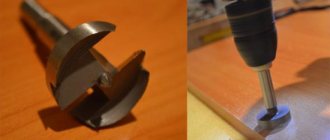
Holes are created using a drill based on the markings. An electric screwdriver with an appropriate attachment is also suitable as an alternative tool. In addition, the use of a cutter is a must, which ensures that the structural integrity of the door facade and cabinet panel is preserved. Otherwise, drilling a hole can lead to chipping and deformation of the wood panel. The insertion should be made with a depth of no more than 12 mm, which will be enough for a reliable hole for the loop cup platform. It is better to select the drilling speed yourself, based on the density of the material from which the facade and cabinet are made. While chipboard panels are fairly easy to process, natural walnut or ash are distinguished by high strength. For the same reason, you need to ensure that the drill works strictly at an angle of 90 degrees, from which it can easily deviate if you are dealing with hard natural wood.
What are the stages involved in installing furniture hinges?
Many novice craftsmen are puzzled by the question of how to properly install hinges. Therefore, in order to avoid making any mistakes, you need to know the sequence of installation work:
- Marking installation locations for furniture hinges. As you know, a furniture hinge includes a bowl and a strip, which are mounted on the facade and on the frame itself. That is why the markings should be left on both of these parts. It is important to measure the distance required for the hinges and calculate the exact position of the planks.
- The next step will be to create a hole for installing the cup. This can be done using a drill of the required size.
- Door installation.
- Hinge adjustment in all directions.
Do not screw the hinges by eye, without markings
Video - Marking furniture hinges
Installation of furniture hinges
It is worth noting that installing furniture hinges is a simple process that even a beginner can do. In this matter, it is necessary to follow a certain algorithm, then the occurrence of any problems is practically eliminated.
During the work you will need the following:
- a screwdriver or electric drill (it is advisable to take a drill with a large number of interchangeable attachments);
- drill-mill (usually its diameter is 25-35 millimeters, it depends directly on the size of the cup);
- a simple pencil;
- measuring tape;
- screwdriver;
- awl;
- self-tapping screws
Step-by-step instruction
Step one: mark the furniture hinges. First of all, it is important to identify the centers of future recesses. It should be borne in mind that all doors have different heights, so these indicators will differ (from 70 to 120 millimeters). An equally important point is the weight of the door leaf. In some cases, three or more loops are fixed.
Marking the location of furniture hinges
Important point! If more than three hinges are installed, care must be taken that they do not come into contact with the transverse elements inside the cabinet (shelves). The mark for preparing the hole should be made at a distance of 2 millimeters from the end of the door.
Step two: drill a hole for the hinge. Using a drill and a special end mill, you can begin the process of drilling a hole in the blade. Most often, the standard bowl depth is about 12-13 millimeters. It is not recommended to try to make the recess larger, especially in the case of a chipboard door leaf. After all, the outer polymer layer may crack as a result of such actions. It is almost impossible to fix such a problem.
We work with a special end mill, which can be used to make round holes
To ensure that there are no chips left on the surface, it is recommended to use only a sharp, sharpened cutter. In addition, during the drilling process, the drill is kept in a vertical position, without leaning to the side.
Step three: after the work is completed, you need to place the loop in the prepared hole and align it along the end of the facade. Next, using an awl, you need to leave markings in the hinge holes for the purpose of further installation of self-tapping screws. Then they will need to be screwed in there.
Installation process
Step four: hang the facade on furniture hinges. Another part of the furniture hinge should be secured to the side of the inside of the frame, after which you can connect these canopies to each other. Next, you should adjust the door in relation to the base using a screwdriver. It is recommended to do this in a horizontal position and only on a leveled surface - the side on which part of the loop is fixed should be located in this way. This will allow you to first try on the location of the door, and only then install it.
Hanging the door
Step five: adjust the location of the hinges. Adjustment of furniture hinges is carried out in the following directions: vertically, fixation depth and horizontally.
Adjusting the hinges according to the depth of the canopy attachment is necessary in order to ensure that the door is close to the base. You can weaken it in the same way if there is a need. Use a screwdriver to adjust the oval-shaped hole (this method is often used to adjust hinges in rooms with uneven floors).
Adjustment
Vertical adjustment allows you to set the door slightly higher or lower.
This method will be especially relevant after some time, because under the influence of gravity, any structure begins to sag to one degree or another. The adjustment is made by carefully twisting the oval hole. Horizontal adjustment eliminates the gaps that often remain between the facade and the body. This method is also used in rooms with uneven floors.
If the doors become warped over time, you just need to adjust the hinges
Installing furniture hinges with your own hands is a fairly simple task, but one that requires attention and accuracy, because how well the doors of cabinets and cabinets close will largely depend on correct installation.
Adjustment and Leveling
At this stage, you need to work at the construction level - determine the correspondence of the frame parts to the door leaf. To do this, the level is applied to 3 planes - to the two sides and to the front. They should be as even as possible. That is, there should be no gaps or deviations between the frame and the door leaf.
Alignment begins with adjusting the vertical gap. To do this, pressing the facade against the frame, tighten the fixing screws on the strip. Then close the door and check the possible angles of inclination with a building level.
By adjusting the screws, all gaps between the facade and the frame are eliminated. For example, if the upper corner is tilted to the right, tighten the screws on the upper hinge and loosen the screws on the lower one.
Then they begin to adjust the doors according to their height. Two self-tapping screws located on the “ears” of the strike plate are responsible for this. To begin with, loosen the screws on all hinges, raise or lower the canvas (depending on the situation). Then tighten the screws until they stop, holding the facade in the desired position.
If the door does not press well against the frame body or when pressed the opposite side bounces off, then adjustment of the hinges along the plane is also necessary. To do this, tighten the adjusting bolts located on the bar.

