Stretch ceilings are modern structures designed for finishing premises. A panel of film or fabric is attached around the perimeter of the room to a mounting rail - a baguette. A perfectly smooth surface, matte or glossy, is created.
The tension covering material is not strong enough to withstand the load from ceiling lights, cornices and curtains. Therefore, before stretching the film or canvas, embeds are placed on the base ceiling, to which, after finishing, all the necessary equipment is attached.
Built-in wardrobes are located along the wall. The role of the mortgage in this case is performed by the supporting beam, to which the upper tracks of the furniture and the ceiling molding are attached.
Special platforms are used to install suspended hoods in kitchens and ventilation communications in bathrooms. With their help, the exhaust duct is securely fixed under the stretch ceiling film.
A beautiful aesthetic coating of a stretch ceiling will hide communications and fasteners that are unnecessary to the eye. And all the equipment necessary for coziness and comfort can be securely fastened to supporting structures using mortgages.
Device.
Embeds on the ceiling
Embeds look like strips or rings that secure lamps, cornices, ventilation grilles and other decorative elements to avoid damage to the coating.
The low price and wide range make it possible not to waste time creating parts with your own hands.
The appearance and size are selected depending on the element being installed. A strong frame is attached to the main ceiling to support lighting, grilles or trim. Reinforcement is needed to reduce the likelihood of breakthrough or spreading of films and fabrics, eliminate the influence of the weight of lighting and decoration on the canvas, and increase the service life of the structure.
Photos of curtains in the ceiling niche
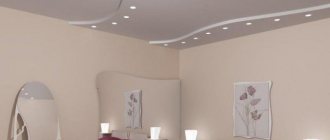
The stretched fabric opens up wide design possibilities. And this applies not only to the surface of the ceiling itself. A new way of designing a window opening is emerging. The curtain rod can not only be screwed to the wall or ceiling, but also hidden in a special niche. Then only the curtains will be open to view. The implementation is simple. You can mount the structure yourself using various materials. An easier way is to install special profiles: a niche or curtain.
Types of materials.
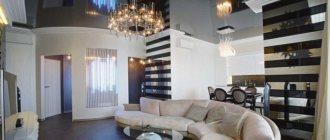
Installation of a two-level ceiling
Mortgages made of heat-resistant plastic are often used. They prevent overheating of PVC film and fabric. For the strength of fastening of heavy chandeliers, wooden, OSB, and plywood parts are also used. To install spotlights, you can attach elements of cut metal hangers to the base surface.
Alternative (hidden) option
Scheme of an alternative method of attaching curtains to a suspended ceiling
This method is much simpler and there is less chance of damaging the tension fabric itself. The essence of this method is this: when the tension fabric is installed, a niche is left between the window and the ceiling, where the cornice itself is already installed on the main ceiling. The cornice is hidden in this niche, creating the effect as if the curtains are falling from the ceiling itself.
Preparing for installation.
A structure prepared for ceiling installation. There are elements whose diameter and shape change, and standard ones with fixed parameters. They are used depending on the required purposes. Before installing the mortgages, you need to buy a sufficient number of parts and make some preparations:
- mark the fixation points of the reinforcing elements on the lighting layout diagram.
- choose methods of tensioning and fastening the fabric.
What to design first
If you stretch the ceiling and then proceed with installation, the following problems may arise:
- workers will damage the ceiling surface;
- the space formed between the cabinet and the ceiling will accumulate dust. Since it is not recommended to attach anything to the film and the distance between the surfaces will be around 70 mm;
- The cost of installing a tension structure depends on the area of the ceiling. Then the question arises, why pay more?
Before installing the ceiling, warn the installers about the subsequent installation of the cabinet
General installation rules:
Multi-level ceiling frame
- installation of the tension surface structure is carried out before fixing the lighting platforms. In the case of concrete floor slabs, installation occurs on the main surface;
- mortgages for baguettes and massive chandeliers are fixed only to the base;
- a covering structure is installed along the edges of the room, elements are mounted;
- timber and beams are attached to the base ceiling;
- the coating is cut through after tensioning where the elements are installed;
- for plasterboard ceilings, sheets are reinforced with mortgages at fastening points to strengthen the structure;
- wooden parts are impregnated with fire retardants, antiseptics and dried before work begins;
- the canvas can be attached to a plasterboard-covered ceiling using harpoonless, harpoon or cam methods;
Article about furniture
Author - designer of the company DEZALT Sukhanov Eduard
So, you're wondering - what's the best way to install a ceiling embed for a wardrobe? Your workers offer one thing, the ceiling stretchers advise the second, and what should you do so as not to regret it?
Now I will explain everything to you and even show some points on video, just be patient, read the entire article and watch all the pictures and videos.
Partition of compartment doors and suspended ceiling
If you need to partition a room or part of it with sliding doors, you will definitely need a mortgage.
Option 1. The mortgage can divide the ceiling into two parts and a suspended ceiling can be attached to it. In this case, if you suddenly decide to change the ceiling, you will not have to remove the compartment doors or unscrew the top track. Just call the masters and they will change the canvas.
Option 2. The mortgage can be located under a suspended ceiling and be invisible. The upper track, which will guide the compartment doors, is attached through the canvas to this mortgage. After this, if you need to change the ceiling, you will have to remove the doors and unscrew the top guide.
Option 3. Install the mortgage just above the expected stretch ceiling, for example at a height of 40mm. Screw on the top track of the compartment doors. After this, the craftsmen can stretch the ceiling using special brackets; they will press the canvas directly to the upper track. The brackets are attached to the concrete ceiling, not to the mortgage.
Once again you get independent ceiling parts and an aesthetically complete look. But consult with ceiling specialists; not everyone can do this.
Now about the nuances
If you settled on the first option, consult with suspended ceiling specialists about what size the timber should be, or, if they do it for you, discuss how they will do it for you. Most often they take 100x100mm timber. attach it to the ceiling in a strictly horizontal position. Sure, can you hear me? Be sure to use a laser level! This is a mandatory requirement. If it doesn’t exist, don’t even start doing it and don’t let others do it. You will spend money, effort and get a skewed mortgage and compartment doors with cracks along the bottom, or even at the top. It's even better if you check the height difference between the floor and this beam. If there is a distortion of more than two centimeters, you will have to level the floors, or warp the mortgage, lower it lower in the place where the floor goes down. It is necessary to ensure that the height between the floor and the beam is the same. I repeat - allow a difference of up to two centimeters.
If you had to lower the embed lower, make it not horizontal, then you will have to stretch the ceiling too crookedly, not like a laser.
Further. You have decided on the size of the mortgage, found out that there is no difference in height of more than two centimeters, purchase timber. Know that wood is a living material, it must lie in the room where it will be screwed for 2 weeks in order to accept the humidity that is in the room. You can also make a mortgage from plasterboard with a metal frame inside, please. If your compartment doors are not suspended, but have a bottom track, then feel free to use drywall or other lighter material. Compartment doors with a lower track put pressure on the floor, on the track on which they ride. If the compartment doors are suspended, a strong mortgage is required. Check the operating principle of sliding doors with the specialists who will install them.
If you ignore my advice or follow the lead of the apartment repairmen, attach an overdried or damp beam, be prepared for it to crack and bend. Of course, there are nuances, for example, in an apartment after renovation there is high humidity. The timber became saturated with moisture, sat for 2 weeks, you installed it, everything in the room dried out, the timber became bent and cracked. All decent finishing craftsmen know such moments. They must do everything right for you. The wood may need to be treated with a special impregnation.
I undertake to assert that we are constantly dealing with failed mortgages that were installed at random. This greatly affects the appearance of the compartment doors; the doors also look skewed.
Further. Don't forget about the appearance of this mortgage. I strongly recommend that you putty the timber and paint it to match the color of the ceiling. People often forget about what the entire structure with compartment doors will look like. It’s easier for master finishers and especially ceiling makers to install a “shaggy” unprocessed mortgage for you with the words - well, they’ll close it...
Who will close it and with what? If the mortgage is visible between the suspended ceiling, the track of the compartment doors will not completely close it.
Watch the video in which I show why you need to improve your mortgage.
And this video tells how we suffer with careless repairmen. Don't make such mortgages!
Perhaps it will be easier for you to first make the compartment doors with a frame, and then stretch the ceiling. Watch the next video.
Let's look at the second option , this is when the suspended ceiling is made as one contour in the room, and a mortgage is installed under it.
Again, I strongly recommend keeping the timber in the room for two weeks so that it acquires the humidity that you will always have. It may need to be treated with a special impregnation, consult your specialists.
After this, fasten it strictly according to the laser level, at the border of the canvas. This should be done by ceiling craftsmen, but make sure that the laser beam passes almost along the beam, so that the ceiling material is at the border of the bottom edge of the beam. You can recess the timber by 2mm, no more. The ceiling will fall down the center of the room under its own weight, this is not scary. The scary thing is that if the beam is 1-2 centimeters higher than the border of the stretch ceiling, or even higher, the upper track of the compartment doors will press the canvas upward so that it will be very noticeable visually and can even break through the canvas with the ends of the track. That's why this is all so important.
The mortgage itself must be installed horizontally along the long side and without distortions along the short side, along its width. The beam should not be skewed or bent. When the top track is attached, it can follow the bend of the beam, because the track is made of aluminum alloy and is flexible. The track will fit like a screw and when the compartment doors move in it, they will rub against the twisted track. Very quickly, abrasions will appear on the metal and a characteristic cut will be heard.
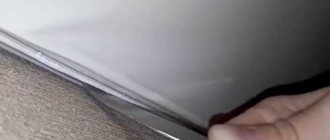
Be sure to ask your ceiling craftsmen for special round patches for the canvas. We cannot screw self-tapping screws through the canvas without first securing the puncture site with a patch. The ceiling may stretch and come apart at the puncture site. First, a special patch is glued on, then a self-tapping screw is screwed through it. Masters should know about them. We usually attach the top track with two self-tapping screws every 60cm.
Very often, we come across all of the above problems at once. The beam is screwed, it is installed above the border of the tension fabric, there are no patches for punctures. When I come to measure sliding doors in such cases, when you need to partition a room, when there is already a suspended ceiling, and they say - we took care of it, we installed a mortgage. I immediately feel the mortgage with my hands. I’m interested in how exactly it was installed on the border with the suspended ceiling, this is clear near the wall of the room. If the timber is 5mm deeper from the beginning of the ceiling. I refuse the order and leave. As I already explained above, when we screw on the top track, it will simply tear the ceiling at the edges and that’s it.
If the beam is installed as level as it should be, I check its width to see if it is too narrow. Sometimes they make it literally 4 cm. width, which also negatively affects the bending of the upper track. After that, I take a laser rangefinder, press it against the beam and check the height between the embed and the floor. If the difference in height does not exceed 2 cm, further cooperation can be discussed. Otherwise, I turn around and leave.
There is also a third option , which I mentioned above. Unfortunately, I can’t explain much about it, because I didn’t see the whole process, I didn’t hold in my hands the brackets themselves, which allow you to bring the canvas closer to the beam. I know for sure that this method exists, I saw the result and came across information on the Internet. I tried to talk to ceiling makers about this topic, but they were surprised by my questions and stated that there were no such brackets. I guess they simply didn’t know about their existence. This is the same as ceilings without any plastic ceiling plinth. The canvas is stretched close to the walls and no decorative corner is required around the perimeter. Few people know about such ceilings. Search the Internet for information if interested.
I told you about the moment when you need to install sliding doors in a room and block off part of the room with them. There's no way to get a mortgage here. By the way, there was a case. Some craftsmen managed to attach the top track in a stretch ceiling with glue. I do not recommend agreeing to this. This is all from the same category: the bottom track needs to be glued, not screwed; laminated chipboard strips on the left and right are unnecessary, etc. Yes, at first it’s nice, it’s easy and simple for the master to work with. One, two, you're done. Only then will the client have problems, after a year or two. But that's another story.
What about wardrobes? The essence is approximately the same. If you don’t want the hassle of dismantling the entire closet, install a stretch ceiling up to the closet. You can also use a mortgage, or first make a wardrobe and then attach the canvas to it. All rules for fastening timber frames also apply to wardrobes.
You can watch an explanatory video for our client about how to make a mortgage for a wardrobe.
If you are sure that nothing bad will happen to your stretch ceiling, then feel free to stretch the canvas in one contour and you don’t need to make any embeds at all. Don't waste your energy, money and nerves.
The sliding wardrobe gives us one wonderful indulgence: we make at least one vertical rack inside it, and to it we attach a laminated chipboard strip, to which we attach the upper track of the sliding doors. Your stretch ceiling remains without a single puncture or crease. If you disassemble the wardrobe, the ceiling will remain intact.
Also, sometimes we are asked to make a ceiling from laminated chipboard inside the cabinet, so as not to accidentally tear the ceiling material. We have done this more than once. You will still need a stand in the middle. As you may have guessed, the wardrobe under the finished suspended ceiling will not have a single large mezzanine shelf, only this has a small drawback. The shelf will be divided by a stand, which serves as a support for the upper track or the entire laminated chipboard ceiling.
Below we attach a video in which we make a wardrobe under a suspended ceiling, but the wardrobe has its own roof made of laminated chipboard. You can appreciate the appearance of the ceiling from 35:59 min of the video. There are no mortgages under the suspended ceiling. The central pillars serve as support for the laminated chipboard roof.
I can also advise at what depth to install the mortgage, if you need it. Decide on the depth of the cabinet . The minimum is 650mm, well, 600 is possible, just be prepared for the fact that the compartment doors will constantly touch the clothes on the hangers, because compartment doors take up 100mm. Of course, you can place the rods across the cabinet, then it can be at least 300mm. Comfortable depth is 700, I’m talking about the total depth. If you stopped at a depth of 650, then mark 650mm on the ceiling. from the wall, this will be the face of the mortgage. There are no other tricks here.
I hope I will have to answer less questions over the phone to the same questions, sometimes several times a day, about how to make a mortgage correctly?
I wish you good luck and find a decent performer so that he will do everything conscientiously.
All articles
For spot lighting.
Installation diagram of spotlights Lamps
are selected paying attention to the intensity of the glow and heating temperature. First, the wiring is pulled, which is installed on the main ceiling, and then reinforcing fasteners are installed.
Mountings for spot lighting look like rings of different sizes made of heat-resistant plastic with a height adjuster. They are:
- universal pyramidal type, in these they make a cutout along the diameter of the lamp;
- stable with an existing hole, they are selected based on the size of the lighting fixture;
After placing the areas for lighting, the canvas is stretched and masks additional details. Afterwards, a thermal ring is glued to the covering above the platform, a hole is made and a lamp is installed.
Is it possible to combine a wardrobe and a suspended ceiling?
We are used to the fact that during a renovation, the floor, walls and ceiling are immediately done, and then they start choosing furniture and decor. But if you don’t initially design the interior of the room, you can forget about harmony and comfort in the room forever.
Even if all cosmetic work is done efficiently. Moreover, difficulties can arise even during installation. And if in the future a suspended ceiling is also proposed, everything will only get worse.
And to make the room look immaculate, you need to figure out what to do first, installing the ceiling covering or installing a compartment.
When planning a renovation, immediately consider where the suspended ceiling will be so that you can combine it with the wardrobe
Under the chandeliers.
Embed for a chandelier
Installation begins before the covering is pulled onto the profile. Durable forms made of plastic, plywood or timber are attached to the main ceiling. They are pre-drilled with holes for wiring. Then the wiring is laid in the corrugation, the fabric is stretched, thermal rings are glued to the surface, a hole is cut for the chandeliers and the lighting is connected.
There are several options for mounting the chandelier:
- for I-beam or cross-shaped mounting.
- on the hook.
- on the bar.
- fixation with hangers and dowels.
- for curtains with curtains.
It is a beam attached with the help of hangers to the main ceiling at the level of the stretch ceiling. Afterwards, a film is installed under the beam and the rings are glued in places for the curtains. Plastic rectangular parts with rounded edges and perforations for self-tapping screws are also used. Such platforms are mounted in places where the cornice is attached.
Installation of profile (baguette)
Before installing the profile on the walls, drill holes in it with a screwdriver at a distance of 7-10 cm. In the future, this will make installation easier and there will be less risk of damaging the walls and wallpaper.
You should start from any of the corners. On the ribbed side of the baguette we cut it down to the middle and bend the stick.
We apply the ribbed side to the wall, along the lower edge of the profile, on the marking line. We drill and hammer in the dowel-nails.
We fasten the next profile stick joint to joint with the installed one, the lower edge should be smooth. We seal all joints with paper tape.
Having reached the next corner, the question arises: “how to make it?” Using a tape measure, measure the length from the corner to the edge of the baguette, subtract 1 cm, and remember. Take the next stick and mark the resulting length on the back (ribbed) side. We saw along the line to the middle, bend it, try it on in a corner on the wall, and fasten it.
When installing the profile on drywall, tighten the screws at an angle. This will give additional rigidity to the fasteners and, while stretching the canvas, will not allow the baguette to pull away from the wall (form cracks).
Afterwards, if necessary, we install the mortgages and lay the wiring.