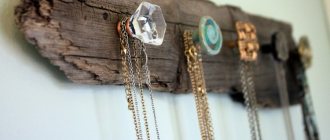
What is decoupage?
This is an amazing technique that allows you to give ordinary objects an unusual look using an ordinary picture or a special napkin.
This is an inexpensive way to make the interior of your own apartment or house especially cozy and memorable.
This is a great way to give your favorite but shabby items a new life.
This is a great way to spend time with your family.
The decoupage technique for beginners is not as complicated as it might seem when looking at the lovely creations, most of all reminiscent of luxurious items of palace utensils or pretty handicrafts of artisans of the 18th-19th centuries, inherited from great-great-grandmothers and retaining their enchanting beauty.
Well, speaking without emotion, the artistic technique of decoupage is a method of decoration using a picture glued to the surface and coated with varnish on top for durability.
The name of the craft comes from the French verb “to cut,” as the image was simply cut or torn out of a postcard, newspaper, or other printed items.
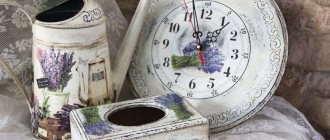
Watch processing
The wooden base of the watch dial is usually renewed. First you need to disassemble the product into its components, separating the arrows and numbers. The work is divided into 2 stages: decorating the circle along which the hands move, and the outer contour of the clock. The first part of the decoupage is updating the arrow space:
- a circle is cut out of paper;
- the dial is cleaned and puttied, if necessary;
- napkins or rice paper are glued onto the prepared plane, the pattern of which is made in a circle of paper;
- the picture is glued to the base, leveling the plane;
- the top of the napkin is treated with glue;
- after the workpiece has dried, the middle of the dial is covered with a paper circle, and the outer part is decorated;
- a structural paste mixed with acrylic paint of the desired color is applied to the surface;
- the finished surface is varnished 1-2 times and lightly sanded after drying;
- The watch is assembled by inserting the hands and numbers into place.
A little history
This type of creativity first appeared in the Middle Ages, when practical German artisans began to decorate the furniture they produced in this way.
But the design style reached its first heyday in the 18th century, when Italian and French masters imitated expensive inlays made of wood or leather in this way.
Note!
DIY gifts for February 23rd - a large selection of ideas for creating unusual gifts for Defender of the Fatherland Day
What to give a 2-year-old boy - a list of the best options for an interesting and useful gift (120 photo ideas)
- Papier-mâché - TOP 120 photo reviews of original products. Detailed instructions for beginners on creating beautiful crafts
A little later, the technique became popular among poorer segments of the population. At the end of the 19th and beginning of the 20th centuries, the decoupage technique conquered all of Europe and moved to America, where it acquired the form of a craze.
The development of new technologies, an increase in production and consumption pushed handicrafts into the background, and for a long time it was in some oblivion. But now it is coming back into fashion.
Napkins
To create stylish antique items, you can use special napkins, but a good option for saving the family budget would be to use ordinary multi-layer paper napkins. For decoration, you only need their upper part with a beautiful image.
Note!
- Ideas for LD (a girl’s personal diary): step-by-step instructions for making it yourself, photo reviews of the best options
- Educational soft books made of felt: materials for making, detailed instructions + reviews of plots for books (100 photos)
Original do-it-yourself valentines - design options, necessary materials, master class for DIY work
Often instead of napkins, newspaper and magazine clippings, postcards and other suitable images are used.
However, for the very first works it is better to buy napkins for decoupage. They have a special density that helps to glue the image evenly or, if necessary, quickly remove it. The paper of such napkins does not tear or deform when applied.
Materials
The decoupage technique for beginners does not require large financial investments. At first, the craftswoman will need decoupage cards; they are denser than ordinary napkins and are guaranteed to stick without holes, tears or folds. Yes, it’s more convenient and easier to work with them.
In the future, when the technique of decoupage with your own hands is mastered almost perfectly, you can even use paper napkins from the store or newspaper sheets (such crafts look especially good in retro or simple city style).
An acrylic primer will help ensure better adhesion between the base and the design, and it will also eliminate minor surface defects.
Glue. To begin with, you can use the most ordinary PVA, but over time, such a craft can turn yellow from the inside and even crack, so in the future it is better to buy acrylic glue or adhesive varnish, which can be applied to the base and used as a final coating.
The varnish will help fix the picture and give the homemade product durability. It is best to use water-based acrylic varnish. It does not have a strong odor, washes well and dries quickly.
Note!
- Kinusaiga technique - TOP-140 photos of the best ways to create crafts using the Kinusaiga technique with your own hands + instructions for beginners
- Do-it-yourself passe-partout - a master class with step-by-step do-it-yourself schemes. Making tips + photos of the best examples
- Decoupage with napkins: TOP-150 photos of ways to decorate with napkins. Simple instructions for beginners at home
Acrylic paints are useful if you want to make a colored base or beautifully inscribe the selected image on the surface. To begin with, you can buy two or three colors, one of which will be the base color, and the rest will become an accent to underline the design.
Furniture decoration: the best options
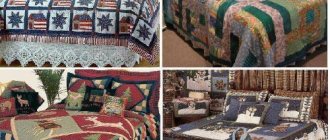
Elements with decoupage in home or country furniture look especially aesthetically pleasing: handmade creations give the interior a special charm. Using this technique you can create the following items:
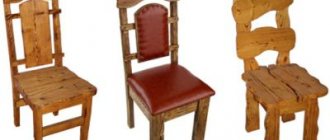
- The back or seat of a chair (stool). With the proper amount of varnish, it can be used for its intended purpose, or as a flower stand.
- A wardrobe or chest of drawers will require costs for materials and time to cover a large area, but the result will please everyone in the household. This will look especially good in a nursery.
- A dressing table in neutral tones can be decorated to match the tone of the bedroom using decoupage techniques.
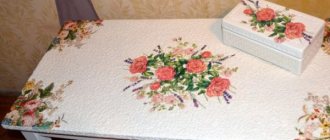
- The desktop has long dreamed of getting rid of the pseudo-wooden oilcloth - you can give a new look to your workspace with the help of designs in napkins and fabrics. The updated workplace will please the eye every time you have to work on it.
- The dining table can also be decorated in the style of the tones of the kitchen or living room. It is better to choose light green and blue tones so as not to visually interrupt your appetite with bright spots.
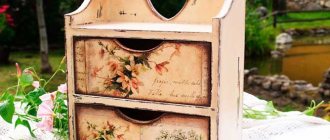
- Decorative shelves with a themed pattern made from napkins can be filled with books, flowers or figurines.
- You can decorate not only the whole object, but also the corners of the furniture: table, kitchen cabinet, chair or door. This solution will not be an eyesore, but will add a special zest to the interior.
- The crib is one of the most suitable places for creativity. Decoupage will perfectly complement the walls of the crib and make the piece of furniture more ethnic and magical.
Tools
The technique of decoupage from napkins will require preparing a small set of tools for comfortable work. It will include synthetic brushes for painting and underpainting, as well as for varnishing the finished product (it is better to purchase one wide flat and one thin brush, and later buy what you need), a spatula for sealing cracks (if any), sandpaper for leveling and cleaning surfaces, small pieces of foam sponge for applying primer or background.
Paint, primer and brushes: which ones are better to choose
The necessary brushes can be selected in art and construction stores:
- Wide flat synthetic brush. It applies paint and primer, as well as glue and varnish. The pile should be gentle so that it is pleasant to rub across the skin of the face. Too hard a pile leaves a lot of marks.
- Tapered flat brush. With its help, narrow and small parts are painted. Both straight and beveled ends will do.
- Liner. Used for painting stems, thin curls and outlines. It should be the thinnest in the set, in size most often numbered 0. The longer the pile, the better.
- Artistic bristles. Used to artificially age the design, texture and texture. The pile should be hard, capable of slightly damaging a napkin or thin fabric. Preference is given to bristles of different lengths. The basis itself is broad.
- Fleitz. Used for varnishing the product. It should be very soft; when cleaning, do not use towels with lint.
- Fan brush. Optional, but some people use it for gluing and leveling napkins, as it has a wide range of piles.
It is not recommended to use natural fibers for decoupage; it is better to give preference to synthetics.
As for paints, it is recommended to take the acrylic version, since, unlike watercolors and gouache, it has a number of advantages:
- fits on any surface;
- when dry, they turn into a waterproof film;
- wet acrylic can be easily removed with water.
Instead of multi-colored acrylic, you can only use acrylic primer.
The basis
Wooden cutting boards or straight plywood boxes and drawers will be useful as a basis for the first experiment.
Although you can use plastic, iron, porcelain or glass surfaces of any shape and size.
But in this case, it is necessary to take into account that all these smooth materials give poor adhesion to other materials, and the rounded or convex shapes of the object for decoration are difficult even for experienced needlewomen.
So it’s better to start decorating Easter eggs using the decoupage technique after gaining experience in creating crafts in this area.
Pictures of the decoupage technique will help you decide on your first creations and select everything you need for creativity.
Types of decoupage
Different decoupage techniques will help you elegantly design different types of surfaces.
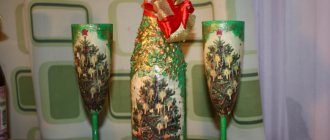
Reverse decoupage
The reverse technique allows you to place an image on transparent objects. In this case, the design is applied to the inside facing outwards.
The principle of creating such decor is the same as that of direct decoupage, but it will require much more attention and concentration. But a decorated table or vase will definitely impress your household or guests.
How to decorate a tea house
Using the example of decoupage of a decorative house “May Roses” for tea bags, the processing of hard-to-reach places is practiced:
- It is first recommended to finish the surface of the house with a primer, dry it, sand small irregularities with sandpaper, and cover the working surface of the product with white acrylic paint in several layers. It is recommended to maintain one direction of strokes.
- The corners, the plane under the roof canopy, and the figured arch must be painted with background green paint.
- For more comfortable work, a napkin with images of pink bouquets must be ironed with a hot iron and then lightly sprayed with aerosol quick-drying varnish.
- Paper moistened with water is placed on the file so that the image hangs slightly over the edge.
- Smooth out the glued pattern to completely eliminate wrinkles and bubbles.
- Cover the surface of the house and the lid, painted green, with several layers of acrylic varnish.
As a decoration, place a butterfly figurine on the roof, and glue a decorative bouquet of roses above the arch.
With each completed job, the master’s qualifications increase. Perseverance and a flight of imagination help make your home beautiful and cozy.
Decopatch
This technique differs from the first two types of creativity with paper and glue. In this style, the entire surface is covered with a pattern (or patterns), leaving no free space at all.
Very often the main image is complemented by patterns or ornaments that resemble patches. Therefore, sometimes such decoupage is compared to patchwork.
But it will be very difficult to rip up the area you don’t like and redo it. So the principle “measure seven times, cut once” will have to be followed 100 percent
Who is suitable for decoupage?
Decoupage is applique - most of us are familiar with such activities from kindergarten. The technique itself requires both attention and perseverance, so the ideal candidate for a decoupage artist would be a person who would like not only to do beautiful work, but also to have fun and escape from the everyday hustle and bustle.
Important: There are no health restrictions when exercising, but you need to remember that some substances used in gluing can cause allergies.
That is why it is necessary to carefully familiarize yourself with the composition of the mixtures before you sit down to work. Otherwise, decoupage is a great activity both for evening relaxation for adults and for children's entertainment.
Artistic decoupage
This technique is often called smoky decoupage. To create it, artistic drawing skills will be useful, since in it you will have to blur the edges of the pictures with the help of paints, gently combining it with the base.
If you are not sure that this technique will work out the first time, you can first practice on a sheet of paper, simply attaching a picture and finishing it with paints.
Basic Rules
A master class on decoupage technique will show the entire sequence of actions. It is not as complicated as it seems at first: the surface is primed, covered with paint, glue and an image are applied to it, and all this is varnished.
But before that, it’s better to learn the basic rules that will help you make a good craft the first time.
It is necessary to paint the entire surface that will be visible. For example, for a flower pot you will have to take care of painting the bottom and inside all the way to the ground, and maybe a little deeper. And if you plan to give the pot without flowers or greenery, then you will have to cover all surfaces with paint.
If imperfections are visible in the paint, you will have to repaint the entire surface, achieving the ideal tone.
Light background colors will help make the image more realistic and expressive. In addition to white, all pastel shades will look great.
Before applying each subsequent layer, the craft must be dry. Rushing through the creative process is a great way to ruin everything.
Small pictures are easier to apply. Therefore, for the first work it is better to use them. Before gluing, you should once again make sure that the picture is suitable for the selected area in size, color or subject. To do this, it is simply leaned against the base.
The glue is applied from the center to the corners, thoroughly covering the entire surface. The pattern is carefully smoothed out, straightening out all the folds.
The essence of art
The basis of needlework is gluing a selected pattern (special or regular napkins, newspaper or magazine paper, fabrics, other materials) onto the surface of almost any product with a dense texture. It is not allowed to use a porous plane. The background is usually painted white to preserve the brightness of the design.
Types of applied arts:
- The classic method of decoration involves gluing a picture onto a smooth surface. Various reliefs, slopes, and curves are excluded. After gluing the pattern, the product is treated with several layers of varnish. Then the errors are sanded down with sandpaper to a uniform coating. If necessary, techniques of coloring, tinting, and artificial aging of the material are used.
- The reverse decoupage method is used for glass surfaces. In this case, the image in the figure is glued face down on the reverse side, and the order of work is performed in the reverse order.
- Volumetric technique combines the techniques of artistic painting and sculptural creativity. In this case, a three-dimensional panorama is recreated on the surface of the object.
- The smoky pattern involves a complete combination of motifs on the background and image. As a result, the work is similar to the artist’s original painting.
The decopatch technique is reminiscent of a patchwork quilt, in which the storyline is created from multi-colored images of different sizes that are not connected by color or theme.
Despite the variety of techniques, needlework is quite accessible to beginners who have decided to take up decoupage for the first time.
Some advice from experienced craftsmen
Thick paint is harder to apply than liquid paint, so don’t be afraid to thin it. A couple of thin layers will be preferable to one thick application.
Slow drying in natural conditions will help the product retain its attractiveness longer.
You can't apply too much varnish.
Sandpaper will help correct most imperfections.
Following these simple rules and tips will help you achieve even quite complex decor, such as the technique of decoupage of bottles, glass jars or eggs.
A photo of the decoupage technique will help you see what has already been done by craftswomen and choose a suitable craft for beginning needlewomen.