How to make a wooden hanger with your own hands? It's very simple, we'll tell you how. It would seem, what is a hanger in the house? Almost no one notices it, even though it is quite a significant and functional item. You will be surprised how you can improve it, and even do it yourself. There are no special skills required, so anyone can do it.
From pebbles
Not only perfume caps, but also other memorabilia can be put on hangers. For example, sea pebbles, which we usually bring from the sea and then don’t know where to put, will look very stylish on the wall. Unfortunately, we did not find a master class or at least the author of this idea, but we can advise how to make such a hanger. Take a couple of screws and metal cylinders (they should be a little wider or a little shorter). Insert screws into the cylinders and screw into the base boards. Apply universal glue to the screw heads and glue the stones to them.
DIY floor wooden hanger
Wooden things have always been of high quality and durable, as well as useful in everyday life. This also applies to hangers, so we will now try to build a wooden floor hanger with our own hands. This work will not take us much time. You will need approximately 20 free minutes, as well as all the necessary materials.
To create a wooden floor hanger we will need:
- Six tribes (copper).
- Four tees (copper).
- Four plugs (must be the same inlet diameter).
- A wooden round stick of the same diameter. The total length should be 5.3 meters, cut into parts: 2 pieces of 125 cm, two more of 70 cm, 4 pieces of 20 cm, and the last 6 of 10 centimeters each.
The process is very simple. Following the drawing plan, we must assemble all the structural elements. To make the task easier, they are marked with letters in the figure.
- "A" - 125cm.
- "B" - 70cm.
- "C" - 20cm.
- "D" - 10 cm.
To further secure our floor hanger, use wood glue. Copper inserts will look interesting; on the one hand, they will attract attention, and on the other, they will be quite durable in use.
Article on the topic: How and what wallpaper to paste in the living room
From tassels
The idea to make hooks from brushes came to designer Dominic Wilcox when he remembered leaving painting tools in paint after work, only to find them frozen and unusable the next day. Well, brushes with curved bristles can still serve in the household. To make these, you'll need curing paint or some reliable glue.
Extraordinary ideas for a wooden hanger
Floor and wall hangers are considered classics, but when you want something unusual or creative, you can consider the following design options.
- A collection of things that is similar to an exhibition from the world famous TV series with Carrie Bradshaw.
The idea is that when you get into the corridor, you don’t spend a long time rummaging about which hat or scarf to wear today, but simply choose from the things hanging out. In order to turn your idea into reality, you will need a free wall in the corridor and ordinary hooks. This will become not only a kind of interior design for the corridor, but also an extraordinary approach to solving the issue of hangers. - With the help of different types of hooks, you can emphasize a particular interior style, be it classic or modern.
- Believe it or not, the most seemingly inappropriate items can be hangers. A very unusual approach would be to use old pitchforks or rakes in this matter, playing with them to suit the desired theme. You just need to cover the sharp ends with it first, so that neither you nor your guests get hurt.
- Fans of hiking and traveling can use old skis or oars as hangers.
- Old chess pieces will serve as an original substitute for ordinary hooks.
- In a vintage style, you can use old doors to create a coat rack, perhaps even with nails instead of hooks.
Of course, you will first need to treat the surface, but imagine the idea itself already in execution. Quite shocking, especially if you work on the small details. In this idea, you can also use an old fence instead of doors. - The motif of a tree on which hooks for things are located has become popular today. It can be cut out of a piece of wood, or simply painted on the wall, placing hooks on the branches.
Technology for manufacturing and installing hinges for gate locks
Padlocks are indispensable in any household. With their help you can close utility rooms, gates or gates. They are quite often used as an auxiliary means for protecting property. The reliability of any lock directly depends on its design and the materials used to make the case and shackle. But not everyone knows that the reliability of locking doors or gates depends not only on how high-quality the lock is. The high level of protection against burglary also depends on the hinges on which it is attached.
Typically, mounting lugs are sold with the lock, but they can also be purchased separately. Experienced craftsmen prefer to make each loop themselves. After all, only then can they be sure of their reliability. The lugs are selected individually for each locking device to match its size as accurately as possible.
Features of hinges for locks
One of the varieties of products and fasteners
Padlock hinges are that part of the locking mechanism that is installed on doors or gates. They have special holes through which the locking shackle is threaded for locking.
Depending on their purpose, lugs come in different thicknesses and sizes. The minimum thickness of the temples should not be less than 3 mm. The most common types of padlock lugs are straight and angled.
Right choice
If you do not have the opportunity to make hinges for the lock yourself, you can purchase ready-made products. This is not always an ideal solution, since factory models may not be as well suited to a specific type of locking mechanism, unlike homemade ones, created individually for each design. Particular attention should be paid to the quality of the material used to make the hinges; it must be very strong.
When choosing lugs, pay attention to the following:
- If you can bend the hinge body even slightly with your hands, they are of low quality and will not provide adequate protection to the gate. After all, a small lever force in the form of a crowbar will easily break them. High-quality lugs should resist not only breakage, but also sawing. Hardened steel containing boron has these properties;
- the optimal thickness for hinges will be 4-5 mm, this figure is suitable for most doors and gates. However, if your gate is very massive, you may need to look for much thicker hinges. Alternatively, you can weld two identical products together and get double thickness. Accordingly, for one lock you will need 4 pieces;
- It is not recommended to install hinges on the end of doors, as this is a very unreliable connection. It is best to place the lugs behind the inner surface of the door. This is especially true for wooden doors;
- try to choose a loop hole that matches the lock shackle as closely as possible. The lock should be easy to install, but the gap in the eyelet and shackle openings should be minimal.
- the base of the hinges (the platform that is attached to the sash) should be quite massive and reliably ensure that the lock is held;
- The coating of the hinges is also important. Galvanized products, for example, are protected from corrosion. In any case, it would be a good idea to paint them.
When using a padlock with hinge protection, it is necessary to adjust it to the size of the lock body so that it fits the door as tightly as possible. If a padlock is installed on the outside of the door on the street side, you need to protect it from moisture by constructing a canopy or box on the gate. This way you can protect both the lock and the hinges from corrosion.
Making loops yourself
The process of creating loops is not very complicated and only involves a couple of steps. The first of which is the selection of a suitable blank for the eye: a plate for a straight loop or an angle for an L-shaped loop. Next, you need to mark the workpiece. It all depends on the individual dimensions of the door and lock. But the main thing is to correctly mark the holes for the locking shackle and bolted connections. If the loop is welded, then there is no need to mark the holes for the bolts.
Dimensions of required holes
For marking you will need a marker and a center punch. First you need to mark the location of the hole with a marker, and then make a notch with a center punch. It is easier to make a hole using such a notch, since the drill will not move out. Regarding drilling holes for the lock shackle, it is better to drill them gradually, starting with small holes, gradually increasing the diameter. The mounting holes can be chamfered so that the screws or self-tapping screws are screwed flush.
Installation on wooden products
Eyelets can be mounted on both metal gates and wooden doors. Let's start with wooden ones. To install hinges on wooden doors, you need the following tools:
- Hammer.
- Chisels.
- Screwdriver or screwdriver.
- Self-tapping screws or self-tapping screws.
- Marker or pencil.
After choosing the appropriate mounting height, we mark the future location of the hinges on the door leaf and wooden frame. To do this, trace each of the loops with a pencil or marker, placing them on the same level. Next, using a chisel of the appropriate size, we create recesses in the doors and frame, the size of the thickness of the eyelet. After this, we secure each loop with self-tapping screws or self-tapping screws. If the wood is very hard, you can pre-make holes with a small drill to avoid cracking and make it easier to tighten the screws. You can strengthen the connection by first applying epoxy glue or PVA to the screws.
Installation on metal products
Place of attachment of lugs
When installing lugs on metal doors or gates, they often resort to welding, so they must be made of fairly thick metal. For this type of door it is necessary to buy L-shaped lugs, since they have a massive base for fastening. They are installed on top of the door, and do not cut into it, as is the case with wooden ones.
Tools you will need:
- Drill.
- Metal drills.
- Wrenches of appropriate sizes (if a bolted connection will be used).
- Marker or drawing on metal.
- Kerner.
- Welding machine (if a welding joint will be used).
Based on the available tools, each hinge can be secured by welding or bolting. Both methods are quite reliable.
To effectively fasten hinges with bolts, they must have a massive base so that at least three bolts can be tightened at a distance of 3-4 cm from each other and from the edges of the base.
After marking the hinges, by analogy with wooden doors, it is necessary to make holes in the doors and install eyelets using bolts, securing them with the appropriate wrenches. Very often, eyelets on bolted connections are hidden in special casings to protect against burglary.
It is not difficult to secure the lugs with a welding joint. The main thing is to monitor the quality of the weld. If you have little welding practice, seek help from a specialist or practice yourself on specially designated workpieces. It is important here to choose the correct electrodes and welding current based on the thickness of the surfaces being welded.
It is best to protect installed hinges with primer and paint from external atmospheric influences so they can serve you for a very long time. With a little effort and patience, you can make and install high-quality lugs yourself using simple tools.
Warnings
- To protect your thumbs, wear a soft thimble while planing. It can be quickly sewn by hand from thick fabric such as rags. It is the same as a regular thimble, but is sized to fit your thumb.
- Never point the knife at yourself or anyone else when working, so it won't hit anyone if it slips. If it's more convenient, work on a hard surface like a workbench. You can protect the surface with oilcloth for cutting, an old magazine or a piece of cardboard.
External design of hooks
Even such an insignificant item as a hanger with hooks can beneficially complement the overall style of the interior, so if you wish, you can choose products of various shapes and colors according to your personal preferences.
Table No. 4. Choosing hooks according to the interior features
| Style, illustration | Description |
| Art Deco | This style is characterized by the presence of shiny surfaces with various metallic elements. Therefore, it is recommended to choose hooks made of bronze or brass. |
| Loft | Loft is a style that includes various industrial elements. Therefore, hooks in the form of various nails and pipes are suitable here. In this case, you can be smart and make products from any available materials. |
| High tech | This style includes the presence of laconic interior elements. Therefore, in this case, you can choose the simplest products possible, in solid colors. |
| Minimalism | Minimalism presupposes the simplest furnishings in the room, devoid of various decorative delights. That’s why hooks are chosen in simple shapes and discreet colors. |
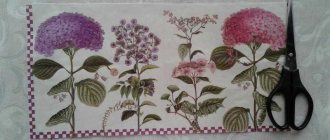
Photo of wooden hangers in the interior
As you can see, you can make a wooden wall or floor hanger - for clothes or jewelry, for children and adults, for a dressing room or for a hallway. This could be either a classic or some unusual hanger made of wood - from skis, hammers, old things, a fence or doors, from pallets and so on. The main thing is to use your imagination, and for inspiration I suggest looking at photos of various wooden hangers that you can make with your own hands.
We can conclude that there are quite a lot of options for hangers, as well as ideas for their implementation, and each of them is unique in its own way. Therefore, choose which of the ideas will best suit your home and start making your own masterpiece. Drawings and available materials will help you with this. The main thing is to have an original idea and the mood to implement it.
Related article: Do-it-yourself airplane chandelier for a children's room
Screw type lock
Locks of this type should be installed exclusively on the outside of the gate door leaf. The device itself is quite simple to use. The basic package includes a threaded rod and the key base itself. Each such base has its own special spire and recess. Using an individual key, you can put the lock into working condition. Such a lock with a kind of secret is quite often mounted on the gate. Basically, the great demand for this device can be explained by the fact that it is quite simple to assemble it yourself, but the fact is that quite often there is simply no space in the wicket frame to install a specialized place into which the rod will fit. But such a lock performs very well protective functions due to the fact that it is almost impossible to break into it.
Complete set of screw mechanism
Step-by-step assembly instructions
An ordinary piece of furniture, such as a coat rack, can be turned into a functional piece of art. This can be a vertical or horizontal structure made of any type of pipe. The assembly of structures from various materials has its own characteristics.
Metal pipe hanger:
- Creating the foundation. We connect 2 pipes of 60 cm each horizontally through a tee. We do the same with the remaining pair of pipes of this length;
- Top bar. Glue two corners to the ends of the 90 cm pipe;
- We place one end of each 150 cm pipe in the base tee, cover the second with the corner of the top strip;
- We close the ends of the base pipes with plugs.
PVC pipe hanger:
- Let's make a stand. We connect 6 12 cm pipes with tees horizontally. This resulted in three separate elements. We thread one of the blanks into the tees of the others. We form the legs from the corners;
- Hands hangers. We assemble the parts - tee, 15 cm pipe, corner;
- Rack. We insert an 80 cm pipe into the central tee of the stand, then an arm, a 20 cm pipe, another arm and again a pipe. Cover the top with a cap. The arms of the hanger should be directed in different directions, and the corners should be raised up.
Painting and varnishing
Any procedures with paint and varnish products can only be carried out with gloves.
The first layer of varnish should be uniformly thin; carefully ensure that the product is evenly distributed over the surface. Then wait for it to dry completely, after which the varnishing must be repeated.
The hanger is almost ready. If you wish, you can burn out a decorative ornament or design on some parts before the varnishing stage. If it is necessary to complete the work in a short time, purchase ready-made decor from thin plywood and glue it onto the surface of the wood.
To achieve complete harmony with the interior of the room and satisfy functional needs, you should think in advance what will be better in your case - varnish or paint. There is a huge selection of paints and varnishes for wood on sale, which indicate the operating conditions of the coatings. Read them carefully; it is apparently not worth varnishing a bath product, but rather painting it. A hanger for the hall in the house will look great in a varnished state, especially since the tone of the composition can be selected with precision.
Tools
To create an open dressing area in a bathhouse with your own hands, you need to prepare the following materials:
- Boards;
- Reiki;
- Pallets (pallets);
- Chocks with knots (logs);
- Tree branches;
- Wooden hooks ready;
- Self-tapping screws;
- Bars.
The following tools will be useful:
- Electric jigsaw (saw, hacksaw);
- Screwdriver;
- Hammer;
- Roulette.
During the creation process, you may need something else.
Decoration
Unusual design solutions can transform any, even unsightly, hallway. To maintain a classic style, the hanger can be covered with leather (leather substitute) or preserve the natural beauty of wood, if that is what was used. Paint the hooks with bronze or gold paint. Upholster the hangers with velvet and satin fabric. For country music, use additional accessories in the form of horns; they can be cut from wood. For a retro style, the color can be artificially aged; the decoupage technique is used for Provence. Glue or draw flowers, images of birds, landscapes as prints. In a modern interior, experiments, unusual shapes, original accessories, silhouettes, and complex intricate patterns are acceptable. You can decorate and add originality with rhinestones, sequins, handmade decor, drawings, bows. Apply images of your favorite cartoon characters, TV series, books.
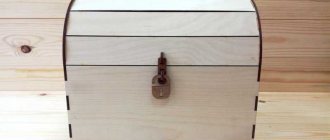
The latch is a reliable latch
Reliable locking mechanism
The next type of gate lock is called a latch. Perhaps this is a very reliable way for constipation. It is not as bulky as the “spinner”; moreover, the latch is almost invisible. The latch is durable, and the simplicity of the mechanism makes it universal. It is clear that the latch must be installed at the opening of the gate.
It is recommended to mark before installation, that is, indicate where the latch itself and its fastening will be located. The technique for performing the work has the following sequence:
- we start by driving an inch-sized pipe into the ground;
- then we fix an iron rod with a hole for twine or cable;
- and finally, if necessary, tighten the cable, the latch rises.
Self-production
In order to do this, you need at least minimal experience in metalworking, as well as minimal knowledge of steel grades and the features of its heat treatment. When choosing a material, you should pay attention to carbon, low-alloy and alloy grades. Poor metal quality will have a negative impact on the quality of finished products.
Important! It must be taken into account that further features of heat treatment depend on the grade of steel.
If we talk about the usual sizes of offset presses, then usually there are no problems with finding them. However, ultralight lovers cannot always find small enough offset hooks on sale. You can make them yourself from wire or from sewing needles, but most fishermen do it easier.
Buy a regular hook of a suitable size, but one that has a long shank and a wide eye. Next, the forend needs to be heated a little, after which it will quite easily take the required shape. This method can even be used directly while fishing, since most often the flame of a lighter is sufficient.
Fishermen often make various improvements for offset hooks, such as corkscrews, which are necessary for better fixation of the silicone bait, which after several casts begins to slide, or they solder a weight on the fore-end, thanks to which the offset catches less algae than when using Cheburashka weights.
Despite the fact that the risk of ending up somewhere far from people, straying from a detachment on a hike, after a shipwreck or an air transport accident, is relatively small, it still exists. In such situations, when making hooks, you may have to use the experience of ancient fishermen:
- You can use a branch with a knot extending at the required angle, but the tree should not be dry, otherwise you should not expect normal strength.
- It is also possible to use it as a material for making bird or fish bones.
- Shells of mollusks are also suitable for these purposes.
Naturally, there will be more fish coming off such improvised gear, but you can still catch something. Better hooks are made from small nails or wire.
Important! Suitable wire can be obtained from pins, hairpins, paper clips; it is also worth remembering that some hats have a metal frame.