For many centuries, chests were important elements of the interior; they could be found in almost every home, regardless of the wealth of the owners. Chests, having various sizes and shapes, were used during travel to store valuables and household items; They were also passed on as inheritance, often with a dowry collected for the bride.
Recently, the fashion for chests has been revived; now they can be increasingly found in houses and apartments . They are sold in many interior stores. But if you wish, you can make a wooden chest with your own hands, since there are a huge variety of different options.
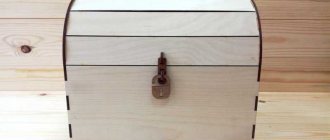
DIY wooden chest
Decorative chests: practical applications
There are many options on how to make a trap chest, or a large chest for children's toys, a woodpile in the form of a chest and a jewelry chest.
Capacious and compact products are decorated in accordance with the chosen style and for this you can use modern decorative materials.
Presentable appearance and practical spaciousness, proper organization of internal space helps to use all the capabilities of such products.
For holiday greetings, you can make a small and attractive money chest, which will be perfectly complemented by a bouquet of flowers and a greeting card.
Interesting facts[edit | edit code]
- Chests can not only be crafted, but also found in treasuries, abandoned mines, fortresses, villages, igloos, Edge cities, bandit outposts and temples.
- Chests do not burn and cannot be used as fuel in stoves.
- Steps, other chests, and any transparent block placed above a chest do not interfere with its opening.
- The chest cannot be moved with a piston in Java Edition.
- If there is a plunger above the chest, the chest can still be opened.
- The cat can sit on the chest, while preventing the player from using it.
- On December 24 and 25 (according to the computer clock), chests take on a festive texture (see).
- A trap chest was added in preview build 13w01a (1.5). In addition to its direct purpose, it is interesting in that it can be used to create more compact storage facilities with chests placed close together, alternating regular chests and traps.
- Before version 1.13: if you put chests in a row in MCEdit or using the commands /, then only two will be displayed in the game, and when one is destroyed, another will appear, and so on. Opening the “middle” one will open a triple chest. In the same way, you can make a five-fold chest, if you place the chests crosswise.
- In the pocket edition, when a chest is destroyed, it begins to “tremble.”
- Items with the Curse of Loss enchantment do not disappear when dropped from a destroyed chest, or when the player who owns the item dies (even in single player).
- Of the stone or wooden tools, the bonus chest can only contain pickaxes and axes.
- Its analogue was contained in the PC Gamer Minecraft Demo.
- If you place two funnels under a large chest, they will simultaneously remove the resource from it, but visually the removal of the resource will occur sequentially.
- If in the pocket edition you try to move a double chest with two pistons at the same time, then after moving the chest will split into two regular ones.
- Chests can be placed next to each other without connecting if you hold down ⇧ Left Shift. This does not work in the pocket edition.
- If in the “Creative” mode you hover the cursor over a chest, hold down ⇧ Shift and MMB, you can not only copy it to your inventory, but also all its contents.
- If you go into the inventory of a chest while moving on a trolley, then after passing a few blocks you will automatically exit it.
- If you place chests next to each other while holding ⇧ Shift, the chests will only be placed correctly in a certain order. To place chests, do not place it near a double chest, otherwise it will face away from you. To have the chest facing you, place the first chest on top of the bottom chest (or below the ceiling), and for a double chest, place the chest facing the side of the first chest.
- In an unknown version there was a bug with opening and closing the chest.
DIY folding chairs made of wood, drawings
What can you use cardboard chests for?
Not complicated technologies and a step-by-step procedure on how to make a chest from a box, described in this article, will help you make a chest yourself.
Such universal and thematically designed crafts can be used for different purposes, it all depends on the functionality, decoration and purpose of the finished product:
- for storing jewelry and money, small souvenirs;
- as a storage system for children's toys and treasures;
- as gift packaging for different sets;
- as a decorative decoration and design addition.
An antique-style chest or small chest is highly decorative and perfectly decorates the room.
To preserve its presentable appearance for a long time, you should carefully follow the manufacturing technology of the craft and select the right materials for manufacturing and decoration.
Values[edit | edit code]
Data numberingedit | edit code
Main article: Data numbering
| Bytes | Values |
| 0x10x20x30x4 | A three-byte field containing values from 2 to 5:
Invalid default value: 2. |
| 0x8 | Not used. |
Main article: Block states
| Name | Meaning | Description |
| facing | Direction of the front of the chest. |
NBT dataedit | edit code
- NBT block-entity data id:
- x: X coordinates of the block entity.
- y: Coordinates of the block entity along the Y axis.
- id: Coordinates of the entity block along the Z axis.
- CustomName: Optional. Changes the name of the chest.
- Lock: Optional. Blocks the chest.
- Items
: Item in chest, including slot number. The slots in the chest are numbered from 0 to 26. 0 indicates the slot in the upper left corner.: List of items in the chest.
Jewelry chest manufacturing technology
To make an old-style chest yourself, you do not need special knowledge or a lot of time; the creative process is based on several stages.
To implement them and obtain the planned result, you must follow all recommendations from experienced craftsmen and designers:
- the choice of idea is based on one’s own taste and preferences, taking into account the intended purpose of the craft;
- depending on your own skills and abilities, you need to select the right materials and tools;
- special attention is paid to the selection of the method and method of fastening the individual elements of the future chest;
- correctly selected accessories and fittings make it possible to significantly increase the decorative value of the craft;
- technologies for interior and exterior design involve the use of different finishing materials.
Based on these tips, you can choose an idea, decide on the theme of the chest design and begin implementing your plans.
At each stage, you don’t have to limit your imagination, because the most daring experiments help you get an ideal and excellent result that can amaze even a master.
A little history
Since time immemorial, chests in Rus' have been a necessary item in which things, kitchen utensils, family heirlooms and jewelry were stored or transported. It was not distinguished by design, special attention was paid not to decoration, but to strength, because even now there are reliable chests from the 15th century!!!
Over its long history, the chest was modified many times and already in the 17th century, legs were attached to it and cells were installed, like a prototype of a modern chest of drawers.
Chest with legs...
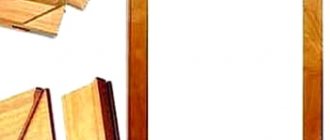
Selection of materials
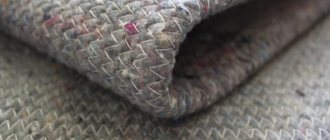
The technology of how to make a chest from cardboard or plywood can differ significantly in the way materials are processed.
For beginning craftsmen, the optimal solution would be to make a practical craft from a ready-made cardboard box, and after practice, you can begin to use more practical materials.
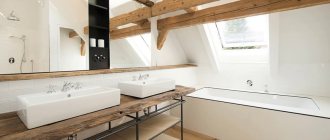
Simple seat on the balcony
At this site we made a cabinet from lining. The customer asked if we could make him a built-in nightstand. You can put things inside and sit on it. We offered him this option.
Tools for work
Depending on the selected idea and materials, you will need to prepare tools to apply the technology for processing them yourself.
The standard set is a stationery knife and scissors, glue with good adhesive properties, additional accessories and paints and varnishes.
Useful tips
Experts have developed a number of recommendations that will be useful to craftsmen who make their own chests:
- The presence of chips and scratches will help give the product a vintage style.
- To ensure that the chest fits perfectly into the interior, it is worth purchasing a lamp and paintings that suit the style.
- In a room with white walls, it is worth installing structures painted in light colors.
- In the process of making a chest with your own hands, it is important not to forget about the need for final treatment of the wood with stain and varnish.
Assembling the chest
The procedure for making a chest for wood begins with cutting the source material in accordance with the selected sketch into individual elements.
Working with packaging cardboard is simple and convenient; it bends perfectly and is suitable for forming any configuration; it is easy to glue and decorate.
First of all, we think about the design
I offer you step-by-step instructions in order to get not just a chest, but a unique piece of furniture. Do you want to make an antique chest? Turn on your imagination and go ahead!
First you need to determine the location and draw an approximate image on a piece of paper. The dimensions need to be considered in advance, taking into account the thickness of the wood.
It is very important what kind of wood is used for production, there are many options. The least expensive option is pine furniture, but you need to take into account that at the slightest sign of moisture, the material swells, becomes covered with cracks and soon loses its “marketable appearance.” Alder is also on the list of budget options. It is not very hard, but thanks to its soft texture and light tone, it can imitate expensive tropical woods.
Making an antique chest...
How to make an antique chest? And this question can be answered. Several tricks are used to age wood, which I wrote about earlier.
To give it an antique look, you should arm yourself with matte, semi-matte or craquelure varnish. When applied to a wooden surface, it will become covered with a web of small cracks, imitating old wood.
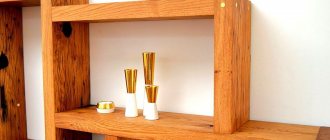
Chest decoration
If we are making a chest for money or jewelry, then it is necessary to decorate it beautifully not only on the outside, but also on the inside.
To do this, you can select different materials and cover it entirely with paper or wallpaper with an appropriate print, use self-adhesive film or acrylic paint, and bronzing technologies.
General repair steps
There are several ways to give an old chest a new life, but at the very first stage it is necessary to put the shape of the dried-out object in order. If it has dried out so much that it can be folded or even disassembled into its components, it is necessary to saturate the wood with water. To do this, you need to fill the bath with water and put parts of a wooden object in it for a while. For each type of wood, the time spent in water is individual. Birch and aspen absorb water quickly, oak much slower. The main thing is not to overexpose the workpieces in water, otherwise they will not be assembled, and the grooves will have to be filed. Restoring an antique chest does not involve this kind of action.
When assembling, the grooves must be in close contact - this will give a certain rigidity to the structure. If there are still gaps in the grooves, you need to resort to wood glue and small pieces of cotton fabric, which will be needed to securely join the elements of the object being restored.
Is the paint peeling and faded in patches? It needs to be removed, but previously, when creating chests, dyes were used, which were absorbed into the top layer of wood. In the new version, it is better to color the chest using stain or protective impregnation with a color scheme. To do this, use a plane to thinly remove the top layer. Restoring an old chest in this way is acceptable if there is no original drawing on it. Such a chest can simply be updated using modern means - impregnations and varnishes.
Save an old chest drawing
Do-it-yourself restoration of an ancient chest with an image of the Bereginya, a deity protecting the family from adversity and misfortune, requires a more detailed approach. Bereginya is a bird with a female face; in Russian epic it can be found under the name alkonost. The plumage, headdress, and beads of this creature are clearly depicted. It will not be possible to restore such a chest in one day.
It is necessary to carefully remove the layer of old varnish, apply a protective impregnation, let it absorb and, using acrylic paints with a thin brush, paint all the decorative elements again.
Before varnishing a chest with a restored design, you can give it an aged appearance. You can age the drawing using craquelure varnish; it will give the effect of cracks in the paint. This way the old chest will look more realistic, but its pattern will become brighter and more distinguishable. Sometimes on a chest you can find a rooster with an outlandish tail; by the number of feathers in the tail you can judge the antiquity of the family. It’s also not easy to paint this drawing yourself, because every line of the tail is a branch of the family tree.
Using modern materials, you can transform a drawing with your own hands into 3D or give it a light network of cracks inside the varnish coating.