Oenology is the name of the science of winemaking. An important branch of wine science is the storage of varieties with aging potential. Connoisseurs of this drink know that bottled wine cannot always be called ready-made. 10-15% of wine varieties only become better with prolonged aging and fully reveal their flavor bouquet.
To improve the taste and not spoil their favorite drink, collectors strictly follow the rules for storing wine. A wine cabinet is a must-have for those who know a lot about wines and their storage.
Requirements for conditions for storing wine
Not all wine varieties require careful storage and have the potential to age. For young light wines, a small rack in a cool, dark place or a built-in cabinet in a kitchen unit is sufficient. For vintage varieties that require long-term aging, special conditions must be created.
There are five most important parameters for storing wine at home:
- Protection from direct sunlight. Bright lighting contributes to the rapid aging of wine, spoiling the taste and quality. A mandatory requirement for long-term storage of wine is a dark place, protected from sunlight.
- Strict adherence to temperature conditions.
- Maintains a constant humidity level of 60−80%.
- Strong fixation of wine bottles. No movement, vibration or rolling is allowed.
- An additional requirement for bottles with traditional cork stoppers is that they should only be stored horizontally. Contact between the cork and the wine is necessary, because... In a vertical position, the cork dries out and air gets into the drink.
There are several recommendations for storing an open bottle of wine. To extend shelf life, use vacuum stoppers or add gas. A tightly closed container without air access in a cool place will preserve the drink for some time. But the best way is to use the leftover wine in French recipes.
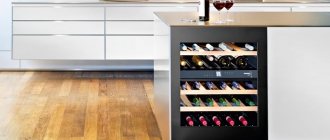
How to make a built-in cabinet under a countertop
Such cabinets are produced without external edging. They can be placed in any room without disturbing the internal harmony of the room. It will look great in the kitchen under the countertop, in the bar counter. It is better to make it strictly according to individual sizes, since the manufacturer can change the parameters of the products. Standard cabinets have transparent doors with anti-ultraviolet coating. They do not need additional covering.
The only disadvantage of countertop cabinets is their insufficient volume. When ordering a factory model, please note that the capacity is calculated without taking into account the shelves. In reality, the number of bottles that the structure can accommodate must be reduced by a third.
Any changes to the built-in furniture in the kitchen will help increase the comfort and efficiency of working in the room. Kitchen cabinets can easily be converted into wine cabinets, making the interior more convenient and adding appeal. You can also use the lower empty part of the island cabinet.
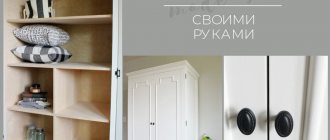
Useful tips for restoring cabinets
Throwing out old, out of fashion, but whole furniture is wrong. Some companies specialize in cabinet restoration. They change them as if they were new, just purchased furniture. But you don’t have to pay money for it. You can update an old cabinet yourself, knowing what material the product is made of. Chipboard and natural wood require different restoration methods.
Natural wood
Wooden furniture used to be made to last, so you might want to try refinishing it before finally ending up in the landfill. The walls are prepared: dust is wiped off, fasteners are repaired, treated with an antibacterial agent, and ventilated. Then they decide how to decorate:
- Toning. All irregularities and cracks are sealed with putty. It needs to be close in tone to the original color. After drying, a layer of putty is rubbed with sandpaper to level the surface. For this technique, building materials stores sell tinting for wooden furniture. It is better to choose a color one or two shades darker.
- Aging. The furniture is given an antique effect, which looks advantageous in some rooms. To do this, buy paint in two tones: light and dark. The color is selected to match the interior. First, a dark layer is applied, and after drying, some areas are wiped with wax. Then paint the surface with a light shade. When the wall is dry, clean the top layer with sandpaper. It will look as if the furniture has worn out from old age.
- Painting. This technique requires painting skills. The surface should be light in color. They paint on the doors with acrylic, and after drying, the design is varnished.
Chipboard
Before you start updating a cabinet made of chipboard, it is prepared like a wooden one. The same methods of decoration are used, except for tinting.
Dark polishing is the main option for Russians. The problem with such furniture is that the polishing layer is almost impossible to clean off. This makes it difficult to restore the cabinet. It is best to replace the doors if they are severely scratched or broken. The product is updated in two ways:
- Tupovka. This is a type of tinting that is done with a sponge. Buy gold or copper-colored metal paint and press it into the surface with a sponge. On top of this layer, molded PVC elements are attached.
- Stencil pattern. Paint for this is needed just like for blunting, but in the form of an aerosol. A template is glued to the walls, covered with matte varnish, and painted. Everything dries within 15-30 minutes.
How to choose paint for a chipboard cabinet
Several types of paint are used to paint chipboard:
- alkyd;
- acrylic;
- aerosol:
- on wood.
To make the color deeper, fill it with varnish. But acrylic is the safest for humans, dries quickly in the room and does not require long-term ventilation. Stores sell a large number of colors that are mixed to obtain the desired shade. Acrylic in an aerosol lays flat and smooth on the walls.
Varnishes give the appearance of rich antiquity. They are poured with paint and left to dry. In addition to the fact that varnish improves furniture, it protects against scratches and chips.
How to choose brushes or roller
Brushes and rollers are chosen of good quality, because the uniformity of paint application depends on them. After proper painting, the cabinet will look like new for 3-5 years. Due to poor quality brushes, lint, hairs, and dust stick to the walls.
For large surfaces, rollers and aerosols are suitable. It is more convenient to control uniformity with a roller. If the paint is leaking, a roller can easily fix it. But with careful application of the aerosol, a smoother coating is obtained. For painting small parts or small doors, a wide and narrow brush is suitable.
Attention!
While working, keep the brushes in water, otherwise the paint on them will quickly dry out, they will stick together, and they will have to be thrown away.
Some restoration methods will require large expenditures, while others can be made from cheap materials. There are some things we can do ourselves, but others are better left in the hands of professionals. But each method is played out in its own way, creating a unique design that guests will not be able to take their eyes off.
How to choose
The choice of wine cabinet depends on personal preferences, available space and financial capabilities. A standard ready-made cabinet has a full range of necessary functions and a simple design. More expensive models are equipped with additional options and are decorated more effectively. Elite devices are made to order for expensive and rare varieties and are equipped to ensure long-term perfect preservation of the drink.
The main task of a wine cabinet is to provide all storage requirements. To ensure that the purchased unit is distinguished by its functionality, reliability and long service life, we provide several recommendations for selection.
- Vibration is not allowed. Careless handling spoils the wine, promotes sedimentation, and disrupts the ripening process. Equipping with shock absorbers and shelves made of strong wood is a must in a cabinet with a compressor. The non-compressor model eliminates the risk of vibration.
- Stable temperature and humidity. The storage regime must not be violated; constant temperature and humidity indicators must be observed.
- The collection, which includes different types of wines, is placed in a cabinet with isolated zones.
- Protection from light is required. An open closet is only permissible in rooms without windows and bright lighting. In all other cases, doors made of wood or tinted glass are hermetically sealed. Lamps without heating are used.
- Ventilation is necessary. Carbon filters do a good job of cleaning the air and removing foreign odors.
Review of the best market offers
In our country, similar products are represented by various brands. Among them, Liebherr, Gorenje, and Miele stand out. There are decent offers from Electrolux, Samsung and Bosch-Siemens. Much less known are models from the French manufacturer EuroCave (one of the leading ones in Europe). There are several lines on sale, from compact cabinets costing approximately 90,000 rubles, which can hold only 56 bottles, to solid options for 76 bottles. There are also very exclusive one-off offers finished with expensive materials.
Gorenje XWC660EF
This is the most inexpensive model presented on the Russian market - it can be purchased for 35,000 rubles. Capacity: 52 standard size wine bottles. The unit is a free-standing model. Dimensions of the device are 90x60x90 cm (height-width-depth). The total volume is 158 liters.
- the ability to independently select the temperature for storing wine;
- two modes (“white wine” and “red wine”);
- 7 shelves;
- double glazed door (tempered tinted glass);
- antibacterial coating;
- presence of internal lighting.
Flaws:
- monotemperature device;
- relatively expensive device.
Liebherr SBSes 7155
This offer from the German brand is worthy of attention for several reasons. First of all, because it is a side-by-side refrigerator with a built-in wine cabinet. The wine compartment is located in the left corner of the equipment. Its 128 liters volume can accommodate 41 bottles.
The advantages are as follows:
- multi-temperature (two-zone option);
- temperature range 5-18°C;
- smoked door glass;
- internal lighting;
- 4 shelves made of natural wood (two for presentation and two with telescopic guides).
A significant drawback is the price. Not everyone can afford equipment that costs 180,000 rubles or more. The built-in concept of the option is also not impressive: the device cannot be purchased without a refrigerator, since it is a full-fledged part of the structure.
Miele KWT 4154 UG-1
This compact unit holds 38 bottles. But even with its small and home-friendly dimensions (82 x 60 x 57.5 cm), it is equipped with sufficient capabilities.
Among the advantages are:
- compact dimensions for the kitchen;
- presence of two temperature zones;
- internal dynamic cooling allows the cooled air inside to be evenly distributed;
- heating if necessary (most often when a low temperature occurs);
- presence of a carbon ventilation filter.
Of course, a wine cooler is not an appliance that you will find in every home. As well as a wine cellar, which will store elite varieties of such an alcoholic drink. However, if you follow the rule of teaching yourself and your loved ones to use really high-quality products, you can think about purchasing or at least making such a device. Moreover, it can fit perfectly into the concept of any interior.
How to make a wine cabinet with your own hands
You can make a wine storage cabinet yourself at home. This will require minimal carpentry skills and a set of tools. First of all, you need to decide on the location of its installation and the dimensions of the room. The listed parameters directly affect the dimensions of the planned product. For a small room, preference should be given to small narrow pieces of furniture.
When drawing up a project, you should think in advance about what materials will be used and decide on the principle of organizing the internal space. It is worth considering the fact that diagonal shelves are the most difficult to make, and not everyone will succeed the first time. For beginners, it is better to choose simpler designs. For example, consider a master class on making a wooden cabinet.
Required tools and materials
Before starting work, it is necessary to select and prepare raw materials. Wood for making furniture must be smooth, the presence of knots and mechanical damage on the surface is unacceptable. Any deformations reduce the service life of manufactured products. Also, for carrying out events you will need the following set of tools and materials:
- pencil, tape measure, construction square, level;
- hammer, pliers;
- saw, electric drill, screwdriver;
- jigsaw, chisel, grinder;
- planed boards with a thickness of at least 20 mm;
- wooden beams 30x30;
- plywood sheets;
- corners for connecting perpendicular elements;
- clear varnish, paint;
- nails, screws.
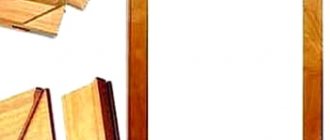
Drawing and cutting diagram
It is impossible to do without constructing an assembly drawing, indicating in it the exact dimensions of all parts. Only on the basis of the design documentation, where the components for cutting are calculated on diagrams drawn to scale, can one calculate the amount of wood material, fasteners, functional and facial fittings required for the work.
Not many people will be able to develop a project on their own. This will require specific knowledge. But the problem can be solved. To do this, you should use ready-made sketches that are present in the literature on winemaking, or download them online. The main thing is to choose the right cabinet design, commensurate in size with the dimensions of the room.
Cabinet assembly and installation
Based on the existing drawing, it is necessary to prepare all the main parts of the cabinet. Initially, you will need to cut the beams and boards according to the dimensions indicated in the diagram, then sand them and treat them with an antiseptic compound. Next, a frame is assembled from the timber, all wooden parts are connected to each other using self-tapping screws. To ensure reliable fastening, perpendicular elements at the joints are fixed with metal corners.
The sides of the finished frame are sheathed with boards. The rear partition is cut out of a sheet of plywood and attached to the overall structure. To make shelves, you can use both wood and sheets of chipboard and fiberboard. Their width and depth must exactly match the similar internal parameters of the product. It is very important to maintain the size of the individual cells; they must match the bottle so that it is clearly fixed and cannot roll around.
To build separate niches for each container, it is necessary to make small cuts at right angles in the horizontal shelves. Vertical elements are inserted into these grooves and rigidly fixed with glue and self-tapping screws. At the final stage, doors and fittings are attached. After assembling the furniture, the surfaces are varnished and installed in a pre-selected place. The base of the floor must be solid and level.
Shabby chic
Using the decoupage technique, you can refine even those things that have already completely lost their aesthetic appearance. Nowadays, in this way, they add individuality not only to old products, but also to completely new pieces of furniture.
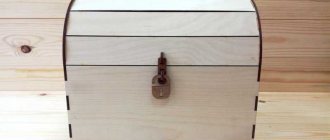
To decoupage an old small cabinet with your own hands, in which useful things for the home are stored, you can choose plant motifs and floral patterns. To carry out the work of restoring old, worn-out furniture, you will need the following materials and tools:
- napkins with large floral patterns;
- glue for decoupage - special or PVA;
- acrylic lacquer;
- wide brush;
- acrylic paints brown and white;
- paraffin candle.
Follow this tutorial for decoupaging a small cabinet with your own hands:
- If the cabinet you want to extend the life of is covered in paint, you will need to remove a layer of that old paint coating. It is enough to sand furniture that is not covered with paint, removing all the unevenness and roughness of the surface of the material.
- Paint the cabinet with brown paint in one coat, both inside and out.
- Once the paint has dried well, treat the surface of the piece of furniture with paraffin to create the natural scuff marks typical of shabby chic pieces.
- Prime the cabinet with one or two coats of white acrylic. It is necessary to make a translucent coating; it should not be dense.
- Using sandpaper, go over the areas that were treated with paraffin. During this type of work, the top layer of material will be removed, revealing dark paint, creating a scuffed effect on the furniture.
- Now you can start applying patterns to the surface of the furniture. To do this, take napkins with flowers, remove the top two layers of paper, leaving only the one on which the image is located. Having prepared the required number of motifs, attach them to the closet and think about how well they will look in the chosen place. Consider the ability of paper napkins to stretch when glued to a hard surface.
Place the napkin on the furniture, hold it with your hands and cover it with glue on top, pressing it tightly with a brush to release air bubbles. Such actions should be performed very quickly, since the napkin will immediately become wet and the picture may be damaged. When all the motifs are glued, leave them to dry for several hours
To speed up this process, you can use a hair dryer. Sometimes small wrinkles may be visible on dried napkins; these can be carefully smoothed out with fine sandpaper. The final stage of decoupage is varnishing the furniture.
This option for decoupaging a cabinet using napkins with your own hands is shown in the photo below:
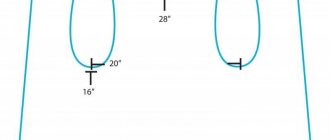
Tackle the foundation
Drill overlapping holes to make sockets 32mm long by 14mm deep on two faces of each piece as indicated on the template.
1. Glue two blanks measuring 38x51x240 for the legs J. Each piece will make two legs.
2. Make two copies of the leg template. Using spray adhesive, attach them to the blanks by bending them along the fold line. Place a 6mm diameter drill bit into the drill chuck and form 32x14mm sockets in the locations indicated on the template (photo D ). Then use a sharp chisel to level the walls of the nests and trim the corners.
3. Cut out the legs along the contour lines using a band saw and sand, but do not separate them. Insert a cutter for roundings with a radius of 3 mm into the collet of the router installed in the table and process the workpieces on both sides, as indicated in the template and Fig. 1. Sand the workpieces smoothly.
4. Using a saw machine, using a crosscut (angle) stop with a wooden pad and an end stop-stop that ensures the parts are the same length, saw off two legs 114 mm long from each workpiece.
5. You are sawing the kings K. Using a groove disk, form 6x13 mm tenons at the ends of the frames, fitting tightly into the sockets of the legs (Fig. 1 and 1a). Before sawing tenons on parts, check the settings of the sawing machine on scraps of the same thickness. Having cut out the cheeks of the tenons, place each drawer on a narrow edge and reduce the width of the tenons to 32 mm.
6. Install a standard 3 mm thick blade into the saw machine. Make a couple of shallow cuts on the top side of each drawer (Fig. 1a). The cuts will serve as traps for excess glue when attaching the base to the body. Sand the sides smoothly.
7. Dry assemble the base by connecting the drawers K with the legs J , and make sure that the parts fit accurately. Then glue the base (photo E).
Glue legs J and drawers K together, aligning the pieces along the top side. Check the squareness of the base by measuring its diagonals.
Glue the J/K base to the bottom of the C/E/F body, lining up the side gaps. The legs J should be flush with the back of the cabinet.
8. Place the case on the floor with its bottom upside down. Apply glue to the upper edges of frame K between the cuts. Align the J/K with the body and secure with clamps (photo F ).
Wine rack for storing bottles in the home
A rack for wine bottles is one of the ways to give your apartment or house a more stylish look. There is far from one option today, it all depends on capabilities and imagination.
For example, the idea of building wine storage rooms from glass and polycarbonate is common. But storing wine on such a structure is far from ideal, so this kind of room is considered more like a cabinet or refrigerator.
Important!
A more logical solution for organizing shelving racks is under the kitchen floor. Such conditions make it possible to have high-quality drinks of a decent level even in the heat.
A significant collection of wines is placed on a rack to give the kitchen or dining room a special aura. A wooden cabinet made of shelved cells looks very impressive. This option is a godsend for professional collectors.
Bottles also adorn kitchen shelves as souvenirs. True, this is not particularly useful for the drink itself; it can deteriorate in just three days, so experts do not approve of such placement.
In general, there is no general advice on what such a rack looks like. This design, like any house, is a subject of personal preference.
Paint application process
- Place the can on a stand and apply paint to the inside.
- Turn the can over and apply paint to the other side.
- Wait until the product is completely dry.
- Start painting the outer edges.
- Let the work dry.
The number of jars may vary, it all depends on how many tiers you want to make in the stand.
Assemble the structure. Determine how many cans you will have in the first row and apply superglue between them. Secure the work with clothespins. Glue the additional planned number of cans to the top, secure and let dry.
Table with wine rack
At home, wine can be stored in a variety of places. The best option is a special refrigerator. But, if it is not possible to install such equipment, you can make a beautiful table for the living room with special holes for bottles.
You can make a simple piece of furniture according to a standard plan or give it originality by using your imagination. The round table with side compartments for wine looks interesting. Circular strips are nailed to the bottom of the tabletop and holes are made in them to suit the size of the bottles. The legs can be made straight or a fancy design can be created.
What is a wine stand and why is it invented?
Racks for storing homemade wine in the basement of a house
The owners of a country house are absolutely lucky, who can afford to equip a real wine cellar, where they can enjoy the gifts of Dionysus all year round, sitting in front of the fireplace in the evening. But what should a person do who, being a connoisseur of the “art of wine”, is forced to live in an apartment where it is hardly possible to allocate space for specialized storage?
A wine cabinet in the kitchen allows you to preserve the quality of wine at home
The wine rack is equipment for several other purposes. Therefore, returning to the beginning of the article, it is worth fully deciding on the purpose of purchasing a rack. Would you like your wine to mature in the kitchen? Then your choice is a closet to store it. If you need a beautiful decorative element or just a shelf for storing bottles where a couple or two of semi-sweet red wines will await the next celebration - make a wine rack!
An original honeycomb shelf for wine bottles for your guests
Manufacturing materials
Wood is considered the best material for making wine cabinets (except for conifers with a characteristic resinous odor). A wooden cabinet is a traditional storage unit that has long earned its impeccable reputation among collectors .
Wood allows wine to breathe and maintains the desired temperature and humidity. Wood species that are distinguished by their durability and excellent aesthetic characteristics are especially valued. Wood lends itself perfectly to self-repair and restoration.
The following breeds combine all these requirements:
- Red tree;
- cherry;
- oak;
- Karelian birch;
- acacia;
- nut;
- ash;
- maple.
Metal and plastic are used to produce high-tech wine refrigerators. Such equipment regulates and maintains the required parameters regardless of the temperature and humidity of the environment. Small models fit perfectly into home kitchens, and large refrigerators are installed in restaurants and cafes.
Clay is used to make drainage pipes, in which wine bottles remarkably preserve the properties of the drink. Tinted glass is often used for wine cabinet doors. Such glass prevents ultraviolet radiation from entering the cabinet, preventing oxidation of wine and sedimentation. In addition, tinted doors look impressive and decorate the wine cabinet.
Wine cabinet for living room made of laminated HDF
A cabinet made of wood material will be an excellent addition to any living room interior. The decorative effect of HDF sheets lies in the special technology of their production. Several layers of varnish of different colors are applied to them. Then they use special equipment to achieve a pattern on the surface that imitates the structure of various types of wood. This approach makes the material for the wine cabinet noble and refined.
A piece of furniture in the living room can be of any size and configuration. More often this is a floor option. Inside the design there is space for several wine bottles, a compartment for glasses and cups, a drawer for bottle openers and other accessories. This compartment is covered by two doors with translucent decorative inserts. The lower open tier can be used simply as a shelf.
Design Features
A modern wine cabinet is the ideal storage for a noble drink. Cabinets provide the required temperature and ventilation, maintain humidity, and protect from direct light. Temperature cabinets are designed for short-term storage, while climatic structures are designed for long-term storage and create conditions similar to a wine cellar.
In addition to the aesthetic appearance, the cabinets are equipped with a climate control system. The operating principle of this system is similar to the operating principle of a refrigerator. The compressor reduces the temperature, the ventilation system ensures uniform distribution of cooled air. Carbon filters clean the air of fine dust. For illumination, lamps that do not heat the air are used.
The compressor creates a slight vibration, so the system provides structural protection - mechanical impact on the cabinet is unacceptable for storing wine. The compressor is secured so that it does not come into contact with the cabinet walls. Compressor trays are made of dense wood. Special rubber shock absorbers installed in cabinets dampen vibration.
The most modern models are created according to the Peltier principle. They use thermoelectric cooling, where thermal energy is pumped out of the chamber. The moisture partially settles on the walls, thereby achieving the desired percentage of humidity. Excess liquid is removed outside by a special drainage system. They control the equipment using the built-in panel or remote control.
Dimensions, design and additional functions
Various wine cooler models may have additional equipment and/or features.
Useful options:
- display;
- remote control;
- air circulation system;
- control of cooling zones;
- heating option;
- humidity control;
- locks and accessories.
A digital screen is often installed on the front wall of the cabinet, informing about the temperature and humidity of the chamber. Usually there are mechanical or touch buttons for settings here.
Some modifications provide remote control. In this case, the kit includes a remote control, which is used to regulate the operation of the device.
Wine cabinets often have shelves made of natural wood. They not only have an aesthetic appearance, but also help dampen the vibration that accompanies the operation of some devices.
Specialized refrigerators may have a different number of temperature zones. Dual-zone devices are especially in demand, since they maintain ideal conditions for storing two types of drinks.
They provide a section for white wines and champagne with a temperature of 6°C, as well as a compartment for full-bodied red wines at 16-18°C
It is important to consider that the presence of an additional compartment for cooling reduces internal space and significantly increases the cost of the model
A wine refrigerator with electronic control allows you to select the most suitable cooling mode for red, white and sparkling wines, taking into account their individual qualities
Multi-zone devices have a simpler design. They are characterized by a single space in which a vertical temperature change is provided: at the bottom it is lower than at the top. The spread of indicators in such options is usually 3-6°C.
For faster and more uniform cooling, a fan is sometimes installed in the working chamber. By definition, it is absent in multi-zone refrigerators, where temperature differences are important.
Most wine coolers are designed for cooling purposes only. However, there are modifications equipped with a heating function - “winter mode”. Such devices can be left without fear in unheated rooms, for example, in a country house or in a storage room.
To maintain the level of humidity, a number of modifications involve the use of lava stones. Their porous structure easily absorbs condensation, preserving it for a long time
In budget options, a constant content of water vapor is automatically maintained, the value of which varies in the range of 50-80%. Expensive units are usually equipped with special systems that allow you to independently set the humidity level.
In addition to the above factors, wine refrigerators may be equipped with additional devices and accessories, such as locks that prevent unauthorized access, UV protection screens, carbon filters, and lava stones.
As for dimensions, manufacturers offer a variety of parameters. Devices for private owners, designed to store several dozen bottles, usually have rather modest dimensions.
Industrial units for bars and other establishments have impressive dimensions, which makes it possible to store batches of various drinks in them.
The volume of the wine preservation device is measured in standard Bordeaux bottles with a capacity of 0.75 liters. The largest unit holds 500 wine bottles
Since wine storage units are considered luxury items, manufacturers pay special attention to the design of the models. They are made from metal, wood, tinted and mirror glass. Often devices are decorated with carvings, forged elements, leather, mosaics, which gives them a luxurious appearance
They are made from metal, wood, tinted and mirror glass. Often devices are decorated with carvings, forged elements, leather, and mosaics, which gives them a luxurious appearance.
The smallest wine cooling device is designed for just one bottle. Its task is to cool the contents for dinner
Cooling technologies
Depending on the model, a wine cabinet may offer several different drink cooling technologies:
Absorption cooling
Absorption is the quietest technology that does not make any noise during operation. It is based on evaporation and heat absorption through chemical reactions. Thanks to its silent operation, the absorption cabinet can be installed in any room. But this technology is not without its drawbacks - high price, high electricity consumption and the presence of harmful substances in the system.
Compressor cooling
Compressor – cools the contents by compressing and expanding gas. When it contracts, it evaporates heat, and when it expands, it absorbs it. The main advantage of the compressor is its efficiency. It does not consume a lot of electricity, but maintains the set temperature well. It is also good that the compressor cabinet is quite narrow, which allows it to fit into any space.
Thermoelectric cooling
Thermoelectric - carries out cooling using a special plate, which, when voltage is applied, cools one side and heats the other. Thermoelectric wine coolers may produce noise, the volume of which depends on the quality of the devices themselves. An expensive model will be almost silent, while a cheap model will cause noise discomfort.
This technology is good because it is low cost and does not emit vibrations or vibrations during operation.
TOP 5 built-in models
When choosing a wine refrigerator, an important factor is its location. Freestanding models require a lot of space in the room, so those who do not have much space in the kitchen or store choose built-in ones.
Built-in wine cabinets have a number of advantages. And which one to choose – read in the continuation of our rating.
Cold Vine C7-KBT1
Compact vertical type wine cabinet, great for small kitchen. Equipped with an external fan, which eliminates the possibility of the compressor overheating during operation, also providing it with additional cooling.
Holds up to 7 bottles of Bordeaux, which are hidden behind a UV-protected glass unit. Defrosting occurs automatically, and there is also a blue LED backlight.
Cold Vine C7-KBT1
- Compressor cooling system with environmentally friendly R600a refrigerant.
- There is an automatic defrost function.
- Convenient control panel.
- Possibility of reversing the door.
Caso WineSafe 18 EB
This wine refrigerator is based on a modern compressor that consumes little energy. The body can be made in black or gray, holds up to 18 bottles, and the temperature control is located outside. Equipped with pull-out solid wood shelves.
The anti-vibration system will prevent bottles from falling off the shelves. There is LED backlighting in a pleasant blue hue.
Caso WineSafe 18 EB
- Low noise level.
- Capacity.
- Beautiful appearance
- A keypad with LED display allows you to adjust the temperature without opening the door.
Cold Vine C40-KST2
One of the best built-in wine cabinets for the home in terms of price-quality ratio, capable of holding up to 40 bottles. The body can be made in black or silver, the glass door is tinted. There is backlighting in blue and white colors. Equipped with wooden shelves on special guides.
Two temperature zones for storing different types of drinks. You can adjust the temperature from +5 to +20 degrees.
Cold Vine C40-KST2
- Automatic defrost.
- Double glass with UV protection.
- Two temperature zones.
Liebherr WKEes 553
An excellent home wine cabinet from a famous European brand with excellent quality and unrivaled design. Thanks to the built-in fan, the temperature is distributed evenly throughout the refrigerator. When the fan operates, a certain humidity is also created, which helps preserve wine corks.
Using special indicators, you can find out the temperature in the compartment at any time. Equipped with wooden shelves, two of which are retractable. There is an internal backlight with adjustable brightness.
Liebherr WKEes 553
- The presence of an activated carbon filter means there will be no foreign odors.
- Beautiful design.
- Durable housing.
- Excellent quality.
Dunavox DX-17.58SDSK
Built-in vertical wine cabinet with two temperature zones. The temperature on the top shelf can be adjusted in the range from +5 to + 12 degrees, on the bottom - from +12 to + 22 degrees.
The advantages of this model are the compressor and fan with minimal noise. It is installed without any gaps, since cooling is carried out through the outer grille.
Wooden shelves are provided for easy storage, and there is a special stand for presenting special bottles.
Dunavox DX-17.58SDSK
- Two temperature zones.
- Minimum noise level.
- Possibility of storing bottles vertically.
- The door can be reversed.
- High price.
- External plinth grille not included.
Wall racks
Not everyone is lucky enough to have extra space for a built-in wine rack. However, everyone will definitely have a free wall.
So why not use the empty space for a minibar? This project from Shanty 2 Chic was brought to life using a few pieces of wood and large hex screws. Light wear and marked title stickers give the shelf an elegant look, turning it into an antique piece.
An unusual option is offered by the designers of Hart's Desire Photography. This wooden shelf allows you to store your drink at an angle of 45 degrees. It looks a little dangerous, but in fact, the design is very reliable!
If you prefer versatility and multifunctionality in everything, then the project from The Kurtz Corner is what you need! By attaching special threaded trays to a regular hanging box, you will accomplish two tasks. This will be a shelf for storing both wine and glasses.
Our next idea comes from Erin's Lane/Etsy. Everything is extremely simple: all you need is a massive wooden board and a few cast iron bolts from the railway. Combine all this and you have a rustic wine rack in your home! A quick but very stylish DIY project.
Types of shelves and their features
You can organize your wine storage system in different ways. Cabinets, racks, racks, and shelves are used to place bottles. Let's look at the last option in more detail. It is worth considering the fact that not all types of furniture products are suitable for placing alcohol, only wall-mounted and corner models. Suspended structures attached to the ceiling should not even be considered.
There is a wide variety of shelves. According to the design, the following types are distinguished: consoles, with side walls, with a rear partition, single-tier, multi-tier, combined. By mutual arrangement - single and group. By position in space - vertical, horizontal, diagonal, inclined, and each of the listed types has its own advantages and disadvantages.
Vertical
The variety of shelves located vertically is very large. They allow you to store bottles both vertically and horizontally, but the first method is used very rarely. Depending on the available space, you can choose different models. In one case, the container is laid perpendicular to the wall, with the neck or bottom facing outward, while others make it possible to place wine drinks parallel to the partition.
Narrow shelves can be attached not only to the wall, but also to cabinet furniture. The simplest product, located vertically, is a wooden beam or board with round holes drilled through it of a certain diameter. The necks of the bottles are inserted horizontally into these grooves from two different sides. The result is a kind of tree with branches.
Start with the body
1. From 19 mm plywood lined with cherry veneer, cut out the side walls A , top panel and shelf B , and bottom C according to the dimensions specified in the “List of Materials”.
2. On the inside of the side walls A , cut grooves and folds 19 mm wide and 10 mm deep ( Fig. 1) for inserting the top panel and shelf B. , cut a 6x10 mm fold along the back edge to insert the plywood back wall I.
D from a 19 mm thick cherry board . Mill a 6mm wide chamfer on the front side of the posts along both edges, not extending 50mm to the ends. How to do this carefully, avoiding chipping, is described in the “Advice of the Master” on the next page.
Master's advice
When milling partial chamfers, avoid burns
Surely you have already encountered chips and burns when milling incomplete chamfers. Chipping usually occurs when you try to rout an entire bevel in one pass.
Expert opinion Ekaterina Anatolyevna Smirnova has been engaged in interior design for 7 years, a professional architect
Burns occur when the rotating cutter becomes stuck in one place, so it is necessary to quickly move the workpiece away from the cutter at the end of the pass. There is an easy way to avoid these problems.
Having placed the workpiece on the edge and resting its rear end against the stopper, move it towards the cutter with a rotating motion, as shown in (left photo below). Without worrying about chipping or burning at the end point, mill about two-thirds of the bevel length.
Then turn the workpiece 180° with its ends and turn it face down so that the partially chamfered face is facing the longitudinal fence (right photo below). Mill again, finishing the pass on the already finished area.
4. Glue the posts D to the side walls A (Fig. 1), aligning the ends and outer sides. Once the glue has dried, sand the parts using 220 grit sandpaper.
5. In the top panel B , make a pair of mounting holes, countersunk from the bottom, and two slotted holes (slots) 4x10 mm for attaching cover G (Fig. 2). To form each slot, drill a series of overlapping holes.
Insert a spacer between the D posts and press the bottom with the C/E/F pads against the body, aligning it in the middle.
Using a 4mm pointed drill bit, mark the centers of the holes in cover G through the slots and mounting holes of top panel B.
Wardrobe with doors to the nursery
This cute cabinet can store anything, even a TV.
Suitable not only for children's rooms, but also for any other room. Making a cabinet with your own hands is not difficult. Simply attach the sides to the base and shelf using the dimensions shown in the photo. Keep the back edges flush. Attach the top, keeping the back edges flush.
The front will stick out about 1/2 inch. Use nails and glue to secure the back as shown in the diagram.
Next add the top trim, use fasteners to attach the sides to the end edges of the top trim.
Check that the door has a gap of approximately 3 mm. Attach the strips to the rear door panels using staples or nails as shown in the diagram. Make sure the edges are flush. Glue and secure in place as directed in step 2. Lay the door on a flat surface to dry, placing heavy objects on top. The cabinet is almost ready, all that remains is to secure the doors and install the shelves.
Photo source: www.ana-white.com/2010/01/plans-cubby-media-wall-hutch-with-doors.html
Children's wardrobe on wheels
This convenient mobile block design looks great and can be designed to fit your space. Here's how to make your own children's closet, as well as what tools and materials you'll need. Once you have chosen the size of the block you are going to make, cut the plywood to the required dimensions. For the frame, cut 600mm x 2250mm wallpaper in half to make four 300mm x 2250mm pieces. Then cut two of them at 1330mm for the sides and two at 1200mm for the top and bottom. For the shelf and dividers, cut 2400mm x 1200mm x 17mm ply into 300mm pieces along the 2400mm length to make eight pieces. Then make the frame. Make sure all corners are square and drill holes to connect the pieces. Use 50mm screws. Secure the first shelf and dividers. Starting from the bottom, install one of the 1200 mm shelves into the frame. The space should run evenly along the bottom of the frame.
Photo source: www.bunnings.com.au/diy-advice/home-improvement/shelving-and-storage/diy-cube-storage-unit
Bedside cabinet for children's room
A wooden bedside table for a nursery is the perfect way to keep your children's bedrooms tidy.
The children's locker not only looks great, but also has functional shelves and a convenient storage drawer that will help keep books and toys safe and sound. Look at the step-by-step photos and you will be surprised how easy it is to do.
Photo source: www.bunnings.com.au/diy-advice/home-improvement/shelving-and-storage/diy-kids-wooden-storage-bench
How to assemble a cabinet for a nursery
Assembly from ready-made panels is the easiest and most affordable way to make a children's locker with your own hands. This compact cabinet is the quintessential building block in a flexible modular storage system. You can add drawers, a shelf or a door to customize your closet. Convenient and economical in the sense that you can buy only as many shields as needed to assemble one unit.
Master class on how to assemble this simple cabinet, see step-by-step photos below.
Photo source: www.diy.com/ideas-advice/how-to-assemble-flatpack-cabinets-shelves/CC_npci_100108.art#page-top
Floor bookshelf for children
This children's wooden bookshelf allows you to display your child's favorite books or toys.
The shelf is really easy to make and you can paint it to suit the room's design and your child's tastes. Below, see the master class with step-by-step photos.
Photo source: www.bunnings.com.au/diy-advice/home-improvement/shelving-and-storage/how-to-make-a-diy-kids-wooden-bookshelf
Material
Wooden wine racks have proven themselves to be the most practical and durable - they do not fade or deform, and special coatings protect them from dirt. In addition, the tree does not overheat when exposed to direct sunlight.
Many manufacturers include plastic wine racks in their product range - they are cheaper than wooden ones, but tend to sag over time and stretch out when fully loaded.
Glass models are rarely found on sale and are not in great demand, since the likelihood of damaging them during cooking in the kitchen is quite high. When choosing such a model, you should give preference to tinted safety glass. The cost of the shelf may turn out to be unexpectedly high.
Questions and answers
My kitchen is in a classic style, chrome and plastic will not work. Which bottle holder should you choose?
Pay attention to baskets and shelves coated in bronze: such modules are found in high-status collections of leading brands. Bronze goes especially beautifully with dark wood: wenge, walnut, rosewood, oak.
There is a small kitchen with a very awkward configuration. I plan to make the most of the entire space and order tall cabinets. Will a pop-out bottle holder fit?
Yes, you can order a module for a tall cabinet, but decide in advance whether it will be convenient to use the upper shelves. It might make sense to save money and install 2-3 cargo shelves in a row of floor cabinets. If necessary, you can place 2 modules at different ends of the kitchen.
Can you store wine bottles in a pull-out bottle holder?
To store closed bottles of wine, it is better to choose special designs with horizontal lattice shelves or recesses; this will protect the corks from drying out and preserve the quality of the drink. But bottles with cognac and other strong drinks can be stored vertically, but in this case it is better to place the structure away from the stove.
Is it worth paying extra for a full extension system?
If the cargo does not extend completely, up to a third of the usable interior space is not used. In addition, such a bottle holder is difficult to clean if it gets dirty. You shouldn’t deprive yourself of amenities for the sake of saving a little money. Don’t forget about the door closers: they are irreplaceable if you constantly use cargo.
We bought a bottle holder with a chrome finish, but after a few months it became cloudy and rust appeared on the joints. What is the reason?
The most durable coating is applied by galvanic means: such bottle holders are produced by German and Spanish companies. Unfortunately, such designs are more expensive.
When choosing a bottle holder for the kitchen, consider not only the size and appearance; for optimal use, you need to take into account all the parameters. A high-quality product from a reputable brand is guaranteed to last 8-10 years and will not require repairs; inexpensive modules will have to be replaced every 2-3 years.
Holder made of hooks or metal plates
This design is suitable for a country style kitchen. Metal hooks are inserted into a large solid board. The board will be mounted vertically on the wall.
The hooks are fixed on both sides, at equal intervals.
Additional Information. To create a special authentic spirit, you can use cast iron bolts as hooks, like on a railway.
These bottle holders are great space savers.
Unusual designs
A wine rack or bottle rack is a very simple solution for a standard kitchen. Design structures of various shapes can diversify the interior and add elegance to it. Any stand for wine bottles should be not only practical, but also beautiful.
There are several options that are used when creating a product. Using drawings of known designs, you can create your own device.
Tree stand
The wooden wine stand is considered a classic. Only this type of material successfully harmonizes with the interior in Provence, classic or retro style. If you make an unusual design from these raw materials, then the kitchen will sparkle with new colors. An interesting and unusual option is the “wine tree”. A trunk-and-branches bottle rack is a base that extends from the floor and rests on the ceiling. Holes are drilled along the entire length of the deck into which the necks of the containers are inserted. It seems that the bottles seem to grow from the trunk. The “Wine Tree” takes up little space, holds many bottles, and looks unusual.
Article on the topic: DIY wardrobe
If a stand for wine bottles takes up a lot of space or does not fit into the overall kitchen design concept, then a “honeycomb” would be an ideal option. You can build these divisions into a wine rack or bottle rack. Typically, honeycombs are formed using staggered holes and mounted on the wall.
The wine storage stand can be built-in or placed directly in the wall where a niche was previously formed. The simplest option is a “honeycomb” of pipes connected at the sides in a random order.
Wavy stand
This type of wine stand is a structure that consists of several wavy niches. They are connected in parallel to each other. This design has several advantages compared to other design options:
- the stand for a wine bottle can be placed on a cabinet or attached to the wall, which makes it universal;
- accommodates many elements and maintains balance;
- even without wine, it is an independent art object that will decorate any interior.
Visually, waves make even the most meager selection of alcohol on the shelf more presentable.
Flower stand
A flower-shaped wine stand for 5 bottles is a design in which the elements, namely the recesses for bottles, have the same shape and are arranged like petals. Glass holders can be placed in the center of the composition. This wine bottle holder is usually made of wood, which gives the device more sophistication and elegance. Suitable for creative as well as modern style with design solutions.
Posting rules
There are two types of wine cabinets for the home: free-standing and built-in. A separate closet is installed so that it does not interfere with other pieces of furniture. The cooling radiator is placed on the rear wall or in the side of the structure. Built-in devices are compactly placed in furniture sets. Wall racks and shelves are the easiest and most functional option.
The ideal place to install a wine cabinet is the cellar, so it is easier for owners of private houses to decide the issue of placing a wine cabinet. In addition to the cellar, the underground and attic are excellent for wine storage. The space under the stairs, dark storage rooms - the choice of homeowners is very wide and allows you to show not only practicality, but also imagination. In the spacious cottage it is possible to allocate a separate room for storing elite varieties of collection wines.
Important! Using the refrigerated wine cabinet for purposes other than its intended purpose is unacceptable. You cannot store food together with wine - foreign odors and mold will appear.
However, lovers of good wine will be able to place the necessary equipment in the apartment. Most often, a wine cabinet is installed in the dining room or kitchen. A built-in wardrobe or wall rack is an excellent solution for an apartment. The design can be developed for any empty corner, free wall, or built into a countertop. You can also buy a modern small wine refrigerator and place it in any convenient place.
Where to install wine racks
For owners of private houses, it is best to build a wine cellar. If this is not possible, then you can equip an attic for storing wine. In most residential buildings there are no windows under the roof; it is always dark here. The main thing is to ensure the desired level of air temperature in the range of 10 - 15 degrees; if this cannot be done, you will have to consider other options.
Inside your home, you can install a wine rack or shelves almost anywhere. For owners of two-story buildings, you can opt for the space under the stairs. This will save usable space. The kitchen is not suitable for keeping the drink for a long time. The temperature here is constantly changing, there are many foreign odors that an alcoholic drink can absorb through a wooden cork.
Add glass holders
1. Cut out the middle and outer holders R, S from the cherry board. Using a standard saw blade, make folds 38 mm wide and 12 mm deep in two passes (Fig. 2). Then file a 3 mm wide chamfer at an angle of 45° on the longitudinal edges of the holders. (Formation of folds and chamfering is shown in the photo on page 20.)
2. Make chamfers 3 mm wide along the front ends of the holders R, S using a file (Fig. 2).
3. Drill mounting holes in the R, S holders and countersink them from the bottom. Make the holes in the outer holders S at an angle of 8° (Fig. 2a). Sand the holders.
Pressing the middle and outer holders R, S with clamps and inserting spacers 27 mm wide, drill guide holes in shelf B and screw in the screws.
4. To install the R, S holders in place, turn the body over and place it on blocks made of blocks to make it easier to work with the clamps (photo G). From a scrap of 19mm board, cut a 27x305mm strip and saw it crosswise into 45mm lengths to use as spacers. Place the holders on the underside of the shelf B flush with its rear edge and install 27 mm wide spacers between them. Secure the holders. Drill guide holes in the shelf through the mounting holes of the holders and screw in the screws. To simplify further finishing, remove the screws and holders, marking their positions, and set them aside.
Comparison of models
In order to compare the presented products, we suggest taking a look at the table below with their characteristics.
| Model | Number of compartments | Weight, kg) | Temperature range (°C) | Bottle capacity (pcs) | Price, rub) |
| Cavanova CV-004 | 1 | 9,7 | from + 7 to + 18 | 4 | from 13800 to 14200 |
| Dunavox DX-16.46K | 1 | 23 | from 4 to 18 | 12 | from 15900 to 16700 |
| Ecotronic WCM-16TE | 1 | 16 | from 10 to 18 | 16 | from 20000 to 22000 |
| Vestfrost VFWC 350 Z2 | 2 | 82,8 | from +5 to +18 | 102 | from 69990 to 79900 |
| Liebherr WKB 1812 | 2 | 45 | from 5 to 20 | 66 | from 65999 to 70391 |