To creatively decorate your apartment, as well as add personality to it, you can make furniture from cardboard with your own hands; the patterns and diagrams are so simple that even a beginner can make the products. A variety of options will allow you to choose the right piece of furniture and make it, involving all family members in the process.
Why can you make a chest of drawers from boxes?
It all depends on the thickness of the boxes you use.
If their thickness is two millimeters or less, then it is better to refrain from using them. You can, of course, try your luck, but the resulting structure cannot be called reliable, because it will not withstand a large load.
From unnecessary boxes and pieces of wallpaper you can make a complete and worthy piece of furniture for a child’s room or living room.
Do you need a drawer for cosmetics? You can use cardboard with a thickness of two millimeters or more; it should support all your accessories.
Are you a renovation and construction enthusiast? I advise you to use boxes with a thickness of four millimeters, since the tools can weigh up to several kilograms.
Anyone can make a chest of drawers from cardboard or other available materials.
Let's take a closer look at the last two options.
For cosmetics
This option can be called female. Have a lot of tubes, lipsticks, pencils and other cosmetics accumulated? Don't want to take up half the table? Making a chest of drawers out of cardboard for cosmetics is a way out of this situation!
By gluing the cardboard in several layers, we get an object with the required strength.
As stated earlier, you will not need thick material. Cosmetics don't weigh much, but they take up a lot of space. This is the reason for creating a cardboard chest of drawers.
If you cover the chest of drawers with bright fabric or colored wallpaper, you will get an original piece of furniture.
Speaking about volume, you need to understand that each woman has a different number of cosmetic accessories. But, on average, from one box you can make a shelf that can accommodate from three to five bottles of perfume (depending on volume), from five to seven packages of cream or countless jars of nail polish, scissors or tweezers.
They are able to withstand books, photo frames, vases with flowers, and other decorative items.
For tools
Now let's talk about the male version of this invention. The vast majority of men have at least once worked in construction, assembling furniture or repairing. Even if you have not had such experience, it is better to always have at least a couple of screwdrivers and a hammer with you. You never know where something will have to be urgently screwed in or hammered in.
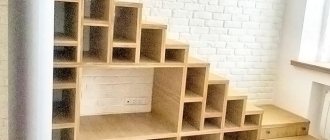
White chest of drawers made of cardboard with drawers of different sizes
But, like cosmetic accessories, work tools tend to accumulate in large quantities. The same chest of drawers, made by yourself, will help you solve this problem. The preferred thickness of cardboard used to create this design was written above.
Having subjected the cardboard to external and internal decoration, no one will guess that you made the shelving unit or chest of drawers from cardboard boxes yourself.
Due to the fact that working tools take up more volume than cosmetics, you won’t be able to fit a lot of them on one shelf. One holds about four hammers, one or two power tools or a couple of screwdrivers, and a large supply of nails and screws.
When starting to realize your creative ideas, think about the design of the future product and the place where it will be located.
What are its advantages and disadvantages
The main advantage of a chest of drawers for cosmetics is its practical use.
With this accessory, cosmetics, jewelry and other small items will not be arranged, let alone scattered in a chaotic manner. There is a drawer or section for everything. This tabletop chest of drawers is also perfect for storing jewelry.
This thing looks very beautiful. You can buy or make an organizer in the form of a chest of drawers in any style.
Briefly about the advantages:
- does not take up much space;
- can be of any shape, color, with a different number of compartments;
- helps maintain order on the cosmetic shelf;
- looks original;
- perfect as a gift.
The chest of drawers can be used to store not only cosmetics, but also jewelry. In it, things are given their own separate place.
As such, the mini-dresser has no disadvantages. The only thing is that if it is made of a cardboard frame and fabric, it is unlikely to last long.
All items are arranged in an orderly and convenient manner.
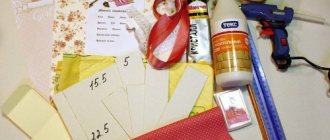
What tools and materials are needed for the job?
The main materials and tools for work are the cardboard itself, a stationery knife and glue. If you are using boxes rather than sheets of cardboard, then use a knife to cut them into separate pieces.
Additionally, you can use hot glue and paper of different colors or paints. The chest of drawers will stand without this, but few people will want it to be brown. And besides, the cardboard itself differs in color. There is both dark and bright light. And hot glue will be needed in the future to add greater strength.
Note! Paint will not hide the side gaps of the cardboard, so to get the best look, you need to use both paper and paint at the same time.
Making internal drawers
The chest of drawers for jewelry is almost ready, all that remains is to equip it with four drawers. They are made using exactly the same technology as the lid, but the sheets have a smaller format: 20.3x20.3 cm.
Don't forget to glue a contrasting bottom to the drawers.
We leave the casings to dry for half an hour.
Manufacturing technology
This article will present the assembly of a spacious chest of drawers, which requires a fairly large amount of cardboard.
Cardboard is suitable for design and decoration, providing a wide variety of original forms.
Note! It's okay if your cardboard is not perfectly smooth. You don't collect furniture to sell. You can use a sheet that is slightly wrinkled or has traces of bending. The main thing is that it does not sag under the slightest load.
For the details of the bottom, top cover and side walls you will need twelve pieces of cardboard measuring thirty-five by nineteen centimeters. The thicker the better.
For the partitions on which the drawers will stand, sheets measuring thirty-four by seventeen centimeters are needed. There are also twelve of them.
A hand-made cardboard chest of drawers can withstand decent loads.
For the front and back walls of the drawers, you will need thirty pieces, the size of which is thirty-one by five and a half centimeters.
Below is a master class on assembling a chest of drawers using these parts.
You can do without any investment at all if you have a supply of cardboard in the house or you know where to get extra.
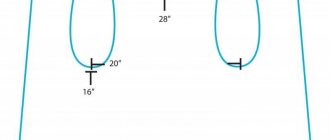
Schemes and drawings
Scheme for determining cardboard thickness
| Length | Width | Quantity | |
| Bottom, lid, walls (sides) | Thirty five centimeters | Nineteen centimeters | Twelve pieces |
| Partitions | Thirty four centimeters | Seventeen centimeters | Twelve pieces |
| Walls (front and back) | thirty one centimeter | Five and a half centimeters | Thirty pieces |
With careful use and high-quality assembly, cardboard will last 5 to 10 years.
- Bottom, lid, side walls. 1 cell = 1 cm.
- Partitions. 1 cell = 1 cm.
- Front and rear walls. 1 cell = 1 cm.
Master class on making a chest of drawers from boxes
We take the side parts of the chest of drawers (thirty-five by nineteen centimeters). We mark first five, then seven centimeters from the edge. From the top edge, mark six centimeters along the height of the drawer, add the thickness of the partition, and so on until the very bottom. We cut out the small rectangles that we got with a stationery knife and take out two of the three layers of cardboard.
For those who will be making a chest of drawers out of cardboard with their own hands for the first time, choose a lighter model.
We do this specifically in order to fix the partitions in the future. Otherwise, due to heavy things, the partitions will begin to sag and peel off.
Important! Before going any further, you need to measure the thickness of the two side walls of the dresser and mark this thickness on the bottom and on the top lid. Then we will know how wide the partitions should be. In this case it is 31.5 cm. Because. each partition measures 34 by 17 centimeters, you need to subtract 31.5 from 34 and divide the result by two. The resulting distance is 1.25 cm, which needs to be marked on both sides.
We measure 5 and 7 centimeters from the edges of the partition and cut off the excess. Now the side wall and the partition fit perfectly together.
Connect the surfaces with instant glue, a glue gun, then place under a load for an hour for adhesion.
We repeat everything that we did with the first side wall with the second.
We check that the upper partition falls into place without problems and, if everything fits together, you can cut out the remaining rectangles in the side wall and install the partitions.
All that remains is to glue the partitions into the side walls. To do this, fill all the holes with glue. You can also use hot glue for strength. It will securely fix the partition, and after drying everything will hold tight. We repeat this whole process with all four partitions.
Glue the parts on the inside of the sides so that there are gaps in the places where the shelves will be inserted. The dimensions of the groove must correspond to the height of the shelves.
After the glue has dried, we will do the same with the second side wall.
Important! If you use hot glue, remember that it dries very quickly, and you need to have time to fit the pieces together before the glue hardens.
We glue the top cover and the bottom (two parts measuring 35 by 19 centimeters) and, if you decide to use colored paper, cover the entire front part of the chest with it. Next, measure the size of the back wall and glue it (may vary depending on the thickness of the cardboard)
For neatness, the edges are covered with paper tape or paper.
Note! It is highly recommended to use paper as it will help smooth out any rough edges.
Let's take care of the drawers. The front and back walls (31x5.5 cm) need to be glued to pieces of cardboard measuring 31 by 16.5 centimeters. After this, we measure the size of the side walls and glue them between the front and back. It turned out 16.5 by 5 centimeters, but this figure may vary depending on the thickness of the cardboard used.
Then, if you wish, you can cover the entire structure with colored paper and/or paint it in any color of your choice. You can also screw the handles for convenience.
To summarize, I would like to say that you can assemble many different designs from cardboard, and this is just one of the options. After spending a couple of hours on assembly, you will have a beautiful and comfortable chest of drawers at your disposal, which will cost you mere pennies.
Master class: surface decoupage
Useful:
- napkins with drawings;
- acrylic paints, acrylic paints and brushes;
- scissors;
- iron.
For added strength, place a second, slightly smaller box in a sturdy corrugated cardboard box.
Materials for decorating the finished product: paints, wallpaper, fabric and everything your imagination desires.
Cover the surface of the shelving with several layers of paint, allowing each layer to dry, then apply another. Do not let the last layer dry completely; it should remain sticky. Remove the top layer from the napkin, wipe with an iron and place on the surface of the product. Place a clean sheet of paper on top of the napkin and iron with a low power iron.
Instead of paint, you can use wallpaper or fabric.
The napkin should completely adhere to the surface; if not, add a little paint under it with a brush and let it dry. Do not rush to move on to the next stage; the decoupage must dry completely, otherwise the pattern will be deformed.
It should be understood that the thicker the material, the stronger the furniture will be.
Note: Tracing paper or kraft paper must be torn off and not cut before applying.
When the surface is completely dry, cover it with acrylic paint.
However, do not rush to get rid of the thin material; it will be useful for gluing seams.
By showing your imagination and creativity to the fullest, you will create a unique masterpiece of interior that will be admired by your family and guests at your home. Don’t be afraid to experiment, keep up with the times, because cardboard furniture is not only affordable, but is also an original option for creating comfort and a unique atmosphere.
You can use any type, but Moment glue is the best option.
Kraft paper is used to reinforce the edges of furniture; thin cardboard can be used instead.
Photo of 50 design options for homemade chests of drawers made of cardboard
Let's start the lesson
The master class “How to make a chest of drawers” will help you cope with this task without any problems.
To make a chest of drawers from cardboard, you will need the following materials:
- Cardboard boxes or cardboard sheets;
- Vinyl glue;
- Brushes;
- Acrylic paints (shades depend on your imagination and desire);
- Various decorative elements for your choice.
- Awl;
- Stapler;
- Stationery tape;
- Scissors;
First of all, draw the so-called desired result on a piece of paper.
If you are planning to make a chest of drawers for the first time, we highly recommend making a “mini version” from regular paper. This way you can protect yourself from damage to the collected materials. Based on the completed sketch, you can proceed to further steps to create a chest of drawers.
We create the basis of the future chest of drawers. Based on its size, we will check the boxes. For boxes, you will need six boxes of the same size (for example, cereal or baby cereal). You can also assemble and glue boxes from a single sheet of cardboard. In our case, we will use ready-made oatmeal boxes.
Use scissors or a utility knife to cut the box cross to cross as shown in the photos. The cut out parts of the box must be bent inward to strengthen the walls of future boxes. You can secure the folded pieces of cardboard using vinyl glue or a stapler. Similar actions must be done with the remaining five fields. Thus, all six drawers are ready for the future chest of drawers.
Showing your imagination, you can cover the boxes with self-adhesive film, decorative or gift paper, craft paper and even fabric. Or you can simply paint it with paints, for example acrylic. In this case, the method of pasting boxes with decorative paper is used. After this, the parts must be allowed to dry.
To make shelves for drawers, you will need thick corrugated cardboard. It is necessary to cut strips from it so that you can wrap two adjacent boxes, namely:
- the width of the strip must match the length of the boxes;
- strip length = two heights and four widths.
To make the fold more accurate and even, you must first mark the strip with a light pressure of the scissors. Since the cardboard is quite dense and thick, it would be advisable to draw parallel strips at a distance of 2 millimeters from each other.
After the work is done, you can begin to cover the insides of the resulting shelf with the same decorative film that was used to decorate the drawers. To hide the edges of the shelf and the cut, be sure to fold the edges. By gluing the edges and thus forming a complete shelf, you can first check the operation of the future chest of drawers. To do this, you need to insert two drawers into the shelf. They should come out smoothly, after which you need to make two more such shelves. There should be three shelves with six drawers in total.
- The next step is to connect the three prepared shelves together. To do this, you need to put them on top of each other and grease them well with PVA glue. Then, using some weight, you need to press it and let it dry completely.
After the glue has completely dried and the shelves are securely attached, you need to use glue to cover the back of the chest of drawers with a solid sheet of cardboard. Glue should be applied to the bottom of the chest, its lid, and also on the sides. Next, you need to carefully cut out the back, top of the chest, bottom and side parts from corrugated cardboard, securing them with glue to the resulting chest of drawers. Next we cover everything with paper.
Making pens
You can make any drawer handle you want. It is enough to show your imagination. Depending on his style they can be:
- bottle caps;
- various beads or rivets;
- buttons;
- small ropes attached to the inside of the boxes;
- wine bottle stoppers and much more.
In our case, satin ribbons will serve as handles for the chest of drawers. To do this, you need to make two holes with an awl, then thread our satin ribbons into them and tie them from the inside of the box.
This is such a neat and cute chest of drawers made from cardboard boxes!
Choice of finishes
After creating a finished product, you need to start designing it. Selecting colors, finishing with various decorations and using elements will help you create a universal design for your own product. In modern society there are many different types of jewelry. To decorate the chest of drawers, you can use stones, and even interrupt different pictures to choose from. You can also show your creativity and draw illustrations on the cabinets.
Another way to model
The next master class will also help you make a convenient chest of drawers where you can store sewing and yarn supplies: threads, needles, balls, yarn and other items for needlework.
For the process itself, you will need:
- a couple of boxes in which refrigerators or televisions are packed;
- knife-cutter;
- a large ruler or tray (even a metal one is suitable);
- PVA and universal glues;
- 2.5 m of beautiful self-adhesive wallpaper film, about 1 m of non-woven wallpaper;
- small and preferably elegant handles (they are suitable for drawers);
- acrylic paint in case you want to tint something.
Take all the necessary measurements on paper and only after that transfer all the diagrams to dense material. To prevent the bottom, top and sides from tearing soon, you need to use cardboard to package goods. Use PVA glue to connect all the parts together, and then check all the calculations again.
Once you are convinced of their accuracy, you can begin drawing the shelves for the cabinet. It must be remembered that they must be curved on the sides. They can be made from corrugated cardboard. It is convenient to bend such material if you end up with extra centimeters. Glue the folded edges to the walls using PVA.
Attach slats on which cardboard boxes can easily slide and slide out. You can make them by gluing several strips together. You can bend narrow strips of cardboard accordingly (like the letter P) and glue them to the walls of the chest of drawers.
The sides can be colored with pencils or watercolors. In addition, in construction stores you can buy special wallpaper, pieces of which can be used to decorate shelf panels. In order for the chest of drawers to open easily, you need to attach handles to it.
Your product is ready for service. On average, such modeling will take you a couple of days.
If you wish, you can glue all the parts together on the first day, and leave the second for decorating the product.
One of the options for decorating a chest of drawers is to paint it black and white.
First you need to paint the cabinet black and wait until the paint dries
Then use sandpaper to gently rub the corners and edges until the surface is worn away. You should get small scratches that will be visually similar to stripes on the surface of the wood
Once you finish your work, you no longer have to worry about where to store your jewelry and other items.