What can be done
At first glance, you might think that cardboard is a fragile material that requires special handling. On the one hand, this is correct, on the other hand, having chosen the desired type of cardboard, you don’t have to worry about its further use. Cardboard furniture will be durable and practical if you follow the sequence of work and recommendations for using tools.
To choose an option for making a furniture product yourself, you need to consider several proposals:
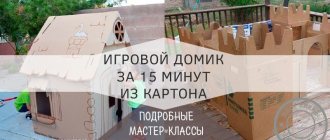
- Toy furniture made of cardboard - it is profitable and creative to make your own furniture for dolls. If children require the purchase of a new house for Barbie with all the accompanying accessories, the solution would be to produce this option with your own hands;
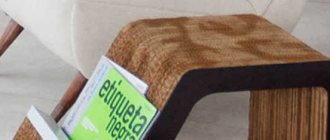
- Book shelves are considered one of the simplest cardboard products. They don’t take much time to make, and the books don’t put much stress on the cardboard;
- The original table will not be a dining table on which dishes are constantly located, but a small coffee or coffee table. A child can perform developmental tasks on such a piece of furniture, because it is designed for a light load;
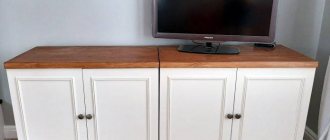
- Chest of drawers - this kind of furniture is convenient for storing documents or papers; children’s accessories will also fit here. It is easier to make a chest of drawers from cardboard boxes from large appliances, such as a refrigerator;
- Shoe rack - an original shoe stand in the form of triangular cells will fit comfortably into any hallway. Entering the room, all guests will be surprised at how convenient and practical the rack turned out to be;
- A small chair for children - since cardboard is not intended for heavy loads, furniture for children is what you need. A small chair for your baby will become his favorite object, where he can draw or play.
As you can see, furniture made of cardboard is easy to make. To make it you need the simplest material and a minimum of tools.
Table Shoe rack Chair Chest of drawers
Shelves Toy
Cat's house
A cat house will delight your pet by creating a cozy place for him to sleep. For the simplest “construction” you will need a box, slightly larger than a standard shoe box - the cat should not be cramped in there. When two or more cats live in an apartment, it makes sense to make a larger house - many cats like to share a home with a neighbor, especially in the cold season. The building is decorated with a roof - its sides are made open. The door is made “according to the size of the cat” - the animal should crawl through it freely, but a completely missing wall is not desirable. Windows are also necessary - old, visually impaired animals are sometimes afraid of completely enclosed spaces. A mattress is placed inside the house, and the outside is covered with fabric or wallpaper so that the item fits well into the interior. A more complex structure, costly in terms of time and materials, takes the form of a yurt or a beehive. A lot of corrugated cardboard will be needed here, but the house will turn out strong and durable. For the base, two circles or ovals of suitable size are cut out and firmly glued together. Afterwards, three more blanks of the same size are made, but in the middle, four to five cm away from the edge, an oval or round fragment is cut out. Three more parts correspond to the previous ones in size, but are made C-shaped. Next, another 12-15 C-shaped elements are made, gluing them layer by layer, but after every two layers the parts are reduced by five to seven mm. At the very end, two layers of the roof are made, the product is dried and ready for use.
Required materials and tools
Regardless of what type of furniture is chosen for self-production, the list of materials will remain the same. This necessarily includes the main raw material - cardboard.
To make the products durable, you should give preference to three-layer cardboard. The quality of the material can be checked by cutting.
If you purchased a single-layer analogue in advance, do not be upset. This option works well for making a dollhouse and furniture for dolls. If you use it to work on real furniture, you need to glue several layers of cardboard to give it greater strength.
List of materials and tools for work:
- Scotch tape - it is better to buy paper, regular and double-sided;
- Stationery or sharp construction knife;
- Scissors;
- Tape measure and long ruler;
- Pencil and rubber band;
- Sandpaper – for cleaning cuts;
- Kraft paper;
- Glue – depending on the type of cardboard, you may need PVA, hot melt glue or Moment.
If all the listed materials and devices are prepared, you should proceed to the manufacture of the selected furniture. Experienced cardboard craftsmen recommend that beginners choose simple work to start with, for example, shelves or a table.
DIY decorative New Year's houses
Small New Year's houses will decorate a kindergarten group, a school classroom, or a home environment. To decorate the holiday, both a candy box-house and a more solid structure housing dolls dressed as Father Frost and the Snow Maiden live. The “building” is constructed from:
- corrugated cardboard;
- ordinary thin cardboard;
- toilet paper rolls;
- old postcards;
- boxes of tea, juice, milk.
Houses made of sleeves, paper
A pyramid house is made from toilet paper rolls - you will need ten pieces. They need to be glued together and the “residents” from Kinder Surprises placed there. If desired, you can minimally decorate the interior by cutting out cardboard circles and depicting the decor on them. The outer part is covered with “snow” made of white felt, cotton wool, padding polyester, or painted with silver spray paint. If there are more than three hubs, an entire night metropolis is built. To do this, the parts are painted with dark paint, leaving only light rectangles of the windows. Windows can also be cut out of foil or painted with shiny paint. To make a candlestick house, windows are cut through so that the flame can be seen. An equally interesting idea is an elven town. The upper parts of the bushings are bent with two fingers to form an angle, the structure is slightly flattened. From a square folded in half twice, a bright, almost flat roof is made, which is placed on a base made of a sleeve. The house is decorated with a window, a door, and snow on the roof.
The New Year's city will be guarded by “winter” characters - Santa Claus, deer, hares, snowmen, also made from cardboard sleeves.
House made of cardboard and polyurethane foam
If you have a can of polyurethane foam at home, along with cardboard, it will be an excellent material for creating a New Year's hut. How it's done:
- first you need to build a strong base from corrugated or regular cardboard - it can be made of any convenient size;
- then, starting from the bottom up, the logs of the winter hut are “drawn” with a balloon of foam;
- each side is performed separately, not forgetting to leave space for doors and windows;
- the roof is decorated last;
- Almost any paint is suitable for decoration - the walls are partially or completely painted brown, bluish fragments are drawn on the white snow-covered roof for greater plausibility;
- Nearby, also from foam, they construct Christmas trees, snowdrifts, and other elements.
Houses with lighting
Decorating a cardboard “building” with LEDs will create a real “magical” design; such a structure looks especially interesting in the evening. If the structure is large, such as a children's play structure, the easiest way to illuminate it is with a lamp on a clothespin or an LED strip plugged into an outlet. It is only important to place the device so that the likelihood of touching and breaking it is minimal. The winter dollhouse is also illuminated, and the light is directed into each room. To create lighting, pieces of LED strip and a power supply are used. On the back wall of the house there are switches that allow you to illuminate each room separately. It’s even more interesting to build an entire magical city. To work you will need:
- a stand is a simple thick cardboard that is placed on a table, bedside table, window sill, or any other surface where the composition will be placed;
- preparations for houses - boxes of tea, milk, juices, shoes, etc.;
- paints – acrylic, gouache, watercolor;
- paper – white and several bright colors;
- snow - it is made from polystyrene foam, cotton wool, padding polyester, paper napkins, or you can buy dry imitation in bags, liquid imitation - in cylinders;
- the lighting itself is a strip of LEDs, a Christmas tree garland, individual colored light bulbs with stands, powered by batteries;
- residents of the town - appropriately sized figures of animals, men, snowmen, the Snow Maiden, and Father Frost.
In the city, they sometimes make lanterns along the paths, illuminated signs, etc.
Ways to decorate New Year's houses
The New Year's house is usually painted by hand - it imitates a log hut or a brick building. The roof is decorated with snow made of cotton wool, padding polyester, and white felt. The clearing base on which the house stands is made of the same material. A house made of simple corrugated cardboard looks interesting, on the roof of which the contours of doors, windows, and tiles are drawn with white paint. If the house is planned to be an element of a winter composition, the environment for it is sculpted from polymer clay, salt dough, and paper. Here you can sculpt or cut out Christmas trees, a doghouse, and figurines of forest dwellers. Since the “picture” is winter, white or silver paint in a can will come in handy for decorating many details.
Rules for working with cardboard
In order for furniture made with your own hands at home to turn out not only beautiful, but durable, a number of rules must be followed. They will help you make high-quality products that will appeal to all household members:
- Gluing layers - when working with single-layer cardboard or to strengthen furniture, it is necessary to glue the material. When gluing cardboard together, try to place the layers perpendicular to each other - this is how they give increased rigidity;
- Choice of glue - people who have already made furniture from this material recommend using Moment glue. It does not get wet after application and instantly holds product parts together. You can also purchase a glue gun and thermal sticks, which melt when heated, creating a glue trail;
- Why do you need kraft paper? Kraft paper is used to cover the edges and joints of furniture. With this move, the furniture looks neater. Before gluing, the joints are cleaned with sandpaper. You need to remember that the paper cannot be cut - it must be torn with your hands. This way the layers will become smooth, without transitions;
- Features of cutting - during the manufacture of cardboard furniture, special attention is paid to cutting the material. Usually a stationery knife is used - it is important that it is always sharp, because the accuracy of the parts depends on it. If thick cardboard is difficult to cut, you can use a jigsaw.
Using a jigsaw, the work goes much faster. It is important to carefully cut the parts and avoid mistakes, because the tool is too powerful for cardboard.
Cut cardboard with a knife Select the type of cardboard you need
Use kraft paper
Choose your glue carefully
Comments2 comments
- Tatiana:
03/24/2017 at 15:36Great. I'll take note of some of the layouts. Not long ago, kindergarten teachers warned that it would be necessary to make a fairy-tale city for a competition. For example, you can build a house for Baba Yaga from paper cylinders. The game is a game, but with the help of a paper model you can see a miniature example of the structure and correct anything on paper, rather than disassemble the logs later. I want to try to make a model of the future Russian bathhouse in our landscape.
- Masha:
03/03/2019 at 20:01
Beautiful
Step-by-step instruction
To ensure that production goes quickly and is not accompanied by problems, there are step-by-step instructions; a master class on cardboard furniture consists of a step-by-step description of each action. It begins with the creation of a drawing, followed by the formation of parts and their strengthening. The final stage is the assembly of furniture. Each of the stages must be considered separately.
Create a drawing
The first thing you need to do is make a drawing of the furniture. To begin with, draw it on a regular A4 sheet so that you can see a smaller version. In such a sketch, it is important to write down all the dimensions and respect the scaling. If you have the skill to work in special programs that allow you to develop product models, you should use them.
The first drawing must show the product in a general three-dimensional form. Next, you need to draw a projection of the furniture with a top, side, and rear view separately. The next step is to depict the details of the product: each detail must be drawn separately.
When the drawing is ready, it must be transferred to sheets of cardboard:
- Using a tape measure and a long ruler, draw on the surface of the raw material with a pencil, measuring the required dimensions;
- For work, you may need a square so that the corners of the future furniture are even in the drawing;
- When drawing on thin cardboard, try not to leave scratches with a pencil, and when making furniture from corrugated cardboard, draw clear and deep lines;
- It is necessary to cut out parts in compliance with all indentations and possible distance margins.
You can use ready-made patterns or come up with your own product that meets specific sizes and preferences.
Forming parts
It is worth noting that when cutting out parts there should be no visible bends. If the work is done on a box of household appliances, it is better to cut on smooth edges. From six-layer cardboard you can make your own furniture of increased strength, for example, a shelf for shoes or books.
The details of the product are formed using a sharp stationery knife. Craftsmen advise using a construction knife if you plan to work with multi-layered raw materials. As the knife becomes dull, its blade is replaced. A dull knife will not be able to cut the required part smoothly and along the contour - you will have to redo the pattern.
Depending on the type of furniture assembly, parts may be:
- Plug-in;
- Glued;
- Stackable.
The latter option involves gradually increasing the cardboard to achieve optimal thickness. This move will further strengthen the model, preventing it from sagging under loads. It is beneficial to use cardboard sleeves in the design - special tubes with a high density. They are suitable for the production of furniture legs, as well as for assembling structures in an original style. For example, a chair made of cardboard tubes looks creative and can support a person’s weight.
Insert Bonded Extensions
Strengthening structures
Each part must be processed after cutting with a knife. This happens in the following way:
- Cleaning up. The cut edges of the module must be sanded. This technique will give them smoothness and prepare them for further processing;
- Pasting. Kraft paper is used for this. It must be torn by hand, and then carefully glued over the edges using PVA glue. You can apply paper to the entire surface, which creates additional reinforcement.
Furniture assembled using grooves will be durable and reliable. In the photo below you can see the principle of making such furniture: during the cutting process, oblong holes are additionally outlined, which are subsequently cut out. An additional structure is inserted into the grooves, which fastens the frame on both sides. Thanks to this, the furniture becomes stronger.
Stiffening ribs are often used, which additionally secure the base of the furniture. Using them, you can independently strengthen a cardboard tabletop, a shoe shelf, or a bookcase. The stiffening ribs and grooves must be coated with glue. By strengthening the structure, you won’t have to worry about the durability of the furniture in the future.
Sand the surface with sandpaper. Cover the surface with kraft paper.
Build process
All prepared parts are glued together using a glue gun or Moment glue. If assembly is carried out using grooves, they are also glued for strength. It is recommended to repair all unevenness on the surface of thick cardboard using putty - it will not leave marks, and the excess will be hidden under the finish.
Parts that require gluing in layers must be placed under a press. Books or other heavy objects are good for this. After gluing, they are left for several hours, or better yet, for the whole day, until completely dry. All resulting ribs must be masked using craft paper. Carefully paste over the resulting corners to give them roundness. Next up is the small matter - decoration. There are several options:
- Decoupage - pasting with napkins;
- Painting with acrylic composition;
- Wallpapering;
- Using self-adhesive film;
- Decorating with mixtures.
Finished furniture can be used for its intended purpose within a day after production. Anyone can make furniture from cardboard with their own hands; how to find patterns and diagrams will be discussed below.
Apply glue to the coating Press the elements Putty on the cracks Cover with kraft paper Make the decor
Making a corner shelf
Step 1. Draw the shelves on the cardboard. You need to have a piece measuring 25x24.5 cm.
Cardboard blanks
Take a measuring tape, place one end of it in the corner and, using it as a radius, gradually turn it, mark the arc marks with a radius of 24.5 cm.
Outlining an arc
Step 2. Connect all the dots. Each shelf requires three blanks; glue them together with tile adhesive. We use Titan, but the brand doesn't matter.
Corner shelves, blanks Parts need to be glued together in three pieces
Practical advice. In addition to this composition, you also need to have hot glue with a gun and ordinary PVA on hand.
Step 3. Cut out two side parts of the corner shelf, the size of one is 60x24.5 cm, and the size of the second is 25x60 cm.
Side parts
Step 4. Mark the locations of the shelves on the sides. We got the distances between the first and second 25 cm, between the second and third 24.5 cm, the thickness of the shelves is approximately 0.5 cm. You can change the dimensions, we chose these taking into account the height of the objects placed on it.
Shelf locations are marked
Step 5. Using a hot gun and Titan glue, glue the shelves. Work very carefully, do not skimp on the glue, the connection should be as reliable as possible.
Applying glue to fix the shelf
To strengthen the structure, it is recommended to fix pieces of cardboard of appropriate sizes between the shelves. They will perform two tasks: keep the ends of the shelves from falling and increase the strength of the side walls. Glue the second side panel in the same way.
Another layer of cardboard is glued between the shelves
Additional layer of glue at the joints
Complete product
Step 6. Start strengthening the bottom. Glue stiffening ribs between the two elements, the distance between them is approximately 4–5 cm. The upper plane of the bottom serves as the third shelf, and the bottom as a stop.
Bottom reinforcement
Step 7: Roll up the strip of cardboard and seal the gap under the bottom shelf.
A strip of cardboard covers the stiffeners
At this point, the assembly work is completed, you can begin decorating the surfaces.
Finishing the shelf
The ends and inner surfaces of the shelf should be covered with small pieces of white paper. The size of the sheets is approximately 5x5 cm, no more is needed. The fact is that the surface of the shelf should be as flat as possible, and large pieces of paper must have folds at the corners.
Step 1. One by one, coat the paper with PVA glue and finish the surfaces and edges.
Pasting a shelf with paper
Step 2. After the glue has completely dried, remove any smudges or ripples with fine sandpaper.
Step 3. Clean the surfaces from dust and cover them with three layers of white acrylic paint. Allow time to dry and finish with clear varnish. Choose the number of layers yourself, but experienced craftsmen recommend doing at least three. Make sure that all surfaces of the shelf are even, smooth and shiny.
Painting a shelf
Step 4. Decorate the product with braid and lace. Glue the material with hot glue; it is advisable to remove the burrs immediately, do not allow them to stick to clean surfaces.
You can decorate with lace, beads, rhinestones, sequins, stickers, etc. Gluing the lace
To improve the appearance, you can additionally use colored rhinestones. In a word, show your creativity, decorate the shelf in a way that you personally like.
The shelf is ready and used for its intended purpose
Patterns and diagrams
Environmental friendliness is the main characteristic of cardboard furniture. This material does not contain components harmful to humans. It does not emit any substances into the atmosphere and will be durable if used properly. The only negative is that cardboard is afraid of moisture, so installing furniture made of cardboard is not recommended in damp rooms and near heating radiators.
Patterns and diagrams of furniture made from cardboard with your own hands are presented in this material. They are offered for the manufacture of the following models:
- Coffee table;
- Child chair;
- Book shelf;
- Shoe rack;
- Base for a wardrobe.
Based on the proposed options, you can easily create your own drawing. It is worth considering the proportions of sizes and increasing or decreasing all indicators. Cardboard is considered the most affordable material for making furniture. It is also easy to use, but requires careful care. Use thick corrugated cardboard, then the furniture you make will be durable and practical.
Selecting a scan
If this is your first experience in reproducing house layouts, it is better, of course, to take a ready-made layout. You can not only find them on the Internet, but also make them yourself. This is a very exciting process.
You can choose almost any program. It is desirable that it works with vector images. One of the most convenient in this regard is CorelDRAW. Constructions in it are very easy, you can change the thickness of the lines and load your own textures. But the built-in library also pleases with the proposed photos.
The first step is to draw an oblong rectangle. Now it needs to be divided into two pairs of identical walls located one after the other. You need to build a floor along the lower edges; it is attached to one of the edges to the general layout. We divide the roof into segments and also attach it. After this, you can add architectural elements and visual effects. And don't forget about the fastening strips.
Advent calendar
Nowadays, Advent calendars or Christmas calendars are becoming more and more popular. They contain several cells with numbers, the opening of which allows you to conduct a fascinating countdown of the days until Christmas or the New Year. The content of such calendars can be anything: sweet treats, small gifts, cosmetics, wishes or even financial resources. The main thing is that every open day brings something new that is not present in any other.
Putting together such a calendar for the New Year is quite easy. To do this, all parts are printed or transferred by hand onto paper, cut out along the contour and bent in the places indicated by the dotted line. At the end, all this is carefully and step by step glued together, filled with the appropriate content.
Christmas village
To create a multi-component decoration, you can make a full-fledged Christmas village. To do this, the templates of all buildings need to be printed, cut out and carefully glued together. The finished layouts are decorated with paint, pencils or felt-tip pens and arranged into a single composition.
