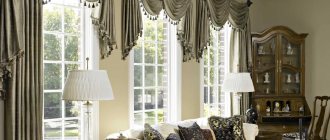
A bedside ottoman for a bedroom is an interior detail that does not carry a special functional load, but gives the room coziness and zest. At the same time, ottomans are universal - they can serve as a bedside table, a bedside shelf, or be used as a footrest, for storing things or bed linen.
Bedside ottoman for the bedroom
Today we will tell you more about this small piece of furniture, talk about the types of ottomans, and also present step-by-step instructions for making your own bedside ottoman.
Bedside ottoman with storage compartment
A simple ottoman made from sheets and burlap
You can use any fabric for this, either ribbon burlap or decorative fabric, which is simple and easy to use.
If you want to do something different, choose a fabric that meets the same criteria. What you need:
- pattern;
- scissors;
- ribbon;
- sackcloth;
- 1 old sheet;
- pins;
- threads;
- old things (for example, old clothes, worn towels, fabric scraps);
- sewing machine;
- fiberfill;
- ribbon;
- thick needle.
Work process:
We work with the pattern. Print out all the pattern pieces and cut them out.
Place the burlap (any thick fabric will work) and the sheets together, with the burlap on top. Attach the pattern and cut the fabric, repeat until you have eight pieces (You will have eight pieces of burlap and eight pieces of bedding).
On the bottom layer, place two pieces of burlap in the middle and one piece of sheet on top. Press the layers together so they are completely even.
Sew your layered set together using a straight stitch.
Open each pair in the middle and press the seams.
Sew two pieces of fabric together, placing one piece on top of the other. Repeat this with the other two layers. At this point you will have two halves of the pouf. Turn one half right side out and the other inside out.
Attach the halves and sew them, but not all the way, leave a few centimeters for an opening through which you can fill your product. Turn out the resulting product.
At this stage, you need to fill your pouf with old things. At the bottom of the product you need to put things from heavy fabrics, then start putting lighter things there, such as rags and scraps of fabric. Continue filling - heavier fabrics are placed in the center, and lighter fabrics are placed on the sides. The bottom of the pouf and the center should be stuffed with heavy fabrics to strengthen the entire structure. Try to avoid any gaps.
When the pouf is two-thirds full, place fiberfill on the sides to smooth out the shape and fill out the bumps. The upper part of the pouf should be soft so that it is comfortable to sit on, and the product should hold its shape well.
Once you have filled the pillow with filling, sew the opening by hand. Don't worry about the quality as the top will be covered with another piece of fabric.
Cut an octagonal piece to cover the hole and sew it up and down with a special stitch. You can also add decorative stitching to your sewing.
As you can see, making an ottoman with your own hands is not too difficult; with a little patience and labor, a wonderful interior decoration is ready. This way you will get a soft ottoman that will be a great tool for relaxation at home.
Manufacturing instructions
The main thing is to immediately decide on the frame and choose the fabric for the pouf. Its wear resistance and durability depend on these materials. Additionally, you need to prepare scissors, glue and other tools. For a frameless pouf you will need a sewing machine.
From polyethylene bottles
An ottoman made from scrap materials can be of any height.
You can leave them on the balcony or in the refrigerator overnight, and then place them near a hot radiator. The air inside will expand, and the bottles will become perfectly smooth and strong. The procedure for making a pouf is as follows.
- Prepare 14 bottles of the same size in advance. Wrap them tightly with tape or twine to form a cylinder.
- Trace the bottom part of the workpiece and make a pattern, cut two circles of the required size from plywood. Glue the fabric onto one, this will be the bottom of the product.
- Secure the plywood to the bottles with double-sided tape. Make notches on the disks for twine and additionally wrap the structure with it.
- Cut a rectangle out of thin foam rubber to wrap around a cylinder of bottles.
- Sew foam rubber onto the blank. You can use strong threads and an awl.
- Cut a round blank for the seat from thicker foam rubber. The size must match the top of the product.
- Make a fabric cover for the pouf and put it on the product.
Frameless with balls
In a simple version, you can use a large pillowcase as a cover.
There should be two types of fabric, for the inner cover and the outer one. The procedure is as follows.
- Make a pattern on paper. Three elements can be made: sides and bottom. Another option is petals and the lower part.
- Cut out the required elements from two types of fabric.
- Sew all the fragments of the inner cover, insert the snake. Do the same with the decorative part.
- Insert one bag into the other so that the zippers match.
- Pour the required amount of filler inside.
- Fasten the covers and give the pouf the desired shape.
From a plastic bucket
This choice of material for the base greatly simplifies the task of making a frame pouffe. You should prepare a bucket without a handle, padding polyester, rope, glue, buttons, lace and fabric in advance. Let's give the procedure.
- Divide the rope into 2 parts. Twist the first one into a spiral and paint it white. For this purpose, it is better to use a can of paint that dries quickly.
- Wrap unpainted rope around the entire bucket. The base must be lubricated with glue.
- Wind the white cord approximately in the middle of the bucket to create a prominent stripe.
- Cut a circle from the fabric to the size of the bottom of the frame and a rectangle of a suitable size. Sew the bag and put it in a bucket.
- Hide the edges of the bag under the lace.
- Cut out a lid for the pouf from cardboard. Place the padding polyester on top and cover with a cloth so that it protrudes by 7-10 cm.
- Fold the edges and glue them to the inside of the pouf lid.
- Sew a button on the front side of the fabric for additional fixation.
- Glue the soft part onto the lid.
- The edging can be decorated using rope.
How to make a pouf with your own hands, see below.
Ottoman made from plastic bottles
Not everyone has carpentry skills and can make an ottoman from boards, but this does not mean that you need to abandon this idea. You can even make a wonderful ottoman from plastic bottles. And what will be the benefit for nature from this!
As with a wooden ottoman, you will first need to make a frame. It is made from plastic bottles. Two circles are cut out of cardboard, the diameter of which will depend on your personal preferences. It is advisable to take thick cardboard, so you can take the box where the office equipment was located.
Then take plastic bottles and fasten them together with tape; this must be done carefully so that the bottles are fastened evenly. Put all the design elements together.
Make upholstery from thick foam rubber. First, cut out the part for the bottom and top, attach it to your structure. Then cut a rectangle that fits your project. To avoid mistakes, make it a few centimeters larger, as this will need to be sewn together later. All elements can be connected to each other using tight stitches.
Now you can sew a cover for your product. To do this, you will need to choose a suitable fabric, the color and density you need. In this case, you don't need to bother with the pattern. Simply cut out two circles from the fabric to attach to the top and bottom, and 2 rectangles to fit. Then the rectangles will need to be sewn together.
After this, sew the top piece with the rectangles using basting thread. And you can proceed to the lower part, which is stitched in the same way as the upper one. A decorative border will help brighten up all the imperfections if your seam doesn’t turn out so beautiful. Just attach it, your product will look more attractive. You can attach a zipper to the unstitched edges of rectangles sewn together.
If you are making a cylindrical ottoman, then the cover for it is sewn a little differently. You must make all the parts in the shape of a cylinder. You should make the side parts not from two pieces of fabric, but from four. The fabric must be dense so that the shape holds well.
How to make soft frameless poufs
On the Internet you can find the necessary drawings and diagrams, according to which it is easy to make a frameless soft pouf for your room yourself. Such furniture is perfect for both a nursery and a living room; the main thing is to properly think through its design and decorative design.
For a nursery, it is best to use thick fabric, such as jacquard, as a material. Not every fabric can withstand daily testing.
A pouf for a nursery is made in the form of a soft toy, then it arouses more interest in the baby and fits perfectly into the design of the room.
Furniture for the living room should be more classic or consistent in the general style, for example, shabby chic, Provence or loft.
"Octahedron"
This piece of furniture is sewn from scraps. To make it you will need:
- woven material;
- sewing machine;
- thread and needle;
- filler.
First, you need to cut out a blank from thick cardboard or any other paper. It is made in the shape of a triangle with one sharp end cut off.
The advantage of the “octahedron” in question is that it can be sewn from patches of different colors. In this case, the designer's capabilities are limited only by his imagination. In addition to differences in color palette, individual patches may also differ in texture.
When all the elements are connected to each other, the overall structure will look like a ball. Before you start stuffing the pouf, the tops of the stitched sections need to be slightly bent.
Without filler, the product will not hold its shape. It uses padding polyester and foam rubber; you can simply fill it with sawdust, but then you will need to build an additional rough cover made of thick fabric, which will prevent particles from falling out.
The remaining hole on top is covered with a small piece of fabric.
The pouf bag consists of two covers. This is one of the simplest models that you can make at home yourself.
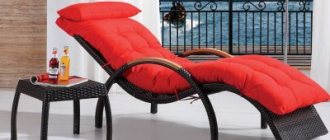
The pear-shaped shape is most common because it gives maximum comfort and convenience to a person.
To sew the outer cover, durable fabric is selected. The inner bag is best made of synthetic material.
To work you will need:
- sewing machine or needle and thread;
- lightning;
- textile;
- filler.
For the pattern you will need a ruler, pencil or chalk, and scissors.
The outer cover is sewn from six wedges, and a zipper is installed between the two. After the filler gets inside, the pouf takes on the desired shape.
Such easy-to-make furniture can have other shapes.
Crocheted round pouf
A popular option today is a round crocheted pouf. You can also use large plastic bottles or cardboard as a base. The soft chair is stuffed with old rags, padding polyester or any other materials, but it is important to take into account the strength of the thread.
PHOTO: avatars.mds.yandex.net
PHOTO: cs5.livemaster.ru
PHOTO: i.pinimg.com
DIY pouf from a chest
What do you think of this idea of creating a pouf? I really like these things. In general, I love to create and I believe that something created with my own hands is the best. After all, a person puts his soul and warmth into it.
Now I will show you how you can make an ottoman yourself from a chest, wooden box or drawer at home. My option will stand out from the others in that it can be used not only as a place to sit, but also as a table.
First we need to prepare the necessary materials and tools. If we take the chest as a basis, great. It does not require additional processing and decoration, unlike a wooden box or box. In this case, the base must be painted or covered with fabric or leather.
In order to make a pouf we need:
- base for an ottoman - for us it’s a chest
- two sheets of plywood to fit the base cover
- stain
- transparent varnish
- brush and rags
- foam rubber about 4 centimeters wide, the size of plywood
- padding polyester is 10 centimeters larger than foam rubber on each side
- seat upholstery fabric
- furniture stapler
- nails or screws with neat heads (furniture)
It is better to cut it with a sharp knife. I tried it with scissors, but it didn't turn out smooth. Cut off the padding polyester and fabric.
Starting from the middle, we attach the padding polyester to the wood using a furniture stapler.
Pay special attention to the corners. If you do them haphazardly at this stage, the pouf will look sloppy.
Slowly stretch the padding polyester and fold it as shown in the picture.
Here comes the final part of our work on making a homemade ottoman and, in combination, a coffee table.
As I said earlier, we will need screws with a beautiful and neat head, as in the picture. The nails for door frames suited me perfectly. Using them we attach the second piece of plywood to the back of the seat.
Now we can install it on our base. This is what happened (do-it-yourself pouf-chest).
Turn it over and we have a table for board games or tea drinking.
All this is done in one evening. Simply and easily. And most importantly, it’s functional, because you can store whatever your heart desires in it!
In the east, in ancient times, people's homes were decorated with various poufs. It was not only comfortable, but also beautiful furniture. After some time, such furniture appeared in European homes. People all over the planet liked them so much that now they can be seen in almost any home.
Pick up any modern home design magazine and you will see images of a wide variety of poufs. Be on the wave of fashion without ruining yourself. A beautiful piece of furniture can be created from scrap materials. By following simple instructions on how to make an ottoman with your own hands, you can make a wonderful decoration for your interior.
The tire model has enough space for two
If there is a car in the house, then there will be an unnecessary tire. It will make a large, comfortable pouf, and quite durable. You just need to prepare two circles of thick plywood or MDF with a diameter slightly smaller than our tire to close the holes. We attach them at three points using self-tapping screws or bolts with nuts.
Now you can start finishing the exterior. For example:
- Country style option. Wrap the pouf with thick braided rope, securing it with glue. First we paste both circles in a spiral, then the sides of the tire. We hide the ends of the rope and varnish the top for strength.
- We cover the top plywood circle with foam rubber, and attach the foam rubber to the side of the tire with a furniture stapler. Then we make a cover and put it on top. If desired, you can make legs from square pieces of bars, painting them or covering them with artificial leather.
The following video will tell everyone how to make an ottoman with your own hands from a tire:
https://youtube.com/watch?v=rIeGuiqF2aA
Additional layer
Once you have adjusted the shape of the stand, you will need to add a double layer of batting to provide additional leveling padding. To secure it, also use a glue gun. After this, turn the bucket over and glue the raw edges at the bottom.
Smooth and fresh skin: dermaplaning, or why a woman needs to shave her face
A Brazilian travels 36 km by bike every day to take his loved one home.
Why French children behave well: eight ways to raise them
Cut a circle out of felt (you can use faux leather or suede) and secure it to the bottom with hot glue.
Interesting ideas for creating an ottoman
Budget options for ottomans are made from improvised materials that have served their purpose or are very inexpensive.
One option could be a DIY ottoman box made from a car tire, which is made like this:
- The pre-cleaned and brushed tire is dried;
- Cut out 2 circles from plywood. The diameter of the bottom one must match the diameter of the tire. The top circle of plywood should be smaller so that it can fit snugly on the wheel rim. Such a pouf can be made from 2 wheels connected by bolts and without legs, or from one wheel, but with legs. The legs are cut out of wood (or bought), used from old furniture (previously restored) or furniture casters are screwed on.
The next option is a pouf with a DIY storage box made from plastic bottles. You choose the shape yourself: square, rectangular, oval, depending on your preferences. The work flow is as follows:
- For structural strength, it is advisable to expose bottles of the same shape and volume to the cold for 1-2 hours with the lids open. Close the lids tightly, then bring them into the room and let them warm up.
- Place the bottles on a flat horizontal surface, connect 3-4 pieces with tape (depending on the desired size and shape of the ottoman), then tape them together into one product of the desired shape.
- According to the shape and size of the resulting structure, cut out the bottom and top from plywood. File notches along their edges. For strength, wrap the entire structure several times with twine through the notches.
- Cut a rectangle from thin foam rubber with a width equal to the height of the bottle and a length equal to the perimeter of the product. Wrap the structure around the circumference with foam rubber and sew its vertical edges with strong thread.
- To the plywood, fixed in the upper part of the product (where the bottle caps are located), use double-sided tape to glue foam rubber pre-cut to the shape of the product, 5–10 cm thick, and sew it with the same thread with the foam rubber of the side.
- Sew a cover, at the bottom of which make a drawstring with a cord. Place the cover on the ottoman, pull the drawstring cord and tie it.
An ottoman is made from a bucket by first removing the handle from it.
The materials and operation scheme are similar to the previous version of the product, only from one bucket. Grease the walls of the bucket with glue, wrap it in a rectangle of thin foam rubber, and sew it together. Cut the top and bottom from plywood or thick and strong cardboard (you can glue it in two layers). Attach them to the bucket with tape.
Cut a circle from foam rubber that matches the diameter of the top of the bucket. Sew it to the side foam.
Sew a cover with a drawstring from fabric, leatherette, suede, faux fur or other suitable material and put it on the prepared product. Pull the drawstring and tie the cord.
Tools and materials
To make the described piece of furniture with your own hands, you need to have special tools on hand. The list of necessary materials also depends on the scheme the master will follow.
Recently, synthetic fillers have become in demand, but if they cause allergies, you should opt for the wood variety.
Cedar and pine sawdust are praised for their healing effect, but they need to be changed periodically. The main advantage of natural wood filler is its environmental friendliness and the absence of chemical components.
A soft and comfortable pouf is obtained if you use polystyrene foam. Small balls provide the required volume and do not sag over time. You can use lightweight holofiber.
Polyurethane foam is often used as a filler for poufs; it also does not cause allergies and has the desired elasticity.
Even an old blanket can be used to create a pouf. A pillow may be suitable if you plan to make frameless furniture.
Abroad, peas, cereals and even dry grass are widely used as filler.
Regardless of what materials you plan to make the item from, you should have at hand:
- scissors;
- knife;
- construction stapler;
- thread and needle;
- universal glue;
- upholstery fabric;
- filler.
As a rule, the fabric is crocheted, since this tool has more possibilities. The yarn can be either wool or any other, it all depends on the preferences of the designer.
Such a pouf can be used as a separate piece of furniture or as an addition to an ottoman. Lyon brand yarn is good for knitting. It is better to take a darker shade, since dirt will quickly be visible on a light one.
In addition, you will need:
- hook;
- tapestry needles;
- filler;
- plastic bag.
Since the filling of knitted material can come out, the latter should first be placed in a bag, then in a soft bag. A simple pillowcase does the job perfectly.
It is recommended to purchase dense fabric that can withstand constant use. The size of the purchased canvas is at least 1.25 meters.
In addition to the material, you will need:
- lightning;
- measuring tape;
- pins;
- filler.
It is advisable to sew all individual parts together using a sewing machine.
A circle is cut out of the specified amount of fabric, the diameter of which should be 46 centimeters. Also, use scissors to form a rectangle with a length of 142 centimeters and a width of 40 centimeters.
The last thing to cut is a square with sides of 48 centimeters. It is subsequently divided into two halves and a zipper is sewn on. Only after this a circle is made from the square using a ready-made template.
The rectangle is folded in half on the short side and the circle is sewn on. This creates one wall of the pouf. From the other end the actions are repeated. The result is an attractive round piece of furniture that can decorate any interior. The filler is laid after the cover is completely ready.
Let's sum it up
An ottoman is a multifunctional piece of furniture that can be used not only in the bedroom, but also in any other room. However, moving it will not be difficult - its small size and maneuverability allow you to move the ottoman around the apartment at will. When choosing a bedside ottoman, you need to take into account not only its configuration, but also its appearance - if this furniture attribute is in harmony with the interior of not only the bedroom, but also the rest of the living space, you will get a very convenient and practical item!
Video about making an ottoman with your own hands
Ottomans are universal furniture in any home. You can make ottomans yourself to suit any interior, they are universal, you can put whatever you want in them and move them wherever it is convenient. In our article we will talk about how easy it is to make an ottoman of any configuration from scrap material.
Materials
- Rectangular pieces of chipboard measuring 40 x 33 cm – 4 pcs.
- Circle made of chipboard with a diameter of 30 cm – 1 pc.
- Bars 4 x 8 x 8 cm – 4 pcs.
- Furniture wheels – 4 pcs.
- PVA glue and wood glue.
- Metal corners – 4 pcs.
- Foam rubber (circle, diameter – 30 cm) – 2 pcs.
- Upholstery fabric.
- Self-tapping screws.
- Drill, screwdriver, sewing machine, stapler.
Ideally, the ottoman should look like the one in the picture.
Assembling a wooden pouf
The first step is to list the order in which the pouf is produced.
- We are preparing the material.
- We knock down the box.
- We mount the wheels
- We cover the wooden base.
The first stage (collecting the necessary materials) was taken into account earlier, so we assemble the box. Everything is very simple. You need to take four rectangular chipboards and connect them using screws or corners. For a stronger fixation, coat the seams with wood glue.
The wheels must be installed on separately screwed small bars. We fasten them with screws to the lower inner corners and coat them with wood glue for strength. After gluing and fastening, we mount the wheels.
Essentially, the ottoman is finished, but if you don’t have a sewing machine, you can simplify your task: just cover the wood with fabric and secure it with staples. To do this, just take a whole strip of fabric and tightly attach it around the entire perimeter with a construction stapler. Then pull it tightly downwards and staple it at the very bottom, or better yet, on the inside of the pouf. Cover the lid in the same way. But in this case the ottoman will turn out to be square.
This model is the most common. It is a soft ottoman with an opening lid and bottom.
The principle of assembling the ottoman is the same as the previous model, but the only difference is the presence of a bottom and a square pillow on small furniture hinges. To form the bottom you will need a square board. You need to cut out the corners for the wheels. We cut out the corners, lay the bottom and secure with self-tapping screws and glue. Let's move on to the pillow. Before attaching the pillow to the hinges, it must be softened and sheathed. Using a stapler and fabric. After stretching the drapery, we attach a pair of furniture hinges to the edges of the pillow and the top of the wall box.
In addition to the possible models of poufs presented, there is another type - with a removable lid. It is also not difficult to produce and can be made with your own hands. To do this you will need square pieces of chipboard, bars, fabric and a stapler. Initially, we will assemble the body and the bottom with legs.
We fix wooden blocks at the corners. Thanks to them, the frame of the ottoman will hold tightly. We attach small even blocks to a square sheet using self-tapping screws. This will be the bottom. Next, we screw the bottom with legs to the corner bars. The box is ready. Let's move on to the lid.
For the top of the lid, you need to choose a strong material, because... they will sit on it. We attach pieces to it along the docks and sheathe them. We put foam rubber or batting under the fabric, and pulling it tightly, secure it with a stapler. We cover the wooden box with fabric and that’s it. The ottoman is ready “in an hour”!
The photo do-it-yourself ottomans proposed in the article can be placed in the bedroom, hallway or children's room. They will look original everywhere. Ottomans are an easy way to acquire furniture with minimal financial resources. Making them couldn't be easier.
Ottoman on wheels with a drawer for small items
Multifunctionality is a trend today, so an ordinary seating ottoman can be turned into an excellent storage area or even a bedside table, especially if you attach wheels to it.
The process is surprisingly simple, and the result exceeds all expectations. The main task is to make a strong and reliable frame. It is best to use wooden blanks or parcel boxes made of plywood.
PHOTO. i.pinimg.com Pouf option made from pallets
If a finished structure is not available, you can make it yourself using several thin boards. First, a base is created, which can be round, square or even diamond-shaped.
PHOTO: howmeb.com First of all, prepare the base
DIY pouf made from plastic bottles
And for the first master class that I want to show you, you will need simple plastic bottles. I was very surprised by this idea, and I liked it like crazy. Agree, we have bottles a dime a dozen, the material is, one might say, free, why not make a convenient and functional thing yourself.
Among other things, you will need thick cardboard, tape, padding polyester or foam rubber, and fabric. The bottles must be the same size and volume. Their number depends on the size of the future ottoman. You can make it small, or you can make it big enough to fit two people. And the larger the upper surface area, the more load it can withstand. In terms of strength, I can say that it is quite capable of withstanding up to 75 kg. Again, cardboard is cardboard, but if possible, replace it with plywood or plastic sheets, then such an ottoman will serve you for years.
Now put all the bottles together and tie everything with tape. Try to make it even and tight. Next, measure the diameter of the workpiece and cut out 4 cardboard circles. The bottom and lid will be double for greater strength. Secure them to the bottles also with adhesive tape. The basis is cooking, then you need to cut pieces of padding polyester to size. That is, the side part and the top - a circle. The thicker the material, the better. By the way, it can be replaced with foam rubber, but it will be a little more expensive. Using glue, glue to the base. Well, then everything depends on your imagination and possibilities.
For example, a cover can be sewn from fabric, even using small pieces.
Use leather instead. It will be a masterpiece then.
Decorate with lace, ruffles or applique.
Felt flowers will make your pouf an exclusive item and will not leave connoisseurs of handmade items indifferent. Those who love to knit can make decor from threads.
I think it’s worth taking time and seriously imagining to get such an original piece of furniture.
Compact pouf with handle
An original model where small bottles are used to create. This pouf is convenient to take with you outdoors; it is light in weight.
The photo of the ottoman shows that it is decorated with a special handle for convenience.
In addition to the handle, you can equip the ottoman cover with special pockets for household small items - remote controls, glossy magazines, etc.