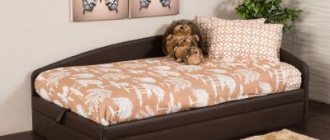
A folding wooden chair will be a wonderful decoration for any country house.
It can be placed in the garden under spreading trees, on the veranda, or in the living room near the fireplace. You don't have to spend a lot of money to buy luxury wooden furniture. It is possible to make such a product on your own if you look at the drawings, select lumber and have some free time.
Advantages of wooden furniture for relaxation
Wooden furniture is relevant at all times. It is different:
aesthetics;- naturalness;
- long service life;
- resistance to negative factors.
Wooden products attract people with their texture and interesting texture . Wood is easy to work with. It can be easily processed with both hand and power tools. If you have experience in carpentry, original and exclusive models are created.
In addition to the above advantages, it is worth adding that the tree can withstand heavy loads of up to 300 kg.
This material does not require careful maintenance. Help : with proper finishing, it is enough to wipe the product once a week with a damp cloth and hide it from rain and frost.
Peculiarities
The chair-bed can be classified as classic and universal furniture. It will fit perfectly into a small apartment and will delight the owners with its aesthetics and original design. As for design features, the product can be:
- frame;
- frameless.
These models differ in form and transformation mechanism.
Making a frame product with your own hands is heavier than a frameless one, but it is quite possible. Frame furniture involves the manufacture of a folding mechanism. It should unfold easily, without distortions or other defects. A product with two folding legs is easier to make than one with four.
Choosing a wood species
The choice of wood when making furniture plays an important role. Each tree can be processed differently and has different textures and technical qualities. The following types of wood are suitable for this:
Oak. An oak chair will delight users with its high strength, wear resistance, and durability. It will harmoniously fit into a classic interior and will look noble and elegant in it .
A rich variety of wood colors allows you to choose an option for any interior.- Beech.
Beech furniture goes well with classic motifs. Due to the elasticity of the material, the product is given curved and complex shapes. Beech is easy to process. It sticks well and dries quickly. Its positive qualities include: wear resistance, strength, beautiful texture on cuts, the ability to maintain natural color even after varnishing. - Nut. This breed is distinguished by an abundance of shades from red-brown, light, greenish-gray to yellowish-gray. Black walnut, used in the manufacture of exclusive and expensive furniture, is considered the most valuable . Thanks to the solid texture, complex openwork carvings are made on the array. During the work process, no chips are formed on the wood.
Budget options include products made from:
Pines. This tree has good qualities and an affordable price. The material copes well with sudden temperature changes. Therefore it is suitable for making garden furniture.- Birches. Lumber lends itself well to processing, which allows you to create real masterpieces in the furniture industry. The chair can be decorated with decorative carvings, reliefs and ornaments.
- Alders.
It is easy to carve, dries quickly, polishes well and practically does not warp. But when used in the fresh air, the wood acquires a dark shade . Therefore, it is better to paint it with paint. - Ash. This material bends well, practically does not crack when dried, and when bleached it acquires the original shade of gray hair. But ash is poorly polished and is quickly damaged by wormholes . When making furniture items from ash, the wood must be treated with antiseptics.
Tip : to make a durable piece of furniture, it is recommended not to skimp on consumables.
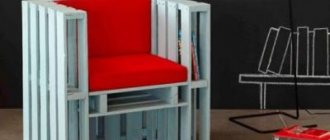
Bean bag model
Despite the familiarity, this design is considered special, both for home and garden.
It is necessary to prepare for work:
- Material that will be used for the outer cover;
- Fabric for inner lining;
- A couple of lightning bolts;
- Filling material;
- Threads.
In addition you will need:
- Pencil with tape measure;
- Sharpened scissors;
- Sewing machine;
- Graph paper.
The chair consists of a couple of parts, one of which is the cover, and the second is the lining. The cover is double-sided.
- A zipper is sewn into the upper part so that it can be removed and, if necessary, cleaned.
- The cover of the inner part is filled with ball filler in about two parts.
- Due to their small size, polystyrene foam balls help the chair easily take the shape of the human body.
- Lightweight fabric is best. It should be breathable and smooth.
- A pattern is made on graph paper according to the calculations performed. It turns out a wedge, bottom part and top.
- It should already be transferred to the fabric with allowances of one and a half centimeters.
- You should end up with a hexagon-shaped top with a base and six wedges.
- Together with the handle, all this will be used to sew the top cover. The same elements are prepared for the case from the inside, but without the handle parts.
The edges are processed in a zigzag, then the side wedges must be folded facing each other. The long edge on both sides is ground down to a length equal to fifteen centimeters.
Here the rivet elements are placed and the zipper is installed. Then the seams of the remaining wedges are sewn down. The individual parts are connected, after which the inner cover is assembled according to the same scheme.
Drawing with dimensions
You can make a drawing of a future piece of furniture in different ways:
- find a suitable option on the Internet and modify it in your own way, using suitable dimensions;
- draw your own invented version by hand with all the calculations and dimensions;
- use a special computer program.
Before drawing up a drawing, it is necessary to decide in advance on the design, dimensions, location and materials of manufacture of the future chair.
Help : the seat and back of the product can be completely wooden or covered with fabric.
Kentucky. Garden chair
The option is stylish so that it can be used both at home and in the garden area. An excellent option for a terrace.
When choosing a material, you should avoid using coniferous trees and larch. It is best to use either beech or oak wood to realize your plan. Walnut or elm are well suited for this design.
It all starts with the seat, onto which elements from the backrest are then applied. The upper part of the backrest is attached to the front of the seat, and its lower part is installed behind the seat.
There should be bars from the back on the seat parts. By moving the adapter bars apart, the piece of furniture opens up like a fan. The backrest parts are fixed between the bars. The wire is used as a connecting element between the lower part of the backrest and the edge of the adapter bars.
Tools and materials
The tools are prepared:
- electric drill;
- screwdriver;
- sander;
- corner.
Materials needed:
- wooden blocks with a cross section of 3 cm;
- plywood 2 cm thick;
- self-tapping screws;
- stain;
- varnish;
- brush;
- antiseptic.
Recommendations
Here are some useful tips that will make it even easier to make a chair from wood with your own hands. To begin with, let's say that before creating any structure made of wood, you should carefully think about how it will roughly look and what you want to see it as. This will allow you to at least approximately determine how much of a particular material you need.
Another important aspect is that you should not neglect such a thing as drawings. For some reason, many people do not pay enough attention to them, which is why they end up with crooked chairs and armchairs. In this matter, everything should be thought through to the smallest detail and the parameters of each detail should be checked. It would not be superfluous to say that it would be better to use a circular saw for cutting longitudinal parts, and a jigsaw for transverse parts.
Another important issue concerns the connection of the chair elements. Everything is quite simple here. In connections where the main load occurs, it is better to use self-tapping screws or self-tapping screws. But in other cases, you can use adhesive or chopsticks made of wood. Choppers can also be used to secure the upper parts.
An important point will be the selection of materials for processing. But here everything will depend on how high-quality the wood is used. If it is “clean” and has no defects, then it will be enough to treat it with stain and apply varnish. But if there are stains on it and there are some defects, then you should putty them, then cover them with a primer and only then paint. Another important point is that you should not paint the wood right away. It must be pre-treated with drying oil. Otherwise, it will quickly be absorbed into the surface. Then there will be bald spots, which will ruin the appearance of the chair.
How to make a folding version?
The sequence of work is as follows:
- The contours of the parts are applied to the prepared plywood.
- The parts are cut out with a jigsaw strictly according to the markings.
- Wooden blocks are divided into slats. They will be used in the manufacture of the seat and backrest. Next, jumpers are prepared from boards of greater thickness.
- From the ends of the ribs, chamfers are removed at an angle of 45 degrees.
- To assemble the product, 16 slats and 2 thrust bridges are prepared.
- The seat frame is assembled from 2 plywood legs and 9 slats. The parts are connected with screws.
- Next, the outer slats are attached with two screws on each side.
- In the same way, the back of the product is assembled from two legs, seven slats, two thrust bridges, one upper bridge and one rounded edge with a hole in the middle.
Attention : the entire process of assembling the chair is checked with a square. The slats are set perpendicular to the plywood legs.
That's the whole process of making and assembling a wooden folding chair with your own hands. Now all that remains is to carry out the finishing touches and the product can be used.
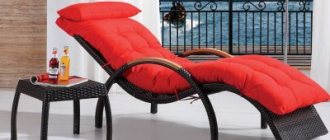
Fabric chaise lounge on frame
A fabric folding chair is one of the simplest and most convenient options for making it yourself. This product is lightweight, does not take up much space, and is convenient, which makes it a fairly good option for country use.
You should prepare the following materials in advance:
- Bolts and nuts for furniture with size D
- Round slats: 1 – 650 mm, 2 x 500 mm; 2 x 600 mm.
- Slats with a rectangular cross-section: length – 650 mm, 25x60 mm.
- Durable seat fabric: 200 cm long and 50 cm wide.
- Fine-grained sandpaper.
- Round file.
- PVA glue.
When all the necessary materials have been collected, you can move on:
- Cut the slats to the required length and sand them thoroughly using sandpaper.
- Count 40 and 40 cm from the corners and drill holes, then be sure to sand them using a needle file.
- To change the position of the backrest, make 3 or 4 cuts at a distance of 7-10 cm (frame B).
- Step back from the slats and drill holes for arranging the seat.
- Take the round slats, coat them with glue, and install them in the holes.
After the assembly of the frame is completed, you should cut out the fabric for the seat. The length of the material is calculated taking into account the possibility of folding. To understand what length is required, you need to fold the structure and take measurements of the fabric. It is important to remember that the material should be slightly stretched. After this, nail a piece of fabric with pre-processed edges with round slats located on parts A and B. Then wrap the edges of the cut and fix it with small nails with thick heads.
Finishing
After making all the parts and assembling them, the product is carefully polished. It should not have nicks or other defects . Next, the wood is treated with antiseptic agents, covered with stain and varnish in two layers. When using a piece of furniture outdoors, it is recommended to use moisture-resistant varnish.
Tip : for outdoor use, chairs are also made from tires and pallets. And next to it you can put a folding picnic table or a convenient table for a laptop.
Frequently asked questions from beginning furniture makers
Before you start making this or that design, you should familiarize yourself with the list of questions that beginners in this business often have.
How to cut parts?
When cutting longitudinal parts, it is better to use a circular saw, and for transverse parts, an electric jigsaw.
Jigsaw
How to connect parts of the structure?
For connections that carry the main load, you will need to use euroscrews or self-tapping screws. In other cases, the parts are assembled using wooden choppers and glue.
Chopiki
Paint or varnish?
The choice of materials for processing depends on the quality of the wood itself. If the material does not have any defects, it can be treated with stain and then a layer of varnish can be applied. If stains appear on the surface, the wood must first be puttied, coated with a primer, and only then painted.
Wood varnishes come in different shades
How to reduce the consumption of paints and varnishes?
Quite often, during final finishing, the paint is quickly absorbed into the surface, which is why bald spots remain on it. This happens because natural wood has a porous structure. That is why professionals recommend pre-treating it with drying oil.
Drying oil for wood processing
Photo
Folding chairs can be very different. The main thing is that they fulfill their direct functions:
Product assembly
When the sides and back are ready, they are screwed with self-tapping screws to one of the plywood squares - the one that will serve as the base of the entire structure. To fit the dimensions of the square, two identical frame elements are created, each of which must have at least two additional slats in the center. Plywood is stuffed onto the frame. When folded, all three squares should create a single, even structure. 4 bars - legs - are nailed to the frame from below.
The final stage is framing the frame. If you need removable covers, they must be sewn on a machine, adding zippers. The simplest option is to simply put sheets of foam rubber on the seats, then fabric, pull its edges under the frame and attach it to the plywood with a construction stapler. The sides, armrests, and back are upholstered in the same way.
Birch lounger
Another designer do-it-yourself sun lounger model is a sun lounger made from birch logs. However, in this design, birch can be replaced with any other type of wood. This lounger is not mobile, and you need to assemble it in the place where it will be installed.
To bring this model to life, you will need birch or other logs. The diameter of the logs should be from 75 to 120 mm.
Assembly of such a chaise lounge is very simple:
- logs need to be cut into pieces 65 cm in length;
- in a pre-selected place for the sun lounger, use chalk, sticks, and masking tape to mark the parameters of the sun lounger;
- We lay out the logs according to the indicated diagram. We fasten the logs together with long self-tapping screws;
- We install the finished structure in the place intended for it and, for greater reliability, we strengthen the back of the chaise lounge with brackets.
Preparing for work
The preparatory process will take some time, but it is necessary to carefully plan the work and make a drawing of the future product.
Preliminary work includes:
- purchase of materials for construction, choice of wood species;
- preparation of tools, devices, workspace for sawing and assembling parts;
- drawing up a drawing, choosing the dimensions of the Kentucky chair.
Material selection
Coniferous species are rarely used for such a chaise lounge chair. Pine and spruce are destroyed during use and form chips due to the special structure of the fibers. More often they use the remains of bars after building a house or outbuildings. If you are buying wood, it is better to take an array - this option will cost less.
Breeds
used
- dense wood of walnut, beech, teak;
- durable cypress, mahogany, cedar, which do not need to be impregnated for durability, but the material is expensive;
- budget group - acacia, birch, cherry, aspen.
To make a chair, bars with a cross section of 50 x 30 mm are prepared; the transverse size can be increased to 50 x 50 mm and 40 x 50 mm. Galvanized wire is taken with a diameter of 4 mm; galvanized staples are needed to fix the wire. Instead, you can use studs, self-locking nuts and washers (M6) with an anodized layer on the surface.
Also prepared:
- slats 375 mm long - 6 pcs.;
- additional finishing parts 875 mm each - 2 pcs. (hind legs);
- for the back - 4 elements of 787 mm each, 2 bars of 745 mm each, 2 slats of 1050 mm each;
- for the seat - jumpers 228 mm - 9 pcs.
For finishing, they buy stain, varnish, paint, wax and furniture oil.
Tools
For sawing, markings are made on the wood using a tape measure, and rectangular cuts are made with a carpenter's square. A tape measure of 3 m is sufficient.
Other tools for work:
- drill with metal drills (without pobedite tip);
- grinder with grinding wheels of different sizes (No. 100 - No. 240);
- sawed on a sawmill, using a jigsaw or a circular saw (depending on the amount of work to form the timber).
You will need pliers, a hammer, a hacksaw, and in some cases clamps. Paint with a brush; a similar tool is needed for impregnation with protective compounds.
Workplace
Assembly is carried out on a flat surface , since accuracy of matching of the holes is important (parts cannot be knocked together due to bumps on the plane). It is better to choose a large table or workbench. Work is carried out in the garage or outside in the warm season.
Provide an area for storing sawn workpieces. There should also be room for a partially assembled structure.
Debris from drilling and sawing is removed in a timely manner so as not to injure the surface of the parts and not create a fire hazard in the workshop (wood can easily catch fire).
It is important to ensure ventilation of the room when painting and varnishing. The flow of fresh air will also contribute to faster drying and film formation.
Blueprints
The presented drawings will help you design a sun lounger yourself:
Drawing with dimensions of parts
Drawing of a wooden deck chair
Determination of height and length
Design diagram
Scheme of a sun lounger with a canopy
Did the article help you?