Upholstered furniture is relevant at all times.
It is found in city apartments, private houses, dachas, and even on personal plots in the warm season. An easy chair is an important attribute of any living room, nursery or bedroom. They are provided by different manufacturers in a wide range. But in order to save your own savings and acquire original and exclusive furniture, you can try to make it yourself.
Useful tips
Making furniture with your own hands is a very exciting activity. If the process is happening for the first time, make the simplest chair with clear lines and simple geometry. It will be easier to work, and the result will be neat.
Having experience in carpentry, you can surprise your family and friends with unusual shapes. The handcrafted round chair is effective and practical in any setting. Another easy way is to make a chair out of a car seat left in the garage.
By being creative and following the instructions, you can make a chair with your own hands that will be used for its intended purpose for many years. In addition, a product made with your own hands will become a source of pride for the owners and a source of pride for friends.
Peculiarities
There are two types of soft foam chair:
Frame . It has a wooden or metal frame, and the seat and back are made of foam rubber and upholstery material. Such products are most often found in modern interiors.- Frameless . It is distinguished by softness and maximum comfort in use. Such a piece of furniture is made of two covers: the inner cover is stuffed with filler, the outer one has aesthetic value.
DIY home chair
Now think about making a regular home chair with your own hands. Unfortunately, the photos were caught; there was no time to take photos. We were able to capture key milestones in a timely manner, eliminating the tedious workflow.
I just wanted a normal chair, not just some strange cologne. So that it is strong and stable, like store-bought options. To assemble the frame correctly, I had to search the Internet for chair types and designs. I suggest you immediately look at the photo of the chair assembly process itself.
At the first stage, the frame of the base of the future chair is made in the shape of a semicircle. Chipboard with wood is used. The base of the chair is 10 centimeters thick. This will be enough to protect the walls. And the spacers perform the same ultimate function.
Fiberboard was perfect for the back and plywood was perfect for the front wall. I traced by eye all the curves and contours of the future chair using the remaining wallpaper. Children's wooden blocks were used as a base.
In the next step I started gluing cardboard to fill the inside. During the work, the glue also had to be changed; the initially chosen PVA did not work. The walls swelled and became like waffles; the glue was replaced with regular carpentry glue. It turned out to be the best choice in the world. I also had the idea of a DIY rocking chair, but I will implement the idea a little later.
After looking at the photo, it’s easy to immediately understand how the finished walls turned out. I used a regular leveling knife, the material is easy to cut and deformable.
Traditional
A traditional chair is an excellent design solution for creating a comfortable environment in the home. Unlike sofas, armchairs take up much less space, and making them yourself from wood, chipboard or metal is easier and faster.
After preparing the tools, a location for assembly is selected. It is recommended that no one move spilled materials. It is important to consider the side effects of the production process and their impact on others. When sawing wood with a jigsaw, sawdust should not settle on furniture and interior items, and when using inverter welding, fire safety requirements must be observed. When all preparations are completed, installation can begin.
Stages of work:
- use cardboard templates to transfer the location of parts onto the frame materials;
- Use a jigsaw or grinder to cut out the elements along the lines of the drawing;
- If necessary, work open parts from the rafters with a grinder;
- we fasten the frame parts with a screwdriver or using a welding machine;
- Draw a pattern for the upholstery on the furniture fabric, cut it out with a 1 cm seam allowance, sew on the parts;
- cut furniture foam, upholstery padding;
- the armrests are wrapped in foam rubber and fixed with a special stapler. Decorative wooden armrests, if necessary, are secured on top with a screwdriver and self-tapping screws.
If a wooden chair will be placed in a room with high humidity, after assembling the frame it should be treated with bioprotective agents.
Once the installation work is completed, you can decorate the chair to your liking. Small buttons are covered with furniture fabric, which are sewn onto the product in a checkerboard pattern. By applying paints of different colors and sanding, wooden elements are decorated in an antique style with your own hands.
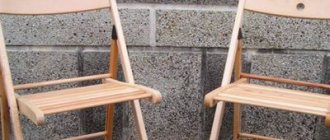
Folding
A folding chair is a great way to organize a seating area. This piece of furniture, designed for use in vegetable gardens, is indispensable in summer. A DIY garden chair will fully fulfill its functional purpose and will not be inferior to its factory counterparts. The possibilities of using a folding piece of furniture allow it to be used in the most unexpected situations: guests at night, while traveling, relaxing on the veranda. Wooden chairs come in many different styles. After selecting a drawing, after completing the drawing, you can begin installation work:
- cut the prepared materials with a jigsaw or grinder to the desired size;
- process the surface with a grinding machine so that it becomes smooth, otherwise sharp traumatic particles may separate;
- treat with bioprotective agents and dry well;
- paint all the details in the desired color;
- assemble the chair frame using a screwdriver, self-tapping screws and the necessary fasteners.
Wooden chairs are decorated to suit almost any style. Patinated varnishes, paints and enamels are used for processing.
The finished chair should definitely be tested for strength. If all points are followed correctly, a wooden folding chair will last a long time.
From pallets
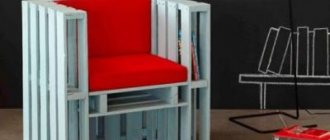
Construction pallets are assembled from flat boards that have dried and no longer change their geometry. However, their use as material for homemade chairs is widespread. Pallets make original loft-style models that practically do not differ from the design options. Production includes several stages:
- After choosing a template and preparing the boards, they are sanded with a grinder. Without this process, wood delamination is possible.
- Using a jigsaw or grinder, the pallets are cut in half, the edges are sanded and painted.
- From the elements you need to assemble a frame chair from boards of the desired shape, and then fasten the elements with screws and a screwdriver.
This handmade garden chair looks no worse than its store-bought counterparts. For comfortable use of the pallet seats, it is necessary to sew cushions onto them. The fabric is selected based on the operating conditions of the furniture. Foam rubber, holofiber, padding polyester, and polystyrene foam balls can be used as filler.
More children...
Children love to feel like adults. If you give them this feeling for a period of long enough painstaking activities (handicrafts, preparing homework), then perseverance will develop. To do this, in Fig. – a child seat, economical, durable and quite comfortable. For the reasons stated above (the child’s skeleton has not yet completely ossified), only soft armrests are allowed; in this case, they are made from covered foam rubber up to 30 mm thick. You don’t need to make it thicker, just as you don’t need to widen the seat and back or make them curved, scoliosis can develop. If your body becomes numb, let it lie on a pouf, pear or ball for half an hour. The key to correct posture is mobility and periodic change of positions.
Drawings of a child seat
The history of children's rocking horses is interesting. Judging by the excavations, they appeared as soon as some primitive innovator first saddled a horse. Initially, their function was purely utilitarian: the initial training of the future equestrian warrior. However, it is still useful for a child to feel like a rider these days; the vestibular apparatus and balance motor skills are developing well. What do the chairs have to do with it? But look how easy it is to make a children's rocking horse chair without any significant costs, see the video:
Video: do-it-yourself baby rocking chair-horse
In addition to developing the vestibular system and sense of balance, the little equestrian will enjoy swaying in a position that prevents deformation of the musculoskeletal system.
Material, fittings, tools for frame attributes
Building a frame chair from scratch comes with some challenges. But the finished product will look more solid. You can verify this by looking at photos of finished homemade products. You can also use an old Soviet “grandmother’s” chair for the base.
To make a simple frame for an upholstered chair, you need to collect strong sheets of 20 mm plywood to cut out the parts yourself. A standard set of repair tools with an electric drill, a jigsaw, a steel ruler, sandpaper, metal hoops, adhesive tape, a pencil, a tape measure, thin nails, screws, wood glue, and stain will also be useful. For upholstery you will need: artificial leather or fabric, foam rubber (filler).
Choosing fabric for upholstery
The first step in the manufacture of home upholstered furniture is the choice of fabric for the external design of the soft parts of the structure. Each master selects upholstery depending on the physical properties and price aspects and features that different drawings have. Let's look at the most common fabrics for decorating chairs in our time:
- velor – velvety to the touch, gives the furniture a certain charm;
Article on the topic: Do-it-yourself chair made of wicker
- flog is a distant analogue of velor, easy to clean, so designers use it to decorate children's upholstered furniture;
- chenille - a fabric based on a combination of natural and synthetic fibers, has particular wear resistance (a well-thought-out structure prevents the formation of pilling);
- jacquard - the upholstery is considered durable, but over time the loops turn into puffs;
- natural tapestry is the most expensive and beautiful type of fabric for upholstery;
- artificial suede is a universal option for chairs in a sunny room, resistant to UV rays and easy to clean;
- leatherette is a durable material that allows you to play with decorative embossing.
Chairs on radius runners
They are especially popular with avid readers of newspapers and books. The frame can be different: with kinks (when the chair can change shape) and solid. Possible types of products:
- Classic rocking chair. The most common and simple model. It suits both modern and classic. Easy enough to create.
- Chairs with sides (the ends of the rails are bent in the other direction, preventing them from falling backwards). A variety with medium planting height.
- Furniture with elliptical arches. Smooth turning is guaranteed, but may accidentally tip over. Better equipped with bumpers
Types of rocking chairs
You need to comply with your own needs already at the stage of choosing a prototype. There are several types of rocking chairs, aimed at users with different habits and needs. The main types of rocking chairs are shown in the photo. Rocking chairs on simple radius runners (arches, rocker arms, skis) were the first to appear in everyday use. They are in use to this day, both in modern and classic appearance, pos. 1 and 2. Their main advantage is constructive and technological simplicity.
Main types of rocking chairs
Radius runners provide smoothness and softness of rocking only with relatively small swings, and with strong swings they do not guarantee against tipping over. Therefore, rockers “on radii” are made with a low landing, ensuring a large excess of the center of the generating circle (CO) over the general center of gravity (CG); For more details on the kinematics of rocking chairs, see below. If a seat of normal height is required, then the runners are equipped with bumpers, pos. 3. The shocks of the bump stops on the floor are noticeably felt at the “fifth point”, and in any case, you have to get out of the rocking chair on the radius runners, straining somewhat.
Tipping is excluded in rocking chairs on runners of variable curvature, pos. 4. All of them are comfortable enough for riders of different body types. They themselves gently unseat the rider of a rocking chair of the Nirvana type who has stood up and leaned forward on runners of variable curvature, pos. 5 and 6. It is also possible, by changing the progression indicator in the law of change of the generating radius (also see about kinematics), to design them for any landing height, within acceptable limits.
Nirvana rocking chairs on elliptical runners, pos. 7, provide a gentle, truly blissful rocking, but do not prevent capsizing during strong swinging, so they are equipped with bump stops; the front one is often combined with a footrest. Garden rocking chairs with ellipse awnings never tip over, pos. 8.
Rocking chair with springs
Nirvana rockers on springs, see fig. on the left, they swing as softly as on ellipses, because The mechanical characteristics of the springs are progressive. But making a spring chair with your own hands is difficult: you need either high-quality boards of special types of wood (teak, boxwood, dogwood) or a rubberized strip of spring steel so that it does not scratch the floor. In addition, dirt gets packed into the gap between the spring and the runner and it can be very painful to pinch your finger. For the latter reasons, spring chairs are now very rare on sale.
Rocking chair 3 in 1
Finally, there are also multifunctional “3 in 1” rockers on runners with smooth bends, see fig. on right. When seated upright, this is a regular chair; by leaning back, it can be switched to rocking mode on radii, and by leaning back even more, it can be turned into a sun lounger. But the dimensions of the 3 in 1 rocking chair are too large for apartments below business class, and transitions from mode to mode are accompanied by rather sensitive shocks. In unsuccessful models, you either have to stand up or twitch, squirm and fidget like a puppet on strings. Therefore, 3 in 1 rocking chairs are a piece of furniture for everyone.
What you need to create a chair
In addition to materials and tools, the craftsman needs an idea and an accurate understanding of who makes the chair and why. If this thing fits inside, you need quality materials. If it's a high chair that can be disposed of after a while, a cardboard frame with cheap (but hypoallergenic) upholstery and upholstery will do.
Tools
Most tools can be found in any home:
- rulers (steel, protractor);
- compass;
- scissors;
- vice (table and hand);
- hacksaw;
- puzzle;
- welder;
- hammer;
- bunch of keys;
- drill;
- hammer;
- hacksaw;
- central punch;
- glue, nails, staples.
Be prepared for the fact that you will need an impressive set of tools.
To assemble the simplest chair, you'll need the absolute minimum: tools to measure, cut and assemble the frame, and a sewing machine to make the slipcovers/upholstery.
Main types of rocking chairs
According to the type of design, all rocking chairs are usually divided into the following types:
- Rocking chairs on simple radius runners;
- Rocking chairs on runners with variable curvature;
- Rocking chairs on so-called elliptical runners;
- Glider;
- Vanka-stanka;
Let's look at each of these types of rocking chairs in more detail.
Rocking chairs on simple radius runners
Arcs, rocker arms, and skis can serve as simple radius runners. This type of rocking chair appeared earlier than all others and has not lost its relevance to this day. However, this type of swing has a significant drawback, which is that if it swings too much, there is a high probability of falling. It is for this reason that the vast majority of rocking chairs on simple radius runners have a low seating position in order to ensure that the center of the generating circle is greater than the center of gravity. In addition, there are models that have a horizontal locking arc. To manufacture such models of rocking chairs on simple radius runners, individual drawings are required.
Rocking chairs on runners with variable curvature
This type of rocking chair completely eliminates the possibility of falling. Their length prevents the rocking chair from tipping over backwards. And when tilted in front, they simply push the person out of the seat. In the process of manufacturing this type of rocking chair, it is best to use a ready-made drawing.
Rocking chairs on so-called elliptical runners
As the main distinguishing feature of this type of rocking chair, it should be noted that they swing very smoothly. The vast majority of rocking chairs on so-called elliptical runners are equipped with bumpers on the rear side, and springs or a footrest on the front side. A model with springs cannot be made independently, because this requires the use of materials such as a rubberized metal strip or expensive wood species.
Glider
Gliders are sliding rocking chairs. The design of this type of rocking chair differs from the designs of other types of rocking chairs by its immobility. Rocking of this type of rocking chair is carried out due to a special pendulum-type mechanism. If you are just taking your first steps in making rocking chairs yourself, then this option is not for you.
Vanka-Vstanka
This type of rocking chair is considered a garden option. As the main distinguishing feature of this type of rocking chair, it should be noted that they do not lose their stability in absolutely any position. This is mainly due to the fact that the runners also act as a seat. If you lean back very strongly, the chair will take an almost horizontal position, but will not turn over, and with a little effort it will return to its original position. It is quite difficult to make a drawing of this type of rocking chair. For this reason, it is best to use a ready-made drawing.
How to make an upholstered chair with your own hands?
No work can begin without a clear action plan. Decide on the design of future furniture. A frame chair is more difficult to make, but it looks more solid.
If you decide to sew a bean bag chair, be prepared to master the patterns. Your actions will concern not so much furniture production as sewing art. In any case, you will need an approximate budget and an idea of material consumption. For example, a bean bag chair costs 1200-1300 rubles. This includes fabric for external (approximately 300-500) and internal (200-300) coverings. In addition, 500 rubles are allocated for the purchase of filler.
Maybe you already have an old “grandfather’s” chair that has lost its presentation? Then you can do it yourself and fix it as shown in the following video:
Traditional soft product
An ordinary professorship requires a thorough approach and an extensive preparatory phase. Let's look at the list of materials and tools needed to make a plywood chair with upholstery:
- plywood from 20 mm;
- electric drill;
- sandpaper;
- screws;
- puzzle;
- metal tapes;
- thin nails;
- foam;
- wood glue;
- artificial leather;
- spot;
- glossy black paint;
- pencil;
- scotch;
- roulette.
Begin:
- After downloading one of the drawings presented below, large-scale work begins. Calculate the amount of materials and start creating the model. First, templates are made from cardboard and plywood parts are cut from them.
- The sides of a standard chair are shaped like a banana. You will also need sleepers. Decide on the angles of inclination, folding and dimensions of the product.
- The surface of the wooden parts is cleaned and smoothed. Pay special attention to the ends: moisten them with heated linseed oil, flatten the fibers with a hammer (if bends are provided). Each frame detail is cut out with a puzzle.
- The sides of the seats are painted or treated to match the color of wood. The ends of the side walls are reinforced with metal circles. Next, the packaging process begins.
- The necessary holes are made with an electric drill. The rims are attached with self-tapping screws. First, the backrest is covered with leatherette, then it is the turn of the remaining fragments of the chair.
- To secure the fabric, you will need a large head with wallpaper nails. At the back along the transverse parts (along the very edge) an overlay is fixed; at the front it should cover the slats. It is better to treat the fastening points with wood glue - this will increase the level of reliability.
Next we will talk about how to make a bean bag chair from soft fabric with your own hands.
Modern easy chair with your own hands
Bag chair
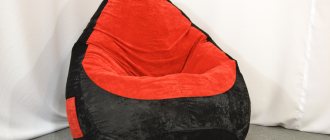
The simplest version of the bag is the so-called pear chair. You can't do without the following materials:
- thick or satin calico (about three meters);
- a piece of fabric for the outer covering (about 3.5 meters);
- lightning one meter long;
- filler;
- fabric for appliqué;
- scissors, pins and thread with needles.
Production:
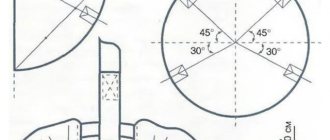
- Copy the template you like from the Internet, change its size and transfer it to the necessary parts. For the top and bottom covers, the work will have to be done separately. The result of your efforts is a small top bottom piece, a large bottom piece, and six wedges of fabric.
- Sew the wedges and start sewing the bag. A small area should be left unprepared. In addition, both bottoms are sewn together. Once you are done with the upper case, start sewing the lower case - the procedure will be the same.
- From the fabric you choose, you need to cut out the elements for the applique - they are adjusted along the top of the cover. A zipper is sewn into one of the gussets: this will allow you to remove the cover and wash it if it gets dirty. Two-thirds of the volume of the inner liner is filled with filler, which can be used as foam.
- Apply putty to the inner lining, insert it into the outer lining and close the zipper. The bean bag is completely ready to use.
Pay attention to the strength of the seams of the inner lining - they should not separate under the weight of a sitting person.
How to make a soft children's chair with your own hands will be discussed further.
DIY bean bag
Drawing with dimensions
Before you start making a chair, you need to make a preliminary drawing with all the dimensions, materials of manufacture and fastening systems for individual elements.
An adult product with a frame will have the following dimensions:
- width – 75 cm;
- height - 90-95 cm;
- seat height 45 cm from the floor;
- for the manufacture of legs, a beam with a square cross-section of 55 cm is selected;
- side bars – 40 cm;
- armrest height – 20 – 30 cm.
When making a frameless chair, a detailed pattern of the future product is made. It will consist of:
- 6 wedge-shaped parts;
- round bottom;
- tops.
A standard bean bag for an adult will have the following dimensions:
- height – 1 – 1.2 meters;
- diameter – 1 meter;
- the diameter of the lower bottom is 30 cm, the upper one is 15 cm.
As for children's models, their sizes will be as follows:
- height – 60 cm;
- bottom bottom diameter – 25 cm;
- top diameter – 11 cm.
Making a cocoon
One of the most comfortable options for a hanging structure is a chair in the shape of a ball, drop, egg or cocoon.
Making a hanging cocoon chair with your own hands will be much more difficult. More materials, effort and time will be required. You will also need hoops, due to which the structure will have a rounded outline.
Article on the topic: Do-it-yourself chair bag filler
The frame will require three or more rings and reinforcing arcs. Before connecting the parts, you will need to wrap the cord tightly, periodically gluing it to the pipe. The space between the arcs and circles is filled with openwork weaving made of wicker, willow twigs, cords, ribbons, wooden slats and other elastic elements.
Such chairs are always equipped with a soft seat made of foam rubber or other filler.
A hanging cocoon is most often suspended from the top to the ceiling using a rope, cable, cord, slings or chain. You can also build a floor-mounted version, but it will require purchasing metal pipes and performing expensive welding work.
To make your vacation as comfortable as possible, you should not spend money on purchasing expensive interior elements. If desired, you can make a real masterpiece that can decorate any home or garden and allow you to fully enjoy the convenience and be proud of the results of your work.
Benefits of homemade furniture
Today, furniture and fittings manufacturers offer customers a huge range of finished products, striking in the variety of shapes, sizes, materials, and design ideas. However, hand-made chairs always have a number of obvious advantages:
- Possibility to choose your own model.
- Constant quality control of pre-processing, grinding of parts, assembly and decoration.
- Unique style of finished products.
The large number of available instructions and video lessons is also a plus in practice.
UPHOLSTERY
1. Lay out the five foam blanks obtained in the previous step on a bright fabric. Outline them, then mark the outer contours, leaving 5 centimeters of margin. Cut the fabric according to the markings.
2. Make sure that the foam is laid out correctly. The seams on the foam should be on the reverse side.
3. Apply glue to the edge of the foam rubber and glue the fabric upholstery.
4. Apply glue to the top half of the foam and glue the fabric. Apply glue to the remaining part, apply and smooth the upholstery. The glue should be applied not to the fabric, but to the foam rubber, otherwise white spots will remain on the upholstery.
5. Turn the blanks over with the foam rubber facing up. Apply glue to the seam allowances and fold the fabric. Try to keep the edges smooth and without wrinkles.
