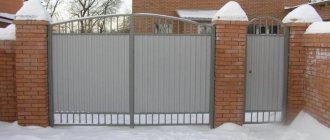
The arrangement of suburban areas near private houses is not complete without the construction of reliable and beautiful fences, and such structures must necessarily have gates. Even if the owner does not yet have a personal car, the gate will allow guests’ cars to enter and various goods to be delivered to the site by truck.
There is no need to rush to make a final decision; carefully read the maximum number of different options, analyze them taking into account your own wishes, terrain features and the size of the site.
It is imperative to take into account financial possibilities, because the cost of existing options differs significantly. By the way, what is more expensive is not always the best in practice from an operational point of view.
DIY gates: drawings, photos and videos
Types of gates
Currently, there are a large number of all kinds of gates, all kinds of materials for their manufacture and special devices with which they are equipped. The most popular of them:
- Sliding gates.
- Tilt and turn gates.
- Swing gates.
- Rolling gates.
- Folding gates.
Sliding gates
Sliding gates include several varieties, including hanging and sliding structures. Each type of structure requires a large amount of free space.
Hanging gates
Suspended structures are not considered popular, since some types of cars will not be able to drive through them, since their height is limited by the upper bar. Their movement is also carried out along this bar.
Sliding gates
Sliding structures move on rails, but they are not common in northern regions with high rainfall because they will have to be constantly cleared of ice and snow.
Console gates
Cantilever gates are the most successful option among sliding structures.
Tilt and turn doors
Tilt and turn doors are a good option for garage doors. They are not suitable for the yard because they are limited by the upper beam.
Swing gates
Swing gates are well suited for owners of their own homes. The foundation of such structures lies on three pillars: two of them support the structure, and the third holds the gate.
Rolling gates
Rolling gates are a relatively new type of gate. They are folding strips that are rolled up and wound onto a base.
Among the advantages: they do not take up much space, they allow transport to come close.
Folding gates
Folding structures can be opened either upwards or sideways.
Types of structures
We will not consider specific options, but will only talk about the main types of structures from the point of view of engineering solutions.
Table. Types of gate designs
| Gate type | Description of the design, strengths and weaknesses |
| Swing | The simplest and most common design is made of wood or metal. Blind doors are used to fence areas; in public organizations, lattice doors are most often used. The latter allow you to view the enclosed space. Swing gates can be double-leaf or single-leaf. The former are much lighter and require less free space to open. For ease of use, one leaf may have an entrance gate. Design characteristics are improved through the use of special forged or stamped elements. Installation of automatic drive and remote control is possible. The disadvantage is that the width of the driveways or site features does not always make it possible to install gates of this type. |
| Sliding | More modern and complex designs are used as an addition to the fencing of prestigious buildings. When opening, the gate slides parallel to the fence, due to this, space is significantly saved; the design can work even when the car has approached the gate closely. The structure is much more complex than swing doors, they require powerful foundations, and have special elements that must be made in specialized mechanical workshops. To manufacture sliding gates, you need to have practical skills in performing various types of work, from structural calculations to welding and construction. Each stage is very important; errors can cause critical consequences. Correcting them requires a lot of time and effort. Sliding gates come in hinged and cantilever types - the former are used to a limited extent and most often in industrial and warehouse facilities. |
It is easier to make swing gates with your own hands; we will consider this option in more detail.
Drawing up a drawing
DIY swing gates (step by step)
Before you start creating a gate, you need to study the diagrams and drawings for the gate with your own hands. Even novice craftsmen can handle making swing gates. There is a lot of information and photos of gates made by yourself on the Internet. They will need:
- Boer.
- Bulgarian.
- Screwdriver.
- Welding.
- Construction tape.
This design implies a large amount of free space.
How to make a gate with a wicket?
The process of assembling swing gates with a door is exactly the same. Simply, four elements are inserted into one of the leaves to form an opening for the door. Vertical ones are installed at full height, horizontal ones between them in the form of crossbars. The doorway structure is assembled at the stage of manufacturing the frame for the sash.
Door location in gates with standard dimensions
The door itself is manufactured in exactly the same way as the gate sections, with the assembly of the frame and installation of the metal sheet. The complexity of the manufacturing process of the leaf itself, in which the door is installed, lies in the fact that the doorway remains uncovered by a sheet of metal, and the remaining planes must be closed with it. All of them will not be equal to each other, so each section must be accurately measured, transferred the dimensions to the sheet and cut them out. After which, each cut piece is transferred to the frame with spot welding around the perimeter. In this case, the laid sections of sheets must be joined on additional profiles that create rigidity of the frame structure.
Drawing of a swing garage door with a wicket
The size of the gate is selected taking into account the convenient passage through it, as well as the dimensions of the gate leaf. For example, if the leaf width is 1.5 m, then the width of the gate should not exceed 1 m. As for the height, the height of the gate and the location of the door itself relative to the lower elements of the gate frame are also taken into account. At the same time, the maximum height of the location is 40 cm. The height of the door itself is within 1.8-2.1 m.
Welded wicket for garage doors
Specifics of swing gates
To create them, push-button corner connectors are used. They hold the sashes and help them not to sag.
All fastening materials are carefully hidden, which makes them attractive and prevents the penetration of small parts into the fastening areas.
The gate shutters are held on three-section hinges, which helps to increase their service life.
Studying the diagrams on how to do it yourself, it remains to understand that the main thing in swing gates is the frame made of metal profiles. To fasten the sashes you will need electric welding.
The peculiarity of the profiled sheet is that it is not a heavy material, and two reliable loops are enough to secure it. A pipe 70-100 mm in diameter is suitable as a foundation support.
The gate is attached to the fence; if the fence is a brick wall, it is necessary to lay seams into it, to which the supports are subsequently welded.
The dimensions of such gates are: width – 3 meters, height – 2 meters. Metal pins are suitable as constipations. These pins are located at the bottom. To do this, you need to install metal pipes in the ground. The distance from the gate to the surface is 5-7cm.
Garage door design options
Depending on the method of opening and the principle of operation of the gate leaves, there are several types.
Swing
Traditional garage door format for the private sector.
The swing design is good for the following:
- Installation, building materials and fittings are several times cheaper than other types.
- They are conveniently insulated, which allows you to retain heat inside the room even in winter.
- These gates are easy to make yourself.
- Installation does not require much space.
- It is possible to install an electric motor to connect an automatic gate control system.
Make one or two leaves. They can be opened both outward and inward (at the owner’s choice).
The disadvantage is that in winter you will have to clear the entrance of snow.
Detailed instructions for installing swing gates made of corrugated sheets.
Folding (lift and turn)
In appearance, it is a solid shield made of profiled iron or steel sheet that completely covers the doorway.
When opened, the sash rises, makes a right angle turn and slides horizontally under the garage ceiling.
The operation is regulated by a system of levers, an electric motor and a gearbox.
Users note the advantages of such gates:
- reliable;
- do not take up free space;
- amenable to thermal insulation;
- are automated.
But there are also a lot of disadvantages to a lifting structure with a rotating mechanism.
- Not suitable for frequent use.
- Reduce the height of the opening by an average of 20 to 30 cm.
- Accuracy of installation is important, so you shouldn’t risk doing them yourself.
For these reasons, roll-up gates are not as popular among homeowners.
Recoil
Consist of one leaf. Fixed to the upper guide profile. They work by moving rollers along the bottom rail.
When the gate is opened mechanically (manually) or using a remote control (automation), it rolls back along the wall.
Pros:
- Sliding gates have increased burglary resistance.
- They do not take up free space during operation.
- Can be automated.
- Opening does not depend on the presence of snow on the site.
Minuses:
- A significant drawback is that the wall along which the sash slides must be wider in width than the sash itself.
- With intensive use, rapid wear of the roller set is observed.
Folding (lifting-sectional)
There are several horizontal sections connected to each other by loops. The lifting mechanism is located on the ceiling of the room.
The material of the sections is sandwich panels.
When opened, the sash rises up along guide profiles located on the sides and is fixed in a horizontal position on the ceiling.
It’s difficult to call the design simple. THIS is not the best option for a homemade gate. It is recommended to order installation from specialists.
The advantages of such doors:
- automated control system;
- neat appearance;
- sound insulation;
- thermal insulation;
- saving free space;
- long service life;
- standard opening dimensions.
Of the minuses:
- high price of materials and installation;
- poor resistance to burglary.
Sectional doors require constant maintenance, which includes lubrication of guide profiles and hinges. Periodically it is necessary to check the serviceability of the automation.
Roller shutters (roll)
This is a canvas made of many plates that form a single sash. When opened, the roller shutter is rolled into a roll, wound around the box (fixed inside or outside the room).
Roller doors are only suitable for garages with high ceilings. Often used for large premises designed for several cars.
Pros:
- Made from lightweight materials.
- Compact when folded.
- With low weight, they are durable and resistant to break-ins.
Managed manually or automatically.
The swing structure has an emergency lift function in case of power failure.
Folding (accordion)
Refers to the sectional type of gate. The parts are arranged vertically. The central parts are attached to each other with hinges, the outer parts are mounted according to the principle of swing doors - with hinges to the frame. The reinforcing fasteners are fixed along the lower and upper guides (depending on the model).
Section material:
- tree;
- light metal (aluminum);
- sandwich panels.
The accordion has an unusual shape.
Advantages:
- It is convenient to open and close.
- Each section can be repaired separately, without dismantling the entire structure.
- They won't cost much.
Flaws:
- Rapid wear of components.
- Low resistance to burglary.
Gate dimensions (we make an exact calculation)
Having studied the sketches for the gates with your own hands, you can begin choosing the material. It is better to choose metal with a thickness of 1.5-2 millimeters.
If the gate weighs less than 150 kg, it is better to take a pipe with a cross-section of 80 by 80 mm and a thickness of about 4 millimeters.
If the weight of the gate varies from 150-300 kg, then the pipe is 100 by 100 and 5 millimeters.
With a weight of more than 300 kg - 140 by 140 and a thickness of 5 millimeters.
Gate hinges must support the weight of the structure. The lock can be a mechanical or electromechanical device.
For concrete or tiled surfaces, it is better to increase the distance between the fence and the tiles to 50 mm. If grass grows under the future fence, then it is better to increase this distance to 100 mm.
Advice from professionals
Owners who want to build a garage themselves are advised to consider the following points:
- If a sheet of steel is used for sheathing, then its optimal thickness is from 2 to 5 mm.
- The average acceptable dimensions of a doorway for the entry of a light truck are 2.4 * 2.1 m, 5.4 * 2.4 m.
- The distance from the side of the car to the side must be at least 30 cm.
- The minimum opening height is 2 m.
- It is not recommended to use a padlock with external hinges.
- Regular lubrication of the hinges prevents their displacement, rod breakage, and other malfunctions.
- Having drawings of the key parts of the gate will simplify the assembly process.
- To prevent the doors from sagging, it is necessary to properly weld the cross members, reinforce the frame with metal gussets, and install spacers.
Tools and materials
Before creating any gate, be it a sliding gate with your own hands, a roller gate, a swing gate, or a garage door with your own hands, you need to think through the sketch of the future structure in great detail. It will help in the future when purchasing components and selecting tools. A typical list consists of:
- Sheathing.
- Support pipes.
- Fittings.
- Metal square.
- Primers.
- Loop.
- Espagnolette.
- Paints.
Required tools:
- Construction cord.
- Welding.
- Hammer.
- Drill.
- Bulgarian.
- Metal scissors.
What paint to paint the gate
Painting the sashes is necessary not only for beauty, but also to protect the metal from corrosion and extend its service life.
It is recommended to repeat the painting procedure once every 2 years.
Consists of the following stages:
- Cleaning welds, grinding.
- Degreasing the surface with a solvent.
- Applying primer in 1-2 layers. Drying time is a day.
- Staining of sashes. It is better to do this with a roller or spray gun. Narrow, hard-to-reach places are painted with a brush.
The list of recommended paints and varnishes is given in the article: “How to paint a metal fence.”
Step-by-step work of erecting a gate
The support pillar assembly can be made from a variety of materials. Assembly can be carried out in two ways: driving and concreting with reinforcement.
For concreting it is necessary to make a 1 meter pit. Before pouring, it is necessary to backfill 15-20 cm of sand or crushed stone. Next you need to install the supports and fill the entire structure with concrete. Allow the fill to dry for at least one week.
Learning to make gate leaves
- Prepare a drawing.
- The calculation of materials is based on the width of the structure.
- When forming the components for the frame, you need to cut off part of the pipe and grind it.
Welding work
The main rule when welding is to prevent water from getting into the joints. Otherwise, the structure will be deformed over time.
Welding of the hinges must be done to the posts and base if it is made of metal. If the pillars are brick, you need to use a channel and then electric weld the hinges.
Priming and painting gates
A primer will be needed in any case. It increases the useful life of paint. Welding seams need to be primed in the most detail. Any paint is suitable for painting gates. For a more uniform application, it is better to use a spray gun.
Photo report on the manufacture and installation of gates
This is one of the options for how to make a gate from corrugated sheets with your own hands. The technology is not the best, but not the worst either: everything has been functioning without problems for the past six years.
Hinges are welded to the installed posts of 80-80 mm, the counterparts are welded at the required distance on the vertical parts of the posts made of 40*40 mm pipe - on the right and left. We hang the posts on hinges on the post, place a layer of the required thickness between them and the posts and secure them with a clamp.
We hang the racks on the hinges welded on the posts
We measure the required height and cut off the excess, from above to the racks, not to the posts, and weld a cross member from the same pipe 40*40 mm. The quality of the welding is not important at this stage. For now, we are tackling the parts, not worrying about the thoroughness of the seam - then we will bring it to standard. The main thing is that everything is smooth and stays together. Therefore, we grab it with dots in several places.
A cross member is welded to the gate posts
We grab the pipe at the bottom in the same way.
We weld the lower pipe
Find the middle of the cross beams. From the middle in both directions we set aside 3 mm. We make clear marks. We measure the distance between the upper and lower beams, cut off two sections, and weld them along the marks (there should be a gap of 6 mm between the two vertical pipes).
We weld two vertical pipes in the middle with a gap of 6 mm
We measure the distance between the two posts of one half of the gate. They should be the same, but it is better to measure separately. Cut the pipes to the required length and clamp them at the desired height. If you need more crossbars, install them too.
Welded cross members for increased rigidity
Along the marked center with a grinder, we make through cuts at the top and bottom, dividing the gate into two halves. So very simply we got a gate that will open and close without any problems.
Divided gate halves
The gate frame is ready. We remove it, lay it on a flat horizontal surface and weld the seams well. This is where the quality of welding is important, we make sure the bath is full and try not to burn holes. We clean the finished seams, prime them, and paint them.
Having laid the sash on a flat horizontal surface, weld all the seams
Let's start assembling the support for attaching the profile sheet. To reduce the windage, it was cut into two parts, so that the sheet was not whole, but cut. To do this, we use a profiled pipe 20*20 mm. We cut it into pieces of the required length, so that it can be secured along the inner perimeter.
We cut a pipe 20*20 mm and screw it along the inner perimeter
We place them in the same plane as the outer part - the sheet will be screwed on from the inside. We fasten it with self-tapping screws, having previously drilled holes of the required diameter.
How to attach strips for corrugated sheets This is what the finished gate frame looks like
We paint the finished frame - inside with light gray paint, outside - red-brown, to match the color of the corrugated board. Leave to dry.
Painted frame
Let's start installing the profiled sheet on the gate. It is cut into a slightly smaller size than the main frame - there should be an indentation of 2-3 mm around the perimeter. They are laid on prepared supports and secured from the inside around the perimeter with self-tapping screws.
Installation of profiled sheets on gates
You can take special ones, with caps and gaskets, but they put them on regular ones.
To save money, we used ordinary metal screws. The gate is ready.
All that remains is to install the locks. You can, of course, install a lock and handle, but the quality of inexpensive ones is very low, and taking expensive ones is currently an unaffordable luxury. Therefore, bolts were welded from the remains of pipes and fittings. They definitely work under any conditions.
Homemade deadbolts
One (the top one) is mounted on self-tapping screws with a counterpart on the sash, the two lower ones are attached to the racks. Small holes are drilled in the ground in the right places, in which sections of round pipes, the diameter of which is larger than the diameter of the rod, are concreted. The gate is made using the same method, only there is a lock embedded in it.
Do-it-yourself finished gates made of corrugated sheets
With this manufacturing technology, gate leaves are guaranteed to open and close. If there were some distortions when installing the pillars, they are taken into account. When presented step-by-step, the whole process does not look complicated, but it is. If you weld all the parts separately, the geometry must be ideal, and you also have to make sure that the pipe does not move during welding. See several different technologies for making gates from corrugated sheets in the next section, where video lessons are collected.
You can make sliding gates from corrugated sheets and equip them with automation.
Photos of homemade gates
Assembly Features
In addition to the gate itself, the frame is initially installed. To make it, you need to weld 3 metal long corners, and then mount them into the garage arch.
- Ideally, they should go slightly into the ground, this will increase the reliability of the structure.
- Next, you need to weld fasteners for the gate hinges onto this frame. This is done very simply; you need to have basic welding skills and all the necessary materials.
- After this, you need to weld the hinges on the sashes, then all that remains is cosmetic work and installing them in place.
- A barn padlock can be used as a closing mechanism.
- This is the simplest option, but it is recommended to place it not on the street, but inside the garage.
- To do this, a hole is made in the sash, like a peephole in the front door. It should be of such a diameter that your hand can fit through it freely.
- On the inside of the garage there is a closed lock, with its face facing the hole.
- In this simple way, you can avoid the possibility of the lock being hacked, achieving high reliability.
A more complex option would be to install a full-fledged door lock. To do this, a frame for attaching the lock is welded on the inside of one of the doors. Next, the lock is inserted inside and secured. Holes are cut on the other flap so that the mechanism closes.
When the entire structure is assembled, it will need to be sanded and the surface degreased for further painting. It is necessary to paint in several layers with moisture-resistant paint. It is much better than usual, it will last at least 2 full seasons.
Installation
Installation of the shutters on the frame is allowed only after the concrete has completely hardened. The maximum strength gain occurs 28 days after mixing the mortar.
First you should do a trial installation. At this stage, you should ensure the evenness and strength of the structure, as well as the quality of closing and opening of the doors - they should open easily and not make any extraneous sounds, the doorway should be completely covered by the doors.
Installation of valves
Installing the shutter mechanisms is not particularly difficult.
Mounted or mortise locking devices are suitable as gate locks.
Please note that the castle will be exposed to low temperatures in winter. Cylinder mechanisms perform especially poorly in such conditions, so you should refrain from purchasing them.
The best option would be to install a lock with a lever mechanism.
Automation
Installation of automatic garage door control systems is not mandatory and is carried out only at the request of the owner.
The main component of automatic gate opening and closing is an electric drive. Its power must correspond to the force required to move the gate. Fulfillment of this condition directly affects the service life of the control system. The power reserve must be at least 30%.
The gate drive is a lever controlled by an electric motor through a gearbox. In addition to the main components, the system includes:
- signaling devices;
- photocell;
- Control block;
- lock.
According to the principle of operation, drive mechanisms are:
- linear;
- hydraulic;
- electromechanical;
- lever.
Linear actuators are the most common due to their affordable price and ease of installation. Such devices have the longest service life.
The linear mechanism allows for both external and internal opening of the door.
Gate insulation
Insulating a garage reduces heat loss in the room by up to 60%. Insulation is done from the inside. The most popular heat insulators are: penoplex, mineral and glass wool.
Before installing heat insulators, it is necessary to lath the sashes. This is done using wooden beams. The insulation sheets are laid evenly, from top to bottom, so that no gaps form between them.
After the insulation is laid, the surface of the sashes must be sheathed with a decorative coating. Lining or plywood are well suited for this. All remaining cracks should be insulated using polyurethane foam.
The thickness of the insulation is selected based on the geographical location of the object. If the garage is located in the northern regions of the country, insulation up to 15 cm thick should be used, and for the southern regions 5 cm will be sufficient.
Finishing
To protect the gate material from corrosion, extend its service life and give it an attractive appearance, the gate should be painted.
Before painting, the gate must be cleaned of dirt and degreased. When the degreaser has evaporated, the surface of the gate should be covered with 1-2 layers of primer, and when it dries, paint them.
Painting can be done using a brush, roller or spray gun.
A well-made gate will not only protect the garage and vehicle from unauthorized access, but will also prevent heat loss from the room, which will allow the vehicle to be serviced in comfortable conditions.
Making swing gates yourself and installing them is not particularly difficult, which will allow you to save a lot of money and get pleasure from the work you do yourself.