At the stage of decorating walls with wallpaper, it is very important to determine the starting point from which work will begin. The aesthetic appearance of the renovated room depends on how correctly the location of the first strip is chosen. Any room has its own nuances - various lighting sources, design features - niches, ledges, corners, window and doorways. In addition, there are certain requirements for the installation of various types of wallpaper - paper, vinyl, non-woven. Only after all the individual characteristics of a particular room and the material used are taken into account can you decide where to start gluing wallpaper. Let's consider various methods that may be suitable in a given case.
Types of wallpaper
There is a huge selection of this material. When a client comes to a hardware store to buy this product, he does not know which ones he needs. Since in the modern world the quality of this product is very diverse.
Wallpapers are:
- Vinyl;
- Paper;
- Non-woven;
- Acrylic;
- Fiberglass;
- Liquid;
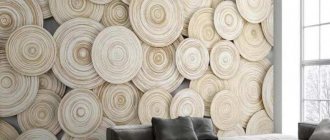
- Photo wallpaper.
Everyone will be able to choose something for themselves, the main thing is to know exactly in which room they will be used. For example, for the kitchen it is better to use washable wallpaper to make it easier to care for.
How to choose wallpaper
Before the client makes his choice in favor of a particular model, he must take into account the following features:
- Wallpaper type;
- Check the serial number of the product;
- Drawing direction;
- How to apply glue to this product;
- Light fastness indicator.
Try to take all this into account when you come to the store. Also, many stores have consultants who can help you decide on the choice of this product.
When choosing wallpaper, it is very important to take into account the area of the room in which you plan to renovate. If the room is small then there is no need to buy dark wallpaper.
They will be able to visually reduce it; it is better to purchase light wallpaper. Very often in such situations, designers advise choosing wallpaper in pink, peach, blue or beige.
You also need to take into account the color scheme of the furniture in the room where the renovation will be done.
If you have the opportunity to invite a designer to your home, he will be able to visually depict on the computer how best to decorate the room and in what color palette. Then contact the store with this design project and they will be able to choose a suitable option for you.
Room design with wallpaper: rules for choosing products for different rooms and combining them
When choosing wallpaper for a room, you must not only be guided by price and appearance, but also take into account their physical characteristics.
On a note! Finishing on a non-woven basis will not shrink after drying, and will also perfectly hide small unevenness. Another advantage of non-woven wallpaper is the ease of gluing, since according to the technology, the glue is applied only to the wall.
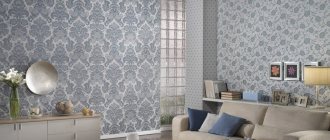
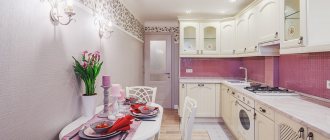
The walls of a bedroom or nursery should “breathe”, so the ideal option is paper wallpaper. Their main disadvantage is their short service life. An alternative to paper covering can be textile wallpaper, but they are much more expensive.
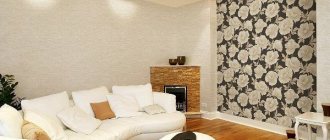
A good option for the living room is silk-screen printing. Its shiny surface will give the room respectability. The color should be chosen in accordance with the furniture; large patterns and bright colors are inappropriate here. It is better to choose calm shades.
A good option for the living room is silk-screen printing; its shiny surface will give the room respectability.
Vinyl wallpaper on a non-woven basis has increased strength and, as a rule, a water-repellent effect, so they are resistant to mechanical damage and all kinds of dirt. They can be cleaned and washed, making these products ideal for kitchens and hallways.
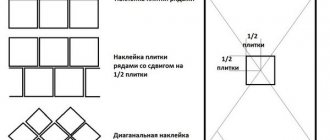
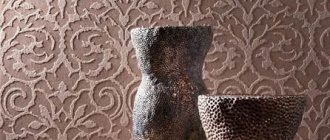
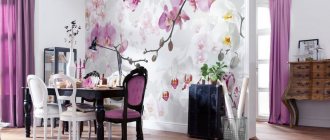
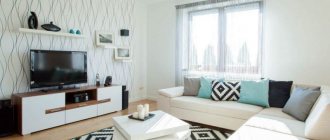
When creating a modern interior design, different wallpapers are often used in the room. Combining different coatings not only in color, but also in texture will help create a unique decor on the walls. By using different wallpapers, you can divide the room into different zones. Vertical or horizontal delimitation using companion wallpaper is also quite popular. The photos show the original version of their use in the form of inserts.
Preparing walls for gluing
After the client has purchased the necessary wallpaper, he will soon begin gluing it. To do this, you need to prepare the walls on which you will glue them.
- If you previously had wallpaper, you need to remove it.
- To do this, use a wet rag or roller.
- With their help you can easily remove old wallpaper.
- The walls also need to be cleaned of dust and try to make them even, if necessary.
If there is such an opportunity, then try to use the services of a master who will make the walls even. For this work you need to use plaster. This will allow you to level the walls. The wallpaper will look very nice on them.
Maintaining verticality in uneven corners
This is especially important if the wallpaper has a geometric pattern that must match. There is a proven method for maintaining verticality. When wallpapering, you should mark a new vertical line on each wall using the method described above. In this case, the last strip of wallpaper on one wall will overlap the first fragment on the second by several centimeters.
Tools and materials
Once you have prepared the walls, you can begin applying wallpaper.
To do this, you need to prepare everything you need for work:
- Roller;
- Putty knife;
- Pencil;
- Brush for applying glue;
- Roulette;
- Ladder;
- Table;
- Glue;
- Bucket;
- Level.
Try to purchase all this in advance so as not to be interrupted in the process of wallpapering.
It is very important to purchase quality glue. It will allow you to stick the wallpaper to the walls well and reliably. When you go to a store to buy this product, it is better to consult with a consultant so that he can help you choose the glue.
What else to pay attention to
To avoid additional problems, you need to consider the following points:
- The relationship between adjacent corners and the door.
- The location of window openings relative to each other, the entrance to the balcony.
- Placement of heating elements: pipes, radiators, etc.
- Arrangement of furniture.
- Availability of other important interior details.
If the room has a stationary cabinet that is not planned to be moved to another place in the future, you can start gluing from it, so that the junction of the strips is hidden behind it. The same applies to the furniture in the kitchen.
Step-by-step instructions for wallpapering
Before you start work, be sure to close the doors and windows, if any. This is necessary for the wallpaper to stick well and reliably.
- Then you need to cut the wallpaper, but for this you need to use a tape measure to measure the desired length, and then make a mark on the back of the wallpaper with a pencil.
- It is easier and faster to glue wallpaper that does not have a specific pattern.
- If the client nevertheless made a choice in favor of such wallpaper, then he needs to select a design during the work process. You will need to spend more time on such wallpaper.
- Wallpapering should be started in an inconspicuous place. As you work, try to apply glue to the inside of the wallpaper.
It is very important that the first sheet of wallpaper is glued evenly. Since all the work will depend on this.
From the window
The old Soviet method is still used, often, despite the ability of modern wallpaper to create a seamless finish. The method is popular because people are used to working this way, and the older generation advises the younger generation to do so.
The second reason: Soviet windows were smooth, unlike doorways or corners, the curvature of which is sometimes visible to the naked eye. Another advantage of this method: the window opening, as a rule, is deformed very slightly and is quite suitable for reference.
And one more argument in favor of the window opening. When gluing from another point, when it comes to the window, the solid canvas will most likely not fit near the opening and you will have to cut off a strip of the required width.
In addition, gluing wallpaper under the window is usually very difficult, since heating radiators are usually located there. If work starts from the window, these problems can be avoided.
Where is the best place to start wallpapering?
Each owner who will do this work on his own begins to doubt where exactly he should start gluing wallpaper. There is a huge selection of options where you can start.
These include:
- Door;
- Window;
- A certain corner in the room.
Let's take a closer look at each of these options.
It is very convenient to glue wallpaper from the door, because if there is an unevenness, then thanks to it, it will not be very noticeable.
The most common method is to wallpaper the window. This method has been used for a very long time. With the help of windows you can understand how to start gluing wallpaper smoothly. They are a guide during the work process.
Some owners start gluing from the corner, but the corners are not always perfectly straight, so the work will not be of high quality. This option can only be used if there are no windows or doors and the doorway is also not level.
Why do you need to choose a starting point?
The first strip of wallpaper should be glued as evenly as possible. All other pieces of the roll will be mounted on the wall relative to the first, in a circle. If it was installed unevenly, then at the end the joints will not meet, and everything will have to be redone. This is why it is so important to find the perfect vertical line as a guide.
In the Soviet Union, wallpaper was applied only from the window, and this is explained by several reasons. Firstly, there was not such a diverse selection of materials and textures. The wallpaper was paper, thin, and easily overlapped. This made it possible to hide unsightly thickenings. Secondly, the window line in Soviet apartments was often smoother than the door, and especially the corner.
Now the structure of the wallpaper allows them to be glued more accurately - end-to-end. Therefore, it is permissible to start from almost anywhere. The main thing is that the vertical reference line is level, then the first and last sheets will converge. The coincidence of verticals will be especially noticeable on wallpaper with a geometric pattern.
How to eliminate unevenness after gluing
It is not always possible to do the perfect job if you decide to do it yourself. It is best to use the services of a master who can hang wallpaper evenly and with high quality.
Many of you know that you will need to pay a certain amount of money for this. There are situations when the owners do not have their own money for this. So they try to do it themselves.
During the work, some problems arise, after which they need to be eliminated somehow. In this article we want to tell you in more detail what you need to pay special attention to:
- Firstly, try to immediately remove the covers from the sockets to make it easier to glue. After drying, you need to cut off everything necessary, and then put the covers in place;
- Secondly, if there are unevenness at the bottom or top of the wallpaper, then this defect can be eliminated with the help of baseboards;
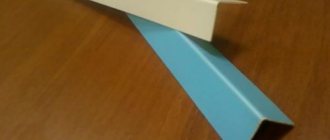
- Thirdly, if there are uneven joints at the corners, they can be hidden using plastic corners.
Try to take all this into account during the work process, after which you will enjoy the new wallpaper.
FAQ
At what temperature to glue wallpaper
Many recommendations indicate that wallpaper should be glued at a temperature of 23-25°C. However, this temperature regime can only be achieved in summer. Winter, when heating is needed, does not allow working in such conditions (in most Russian cities in winter the temperature in the apartment is 18-20°C).
So at what temperature can you wallpaper walls? Manufacturers of trellises and glue have taken this point into account and recommend finishing work at a temperature of 10-25°C. Therefore, it is not recommended to glue wallpaper in unheated rooms (dacha, veranda) in winter.
When can you open windows after pasting?
Impatient apartment owners try to quickly get rid of the smells of glue and wallpaper. But open windows mean drafts. And in drafts, the glue dries quickly and unevenly, as a result of which the adhesive mass does not have time to create the necessary adhesion to the wall. The result is that the seams come apart or the wallpaper peels off.
When can you open windows? You can open the windows after the pasted wallpaper has completely dried - after 1-3 days (the time for complete drying is usually indicated in the instructions printed on the packaging with the glue). For insurance purposes, it is better to add one day to the specified time.
What to do if the wallpaper bubbles
In practice, a situation often occurs, even among professional finishers, when minor violations of technology lead to the appearance of bubbles and air cavities on the surface of glued walls. This is both unsightly and a potential breeding ground for mold and mildew. How to get rid of bubbles on wallpaper?
Depending on the size of the lagging area, we can advise:
First, re-glue the canvas if there are very large air cavities. All attempts to fix the problem without tearing the wallpaper off the wall will be noticeable.
Secondly, for medium-sized pockets, it is also better to re-glue plain trellises (the mark of the cut will be very clearly visible). Wallpaper with a pattern is cut with a construction knife in the middle of the resulting cavity. The edges are carefully pulled away from the wall using a spatula and the adhesive mass is delivered into the resulting space using a brush. It is not necessary to coat the entire dry surface.
You can disperse the glue with a dry cloth while pressing the seam of the cut tightly. Allow the base of the trellis to soak in glue for 5-10 minutes, and then roll the lagging area with a wallpaper roller to remove excess mites and air. It should be remembered that paper wallpaper stretches from the glue and decreases in size after drying. Therefore, the edges of the cut should overlap. Vinyl and non-woven wallpapers have butt joints.
Thirdly, small bubbles are eliminated using a syringe. The needle must be taken according to the thickness of the glue - the thicker it is, the thicker the needle. The bubble is pierced in a circle, from the edges to the center, at an angle of about 30 degrees relative to the wall.
This pattern of punctures allows you to cover the entire loose surface of the wallpaper, as well as release excess adhesive mass through the punctures when smoothing the problem area. If large folds form, they need to be smoothed out. Small wrinkles will disappear on their own after the glue dries.
What to do if the wallpaper is see-through
The problem of translucent wallpaper after it has completely dried is solved in the only way - by redoing the work done. Therefore, at the preparatory stage it is necessary to try to avoid this headache:
- prime the walls with a special primer (as a last resort, whitewash them with water-based paint);
- buy thick trellises;
- check medium and thin wallpaper for transparency - place a piece of sheet on a bright spot and evaluate the degree of density.
How long does it take for wallpaper to dry?
No one will give a definite answer to this question. There are a lot of factors here. And the type of wallpaper, and the adhesive mass used, and the temperature conditions of the room, and air humidity, etc. The maximum delay is from 12 to 72 hours.
Duplex and paper-based non-woven wallpapers take the longest to dry - up to 3 days. Non-woven wallpaper on a different base (not paper) needs about a day to dry completely, vinyl wallpaper - about 48 hours.
Double-layer paper wallpaper.
You can determine the degree of drying of the pasted wall with your palm - pressing it against the wallpaper. If you feel warm - the wall is completely dry, there is a chill - you still need to wait. In passing, we note that it is strictly forbidden to speed up the drying process with heating devices.
How to glue meter-long wallpaper alone
The technique of gluing meter-long wallpaper alone does not have any special techniques that differ from the above instructions for gluing wallpaper.
Some tips from the professionals
Good quality work can be achieved if you take advice from specialists with extensive experience.
- Before starting work, the room where the work is planned is ventilated and then tightly closed for a day.
- It is better to dismantle the plinth - it can be easily removed (gluing the trellises will become faster and easier). In order not to look for the dowel holes under the wallpaper later, self-tapping screws are screwed back into them.
- It is better to cover the floor with cardboard or newsprint, but not with plastic film (on the film, glue easily gets under the wallpaper when coating the edges of the sheet, as a result of which it stains them).
- Use a stepladder. The table and trestles often leave marks on papered walls when moved to another location. In addition, it is more difficult to install the bottom of the wallpaper using them.
- Use specialized wallpaper glue - universal adhesive does not hold trellises on the wall well.
- Do not join the trellises at the corners - glue them with an overlap (1-2 cm), and then cut with a knife, forming a seam.
- Constantly dry (wash) your hands.
- Do not correct uneven cuts of wallpaper along the top and bottom of the walls. At the bottom, errors can be hidden with a plinth, at the top with a frieze or baguette.