Wallpaper is a universal finishing material, the main advantage of which is the relative ease of working with it. You can successfully handle gluing them yourself, without resorting to the help of specialists. But if you decide to transform the appearance of the room on your own, it is important to understand how to properly glue wallpaper in the corners. It is this part of the work that presents the greatest difficulty.
Required materials and tools
Before you start wallpapering, you need to prepare the following tools and material:
- Roulette;
- Level;
- Angle spatula;
- Scissors;
- Putty;
- Beacon profile, for plaster;
- Hacksaw for metal;
- Bulgarian;
- Hammer;
- Self-tapping screws and dowels;
- Screwdriver.
- Wallpaper glue
- Wallpaper glue brushes;
- Pressing spatula;
- Plumb for marking.
This list of tools should be at hand. So that during pasting you will not be distracted by searching for this or that material.
Recommendations from professionals
Questions from the topic “how to hang wallpaper” puzzle amateur craftsmen and sometimes give rise to doubts in them about the speedy and successful completion of the undertaking repairs.
Without a good understanding of all the intricacies of the pasting workflow, you can ruin the wall covering.
Not too right angles are found not only in old apartments: they are also common in new buildings. Uneven walls also often make it difficult to carry out repairs quickly and easily. Let's look at some recommendations that will help us cope with the task.
1. Avoid creases
When gluing wallpaper to the corner outer projections, you should try to do it in such a way that the wallpaper sheets fit as tightly as possible to the wall.
Professionals do not recommend gluing the entire length of the strip to the corner at once. If the joint is not very smooth (and this often happens), then the paper may bunch up in sloppy folds.
2. Maintain overhang
It is not advisable for the wallpaper to end in the very corner. It is advisable to leave a three-centimeter protrusion, which can then be carefully cut off with a knife.
This way you can achieve a more even pasting. If you purchased heavy and dense wallpaper, then when decorating the walls with it, you should use a plumb line.
3. Remove electrical accessories
Switches or sockets are often located near the joints. Remembering to turn off the electricity, remove the outer casings.
After this, you can begin the process of directly gluing the wallpaper. Then, when the glue has dried, circles with a diameter slightly smaller than the casing itself are cut out on the dry canvas with a sharp knife. After completion of the work, the fittings are returned to their place.
Preparing corners (step by step)
In most cases, the corners in apartments or houses are not straight. There are several ways to level corners; professional builders use them. Having examined them in detail, a beginner will be able to independently make the corners even.
Method No1
To make the corner even, first find the most protruding place of the adjacent wall. This can be done using a rule or a metal profile. The rule or profile is applied closely to the wall and held only in a vertical position.
Once the bulging area is found, an angle spatula is applied to it. And a profile for him. Using a plumb line, we check that the profile is strictly in a vertical position. Next, hold everything tightly and make marks for the dowels.
Next, I use a hammer drill to make holes in the wall. Install dowels. The profile is secured with self-tapping screws.
- After installing the profile, it is necessary to apply putty. Professionals recommend gypsum-based putty; it is considered the best.
- Before starting work, moisten the wall with a small layer of water. The putty should be applied using an angle trowel.
- It turns out to be a perfectly even angle; as soon as the material has dried, it is sanded with zero-grade sandpaper.
Method No. 2
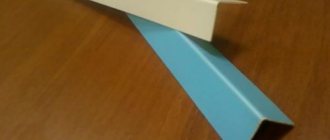
Construction stores have special perforated corners. They can be metal or plastic. A special mesh is attached to the edges of such corners.
This corner is attached strictly vertically. It is fixed with putty. After drying, it is rubbed with sandpaper.
These methods will allow you to quickly and efficiently level the corners in your apartment. This will allow you to easily and efficiently paste the wallpaper.
Preparatory activities
Before you start wallpapering, you need to pay attention to the surface of the walls and the condition of the corners. Ideally, they should be leveled using putty. After it has dried, you need to go over the layer with sandpaper, achieving maximum smoothness. It is necessary to apply a primer to the surface and wait until it dries completely. These works will simplify the gluing process and improve the quality of the result.
How to properly glue wallpaper in corners (instructions)
There are two types of angles:
- External corners;
- Internal corners.
The method of pasting them depends on the type of corners. Let's look at each method in more detail:
External corners
They are quite rare. Let's consider the algorithm for pasting external corners:
- It is necessary to prepare the wallpaper so that it goes around the corner a couple of centimeters;
- Coat the wall and wallpaper with glue;
- We glue the wallpaper and level it with a special spatula to remove folds and expel air;
- Let's fold the wallpaper to the other side of the corner;
- When folds form at the corner, cuts can be made;
- The next strip needs to be glued overlapping;
- Cut the middle of the joined sheets, so the joint will be perfectly even.
Internal corners
It is customary to glue the internal corners with an overlap. Let's consider the algorithm:
- Let's pre-prepare the wallpaper. The width of the first sheet should be greater than the width of the wall, in the place where it will connect with another sheet of wallpaper.
- Glue the first sheet;
- A line is drawn on the strip at a distance of 5 centimeters;
- Let's start gluing the second sheet. It must match the previous one. Their junction should not be noticeable.
Procedure
The first 2-3 glued canvases help you get used to the process and understand the technique. Then the work goes faster, easier, until it comes to the next corner.
External
On the outer corners (these are the ones that are “convex”) you will have to slow down. The process of gluing external corners is very painstaking and takes place in several stages .
- First you need to measure the distance from the corner to the last glued strip and add 2.5 cm to the resulting value. For accuracy, it is better to measure both from above and from below, since perfectly even corners are very rare.
- After taking the measurements, you need to cut a strip of wallpaper of the required width and glue it.
AdviceFirst you need to carefully press the wide part of the canvas, and the remaining 2.5 cm overlap - this part is pressed last.
- The next strip will be glued strictly from the corner, and the existing 2.5 cm from the previous strip will be “hidden” under it: this way you can hide the unevenness.
Below is a visual video of work on the outer corners:
Domestic
Internal corners are insidious in that with the wrong technique, instead of an even transition, you get a curved line full of bubbles, dents, and crooked creases. Therefore, they are pasted over like this:
- The distance from the last canvas to the corner is measured. 1-2 cm is added to the obtained value.
- The next canvas is measured in accordance with the resulting width and carefully cut along a pre-drawn vertical line on the reverse side.
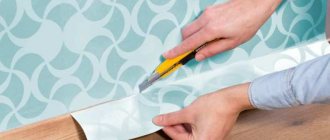
- The canvas is carefully applied to the wall, carefully greased with glue. It needs to be pressed well with a roller, spatula or improvised means to prevent bubbles from forming (how to remove bubbles on wallpaper?).
The 1-2 cm added during measurements will appear on the adjacent wall . They need to be cut off slowly and very carefully with a sharp construction knife, holding the fresh canvas with a spatula. The main thing in this matter is not to rush.
Below is a video about working with an internal corner:
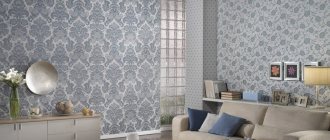
Pasting wallpaper with a pattern
Wallpaper without a pattern does not require adjustment; it matches perfectly. But wallpaper with a pattern needs to be adjusted so that everything looks neat and even.
If the walls are not perfectly smooth, then you should give preference to wallpaper with small patterns. As well as the relief texture, it will help hide defects.
You can also cover one wall with wallpaper with a pattern, and the other with a single color; of course, the wallpaper should be in harmony with each other.
Wallpapers with bright and colorful patterns are always in demand. Such wallpaper requires adjustment. It is worth considering that the consumption of such wallpaper will be quite large. How to glue wallpaper with a pattern in the corners?
- Let's unpack several rolls of wallpaper at once and arrange them in a row, this will allow you to find out how to place the pattern on the wall;
- On the floor, join the wallpaper together. You also need to number them, for convenience, this will prevent you from getting confused when pasting;
- Pasting begins from the corner, bringing the edge slightly onto the adjacent wall;
- Next, glue the next piece of fabric; if the angles are even, the pattern will match perfectly.
Criteria for choosing wallpaper for uneven walls and corners
If there is no desire or opportunity to level the base, you need to be more careful in selecting wallpaper.
- The material for curved surfaces should be loose, so that those joints at which the overlapping strips will have to be glued are not noticeable. Non-woven fabrics work well.
- The pattern should be small and frequent or completely absent.
- The unevenness of the walls will help hide the material with a relief structure.
- For heavily damaged surfaces, paintable fiberglass wallpaper is suitable.
Working with uneven corners
Sometimes it is not possible to make the corners even, due to lack of funds or time. The question arises: how to hang wallpaper if the corner is not level? Is it possible to hide this somehow?
There are some recommendations:
- Wallpaper should be purchased in neutral colors, preferably without a pattern, or with a pattern that does not need to be adjusted;
- It is best to choose non-woven wallpaper; they hide minor wall defects well;
- Use the following trick - glue the wallpaper in two layers in the corner.
Other nuances of pasting corners
Every master in any field of activity always has his own little secrets. Wallpapering corners is no exception. It also has its own secrets.
- If the wall deviates significantly from the vertical, more than 2 cm, you should buy wallpaper without a pattern or with a pattern that does not require careful adjustment - a crooked angle will skew the pattern and spoil the effect of the repair.
- The corners must be primed to enhance the adhesion of the wallpaper glue to the wall - the lag of the trellises usually begins in the corners. If the primer was not applied over the entire surface of the walls, then instead of primer in the corners, you can use water-based paint or wallpaper glue, which is spread 4-5 hours before starting work.
- Glue in the corners must be applied only with a brush - the roller allows gaps (does not coat the entire surface), which will negatively affect the quality of the pasting.
- Before gluing the main panel, it is advisable to glue the corner with a strip of wallpaper 10 cm wide (the recommendation applies to smooth wallpaper). This will hide the unraveling seam and strengthen the trellises from tearing. Professionals often use Cobweb painting fiberglass instead of a paper strip.
- For heavy or thick wallpaper in the corners, you must use a special transparent adhesive.
- Non-woven wallpaper most effectively hides uneven corners.
- When folds form, while smoothing out a strip of wallpaper that has reached the other side of the wall, the spade needs to be trimmed in a herringbone pattern, which will allow it to be leveled. The next sheet glued overlapping will hide the cuts made.
- Ironing the trellises in the corners is carried out until the air cavities disappear - the sheet of wallpaper should fit snugly against the wall and not hang in the air.
- After removing the scraps formed after cutting the seam, the edges of the sheets are carefully moved away from the wall with a metal spatula and coated with glue. If this is not done, the edge of the wallpaper under which the cut strip was located will definitely fall behind - almost all the adhesive mass is removed with the strip.
Useful tips
Before gluing wallpaper, you need to treat the walls with a primer, paying special attention to the corners;
- In corners, glue should be applied carefully and only using a brush;
- The wallpaper should be smoothed until all the wrinkles and all the air disappear;
- Sometimes you should carefully push back the edges of the wallpaper and coat it with glue again so that the wallpaper does not come off in the future;
- It is best to use clear glue;
- You should select an adhesive that matches the wallpaper.
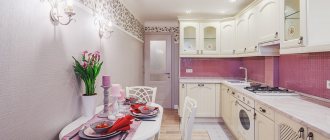
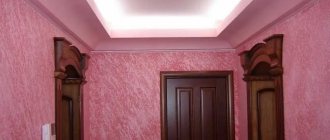
It is quite possible to create an unusual interior using wallpaper. There is a huge selection of textures and colors.
But high-quality wallpapering plays an important role. Before you start work, you should study all the nuances, this will allow you to do everything efficiently and accurately. Beautifully pasted external and internal corners will always please the eye.
Types of wallpaper - choosing the latest materials
Paper wallpaper is an eternal renovation classic. Their unfading popularity is due to two factors - low cost and wide range. However, it should be understood that rolls of paper, no matter how beautifully decorated they are, remain a very short-lived material, and there is no point in gluing them in the hope of a long service life.
In just a year or two they will lose their former attractiveness, and if there are small children or animals in the house, this process can speed up significantly. However, this minus can be used to your advantage in cases where you need to make light cosmetic repairs in a rented apartment, or when you like to experiment with the interior.
Paper-based vinyl wallpaper is a more durable finishing option. The front side, which bears the bulk of all operational loads, in this case is performed by a layer of polyvinyl chloride. And he has a lot of positive qualities:
- it can be washed repeatedly, even with the use of detergents;
- foamed vinyl can be painted up to 10 times;
- vinyl does not fade, does not allow moisture to pass through;
- the decorative effect in the case of silk-screen printing or thick wallpaper (varieties of vinyl) is comparable to the most expensive finishing materials.
Paper-based vinyl wallpaper lasts much longer. Among the disadvantages, you should remember about the airtightness of vinyl; however, if you wish, you can find more modern types of finishes on the market that do not have this problem. Vinyl rolls on a paper base are glued in the same way as regular paper wallpaper, so for most people it will not be difficult to glue the canvases without special preparation.
Just keep in mind that the vinyl layer significantly increases the weight of the canvas, therefore, ordinary wallpaper glue will not work here; you need glue for heavy wallpaper.
Vinyl wallpaper on a non-woven base is an elite type of finish, which is particularly durable due to the non-woven material used as a lining for the vinyl. Interlining is an advanced paper that consists of modified cellulose fibers. It is tear-resistant, does not absorb moisture, and does not shrink, which means that such wallpaper can be glued end to end. Actually, the technology for gluing such canvases is fundamentally different from gluing paper wallpaper and takes significantly less time.
Photo of perfect wallpapering in the corners
What equipment will you need for your work?
If you hire experienced workers to complete the work, you will have to spend about the same amount on services as on material. You can save money by gluing yourself, but you will have to familiarize yourself with the process of performing the work and everything necessary.
Seamless wallpapering Joining plain wallpaper
Inventory:
- wallpaper;
- wallpaper cutting knife;
- glue;
- glue bucket;
- brushes of different widths for applying glue to wallpaper;
- wallpaper spatula;
- plumb line
You can start working on wall coverings only if you have all of the above.
Joining wallpaper with window casing
How to join wallpaper from different materials
To obtain a connecting seam of impeccable quality, you need to study the technical characteristics of wallpaper products. And carry out technological operations taking them into account.
Non-woven
Based on mineral fibers. Their inner side is treated with an adhesive compound. The glue is applied only to the wall surface 15 minutes before gluing. They do not stretch or shrink after drying. The corners are covered with them end to end.
Vinyl
Both the panels and the wall surface are treated with an adhesive composition. Additionally, the joint area is coated with a narrow brush. You need to smooth them out with force. When gluing with an overlap, use a utility knife to cut through both layers of overlap.
Paper
Products with minimal thickness. They need to be glued immediately after spreading the glue, avoiding swelling. The overlap is almost invisible. And it doesn't have to be cut off.
Photo wallpaper
Consist of separate fragments. Each fragment is bordered by a white stripe. It must be cut before gluing. Mark the areas where the fragments will be located on the wall. They need to be glued end to end, following the sequence (indicated on the roll label). You can pre-assemble a photographic image on the floor.
Liquid
They differ from ordinary ones in that they do not require joining, adjustment of texture and pattern. “Sit down” evenly in the inner corners. Carefully go around the outer ones. Masks the curvature of the surface.
Work algorithm
The following algorithm will help you learn how to do the job correctly.
- Pasting the wall should begin with a vertical line drawn using a plumb line. It should be at a distance of 15 cm from the corner.
- Stripes can be cut immediately, but only if the wallpaper does not have a pattern.
- Prepare the glue required for the day of work. Excess glue may deteriorate the next day.
- Cut the fabric, leaving a little margin.
- Place the wallpaper with its front side facing the table and apply glue. After this, the fabric must be folded with the edges toward the center and allowed to soak.
- Start gluing from the ceiling, moving towards the bottom of the canvas. Use a spatula to expel the air from the center to the edges. Remove excess glue with a damp cloth.
- The new fabric must be glued joint-to-joint in relation to the previous one. This technique will help to avoid curvature and discrepancies in patterns.
- After the wallpaper has been joined, it must be carefully passed with a spatula.
After pasting is completed, it is necessary to maintain air humidity and a stable temperature in the room. Otherwise, the joints may begin to peel off.
Joining wallpaper on the ceiling
conclusions
The price of high-quality wallpaper treatment of corners is neither more nor less, but the quality of the entire work. Therefore, approach this task with the utmost care and with a cool head - precise calculation, trimming, control verticals, one side with an allowance, let it dry, the other, trim.
Of course, the matter requires training. This means that start with corners that are not yet so significant, which will still be almost closed. Be sure to watch the additional video in this article, it will help you with advice in difficult times.
Sources
- https://roomester.ru/dekor/steny/kak-kleit-oboi-v-uglah.html
- https://www.spets-stroy-portal.ru/doma-i-dachi/kak-kleit-flizelinovye-oboi-v-uglah-instrukcija-po-montazhu.html
- https://J.Etagi.com/ps/kak-kleit-oboi-v-uglah-komnaty/
- https://bouw.ru/article/kak-kleity-flizelinovie-oboi-v-uglah
- https://2proraba.com/steny/oboi/kak-kleit-ugly-oboyami-na-flizelinovoj-osnove.html
- https://prorab.guru/kvartira/uchimsya-kleit-flizelinovyie-oboi-v-uglah.html
- https://okcomfort.com/steny/oboi/kak-kleit-v-uglah.html
- https://dekoriko.ru/nastennye-pokrytiya/oboi/kak-kleit-v-uglah/
- https://diz-kitchen.ru/%F0%9F%A4%A6%E2%80%8D%E2%99%82remont/kak-kleit-oboi-v-uglax-komnaty.html
7 131
Docking options
There is no clear answer to the question: which docking is best. Each method depends on the type of wallpaper, its design, as well as the manufacturer’s recommendations. Let's look at some methods for joining wallpaper.
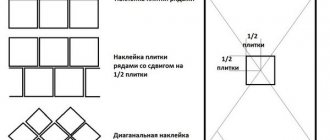
Straight
This type of joining involves combining patterns at the same height.
It is used for those types of wallpaper in which the pattern in each roll starts from one place and is evenly distributed over the entire area of the roll. If your wallpaper shows two arrows pointing towards each other, then this indicates a direct connection . The number indicated there indicates the interval in which the pattern is repeated. That is, if the number 64 is indicated, then this means the pattern is repeated every 64 centimeters. It also follows that for a wall 250 centimeters high, you need to cut 256 centimeter panels and remove the excess part.
Displaced
This joining involves shifting the pattern of the next strip by exactly half (relative to the pattern of the previous section of wallpaper). This mechanism resembles a chessboard, where each cell is offset relative to its neighbor.
free
In this case, there is no need to combine the details of the patterns relative to each other - you can do this arbitrarily. It is allowed to cut the wallpaper in any combination, without taking into account the visual component.
Combination of materials of different colors
When it comes to wallpaper of different colors, here you can fantasize and experiment. You are given a choice: follow the instructions, or rely on your own taste. However, you must take into account that a transition element is needed that will soften the color gap . In this case, you can use planks, baguettes or braids, but you need to select a transition element of the color that would be in harmony between two adjacent canvases.
Attention
Attention! We are only talking about wallpaper of different colors, but not different types and thicknesses - they must be identical. Joining wallpapers of different textures and thicknesses is not advisable.
What to consider before starting work
Before wallpapering, you need to carefully prepare the wall. If there are irregularities on it, then imperfections at the joints of the canvases are inevitable. The wall must be puttied, sanded and primed.
Without a primer, there is a lot of dust on the wall, which absorbs the glue and prevents a good connection with the wallpaper. It is preferable to apply the solution one day before the planned work.
To prevent problems with wallpaper joints, you should apply the glue correctly. Its excess or deficiency leads to unpleasant consequences. If the glue layer is too thick, it will take a long time to dry.
The surface must be prepared before wallpapering.
If glue is applied to wallpaper, then you should fold the strip into an envelope and run over it with a rubber roller to distribute it evenly. The procedure must be repeated after placing the wallpaper on the wall.
When purchasing, it is best to pay attention to wallpapers with a large width. This way there will be fewer joints, and it will be possible to disguise them with furniture and accessories.