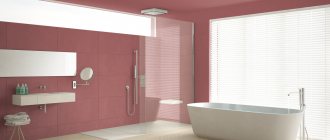
What finishing material should you choose for bathroom walls? Most will answer that the best option is ceramic tiles. But this type of finishing is quite expensive. If the renovation budget is limited, it is worth choosing more affordable, but equally moisture-resistant materials. For example, MDF panels for the bathroom. Such repairs will cost much less, especially since the panels can be installed yourself.
MDF panels are a universal material that is suitable for renovation of any premises. Since the range of panels and their colors is very diverse, you can easily choose the material for finishing living rooms or office premises. And moisture resistance and resistance to temperature changes allows us to recommend MDF panels for the bathroom or kitchen.
What kind of material is this?
The manufacturing technology of MDF boards consists of pressing finely dispersed chips under conditions of high temperature and pressure. When wood is heated, an organic binder is released from it - lignin, that is, substances such as phenol and epoxy resins are not used in the production process.
Essentially, MDF is a medium-density fiberboard.
conclusions
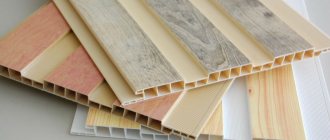
MDF boards for the bathroom are a universal material. Some manufacturers additionally cover panels or facades with polyvinyl chloride film, as a result they can achieve the effect of a laminated surface. Here is about laminated wall panels.
Thanks to this, slabs can be produced in any color or shade, up to a complete repetition of the structure and texture of natural wood .
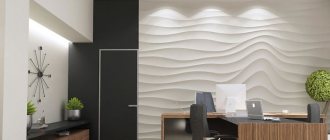
Laminated wall panels for interior decoration are several times more expensive, not to mention 3D panels, which are the most expensive.
And at the same time, natural wood does not react well with moisture, it begins to deform, rot, and smell unpleasant, but laminated MDF panels do not absorb moisture, so they will last you quite a long time.
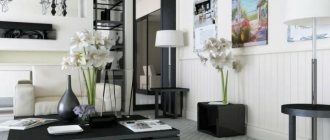
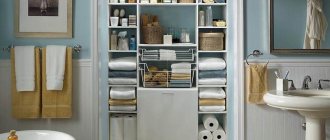
If you don’t know what furniture to choose for the bathroom, after reading this article you will certainly make the right choice in favor of high quality and affordable prices.
Advantages of MDF panels
Wall panels made from MDF have a number of undeniable advantages:
- Versatility. The material is suitable for finishing not only walls, but also ceilings. The panels can be used in almost any room.
- Attractive appearance. The variety of panel designs allows you to choose the material for interior design in any style.
- Simplest care. The walls on which the panels are installed do not require special care. To remove dust, it is enough to occasionally wipe the walls with a damp sponge, and to remove stains, you can use detergents.
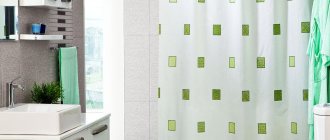
Advice! It is necessary to take into account that the panels are moisture-resistant, but not waterproof, that is, they tolerate the action of humid air well, but do not tolerate direct contact with water, so you should not install them near the bathtub and sink.
- Simplest installation. To install the panels, you will not need to level the walls; even the old finish, provided that it holds tightly, does not need to be removed.
- Economical. The low cost of panels and components, as well as the ability to carry out repairs yourself, provides significant cost savings.
Preparing the base
So, if you decide to install the panels yourself, then, as mentioned above, this work is not difficult, but there are still some nuances and features. The first step is to prepare the base of the walls in the bathroom.
For this:
- Wallpaper, if any, should be torn off. In those places where they peel badly, you can leave them.
- Cover the surface with a primer (since the bathroom has very high humidity, in our case this is necessary). The primer will help prevent the appearance of mold and its spread.
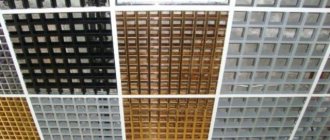
Types of MDF panels
When choosing moisture-resistant MDF panels for bathroom walls, you should pay attention to the fact that this material is available in several versions:
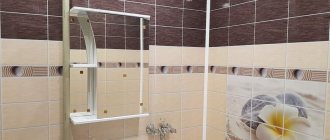
- Rack panels. These are narrow (13-28 cm) and long (2.5 - 3.8 m) elements with a thickness of 8-14 mm. These bathroom panels are most often chosen.
- Tile panels. This material is produced in the form of squares, so it is convenient to lay out various patterns and designs from such panels. The sizes of the tiles can be different, most often there are squares with a side length from 30 to 98 cm.
- Sheet panels. These are large elements measuring 1.25 by 2.5 meters. The thickness of the sheets can be from 3 to 7 mm.
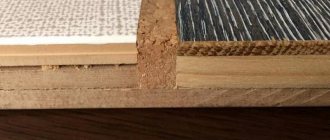
Fiberboard as a budget option for covering walls
If this material is inferior in density to MDF, it is only slightly, and only because the fractions used in the manufacture of fiberboards are quite large. However, the use of synthetic resins, paraffin and rosin in combination with hot pressing under high pressure makes it possible to obtain moisture-resistant and, most importantly, durable panels. In a mixture of wood fibers, coniferous species sometimes predominate, which significantly increases the material’s resistance to water after pressing at high temperatures, when the resins are partially released from the fractions. To obtain a particularly durable class of panels, additional impregnation with pectol - tall oil - is used, which also increases moisture resistance.
Features of installation of MDF panels
Moisture-resistant wall panels are usually installed on a sheathing assembled from a metal profile.
Preparation of materials and tools
You should start by purchasing materials. How many panels will be needed? The calculation is not difficult, you need to measure the width of the room (since the panels are produced up to 3.8 meters long, they will fit in height to a room of any size) and find out the width of the panels. After simple calculations, you will know how many pieces will need to be purchased.
Finishing corners will be required for finishing. This part consists of two fiberboard strips, laid parallel and fastened on one side with a film in the color of the panels. Thanks to this design, the corners are universal; they can be bent both outward and inward.
Advice! Such corners are very convenient if you have to work with non-standard, that is, indirect angles.
To attach the panels to the frame, you will need small self-tapping screws (builders call them “bugs”, “fleas” or “seeds”). And to attach the profile to the wall you will need dowels. The sheathing will be constructed from a metal profile. In addition, you will need the following set of tools:
- Hammer.
- Screwdriver.
- Roulette.
- Level.
- Plumb.
- Pencil or marker.
Advice! If electrical wiring will run under the panels, then it will be necessary to purchase a special protective corrugation for the wires.
Preparing the walls
In principle, when renovating premises, no special preparation of the walls is required; you just need to remove the old coating that is falling off and remove the crumbling places in the plaster layer. But since the bathroom is a specific room, the requirements for renovation technology are somewhat different.
It is still recommended to remove the existing decorative coating in the bathroom. The fact is that it is under the tiles or wallpaper that there may be a “mycelium” of mold fungi. To destroy it, you need to remove the coating and treat the infected area with an antiseptic solution.
Next, you need to apply 2-3 layers of special antifungal primer to the walls. This protective measure will prevent the formation of mold and prevent premature destruction of the walls. If necessary, you can cover the walls with insulating material made from polyethylene foam.
Construction of sheathing
At the first stage, markings should be made, indicating the places where the profiles are attached. It must be remembered that if the panels are planned to be mounted parallel to the ceiling, then the profile should be positioned vertically and, accordingly, vice versa. According to the completed markings, the profile is attached, each time checking with a level that they are correctly positioned. The optimal profile spacing is 40 cm, maximum is 50.
Paneling
- Installation of an MDF panel for a bathroom starts from the corner of the room. It needs to be measured and cut to height, not forgetting to leave a gap of 2 mm.
- Place the panel against the wall, also 2 mm away from the corner, and secure it on both sides.
- All panels are connected according to the “groove-tenon” principle; the first panel is placed so that this “tenon” is directed into the corner. The panel is screwed to the frame slats using self-tapping screws.
Advice! It is advisable to make the holes for the screws in advance and countersink them for the caps.
- Self-tapping screws should be screwed at a distance of 10-15 mm from the edge of the panel strip. This is the optimal distance, since if you screw the screws into the very edge of the panel, it may crack, and if you step back too far, the corner will not cover the attachment point.
- From the side where the groove is located, the panel is fixed to the slats using clamps - fastening clips. The kleimer is put on the side of the groove that faces the wall and secured to the sheathing slats.
- The second and subsequent panels are easier to install, since they are simply inserted into the groove of the previous one, and on the opposite side, each panel is secured with clamps, as described above.
- It is extremely rare for the last panel to fit perfectly in width. Most likely, it will have to be cut to fit. The last panel is no longer fastened with clamps; like the first, it is screwed with self-tapping screws in the corner; the fastening point will then be covered with a corner.
- Universal corners are installed when all the walls are covered with panels. They are attached with glue. If it is necessary to join the corners, they are cut at an angle of 45 degrees; they are easy to cut; you can use a paint knife or metal scissors.
- To glue the corners, it is convenient to use “Liquid Nails”; the adhesive should not be applied in a too thick layer. First, you just need to attach the corner to the place where it is installed. This is done so that the glue is on both surfaces. Then, after waiting for 3-5 minutes, you need to press the corner firmly against the wall, since the strength of the gluing will depend on this.
- If, despite precautions, the adhesive composition comes out, you should not try to remove it immediately. The fact is that if you rub with a dry cloth, the glue will only smear, forming an unsightly stain. The best solution is to wait until the glue has completely hardened, and then try to carefully cut off the frozen drop with a knife.
So, moisture-resistant MDF panels for bathroom walls are an excellent finishing option that you can easily do yourself.
Installation without sheathing
If you need to save bathroom space, you can attach moisture-resistant panels directly to the surface. However, for this the walls must be perfectly smooth. The stages of work are as follows:
Preparation of tools and materials. In addition to MDF panels, the calculation of which is carried out according to the same principle as in the previous case, you will need glue (do not forget: it must also be moisture resistant), a tape measure, a plumb line, a level, putty and cement mortar for treating the walls. It is better to first keep the panels at room temperature for about two days, then cut them into pieces of the required length and make holes for lamps and sockets. It is advisable to treat all edges with sealant.
- Surface preparation. This stage must be taken very seriously: unevenness must be carefully eliminated in order to obtain smooth walls as a result. The surface is well cleaned, dried and primed.
- Facing. The adhesive composition should be applied using a spatula to the panels in thin strips at a distance of approximately 5-10 cm or in a zigzag pattern. Then the panels are applied to the wall and pressed. In this way, all the material is gradually assembled, which, after completion of the work, is wiped and treated with an antistatic agent.
Tip: when using adhesives, a problem that often arises is their excess. As a result, glue gets onto the surface of the slabs, but you can’t wipe it off right away: the paint may be damaged. It's better to wait until it hardens and cut off the excess with a knife.
Thus, decorating walls with MDF panels is an excellent and very simple way to get a magnificent bathroom that will delight you with its bright design for a long time.
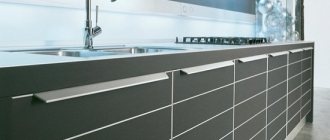
How reliable are chipboards as bathroom cladding?
This material is the cheapest in comparison with the other two wood-fiber materials discussed earlier. However, its strength qualities are the lowest, although here too there is a division into separate classes. In particular, for environmental safety, you should choose panels produced according to the E1 standard; their formaldehyde emissions are insignificant, acceptable even for the production of children's furniture. In Europe, these types of slabs are currently produced for the most part.
Suitable for bathroom chipboards
However, the E2 standard is not yet prohibited everywhere, and it is very easy to confuse panels of these two classes in appearance.
Therefore, it is advisable to check the product certificate before purchasing, since in the bathroom with little ventilation, the effect of formaldehyde on the body will be especially strong. Water resistance is the second and no less important requirement when using such panels for bathroom cladding. In this regard, chipboard is much worse than fiberboard and MDF, since the structure is looser. The best indicator for standard wood-based sheets is 20% moisture absorption, and the average is 30%. But this value can only be achieved when the chipboard is completely immersed in water; in general, swelling is less critical.
There are certain brands of class P-A, in which moisture absorption does not exceed 5%. These are materials with a particularly high density (about 750 kg/m2), covered with laminate and, often, varnish, but their cost can be the same as conventional waterproof MDF panels. Attention! Chipboards with the highest water resistance ratings are usually painted green, making them easy to recognize when purchasing.