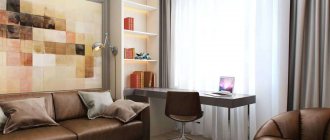
When creating a preliminary interior plan or layout, simple paper figures - origami - are often used. In addition, you can use the techniques presented below to create toys for children. Every child wants to have a dollhouse, furnished with the same interior items as the apartment in which he lives. Diagrams, step-by-step instructions, videos will help you make paper furniture for a dollhouse. Moreover, origami furniture is a fairly budget option that does not require large financial and time expenditures.
In order to make products, you do not need special technical skills or enormous effort, you just need to follow the proposed step-by-step instructions. Making furniture for a dollhouse or for constructing models of a future interior is an exciting activity that can bring the whole family together at one table.
Making furniture from paper
If it is not possible to buy ready-made doll furniture, you can make it from paper. How to make a chair out of paper so that it is strong and does not immediately wrinkle? Roll the paper into tubes! Craftsmen have long been weaving anything from newspaper tubes. Sets for dolls will be no exception. Weaving patterns can be found on the Internet
. Such items will decorate the house and look very cozy. In addition, they will be quite durable if painted or coated with several layers of varnish.
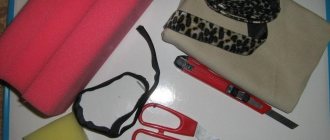
To make paper furniture you will need:
You need to roll thin tubes out of paper. This can be done using a knitting needle. They should dry well. Then the tubes need to be glued lengthwise using glue. It is better to use a hot gun, so the connection will be stronger and the paper will not get wet.
In this way, small blocks (walls) are glued together, which are then connected to each other. They are easy to cut into the desired pieces. For better fastening, you can use wire or thread.
Then shelves and doors are made in the same way.
. The doors need to be secured with tape or wire.
The legs and arms are made from the same tubes, rolled into a roll. The edge needs to be glued with hot glue.
Step-by-step instructions for making a table
To make the table, you can use cardboard from various packages; the presence of old bends on the planes does not have a negative effect.
Step 1. Prepare the table parts. You need to cut out the following elements:
- four legs 74x37 cm each;
Leg details - two tabletops 65x55 cm each;
Table top details - two rear walls 30x60 cm each;
Two back walls - approximately one hundred pieces of strips for internal filling, part dimensions 3x55 cm.
Internal filling details
The sizes are approximate, everyone can adjust them to their own needs.
Step 2. Using PVA glue, glue the cut strips in pairs. We have already mentioned that cardboard loses strength as humidity increases; while the glue dries, do not press the strips with a weight, but fix their position with paper masking tape.
Cut strips Glue
Gluing parts Fixing with paper masking tape
Step 3. With a stronger glue or the same PVA, after drying, glue the strips again in pairs. You should end up with fairly thick pieces, each consisting of four pieces.
Application of Titan glue
Gluing paired workpieces
Step 4. Apply glue to the ends of the planks and secure them around the perimeter of the tabletop. Make sure that they are positioned strictly in a vertical position. If there are problems with the length, fix them with a sharp knife.
Gluing the end All four ends are glued
Step 5. Start strengthening the countertop. To do this, glue the strips at a distance of 10 cm, you will need 4 pieces in total. The planks are double, they work well against fractures along the width.
Applying hot glue to the end of the part
Gluing the stiffener And another stiffener
Practical advice. For fixation, it is recommended to use hot glue; it can be applied in a thick layer and not spread.
Due to this, the problem areas of the planks are leveled - the cut is not perfectly smooth, but has many small indentations. Ordinary glue is too liquid and cannot completely fill all the irregularities; it spreads and the recesses are exposed. If there is not enough length, you can use small pieces as spacers.
Step 6. Glue short strips in the shape of a honeycomb to the tabletop; they will significantly increase the strength of the table; quite heavy objects can be placed on it. Take your time, try to make the honeycombs symmetrical.
Jumpers
The jumpers should be glued to the cardboard not at several points, but along the entire cut line. The quality and effectiveness of such actions largely depends on this. First, lay out the pieces dry, adjust all the parts to length, and only then glue the elements one by one.
Step 7. Using a special glue for polymers, fix the top of the tabletop, attach it with masking tape and leave it for about a day to harden.
Applying glue to all stiffeners
Gluing the second tabletop piece
Step 8. Finish the outer surfaces of the tabletop with self-adhesive decorative polyethylene film. In our case, we use a film with imitation of natural marble. The tabletop is ready, you can make other details.
Parts are decorated with self-adhesive film
Preparing the legs and crossbar
They are made using the same algorithm as the tabletop. After drying, the front surfaces are also covered with film.
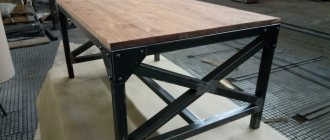
The final stage is assembling the parts into one structure. It is better to use hot glue; it has high adhesion parameters to surfaces. In addition, the mass hardens very quickly; there are no problems with fixing individual parts for a long period of time. Now all that remains is to firmly glue all the elements and the table is ready for use.
Assembling parts into one structure using hot glue The jumper between the bases of the table is glued horizontally Applying glue to fix the table top The finished table is made of cardboard
Stages of making a paper chair with your own hands.
Let's look at creating a paper chair step by step.
This option is quite difficult to implement and may not work the first time.
Read and repeat the following steps carefully:
Take a square piece of paper and fold it diagonally twice. At the same time, return the sheet to its original position each time.
It is important to make the diagonals visible. Next you need to get a horizontal fold line. To do this, we also bend the sheet and immediately return it to its unbent form. We take the sides and connect them to each other so that we get a triangle. Bend the left edge and direct it to the center
This is a kind of mark at the bottom of the triangle. We direct the right tip towards the resulting mark, and then tilt it downwards. We bend the lower part twice so that the product is thinner. We bend a small corner in half and direct it to the left side. Next we straighten it. You need to insert some thin object into the corner. Then we straighten the corner and see a part that is very similar in appearance to the leg of the future chair. Next you should make another leg. In exactly the same way, we get a small but noticeable mark and bend the right side to the center. And we bend the left corner to the right side towards the mark and bend the corner back and down. Then the lower part must be bent in half. We repeat all the steps for the second leg in the same sequence. As a result of the work done, the chair already has two supports. Let's start making the third support. We tilt the second part of the right corner to the left. We tilt the bottom corner back up to the vertical line. We bend the left side towards the right, and point the bottom corner up. We open it, straighten it and get a small triangle-shaped figure. We bend it in half and get the third leg of the craft. The fourth support can be made using a similar and already proven technology as the previous one. Bend the sharp corners of each leg upward. We make the back of the product. To do this, bend the top of the workpiece back in the opposite direction.
DIY doll chair
When making one of the dolls, I ran into a problem: what should I put it on? I wandered around the Internet for several days, but never found anything suitable. I had to invent my own way of making a high chair from what was at hand. First you need to decide on the sizes. Personally, I didn’t draw any sketches, I just took the doll and started placing it on all the boxes and boxes in the house. I determined empirically that I needed a high chair with a height of 7.5 cm and a seat of 9x9 cm.
I cut out 10 squares measuring 10x10 cm from thin cardboard (sold in stationery stores), glued them with PVA and put them under a press until completely dry.
Using a breadboard knife and a metal ruler, I cut strips of paper. I think you can use any paper, but I used an advertising magazine.
We grease the strips with PVA glue and wrap them around plastic tubes, trying to give the legs the same shape. We also leave until completely dry.
It is best to postpone further work until the next day. The seat blank was dry, and I trimmed off the excess using a breadboard knife along a ruler. The result was a very durable square with perfectly straight edges.
Now I took the leg blanks and carefully sanded all the irregularities with the finest sandpaper. On the seat I mark the places where the legs are attached and screw in the screws.
I put the legs on the screws from below, gluing them to the Moment crystal.
Prime the bench with black or brown acrylic paint. I paint the top with gold paint.
Imitation of wood carving can be done in different ways. You can use stickers.
Or you can glue a suitable braid and paint it the color of your chair.
I took a piece of cardboard a couple of millimeters smaller than the finished seat. I cut out a square from padding polyester using it. I cut the fabric with a hem allowance and covered it with cardboard and padding polyester. I pulled it with thread.
I glued the crystal to the chair with Moment glue. Along the edge I covered the joint between the fabric and the cardboard using a cord.
Other chairs can be made using this technology. It all depends on your imagination!
The result is very light and durable furniture. The bench withstood a two-liter jar filled with water (I was afraid to put anything heavier, although I believe that this is not the limit).
This was my first master class in my life (please don’t judge too harshly)!
Source
Approximate Dimensions
Before you think about how to make a table for dolls yourself and from what material, you need to decide on the dimensions. You need to start from the height of the doll itself and the size of the house. The interior will look beautiful if all the furniture is approximately the same scale and style.
The easiest way to make all objects proportionally the same is to calculate the scale. You need to divide the average height of a person by the size of the doll. You will get a number by which you will subsequently need to divide all the real sizes of the furniture to get the doll sizes.
For example, the height of a doll is 20 cm. We divide the average height of a person 175 cm by 20 cm = 8.75. The actual dimensions of human furniture must be divided by this number to obtain the dimensions of doll furniture.
On average, dolls have a size from 7.5 to 15 cm. If the doll for which this or that piece of furniture is made fits these parameters, you can use the following sizes:
Chair decor with fabric
Decorating with fabric is convenient when you need to frequently change the appearance of furniture.
A simple way is to decorate the back of a chair using a piece of fabric.
- The fabric can be tied to the back and secured with a bow.
- Flowing fabrics are suitable for this method: acrylic, lycra, chiffon, crepe-satin, light cotton.
- From flowing fabric you can sew a universal fabric measuring 1.3m x 1.3m or 1.5m x 1.5m, which is suitable for a chair of any shape and size.
- The canvas is draped over the chair and secured with pins on the back.
- The fabric is also used to make covers according to the size of the chair.
- To do this, first take measurements with seam allowances, make a pattern on paper and transfer it to the fabric. Thick, wear-resistant fabrics are suitable for sewing covers.
- Taking measurements can be simplified if you use a rough piece of fabric rather than paper for marking.
- To do this, you need to attach pieces of fabric to the seat and back with pins or double-sided tape, and then draw with a marker all the lines that will be sewn together.
- Next, trim off any excess fabric at the seam allowance. From such a fabric pattern you can sew a rough version of the cover.
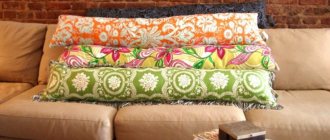
Another way to use fabric to decorate a chair is to update the upholstery of a soft seat.
Cardboard box furniture
From one TV box you can make all the furniture in the house. To create it you will need:
- The box itself.
- Double sided tape.
- Scissors.
- Regular wide tape.
- Glue gun or PVA glue.
- Materials for decoration.
All furniture must be cut out, cut into the necessary parts and glued together.
Next, the most interesting process begins - finishing. Cardboard can be painted, covered with wallpaper or paper . On the front of the cabinet
or dressing table, you should glue a piece of foil, imitating a mirror. You need to put a tablecloth on the table, and pillows on the sofa - this will add coziness.
Be sure to involve the child himself in the decorating process. This is a great opportunity to feel like an interior designer and show creative thinking. Anything can be used: small stones, shells, beads, rhinestones, stickers.
After finishing the design work, the arrangement of furniture in the house and filling it with details (vases, figurines) begins.
Of course, you need dishes in the kitchen. It can be cut out of cardboard, wood or molded from plasticine. How to make a bottle for dolls is a more complicated question. Here you can use bottles of drops for the eyes or nose, or ran out of perfume samples.
Assembly
Before assembly, you should check all parts for possible defects. If there are dents in some places on the cardboard, they need to be filled. Further finishing will hide all inaccuracies. During the assembly process, all parts can be glued, inserted into grooves or extended.
The latter method is used to strengthen the structure and give it optimal thickness. Elements assembled from several layers of cardboard must be placed under a press after gluing and left to dry for a day. Upon completion of assembly, the resulting ribs are treated with kraft paper.
Grooves and stiffeners must be coated with glue, thereby extending the service life of the structure.
Insert parts
How to make furniture from clothespins
It is not necessary to use wooden ones; plastic clothespins are also used. They vary in size and color, but with wooden clothespins the furniture turns out more comfortable and beautiful.
To make a table or chair from clothespins, you need to separate them. Halves of clothespins are used, which are connected to each other. Connecting them in a circle
, make a tabletop, legs can also be made from halves of clothespins.
The beauty of this material is that you can easily shape the clothespin into the desired shape or cut off as much as necessary. Some people make their own theater on clothespins. Templates can be found online.
Making furniture for dolls is a rather exciting process in which you can involve the whole family. Dad can do the crafting, gluing, twisting, and preparing for framing. Mom and daughter will be happy to paint furniture, decorate it, sew tablecloths, pillows and bedspreads. This is a wonderful family activity that will delight your little princess.
Attention, TODAY only!
Children's games require a lot. In this case, you cannot do without it, which may require a lot. If the furniture in the toys does not fit in size, you can make it yourself. In particular, our master class offers a step-by-step process for making a paper chair.
- square sheet of paper;
- scissors;
- scotch.
The final dimensions of the chair will depend on the size of the sheet.
Stages of making a paper chair:
Fold the square in half.
After this, the edges need to be folded towards the resulting midline. As a result, we got two more folds. The square sheet is divided into four parts, one of which needs to be cut off. We do this with scissors.
Fold the resulting workpiece in half. We bend its right edge and form a triangular fold in the upper part.
You also need to do the same with the left edge. We bend the right edge of our future chair towards class=”aligncenter” width=”600″ height=”400″[/img]We do the same with the left edge. These will be the sides of the future high chair. We slightly unfold the edges and bend the central part upward. This is the seat of our chair. We give our blank the shape of a chair. Now all that remains is to secure the seat. To do this you will need scissors and transparent tape. We fix the seat from below (on both sides) with small strips of tape. Our paper chair is ready.
Paper furniture is in demand in interior decoration; you can make simple shapes with your own hands. Another area of application for these items is toys for children. Every child will want to have a dollhouse with beautiful paper furniture made with their own hands. To make such products, you do not need additional origami skills, you just need to follow the instructions provided.
Origami furniture is an interesting trend that requires special attention. Making such figures does not take much time, and the resulting result pleases adults and children with its appearance. The main feature of the products is their maximum similarity to real furniture items: sofas, tables, cabinets, armchairs and chests of drawers.
It is unlikely that you will be able to use such furniture in real life, but the items will be a good option for creating a model of a future room or designing a dollhouse. To achieve similarity with real furniture, textured paper is used during construction to imitate various surfaces: stone, leather, fabric, wood and metal. When creating objects, it is better to use paint that does not completely saturate the material, but only gives it color.
The following materials are used for production:
- Material for the base – matchboxes, some corrugated cardboard, colored thick paper;
- Pieces of fabric, decorative film and textured paper for finishing finished items;
- Scissors;
- Black pencil or pen;
- PVA glue or any other for working with paper.
Decoration
A separate stage is the decoration of finished products. Do-it-yourself furniture, diagrams of which can be found in this material, is decorated as follows.
| Material | Peculiarities | What is it suitable for? |
| Self-adhesive paper for furniture | This material can be used in the manufacture of any type of furniture. This film is ideal for beginning craftsmen, because it is easy to cut, and the adhesive layer allows you to decorate the surface without any problems. | For tabletops, seats of chairs, sofas and armchairs, for decorating cabinet doors and chest of drawers. |
| Using paints | Paints allow you to show creativity and move away from standards. Using paint you can paint any pattern and design. When choosing a product, make sure that it does not damage the paper base. Acrylic or water-based compositions are preferred. | For all types of crafts, especially for decorating the front parts of products. |
| Application of fabric | The fabric allows you to imitate the structure of furniture as much as possible. | Suitable for sofas, armchairs and chairs. |
If gouache is used for decoration, you need to mix it with PVA glue (1:1). After drying, the paint will not imprint on your hands, and the product will receive additional rigidity.
Do-it-yourself paper furniture will be an excellent option for a dollhouse or designing models of a future interior. Creating miniature objects is a fun activity that you can involve all family members in.
Origami sofa
It's hard to imagine a living room without a sofa. For a guest, this is a great place to sit down, and for the owner, it’s a great place to lie down and relax after work. Let's make a sofa out of paper using the origami technique, as in the photo: Diagram:
Step-by-step instruction:
- Fold the sheet in half (twice) and unfold it. Get a cross-shaped fold.
- Fold 1/6 of the page along the dotted line (see photo).
- We wrap the sheet along the fold opposite this strip.
- We wrap the side parts of the resulting rectangle, 1/3 on each side.
- Bend the corners forward (in the places indicated by the white arrow). We do not touch the back side of the sheet.
- Fold the opened white rectangles in half.
- Raise the part of the craft marked with a dotted line.
- Bend half of the raised part down.
- Bend the sides forward.
- Pull the front part (back) forward.
- We get a paper sofa.
Master class No. 3: Hanging shoe rack
- Take a couple of large sheets of cardboard and mark them into equal rectangles based on the size of your shoes. Then cut them out.
- Fold each rectangle as shown in the photo, and secure the resulting pockets with tape.
- Insert the pockets into each other so that it is easy to secure them with double-sided tape, but still leaves room for shoes.
- You can fix the shelf on the door - it will not interfere with you at all and take up a lot of space.
Papier mache
Among the many ways to make furniture out of paper, the papier-mâché method (using paper mass and glue for modeling) stands out.
Most often, this method is used to make masks or some kind of figures, but it is also quite suitable for doll furniture. Like weaving from paper tubes, the papier-mâché technique is very economical, but at the same time it is simpler.
Furniture made in this way must have a frame and dry well before it is coated with paint or varnish. By the way, if you add a little gypsum to the paper mixture, the product will become much stronger.
Each of the above methods for making paper furniture is unique in its own way. Some are complex, others are simpler to implement. But no matter which one is chosen, the main thing is to put your soul into your work. Then the result will definitely please you, and your favorite children's doll will have the best home in the world.
Children's games require a lot. In this case, you cannot do without it, which may require a lot. If the furniture in the toys does not fit in size, you can make it yourself. In particular, our master class offers a step-by-step process for making a paper chair.
- square sheet of paper;
- scissors;
- scotch.
The final dimensions of the chair will depend on the size of the sheet.
Stages of making a paper chair:
Fold the square in half. After this, the edges need to be folded towards the resulting midline. As a result, we got two more folds. The square sheet is divided into four parts, one of which needs to be cut off. We do this using scissors. Fold the resulting workpiece in half.
We bend its right edge and form a triangular fold in the upper part.
You also need to do the same with the left edge.
We bend the right edge of our future chair towards class=”aligncenter” width=”600″ height=”400″[/img]We do the same with the left edge. These will be the sides of the future high chair. We slightly unfold the edges and bend the central part upward. This is the seat of our chair.
We give our blank the shape of a chair. Now all that remains is to secure the seat. To do this you will need scissors and transparent tape. We fix the seat from below (on both sides) with small strips of tape. Our paper chair is ready.
Hello friends! Our cardboard workshop received an order to design and manufacture comfortable and durable school furniture for dolls from cardboard. It was necessary to make a school board, a desk and a teacher's table with a chair. Moreover, the furniture was intended for playing with dolls 30-40 cm tall.
The play furniture turned out to be quite large (for a doll size). For a more visual understanding, here are the general sizes of items from our set:
— school board: width — 31.8 cm
, height -
35 cm
, width of racks -
16 cm
;
– table (length×width×height): 30×17×20 cm
;
– chair: seat – 10×10 cm
, height -
21 cm
;
— desk: length — 31 cm
, width -
30 cm
, height - about
20 cm
, bench -
10x30 cm
.
This is what a school desk looks like:
And here you can take a closer look at the chair.
Our model doll is very comfortable both at the table and at the desk.