Almost all girls love to play with dolls, especially Barbie. For children, such games become the first experience of family life; passions boil in dollhouses, toy people communicate, and everyday situations are played out. Games will not be realistic without an appropriate interior. The furnishings of Barbie's home should be as similar as possible to a real home. If adult women want to have unique things in their wardrobe, then their daughters just need original and beautiful Barbie furniture to be happy. If parents decide to make furniture for Barbie with their own hands and involve their child, then the baby will have an interesting pastime for the evening and new elements for play.
Design and decoration
If you were able to assemble a toy cabinet for your child, this does not mean that the child will like the masterpiece you created.
To do this, it must be beautifully decorated and supplemented with decorative elements. Even if you have a simple box, it should have a pleasant appearance. In this case, you can use the following registration methods:
- painting with a brush;
- pasting with wallpaper or photo wallpaper;
- decoupage with napkins;
- fabric covering;
- stickers, stencils.
Decorate your closet with your favorite characters
Decoration is the most enjoyable moment in work. Before you begin, talk to your child about what he would like to see in his room. You can make a cabinet as a small copy of the main piece of furniture or paste it to match the walls of the room. An original and interesting way is to apply stencils, which you can easily do together with your child.
Don’t forget about the braid, it always looks good along the edge of the product. Various satin ribbons give the product a truly childish, attractive look. Also, beads, sparkles, decorations and rhinestones can visually embellish children's furniture. You can use materials that you have at home, or you can purchase decorations at the store. Where there are a great many of them now.
If you know how to make a wardrobe from various boxes, you can always surprise your child. In addition, this is a great way to save the family budget, because buying such furniture now costs a pretty penny. And spending time with your child will only be beneficial. Don't doubt yourself, take the materials and create!
Required tools and materials
It’s interesting to come up with and make different elements of furniture in a toy house from scrap materials. It is impossible to clearly define the list of necessary tools; it will depend on the imagination of the craftsmen. Useful in any case:
- Scissors;
- Glue;
- Ruler;
- Napkins;
- Oilcloth;
- Threads with needles;
- Pencils.
These things will help create very beautiful details. In fact, it is possible to create furniture using a much larger list of items. For example, to make a lamp with a switch you may need a blowtorch, LEDs, and wires.
Regular cardboard will help in production. Real masterpieces are created from the material. Making furniture from cardboard is an accessible way for everyone to furnish a toy house with high-quality furniture.
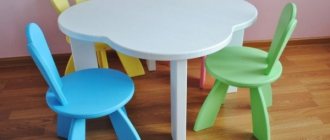
Doll wardrobe
DIY wardrobe. master classes: 370 photos + drawings
You will need: plywood 4 mm thick, white wood paint, cabinetry veneer, carbon paper, sheets of paper, pencil, ruler, jigsaw, jigsaw blade for straight and radial cuts, glue, sandpaper, brushes and sponges for painting, scissors, screwdriver, construction knife, 2 wooden sticks, furniture fittings (hanger hooks, 3 handles, self-tapping screws, 4 hinges).
Master Class
- Draw a sketch of the cabinet.
- Draw each detail on paper.
- Cabinet parts: 2 side walls and 2 rectangular parts for them, roof, bottom, back wall, partition, 2 shelves, drawer module, 2 doors and 2 patterned parts for them, 4 figured legs, upper horizon (shaped part), drawer (bottom, back, 2 sides, front panel and a rectangular part for it).
- Cabinet size: height 34 cm, width 22 cm, depth 9 cm.
- Transfer the cabinet parts onto the plywood using carbon paper.
- Use a jigsaw to cut out every detail of the future cabinet.
- Sand each piece of the cabinet with sandpaper.
- Glue the redwood veneer to the cabinet sides, drawer fronts and cabinet doors, then leave to dry.
- Paint the patterned pieces for the cabinet doors, the rectangle for the drawer and 2 rectangles for the side walls with white paint, then wait until dry and glue them on as decoration.
- Paint the 4 curly legs with white paint and leave to dry.
- Glue the 2 sides, the back wall of the cabinet and the legs as shown in the photo and leave to dry.
- Glue the box parts together.
- Glue the roof and the upper figured horizon.
- Glue the partition inside the cabinet, visually dividing it in half.
- Glue 2 shelves as shown in the image.
- Glue a wooden stick as a pipe for things.
- Make hangers from pieces of wood and hooks.
- Paint the inside of the cabinet, hangers, top horizon and inside of the drawer with white paint, then leave to dry.
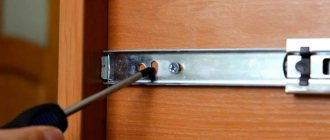
- Attach handles to drawer and cabinet doors.
- Screw the hinges to the cabinet and attach the cabinet doors.
The plywood doll closet is ready!
Step by step guide
You can, of course, come up with ways to make furniture yourself, but it will be much easier and more reliable to use drawings, assembly diagrams, and instructions to help in making toy furniture. All this has been tested several times, and your imagination can run wild at the decorating stage.
Table
Barbie, like people, has different tables. Manufacturing methods differ slightly depending on the purpose, functionality and design features:
- Dinner table;
- Coffee table;
- Desktop.
The tables are made of cardboard. To give strength to the products, table legs must be made in the form of cylinders. This shape creates additional stiffening ribs that prevent breakage or deformation. You can fasten them with glue or tape. These substances should not be spared. The more tape, the stronger the product.
Legs can be attached to the table in two main ways:
- Using through holes. To do this, circles are cut out in the tabletop, equal in diameter to the table legs. Cylinders are inserted into them, their height is equal to each other, the tabletop is lowered so that the cylinders rise about a centimeter above its level. The protruding parts of the cylinders are divided into 3-4 parts; all of them must be tightly glued to the table surface. The upper part of the tabletop will not look very aesthetically pleasing, but this can be corrected with decor;
- Gluing the legs to the “underside” of the table. The process remains exactly the same, except the legs are separated into strips and glued to the bottom of the table. This allows you to leave the front side untouched.
Tables with one leg will not stand stably, so another circle of thick cardboard is attached to the bottom of the only support, which gives the structure stability. For reliability, it is better to use 3-4 legs per product.
Cutting out the details
Gluing the parts
We fix the tabletop
Armchair
In the photo, such products seem almost real and allow children to create compositions for photographs. This is a rather complex piece of furniture, so its production must be approached with all responsibility. It will be most convenient to make a chair from thick cardboard. Packaging from household appliances is perfect. The corrugated middle of these sheets adds strength, and the smooth sides make them easy to attach. A chair without legs and without a large number of small elements will be simple and durable.
- First you need to come up with the shape of the back of the future chair. It must be drawn schematically on cardboard;
- Such forms should be glued to each other until a thickness of 0.5-1 cm is achieved;
- The seat is cut out in the same way. It should follow the shape of the back. The height of the seat is also gained by gluing together several layers of cardboard. Ideally, it is 4-5 cm;
- The arms of the chair can be made from cardboard in the same way;
- The chair turns out angular, flaky and unsightly. You can deal with this using a utility knife or by covering the furniture with a layer of soft fabric.
The chair needs to be made a little larger than required, this will allow you to choose any decorative elements and use soft filler for the textile part.
Preparing the boxes
Fabric seat trim
We fix the fabric with staples
Upholstery with padding polyester
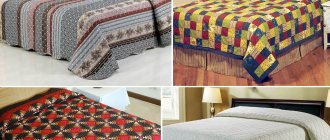
Bed
This element will not cause difficulties, especially if legs are not required. The easiest way is to make a bed out of a shoebox. The dolls have a comfortable height, making them fit perfectly into many boxes. In this case, you will not have to do practically anything, except perhaps prepare the bed linen, pillows and mattress.
You can attach legs to the bed, but they should not be made of fragile material. Bottle caps covered with elastic fabric or painted with acrylic paint in the desired color are perfect. The most convenient way is to attach them to a cardboard bed with a wire. It, like threads, is threaded in two places into cardboard and connected by twisting. To prevent the metal from tearing the cardboard, the wire is attached to several toothpicks placed between the puncture sites.
The sides of the bed should be hidden with fabric, adhesive paper or a soft strip made from synthetic padding, glued to the surface and covered with fabric. You can create a canopy bed. Usually it is mounted on top, on thin legs. It is impossible to create thin and durable legs from cardboard, so parents will have to make them from another material. You can use old pens covered with beautiful elements. Thin tulle is hung on these racks. For strength, 4 vertical supports are connected with strong and thin sticks. They are connected to each other with tape.
The blanket should be approximately 1.5 times the size of the bed in all directions. Thus, wrapping the doll will not be difficult. A large blanket can be used as a carpet if desired.
Cutting parts out of the box
We connect the elements with masking tape
Painting the workpiece
Making and attaching ruffles
Laying out the bed linen
Sofa
The sofa is very similar in design to the armchair. It is made in the same way, by connecting layers. However, there is an easier way:
- First, you need to determine the dimensions of the future sofa and select the most suitable shoe box;
- One of the long sides must be cut out immediately. You can leave a strip 1 cm high at the bottom;
- Cut out the shaped back and armrests, you can leave them square;
- Cut out a rectangle the size of the bottom of the box from polystyrene foam 1–2 cm thick;
- Exactly the same size piece of padding polyester or any other soft material;
- These parts are overlapped and covered with fabric. This will be the seat. It is placed on the bottom, and the remaining centimeter of cardboard prevents the soft part from falling;
- The other parts of the sofa are covered with exactly the same fabric. Soft padding polyester must be glued to surfaces and only then covered with fabric;
- The legs are made from corks. This is a durable and easily accessible material that allows cardboard furniture to last for a long time. They are attached to the sofa with wire and toothpicks, as mentioned in the section on making a bed.
We attach the fabric to the cardboard
We attach the sides and seats of the sofa
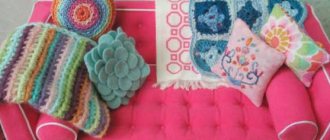
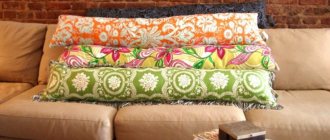
Making pillows
Glue the pillows
Dresser
Parents are wondering how to make furniture for Barbie also functional, and not just beautiful. The chest of drawers should open and small toy items, such as combs, bows and shoes for dolls, can be stored in it. To make a toy chest of drawers, several matchboxes will be useful. They easily create the possibility of storing things:
- First the boxes should be painted. To do this, remove the grater for lighting matches and apply paint;
- Each subsequent box is attached to the previous one with glue;
- They can be wrapped with tape around the perimeter, this will prevent peeling and will help further strengthen the structure;
- For ease of opening, it is necessary to make handles. Buttons on the stem are suitable for this. You can simply sew them on.
You can create a dressing table, then you need two such chests of drawers, a tabletop between them and a mirror. It is made of cardboard covered with mirror film or silver tape. The mirror is attached to the back wall, it can also be its continuation. For strength, this part should be glued to the chest of drawers.
Preparing matchboxes
Cut out the side walls and back
We paint the coatings
We cover the boxes with matches
Making pens
Wire bed
Making a jewelry box. DIY box: how to make it. detailed master classes
You will need: copper wire with a diameter of 1.2 and 0.4 mm (thick and thin), a ruler, wire cutters, pliers, super glue, tulle fabric or mesh, threads, a needle, scissors, a sheet of paper, a simple pencil, beads of 2 sizes , doll bedding set, doll, golden spray paint (optional).
Master Class
- Draw a sketch of the bed.
- Bed size: length 20 cm, width 10 cm, headboard height 10 cm, footboard height 8 cm.
- Bend a rectangle measuring 21x11cm from thick wire.
- Form two semicircular parts from thick wire - a headboard and a footboard with a height of 15 and 13 cm. These dimensions include the height of the headboard and footboard, the length of the legs is 4 cm and a 1 cm allowance.
- Secure the rectangle-lounger with several turns of thin wire.
- Attach the headboard and footboard pieces to the corners of the rectangle with thin wire, as shown in the image.
- Prepare 2 pieces of thick wire 28 cm long and make curls on different sides with pliers.
- Prepare 2 pieces of thick wire 18 cm long and also make curls with pliers.
- Screw on 4 pieces of thick curled wire with thin wire as a bed frame.
- Twist 2 shaped pieces from thick wire and attach with thin wire, decorating the headboard and foot of the bed.
- Sew tulle to the bed frame on all sides as a mesh.
- Glue 2 beads as crib legs.
- If desired, spray paint the bed with gold-colored paint and leave to dry.
- Make the bed with a set of bedding.
The bed for the doll made of copper wire is ready! I recommend watching this video!
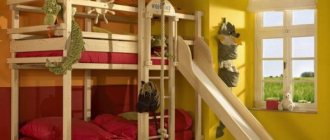
How to make a bunk bed for dolls
Watch this video on YouTube
DIY furniture with dolls
Crib
DIY fabric crafts - interesting master classes, photo ideas and tips
You will need:
- Plywood or thick cardboard.
- Scissors or jigsaw.
- Glue "Moment".
- Fabric for bed linen.
Step-by-step instruction:
- All parts of the product are transferred to plywood or cardboard: mattress, backrests and sides. You can use the following sizes: mattress (10 cm - width, 16-20 cm - length), backrests (height - 6.5 cm, width - 10 cm). The length of the side parts coincides with the length of the mattress, and their thickness is 2 cm.
- The parts are carefully cut out along the contour.
- They are connected to each other using Moment glue. First, the “mattress” is attached to the backrests, then the side elements are carefully glued.
- The crib is ready.
- Now all that remains is to prepare the bed linen. A mattress and pillow are sewn from the prepared fabric. You can use lace, ribbons, and beads as decoration.
From photos on the Internet, you can get ideas for decorating a real doll’s bedroom and do it all yourself using an instructional video.
Tables and chairs for Barbie are made in a similar way, all the details are drawn on paper, then transferred to plywood, carefully cut out and glued together.
To make the table look interesting, you should lay a tablecloth on it, which is also easy to make with your own hands: white fabric is cut to the required size and trimmed with lace.
chairs with soft seat
Using a small mirror, you can make a real dressing table for your doll.
Swing for a doll: master class
When creating a doll swing, you should use wooden popsicle sticks. You will also need a chain, a glue gun and a few toothpicks. Description of work:
- The ice cream sticks are carefully cut to form rectangles 10 cm long.
- They are glued together using a gun. This creates a stage for a swing.
- Toothpicks should also be glued together to create a frame: two pairs on the side are arranged in the shape of the letter L, with a horizontal crossbar on top.
- 4 sticks are cut to a size of 4 cm. This is the future seat for the swing.
- Small sticks are carefully glued together: two become the seat, two become the back.
- A chain thrown over the crossbar is glued to the back and bottom.
The swing for small toys or miniature dolls is ready.
There is nothing complicated in making furniture and other accessories of the doll world; you can use available materials - boxes, dish sponges, matchboxes, cardboard. You can act together with your child, this will teach him perseverance, hard work and accuracy.
Sofas for dolls: step-by-step instructions
Now we are talking about how to make a sofa for dolls with your own hands. Prepare a work corner and spend two to three hours of free time on crafts.
Sofa out of the box
There is always a use for a good box in sewing.
You will need:
- tall box of chocolates;
- a piece of thick cardboard;
- padding polyester;
- napkins or scraps of paper;
- rule;
- a simple pencil or pen;
- scissors or stationery knife;
- clothespins;
- glue "Moment";
- fabric and ribbon for decoration.
This sofa is designed for dolls like "Brothers" or "Monster High". For other dolls, you need to select the sizes yourself.
Instructions:
- Mark the length of the box: measure 7 cm at one end and 9 cm at the other. Use a ruler to draw lines along the width and sides.
- Cut the box along the 9 cm line, it is not necessary to cut completely, but only along one side and sides.
- Lay the box all the way down. Cut the center 9cm piece facing you and open it up. Make cuts in the corners of the entire piece (see photo).
- Cut along the cut portion of the side wall and the open side. Fold the entire piece inward along the marked line (it should look like the photo below). The whole part is the future seat, the flat part is the back of the sofa.
- Fold the back and glue a piece of quilted polyester to it. Stuff the sofa seat with pieces of paper and cover it with polyester filling to add volume.
- Cover the sofa with a cloth. To ensure that the material sticks well, secure it with clothespins.
- Cut out the backing from cardboard and glue it too. Glue the back and let the craft dry.
- Decorate the seat and back with braid. The sofa is ready.
Above in the photo is a regular cut out box, below is an almost finished base of the sofa.
Folding sofa made of plywood
If the doll often has guests, this sofa will come in handy.
You will need:
- plywood;
- padding polyester;
- furniture nails;
- small awnings;
- puzzle;
- glue;
- fabric and various decorative elements.
To make such a sofa, you need to understand how folding furniture works.
Instructions:
- Cut out the details of the future sofa: the back, sides and three bases. One base is a seat, the other two will fold.
- Connect the folding parts together using awnings. The rest can be screwed on.
- Add dimension to your sofa with polyester padding. Now you can cover it with fabric and decorate it to your liking.
Sofa made of pressed cardboard
A strict sofa for a business doll.
You will need:
- pressed cardboard;
- padding polyester;
- artificial leather;
- stationery knife;
- glue "Moment".
This cardboard craft can also be covered with fabric.
Instructions:
- Cut out the base. To make it rigid, you need to glue several layers together. The thinner the cardboard, the more layers you will need.
- Cut out and glue the back and sides to the base. To add softness, you need to glue a thin layer of quilted polyester on the inside.
- The next stage of work is covering the sofa with leather. The length of the first piece of fabric: back height + sofa height and also plus a margin of 1 cm on each side. The length of the second segment is the perimeter from the joints of the back with the side walls around the circumference to the next joint.
- Mark the centers on the sofa and both lines. Lubricate the pieces of leather with glue and, aligning the centers, glue the craft with them (see photo below). Cover the visible cardboard with an additional strip of leather.
- For the pillows, cut out 6 cardboard rectangles. The length of each of them is equal to one third of the length of the seat. The width of the rectangles is equal to the depth of the sofa.
- Glue pieces of padding polyester to future pillows and then wrap them with leather, as in the photo. We put the back and seat together with them.
- Small armrest cushions can be produced upon request.
Above is the base of the sofa, below is the making of the pillow.
DIY doll furniture
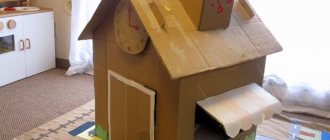
In order to make your task as easy as possible, we have made a selection of the main elements of doll furniture from various materials. Having familiarized yourself with the main stages of work using specific examples, you will be able to independently create a unique toy for your child.
Bed for a doll made of cardboard
Surely, at home you have a cardboard box for shoes or packaging for an electrical appliance. You can make a wonderful bed for a doll from it.
To do this you will need:
- directly the cardboard box itself;
- scissors;
- glue;
- paper tape;
- decorative elements: colored or wrapping paper, fabric.
Manufacturing process:
- Cut the box into sheets of cardboard. Draw the details of the bed on cardboard: headboard, footboard, base, sides.
- Glue all the parts together the way they should be positioned.
- Use paper tape to mask the joints.
After this, you can move on to decorating the bed. Cover it with beautiful paper, cover the base of the bed with fabric, sew pillows and a blanket.
Doll bed made from matchboxes
Making furniture from matchboxes is a very simple and quick process.
To do this you will need:
- matchboxes;
- glue;
- self-adhesive colored paper;
- crib decor elements.
Manufacturing process:
- Using glue, connect the matchboxes together depending on the size of the doll.
- Cover the finished structure with self-adhesive paper, closing the joints and making the surface smooth.
- Don't forget about a pillow, blanket and sheet.
Doll bed made of plywood
This toy will require a little effort. But a bed made of plywood is stronger and more durable.
To make it you will need to prepare the following materials:
- 3 or 4 layer plywood;
- liquid nails or good glue;
- jigsaw;
- decorative elements and paints.
Let's look at the manufacturing process in more detail:
First you need to cut out the crib frame according to the template.
- Using glue or liquid nails, connect the parts together and let them secure.
- Decorate the headboard with drawings, and sew bed linen for decoration.
Sofa made of plywood or wood
Original furniture for a dollhouse can be made from pieces of plywood or carved from wood. For a doll sofa you will need poplar, maple or birch bars, sheets of plywood, paints and varnishes for wood, glue, as well as special tools (file, jigsaw, wire cutters, drill, nails, dowels, welding machine).
First, templates for the sofa parts are cut out of cardboard, then transferred to wood or plywood, cut out and secured. Armrests can be made from wooden pipes. The wooden sofa needs to be painted and varnished. To soften the sofa, the back and seat should be covered with padding polyester and covered with fabric.
It's easy to make a doll table and wooden stools that go better with the sofa.
How to decide on sizes
The dolls, their houses and furnishings are smaller copies of us and our homes. And the most reliable way to make doll furniture with your own hands and not make a mistake is to measure real objects, reduce them several times, and then work with the obtained values.
Furniture for dolls - copies of our furniture
How much to reduce the actual dimensions depends on how small or large the doll is, because they range from 7 cm to 60 cm or even higher. Accordingly, they need furniture of different sizes. To determine the number by which the actual dimensions should be divided, divide the average human height in centimeters (170 cm) by the height of the doll. Let's get some number. This is how you will need to divide the dimensions of real furniture.
For example, the height of the doll is 15 cm. We calculate: 170 cm / 15 cm = 11.3. It is by this number that we divide all the parameters of “human” furniture. It is also worth saying that 14-15 cm is the most popular size among the doll population. Therefore, most of the finished furniture is made in a ratio of 1:12. We can also use the existing dimensions, at least so that we can navigate the scale of the required parts and the amount of materials.
Approximate dimensions of furniture for doll children
So, the most common doll sizes are:
- male doll 150 mm;
- female doll - 140 mm;
- child doll - 75-100 mm;
- toy baby - 65-75 mm.
If you need furniture for dolls of similar sizes, its parameters will be as follows:
- Bed: double – 160*130 mm;
- single - 160*75 mm;
If the toys you have are slightly larger/smaller, you don’t have to adjust the sizes. If the difference is large, you will have to increase or decrease (or you can calculate it yourself).
How to determine size
Doll beds, wardrobes, chairs and sets are human furniture in miniature. Therefore, to determine its size, it is enough to take the dimensions of real furniture and reduce them several times. How long depends on the size of the doll itself.
Let's say the doll is 20 cm tall. The average height of a person is 170 cm. If you divide it by the height of the doll, you get 8.5 - that’s how many times you need to reduce real furniture.
Browse through the catalogs and choose a sofa that you like. Find out its dimensions and “adjust” them to your doll. As a result, you will get a beautiful, proportional sofa that looks like it came from the kingdom of the elves.