The threshold on the balcony is an integral element of the interior of the room adjacent to the balcony. If the appearance of this element leaves much to be desired, then no matter how beautiful the room adjacent to the balcony or loggia is, an old or poorly finished threshold will be striking and spoil the integrity of the picture. And if it still blows, then installation or replacement is simply necessary.
In this article, we will look at how to make, replace and finish the threshold on a balcony step by step without involving specialists, since this type of work does not require additional skills and there is an opportunity to save money .
Preparatory work
The first step is to make the base. There are two options for creating a base for the threshold: from brick or from cement-sand mortar. If you already have a level base that is suitable in height, then you can skip this step and immediately begin finishing.
Note!
The height of the base of the threshold is made taking into account the fact that a layer of finishing material will be laid on top. The point is that the finished balcony threshold does not interfere with the opening and closing of the balcony door.
Instructions for creating a brick base:
The brick base is made when there is a large difference between the balcony frame and the floor (not less than the height of the brick).
- Leveling and cleaning the base. The smoother the base, the easier it will be to lay the brick.
- Prepare cement-sand mortar following the instructions on the bag.
- Distributing the mortar onto the base and laying the first brick. Next, you need to apply the mortar to the end of the brick so that all the seams are filled. Then the next bricks are laid. Usually one row is enough for a nut.
- After all the bricks have been laid, it is necessary to apply a layer of mortar to the entire surface of the brick row and level it.
- After the mixture has dried, moisten the surface with a small amount of water and treat with a grater.
Other types of materials
To finish the threshold on the balcony door, you can use other materials:
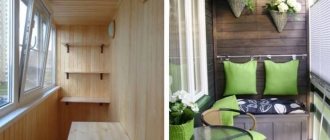
- Natural wood. Eco-friendly, holds heat well. Looks appropriate in interiors made in eco or country styles. Working with it requires certain skills and abilities. The main disadvantage is the high cost.
- Laminate. It is a cheaper analogue of wood, but has good aesthetic and thermal insulation properties.
- Linoleum. One of the most inexpensive and easiest to work materials.
- Cork. An environmentally friendly material that gives originality and exclusivity to the interior. Has excellent thermal insulation properties. The main disadvantage is softness and instability to damage.
So, it’s not difficult to give a finished look to a balcony door. Carefully consider the design solution, and then carry out the work correctly - as a result, the room with a balcony will become even more cozy and comfortable.
Subscribe
Threshold made of plastic window sill
A plastic threshold on a balcony is considered the most practical, inexpensive and versatile option. It looks most aesthetically pleasing if the entire balcony block is made of plastic.
Instructions for installing a plastic threshold from a window sill:
- The surface under the threshold is cleaned of dust, debris and primed. If there is an old threshold, it must be dismantled.
- Next, you need to lay out the beams on the base of the threshold. We do not recommend installing the threshold only on polyurethane foam - it is unreliable. The threshold will be laid on the bars. The size of the bars must be selected in such a way that the finished threshold does not interfere with the opening and closing of the balcony door.
- The next step is to cut the plastic window sill to the size of the threshold.
- Next, we place the threshold and check whether everything fits and check the evenness of the surface with a level. If necessary, we trim the threshold. If the threshold is suitable, but the surface is not flat, it is necessary to install a base under the bars. Substrates can be any available materials (for example: pieces of drywall or plastic).
- After the threshold is adjusted to the level, we proceed to applying polyurethane foam. Carefully remove the threshold and apply an even layer of polyurethane foam between the bars, and liquid nails can be applied to the bars themselves.
- Next, carefully glue the threshold. It should be noted that foam tends to expand, so after installing the threshold it is necessary to place a weight on its surface.
- The threshold from the plastic window sill is ready.
How to make and veneer a threshold from brick or concrete
Piece building material is used for large distances from the door frame to the floor of the room. Apply putty to the cleaned and leveled floor surface and lay bricks on it. To hold the materials together, a mixture of cement and sand (1:3) is useful.
The first layer is cement, the second is brick. After the entire structure has set, cover the brick with a layer of cement composition, level it and tile it. Remnants from the collections with which the bathroom was lined will be useful as finishing. You only need a few tiles, so finishing does not require large investments.
The brick structure will last for several decades. The cement mixture is used for small forms. Mix sand with water and cement, build formwork in the area where the threshold is formed, pour in the composition and wait for it to dry. After drying, cover with any material.
Tile threshold
Tiles are a durable, beautiful and practical option. A variety of sizes, textures, colors and patterns makes it possible to choose tiles to suit any design and interior.
Instructions for finishing the balcony door threshold:
Important!
You should not choose tiles with a glossy surface as they are slippery.
- The first step is to take measurements, calculate the number of tiles and draw a masonry diagram. It is important that there is a solid tile in the center of the threshold, and trimming on the sides - this is done for symmetry.
- After taking measurements, you need to cut the tiles using a tile cutter or grinder.
- Next we move on to installation. Apply glue to the tiles and lay them on the base according to the diagram. If you do not use a pattern, then place solid tiles in the center, and trim along the edges as in the picture below. To ensure the surface is level, use a level.
- After drying, remove excess glue and cover the seams with grout.
In addition to the text version of the instructions, we recommend that you read the instructions in video format, where the installation is shown in more detail with an explanation of the nuances.
Installation, finishing and replacement of the threshold on the balcony with your own hands - step-by-step instructions with photos and descriptions
The threshold on the balcony is an integral element of the interior of the room adjacent to the balcony.
If the appearance of this element leaves much to be desired, then no matter how beautiful the room adjacent to the balcony or loggia is, an old or poorly finished threshold will be striking and spoil the integrity of the picture. And if it still blows, then installation or replacement is simply necessary. In this article, we will look at how to make, replace and finish the threshold on a balcony step by step without involving specialists, since this type of work does not require additional skills and there is an opportunity to save money .
Laminate threshold
How to make a threshold for a balcony from laminate with your own hands - instructions:
- The first step is to putty the threshold.
- Measurements are taken and the necessary laminate elements are cut out. In most cases, one strip may be enough, since laminate comes in different widths and it is possible to choose the optimal solution. When cutting the material, use a wood saw with fine teeth, a hacksaw for metal or a jigsaw.
- To beautifully design the joints between the wall and the laminate, starting guides are used. We cut them to size and fix them around the perimeter.
- Apply silicone sealant or liquid nails to the base of the threshold and glue the laminate.
- The final stage is cutting to size and installing a decorative corner.
Related videos
Video materials will help you choose how to design the transition from the room to the balcony:
Economical solution from a piece of linoleum:
Laminate decoration:
>
As you can see, creating a comfortable transition from a room to an adjacent room is not so difficult; the main thing is to follow the technology of working with the selected materials and not forget about the features of interior design. If you are not confident in your abilities, entrust the work to experienced installers who will quickly and accurately complete your order.
YOU MAY ALSO BE INTERESTED
Linoleum threshold
- A piece of linoleum is applied to the surface and the cutting locations are marked. It is necessary to cut carefully so that the joint with the wall is as smooth as possible.
- Apply liquid nails to the surface of the window sill, level the material over the entire surface and press the canvas. Particular attention should be paid to the joints.
- The final step will be to install the baseboard and install the decorative metal corner. In addition to decorative purposes, these elements are intended to cover the joints of the material.
Finish options
First you need to decide what the finishing for the threshold is chosen for - for the floor laid out in the room, or for the balcony door. Some third option is also being considered, but it still needs to be combined with something, with some noticeable interior element. This is more difficult to do, because the threshold is often equipped with the material that represents the floor covering.
The threshold can be decorated with different materials.
Tile. Ceramic tiles will be relevant if they are the flooring of the entire room. Of course, this option is found only in the kitchen. Tiles are a convenient and practical material that is easy to wash and clean, and there shouldn’t be any big problems with installation. The main thing is to choose a non-slip type that is as comfortable as possible in everyday life.
9.1. Protection of wooden structures from damage caused by fungus and insect pests.
External load-bearing wooden structures in contact with soil or water must be made from industrially impregnated lumber. Impregnated wood does not harm people, animals and plants, but is protected from damage caused by fungi and insect pests due to prolonged exposure to moisture and contact with the ground. The impregnation class of lumber used in these conditions must correspond to class A or AB. Saving on the quality of materials used can cause damage to the life and health of people, as well as material property.
In overhanging balconies with open plank floors laid with narrow gaps, all supporting beams and floor planks must be commercially impregnated to impregnation class A or AB.
What to replace
There are several simple options for replacing a balcony threshold. As a rule, for such cases, pieces of flooring remaining after repair are used. Let's look at the features of using the most basic types.
Floor tiles
Ceramic or porcelain tiles are an excellent solution for high traffic areas. If you have a few elements left in your bathroom or kitchen after renovation, feel free to put them to use. The tiles are not afraid of moisture and serve for a long time. Thanks to the structure of the material, a durable coating is created that is practically not subject to physical stress.
The specificity of installing tiles is that the coating requires a flat concrete base, which can be made of cement, brick or construction waste.
Linoleum
A universal material that is suitable for use in different conditions. Linoleum is not afraid of moisture and creates a fairly durable coating that does not allow cold to pass through . Placed on a rigid base made of wood, lumber or cement slabs. Thin types of linoleum require additional floor insulation.
Carpet
If the room in which the balcony is located is decorated with carpet, one of the best solutions would be to supplement the floor covering with the same material. Carpet creates a warm surface that is pleasant to stand on barefoot - an excellent solution for living rooms. The material is laid according to the same principle as linoleum; it does not particularly need additional insulation.
Parquet
A wooden floor for a balcony threshold is not the best option. But if the room has parquet, it would simply be illogical to make the threshold from linoleum or tiles. Parquet can be laid on a concrete base itself, a slatted frame, or the surface of their wood-based materials; it requires additional insulation.
Using laminate - step-by-step instructions
For the balcony threshold, as a rule, fragments of the laminate flooring in the house left over from the last renovation are used. One of the optimal solutions is material class 31-33 . This laminate has increased durability and is great for high traffic areas.
Installation instructions:
Step 1. We free the threshold from the old structure, remove the remaining foam and construction debris and remove dust.
Step 2. Drill holes in the concrete base for dowels in the required places.
Step 3. Place a layer of insulation on the surface. Mineral wool or penoplex can be used as a heat insulator.
Step 4. Place a sheet of chipboard, plywood or OSB on the insulation and fasten it to the base with dowels. Make sure that the total thickness of the final structure (substrate and coating) does not exceed the optimal height for normal door opening.
If a wooden door needs to be shortened, then with a metal-plastic structure this will not be easy to do.
The final stage is laying the laminate itself and framing the floor fragment with a plinth . The design is ready!
Source
Dismantling the old structure
All work on the construction of a new structure in a house must begin with proper dismantling. It's always much easier than building something new. It is very easy to dismantle wooden structures. But with brick ones you need to work hard.
All work must be carried out carefully, because the main tools for dismantling are a chisel and a hammer. Sometimes you will have to use a hammer drill.
It is better to carry out work near the wall with a grinder, using an attachment for working with stone. If in some places the disk cannot be reached, then you will still have to use a chisel.
You should also take care of your own protection. After all, the work is dusty. Therefore, it is necessary to wear construction glasses and a respirator.
11.1. List of used literature
1. Anders Fröstrup, 2008 “Theory of carpentry. Wooden structures", Gyldendal Undervisning, Oslo, 2008.
2. Haakon Einstabland, Brit Ruald, 2010, “Protruding wooden balconies”, SINTEF, Oslo, 2010.
3. Eurocode 5, EN 1995-1-1 “Design of timber structures”, British Standards Institute, London, 1995.
4. Eurocode 0, EN 1990 “Fundamentals of structural design”, British Standards Institute, London, 1990.
5. Eurocode 1, EN 1991 “Actions on load-bearing structures”, British Standards Institute, London, 1991.
Construction of houses in St. Petersburg, prices, projects. This information is available by phone:
10.1. Structural disadvantages of protruding balconies
1. The length of the projection is limited: 0.6÷2.3 m (depending on the cross-section and pitch of the balcony beams, the type of balcony floor and climatic conditions).
2. The beams of the protruding balconies pass through the heat/moisture insulating materials of the outer wall. This can lead to damage caused by moisture accumulation and depressurization of the building envelope
Therefore, it is very important that wind and waterproofing around the balcony beams is done efficiently
3. Projecting balconies are not suitable for facades that are often exposed to strong winds that direct rain horizontally.
4.The construction of protruding balconies requires special knowledge and skills, and also requires additional time and effort.