Useful tips
Watch the video if you are too lazy to read
Watch the video if you are too lazy to read
If you have old things lying around at home, such as unnecessary clothespins, old cardboard boxes, etc., you should not throw them away.
There are a huge number of options for crafts that you can make with your own hands from various things - old, unnecessary and useless at first glance.
Here is a small selection of interesting crafts, some of which you can do with your children.
Simple technologies
Making easy DIY crafts for children is not difficult. You just need to decide on an idea, select materials and choose a method of processing them.
Usually in such creativity they use ideas that a child can implement. It could be something simple but entertaining: a drawing, an applique, a plasticine figurine, a composition of vegetables, etc.
Classes may require certain things, for example, spools of thread, needles, glue, scissors, ruler, gouache, watercolor.
As you can see in the photo of easy DIY crafts, they can be created from paper, cardboard, wood, pebbles, dry leaves, pine cones, clay and waste materials.
Bookmarks for books made of paper with step-by-step photos.
Origami heart bookmarks
I also liked the idea of mittens on a string. You can draw these mittens yourself, or you can cut them out of paper for scrapbooking.
The next idea is anti-stress bookmarks, although they are indirectly crafts, however, this is also a type of creativity associated with paper, and besides, in our turbulent times they can be very useful. They can be printed or redrawn from the monitor screen.
Crafts using paints
Paints help to make stylish and unusual panels. At the same time, drawing and writing techniques are honed, which is important for fine motor skills. Can:
- Apply the image with your fingers. This technique is usually used to make paintings with sea and forest landscapes.
- Make impressions using potato or cork stamps. In this case, any subject matter of the works is acceptable.
- Create wax paintings. The technique is suitable for older children who already know how to draw.
Interesting do-it-yourself paper: an old mine
The main thing in this preparation is imagination. Use it to create your own interesting designs.
There is no “right” or “wrong” in this craft - just make it the way you like.
You will need:
- toilet paper cylinders
- paper napkin cylinders
- ice cream sticks
- glue gun or tape/duct tape/duct tape
- cardboard (large and small sheets)
1. Cut several toilet paper rolls in half lengthwise.
2. Start attaching slides from any point, moving down and up. You will need to choose packaging with a relief or create a relief yourself, for example from other, smaller boxes. In this case, all the boxes need to be glued to each other so that the structure does not fall apart.
3. The larger and taller your slide, the more popsicle sticks you will need to use to create the holding structure. Simply glue the sticks to the boxes, the base, each other and, if necessary, to the cylinders.
* Some cylinders can be trimmed, which makes it more convenient to build slides, especially when the slide turns.
4. You can make the starting section of your slide. It can be made from either cylinders or cardboard or plastic cups. There you will throw a ball/ball/bouncer, which will roll down the slide.
5. You can also decorate your slides, for example, by adding “Caution”, “Mine”, “Do Not Enter” signs.
Options for homemade paper products
Paper and cardboard crafts have always been considered one of the easiest to make. Despite this, they look quite nice. From white or colored paper you can make:
- animals and insects;
- holiday garlands and decorations;
- Christmas decorations;
- Greeting Cards.
Ideas from cotton pads
Crafts made from cotton pads have a special elegance. From such unusual material you can make:
- flower with the addition of soft multi-colored pompoms;
- snowman on a postcard;
- funny chickens.
Such things can be used to decorate a nursery. They look very cute and cozy.
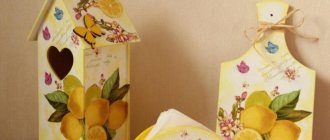
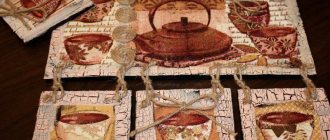
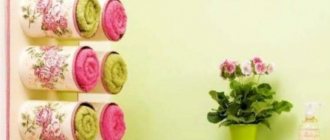
Ideas from napkins
Paper napkins have long become commonplace. They are used in table setting, when cleaning an apartment, and as a hygiene product. But not everyone knows that the product of the pulp and paper industry can be used to realize creative ideas.
Making easy crafts from napkins with your own hands can turn into an interesting hobby. From this material you can make photo frames, panels, paintings, dolls, figurines of fauna, flowers, and gift wrapping.
Stone crafts
Stone is one of the most accessible materials. It makes very stylish decorative items. To work with it you may need the following things:
- acrylic paints;
- glue;
- plasticine;
- clay.
From pebbles you can make a hot stand, a rug for a vestibule, a panel to decorate a wall in a kitchen or nursery, a vase for the garden, a candlestick for a gazebo, etc. Refrigerator magnets and key rings made from pebbles are in demand.
Magic lamp
A craft for the home could be a lamp for a nursery.
- Take a simple boring table lamp. Use small toys that your child has already outgrown.
- For example, several rubber animals or dinosaurs, any figures that your child likes.
- We paint the figures in the color of your choice with spray paint.
- Once dry, glue them onto the lamp stand in the order you choose.
- Glue must be selected depending on the material from which the toys are made.
- If these are small parts, use hot silicone; if the parts are large, it is important to choose the right glue.
Doll made of threads
As you know, a child never has enough toys. But buying a new one every day is too expensive. Therefore, it is worth learning how to make them yourself, using improvised means, for example, threads. To create a thread doll, you should prepare:
- floss threads;
- half a cardboard sheet;
- scissors;
- flesh-colored ribbon;
- markers.
Progress:
- Wind the threads onto the cardboard. The thickness of the thread layer should be large.
- Tie the completed winding with thread. Determine the location of the doll's head and mark it by rewinding it with thread.
- Design the arms and legs in the same way.
- Measure the flesh-colored tape according to the volume of the head. Glue its sides.
- Wrap hair threads around your hand. Cut the resulting roll on one side and glue it to the head.
- Use felt-tip pens to sketch out eyes, eyebrows, mouth. The toy is ready! If you wish, you can sew clothes for her using old scraps.
Fabric animals
You only have half an hour of time? Make these funny little mice. They do not require sewing. By cutting the slits in a certain way, you will create colorful cute toys for your child to play with. Look in the craft box for leftover felt, juice straws and beads.
Move the glue and scissors closer. Progress:
- For each rodent, prepare 2 parts from the same material. The first will be the body, pointed at the head.
- From fabric of a different color you should make “8” shaped ears and a nose.
- Next, you need to take scissors and make 4 cuts on the body: 2 vertical on the back of the head and 2 in the rump area.
- All that remains is to place the ears, glue the nose and attach the beads in place of the eyes.
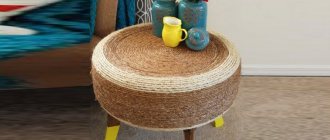
Let there be light
A lamp made at home can be a beautiful and unique craft.
It will take time and patience, but as a result you will get an art object.
- A balloon is inflated. A jute rope coated with PVA glue is wound around it. The glue is diluted with water (1:1), the rope is wetted before wrapping the ball, wrap it slowly and carefully, laying out parallel or crossed lines, or intricate patterns.
- When the intended surface is finished, leave to dry. Apply 2-3 times with the same solution, drying between applications.
- The ball is pierced and pulled out, and here you can paint it with colored, gold, silver spray paint.
- If you make several of these balls, of different sizes, but the same color, you will get a magnificent ceiling lamp.
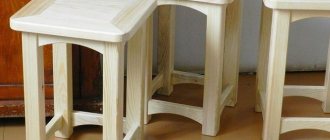
Crafts made from plywood
When arranging interiors, designers increasingly began to use plywood products. Of course, you can buy a figurine in a store, but it’s much nicer to make it yourself. In this case, you do not need to have carpentry skills at all.
To make lightweight plywood crafts with your own hands, they are not required, nor are the use of expensive tools. You just need to print out the design you like, transfer it to a wooden base and carefully cut it out with a jigsaw. If desired, the finished product can be painted or varnished.
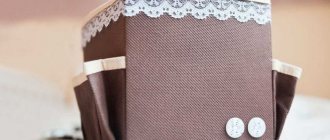
Interesting DIY items: bag for small items
You will need:
- thick fabric (in this example it is a napkin under the plate)
- ruler
- pencil
- rubber
- button
- thread and needle (or sewing machine)
1. Prepare a piece of thick fabric and place it on a flat surface.
2. Fold the fabric in half lengthwise. Iron it (you can use your fingers).
3. Lay out the fabric and fold one part of it to the fold line (see image). Secure with a pin.
4. Do the same on the other side.
Cardboard decor ideas
In winter, when there are few sunny days, it’s time to start creating cardboard crafts that will lift your spirits. Get a bouquet of cheerful flowers on your windowsill. To do this, take:
- some colored paper;
- white cardboard;
- felt-tip pen;
- scissors, glue;
- ribbon.
The procedure for making one flower:
- cut out three blanks (two with six petals from colored paper, one in the shape of a circle from cardboard);
- make holes in the cardboard element for eyes and smiles;
- put the part with the petals in front of you and glue a piece of cardboard in its center;
- Color the eyes with a black felt-tip pen, bend the petals forward;
- cut out a stem from cardboard, on one side of which glue the finished flower blank, on the other - a pre-cut part with petals;
- Make a leaf out of green paper and attach it to the stem.
Having created the required number of flowers, they should be tied with a ribbon and placed in a vase.
We create home comfort with our own hands
There is no person who doesn't like candles. Live fire, a pleasant aroma, are synonymous with convenience and tranquility.
Candles are one of the crafts that symbolize home comfort. There is a composition for candles that you can buy in the store.
If you decide to make it yourself, the ingredients:
- 55-65 paraffin
- 30-40 stearic acid
- 5-10 beeswax.
- Cotton wick
Stages of work:
- The prepared form is greased with vegetable oil. If you are using a decorative mold intended for a candle, there is no need to grease it.
- Secure the wick. To do this, place a stick on the edges of the mold and tie the wick to it so that it is positioned vertically.
- Melt the mixture in a water bath. And at this stage, flavors, oils, dyes, and dried flower leaves are added.
- Pour the melted mixture into the mold and leave until it cools. If the candle molds are transparent, then by adding dyes to the mixture to match the tone of your interior, you will achieve harmony and uniqueness.
- Candlestick. A simple trick for a candlestick is to use two or three clear glasses or glasses of different shapes.
- Tint the candle mixture gradually, adding a little more paint to each subsequent candle. Different tones of the same color diversify the palette of the room.
Vegetable crafts
The arrival of autumn means that it's time to make crafts from vegetables and fruits. Even kids can do this task. Age doesn't matter here. If desired, you can create an edible composition. After the child gets bored of playing with it, he can eat it.
Nowadays, there are a lot of options for vegetable crafts. What idea to realize depends on the imagination. If everything is bad with it, pay attention to the finished works, photos of which are posted on the Internet. Girls will definitely love the swan princess. And the boys can be asked to make a parrot - the companion of the pirate Silver.
Easy DIY crafts for beginners - just right if you decide to get creative, but don’t have any special skills. By creating them, you will gain experience and be able to determine for yourself the most promising directions in needlework.