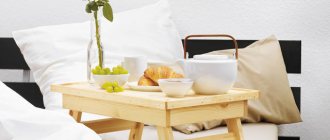
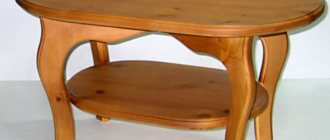
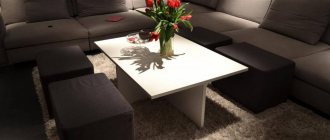
Recently, designers have insisted that preference should be given to the most rational setting of living rooms. It is not recommended to clutter the space with unnecessary interior elements. A bright and at the same time useful piece of furniture in the living room, study, or bedroom is a table that has many names - coffee table, coffee table, bedside table. And if you make a coffee table with your own hands, it will look even more interesting and unusual. Surely few people can boast of a similar product.
Hardboard
What can you make a coffee table from without drawings, a lot of tools and experience? Of course from hardboard! This material is very similar to fiberboard, but at the same time it has a greater margin of safety - a product made from it will be much stronger and will last longer.
To make a coffee table, purchase a sheet of hardboard and table legs from a hardware store. Using a pencil, draw the outline of the tabletop and cut out the workpiece using a plastic cutter.
Sand the edges with sandpaper, after which the tabletop can be painted and varnished. After the varnish is completely dry, you can install the legs.
Hardboard will also solve the problem of how to make a coffee table for dolls - from it you can make not only real, but also high-quality doll furniture for your children.
Instruction No. 2 – assembling a table from logs
A log table is the ideal embodiment of nature lovers’ idea of what kind of furniture should be in the house. You may be indignant, saying that no nature lover would cut down a tree to make a table out of it, but we hasten to reassure our reader: such tables can be made from naturally fallen trees, their quality does not suffer from this.
On the contrary, removing dead wood from the forest does not cause any damage. And it won’t, because the logs won’t go into the stove to become fuel and burn, releasing toxic smoke. This is why independent mining is good: wood, items made of synthetic materials and other various waste receive a second life, they are reused, thereby protecting our mother nature.
Here is an original wood table that you can assemble with your own hands
Step #1: Gather the necessary materials.
So, to create a table of records with our own hands we will need:
- plywood;
- a thin tree fallen by the wind, better than birch;
- legs (can be wooden or metal);
- putty of the same shade as the wood;
- glue gun;
- screwdriver
Having collected everything, let's get to work.
We need plywood to make this stylish coffee table
Step #2: making the base for the table.
So, cut out a square or rectangle of any size from plywood, but with an area sufficient to lay logs along its edges, and also place a frame “box” inside it.
Then we will need to cut out 4 sides of a smaller square or rectangle that will need to fit inside our shape.
Attach the sides to each other and to the lower segment - the base.
Making a frame for our future table
Step No. 3 – cover the base with bars.
Glue the blocks around the bottom inscribed square on all sides using wood glue.
Then we also glue the bars inside our improvised box, leaving only a small distance between them.
We cover our part with bars
Step No. 4: insert putty into the cracks and sand.
Putty of the same shade as the wood is introduced into all gaps between the bars. After filling the space, let the product dry and then sand the surface of the table with a grinder to achieve the smoothest possible surface.
Install all the joists, and then seal the cracks with construction putty of a shade close to them
Step #5 – attach the legs.
We turn our table over and use a drill to make holes along the edges of its parts to which our legs will be attached. Place them tightly so they don't accidentally fall off when you awkwardly push or hit the table.
Carefully attach the pre-purchased legs
This is where the description of how our table is made ends, but we want to give you a few more ideas on how to do it:
- instead of a cut down tree trunk, you can use a large pile of branches, only the branches need to be stronger, not from the type of wood that breaks easily, and they should also be thicker;
- you can stick on the table slats made of old or artificially aged boards, painted to match your living room, thereby also giving a second life to outdated raw materials;
- instead of filling the gaps between the bars with putty, create a flat surface on which you can place dishes or a laptop; place glass or an empty box on top of the bars;
- By the way, if you put glass in the box, you can depict some kind of forest scene inside, or figuratively place twigs, leaves, dried flowers, etc.
Pallets
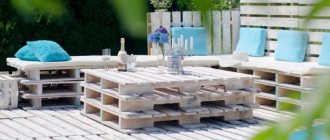
Photos of coffee tables made by hand from construction pallets look unusual and stylish. It is not at all difficult to repeat this design.
To create a table, use 2 identical pallets, stacked on top of each other and fastened with self-tapping screws. At the bottom of the pallets, it is necessary to carefully remove the excess sections - this way the table will not be so heavy, and it will also free up a lot of free space inside the future table.
Both pallets need to be carefully processed - remove protruding nails, fasten poorly connected elements, sand uneven wood with sandpaper. If you want to preserve and emphasize the structure of the wood, then use a transparent varnish to cover the pallets.
Note!
DIY feeder - step-by-step instructions for creating a feeder + detailed diagrams with photo reviews- Do-it-yourself rugs - TOP 120 simple patterns with master classes on how to make them yourself + photo reviews of finished rugs
Do-it-yourself dolls: a master class on making a beautiful doll. Simple instructions with photo examples of ready-made options
A product to be painted requires more thorough preparation - all uneven parts of the workpiece must be filled, then sanded, coated with a primer and only then can you begin painting.
The tabletop for such a piece of furniture can be made of thick tempered glass or furniture plastic. You can also nail the strips from the third pallet to the top of the piece to create a solid wood tabletop.
Selection of dimensions
A table measuring 40–50 cm in height is considered traditional. This is the optimal setting that allows you to sit comfortably next to it on an armchair or pouf. If we are talking about special models, for example, stands, then a height of 60–65 cm is allowed. It is recommended to take into account the parameters of upholstered furniture - the table should not be higher than the sofa or armchairs next to which it is located. The length and width of the tabletop are on average 120 and 60 cm, respectively. According to the standard, the higher the structure, the larger the tabletop can be, but this is not a strict rule. For specimens with round or oval surfaces there are no serious restrictions on dimensions. You should select the exact size of the sofa table, having previously measured the height of the upholstered furniture next to which it will stand.
The size of a self-made coffee table should correspond to the area of the room. Even the most original, but too small models will become inconspicuous elements in the space of the room, and a large specimen will take up a lot of space and interfere with movement around the room. The outlines of the rest of the furniture are also taken into account - the table should organically blend into the style. In the living room, square tables of different heights are often preferred. If you need a more spacious model, you should choose the rectangular option. A round coffee table is considered universal due to the variety of dimensions. Also, such products are preferable if there are small children in the house, due to the absence of sharp corners.
Standard
Folding
Round
Oval
Transformer
Old suitcase
Even something like grandma's suitcase can be made the basis of a designer coffee table.
To do this, you will need furniture legs that match the design and a piece of plywood that fits the size of the bottom of the suitcase. Mark the places at the bottom of the suitcase for attaching the legs and drill holes in those places.
Place a sheet of plywood inside the suitcase and mark where the legs are attached and drill holes. Now you can attach the legs to the structure. The plywood in the suitcase can be decorated with fabric or scrap paper.
Arrangement of additional functional elements
This category of tables in general is not intended for storage, eating or working. But in conditions of limited space, equipping furniture with additional functional elements is always welcome. The following helps to increase the functionality of coffee tables:
- The wheels are screwed to the bottom of the legs. The table on wheels can be easily moved around the room without scratching the floor, and is also convenient for serving hot drinks.
- Drawers, hidden niches.
- Additional devices for placing printed materials, stationery, laptops, telephones, permanently mounted on furniture.
- Additional countertops, lifting or sliding elements (transforming model).
The drawers are usually hidden at the edge of the coffee table, but if desired, they can be pulled out (rollers are attached from the bottom). Regardless of the type of additional elements, it is necessary to use high-quality fittings and guides for their fastening.
Sources
- https://vsepodelki.guru/kak-sdelat-zhurnalnyj-stolik/
- https://mebel-sovet.ru/stoly/samodelnye/1334-zurnalnyj-stolik-svoimi-rukami
- https://designplusdecor.ru/decor_zhurnalnyi-stolik-svoimi-rukami
- https://krrot.net/zhurnalnyj-stolik-svoimi-rukami-foto/
- https://mebel-expert.info/mebel-svoimi-rukami/stoly/zhurnalnyj-stolik-iz-podruchnyh-materialov-svoimi-rukami
- https://vsesamodelki.ru/kak-sdelat-zhurnalnyj-stolik/
- https://jamaster.ru/zhurnalnyj-stolik-svoimi-rukami/
- https://mastersamodelok.ru/zhurnalnyj-stolik-svoimi-rukami/
- https://HouseChief.ru/zhurnalnyj-stolik-svoimi-rukami.html
- https://Trizio.ru/zhurnalnyy-stolik-svoimi-rukami-idei-foto-1020
- https://www.remontbp.com/zhurnalnyj-stolik-svoimi-rukami-2/
Car tires
You can make an original coffee table using an old car tire, a sheet of fiberboard, furniture legs and jute rope.
Note!
DIY satin ribbon bows - step-by-step instructions for creating unusual bows + detailed diagrams with photos- Do-it-yourself furniture restoration: step-by-step master classes on restoration at home (120 photo ideas)
- Do-it-yourself rack: step-by-step instructions with photos and descriptions on how to make an unusual rack
Wash and dry the tire thoroughly. Cut out 2 pieces of chipboard according to its diameter and attach them to both sides of the tire using screws. Attach the legs and decorate the resulting structure using jute rope and a glue gun.
Veneer finishing
Veneer finishing
Restoring an old coffee table with your own hands is a simple process. Today it is not difficult to choose veneer that matches the color of the rest of the furniture - stores offer a huge range of similar products that imitate a wide variety of wood species.
Veneer can be fixed to the tabletop using the cold or hot method. In the first case, you will need a press. Finding it at home is problematic. But it’s quite possible to cover a tabletop with veneer using the hot method with your own hands:
- To ensure that the veneer lays perfectly evenly, clean the surface, removing all irregularities and knots
- The wood must be degreased by treating it with acetone. If there is resin, it is first cleaned off with a knife.
- After carrying out the above procedures, treat the surface to be glued with a primer.
- Apply a small layer of glue (preferably PVA) to the cleaned surface. You can also use hidewood, polyurethane or a special composition for working with wood.
- The glue should be sufficiently thick and viscous. Water-based formulations are not recommended. Otherwise, the veneer, having absorbed moisture, will swell
- The veneer can be glued only after the applied layer of glue has dried. It shouldn't stick to your hands
- Carefully apply the veneer and then place a white sheet of paper on top
- We begin to warm up the veneer with a hot, but not too hot iron. If air bubbles appear, they must be pierced with a needle, smooth the surface with your hand, and then ironed again. The glue protruding at the edges is immediately removed with a rag.
- A stain or varnish is applied over the veneer. They will protect the material from external influences and moisture
remove the swellings formed on the old veneer using the same heated iron. After warming up, pierce the void with a needle and straighten the surface well.
Square table
To make it you will need 4 timbers for the legs and boards for the bottom and table top. The dimensions of the parts can vary depending on the size and height you plan to create the furniture.
Connect the legs together with 8 boards - 2 on each side of the square, top and bottom, to form drawers. Nail the boards parallel to each other onto the bottom planks, creating a shelf.
Note!
Corrugated paper flowers: TOP 100 photos of ready-made options + instructions on how to make them yourselfDIY family tree: instructions for creating a family tree + DIY design ideas
Do-it-yourself sun lounger: photos with instructions for creating sun loungers + detailed diagrams of the stages of work
Knock down the tabletop so that its edges protrude 5-10 cm beyond the frame of the structure. Nail long boards on 2 opposite sides. Now nail the shorter pieces perpendicular to the first two boards. After this, the structure can be sanded, painted and decorated.
Small coffee tables made from pallets
Pallets or trays are a fashionable textured material that best demonstrates its beauty in loft, modern and country style interiors. To make such extraordinary furniture you will need simple available tools:
- several pallets;
- hammer;
- drill;
- glue;
- nail puller;
- clamps;
- screwdriver;
- thumbscrew;
- primer;
- soap;
- legs or wheels.
The first thing you should do is clean your future table from dirt and unnecessary elements. A nail puller will help get rid of protruding nails, glue will connect broken parts, and clamps will compress the boards. Before work, the material itself must be thoroughly washed to remove dust and dirt and sanded.
When everything is ready, the pallets are stacked on top of each other. The height of the cabinet depends on the number of pallets: the more, the higher the table, the smaller it turns out with two pallets. The surface of the furniture is covered with a thick layer of primer and then carefully varnished. The wheels or legs are attached to the back with screws. To make your work easier, you can use basic means at hand - rub the screws with soap.
Table with shelf
This product can be made from solid wood, MDF or chipboard.
Cut out 2 identical quadrangles, one of which will become the tabletop, and the other will become the shelf. Next, you need to cut 3 parts along the width of the tabletop, 2 of which will become the sides of the shelf, and one will be located in the middle as a stiffener and a shelf divider into 2 equal zones.
Next, all that remains is to connect all the parts using a screwdriver and attach the high legs.
Table transformer
The shortage of square meters in housing is solved by replacing familiar pieces of furniture with more functional transformable furniture. For example, if necessary, a coffee table can be turned into a dining table and then put back together.
You can make a transforming coffee table yourself. This will require a competent drawing, high-quality materials and fittings.
Material
In principle, a coffee table can be made from any unnecessary, but not shabby, trash of any design. The furniture is old, but quite strong (not corroded by insects and mold). It all depends on the imagination of what is at hand.
In most cases, such a piece of furniture is made of wood, metal, plastic, tempered glass (not fragile). But you can also turn your dining table into a coffee table. Take apart an old closet, dresser or chest of drawers for parts and make something out of it. Wheels can be taken from an old baby stroller.
How the process of manufacturing and assembling the table will proceed will be influenced solely by enthusiasm and the material at hand (or on your feet).
