Luxury or necessity?
Before you start building a changing table, you need to understand whether its presence is really necessary for the child. On the one hand, this is a fairly convenient thing, but on the other, many young parents can do without it.
The main advantages of the changing table include:
- Convenience for mom. Sometimes a baby has to be changed many times - either he burped, he peed himself, he got dirty, then he needs to be ready for a walk, or undressed. If the mother constantly changes the baby's clothes while standing over the sofa or bed, then she will constantly strain her back. And this part of the body of a young mother is already subject to constant stress. The diaper is at the optimal height, which allows the parent not to bend.
- Safety for the child. As a rule, a changing table or chest of drawers is equipped with various drawers and shelves that contain everything necessary for small children. Therefore, when changing the baby’s clothes, the parent has access to all the supplies he needs, which allows him not to leave the child alone. This provides him with additional safety, because a few months after birth he will learn to roll over, which means he may fall.
- Baby's health. Often a small family member needs therapeutic massage or gymnastics. These treatments allow you to develop muscles and flexibility. For proper treatment, a flat surface is required, which is what the swaddling device has.
Having studied all the positive qualities of this piece of furniture, you can be sure that it is necessary for the early development of the baby. But you don’t have to buy it in a store, because its cost is significantly higher than the cost of ordinary tables and chests of drawers. In addition, a homemade table will become the highlight of a children's room.
Dimensions
Manufacturers of swaddling machines claim that these products are intended for children up to one year old. But in practice this statement is not always true. It is important to correlate the baby’s age with the size of the table.
If the changing table is 70 cm long, then it will only be convenient for a child slightly older than six months. It all depends on the individual characteristics of the child. But a surface length of 90-100 cm can be used by parents until the baby reaches a year or even more.
Kinds
Changing tables are of the following types:
- soft boards for changing;
- pelenator-shetka;
- special chests of drawers;
- hanging models;
- transformable swaddling pens.
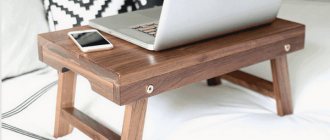
The first option is considered the simplest and most economical, as it is easy to do with your own hands. This board can be carried and installed on the required surface. It is equipped with special sides that prevent the baby from falling. There is a special waterproof material on the surface of the board. The changing board is very convenient to take with you on a trip.
The frame for the shelf can be made of wood, plastic or metal. Its design includes several shelves or drawers, as well as a hard or soft changing board. On the changing table-shelf you can store small baby things like diapers, wet wipes or cosmetics.
A special chest of drawers provides quite a lot of space for storing your baby's things. It differs from the previous version in greater capacity. The changing board can be removable.
But it should be borne in mind that such a chest of drawers requires quite a lot of space and is not suitable for a small room.
Hanging models of pelenators are ideal for small rooms. They are mounted on the wall and can be folded down if necessary. You can additionally attach pockets to them for storing small items. Their folding mechanism saves space and is easy to use.
Transforming tables are more difficult to manufacture, but they will last longer. When the child grows up, they can be converted into a children's table, at which it will be convenient to play and study.
Useful tips
Additionally, consider the following recommendations:
- It is important to monitor the condition of the oilcloth so that no water gets into the soft base.
- You can attach a toy to the sides of the chest of drawers or the ledges of the tabletop to make the baby more fun during the procedures.
- The simplified version of the table does not have special sides, so you should not leave your baby unattended. If desired, you can secure the side and front transverse sides, which is guaranteed to prevent a fall.
Making a changing table with your own hands is not that difficult. In the future, you can decorate it as you wish, focusing on the overall style of the nursery’s interior. This simple design will greatly simplify the life of parents and help the proper development of the baby.
Advantages
A small child has to change clothes at least several times a day. A newborn’s diaper is often changed, changed after and before bedtime, and changed clothes before going outside. In general, this turns out to be at least 5 changes per day. Women after childbirth often complain of back pain, so it is very difficult for them to bend over the sofa every time.
With the help of a changing table, the process of changing your baby will become much easier.
The changing table is also very convenient for performing gymnastics and massage for the baby. It is a hard and smooth surface that is considered ideal for carrying out these procedures. In addition, in the first months of a child’s life, when the doctor often comes home to conduct an examination, such a table will also be very useful.
From a safety point of view, a changing table occupies a more advantageous position than a regular sofa. Typically, a diaper changer requires shelves and drawers where you can store diapers and cosmetics for a newborn. Thus, when changing the baby’s clothes, everything necessary is immediately at hand for the mother. Even when the baby can roll over and crawl on his own, the mother will always be there to hold him with her hand.
Changing chests will help the mother until the baby reaches the age of 1 year.
Create a drawing
You will need a drawing, which can be taken from the World Wide Web or created using a computer program. Here are the most popular:
- WOODY program;
- T-FLEX Furniture;
- Astra Furniture Designer;
- Basis Furniture Maker.
Choice of design and construction
With a little skill, you can easily build a simple structure. Designing a changing table will take some time. But in return, you will receive a product of the required shape and size, which is almost impossible to achieve when purchasing a standard model.
By constructing a changing chest with your own hands, you can guarantee the absence of materials containing harmful substances to the health of the child.
When starting to make a table, you should determine what it will be like:
- portable;
- stationary.
Mobile structures are suitable for families who maintain an active lifestyle. If necessary, you can place such a chest of drawers in the trunk of a car when traveling out of town.
- A stationary version of the changing table will appeal to those whose children spend most of their time at home. Such designs allow you to collect all the necessary things in one place, so that you don’t have to look for them throughout the apartment.
- Portable changing boards and shelves can be quickly folded and disassembled. Their size must correspond to the dimensions of the room. It is advisable that it be located against the wall in the room.
- Parents living in small apartments most often purchase suspended structures. Some tables allow you to combine a changing device and a baby bath.
- The chest of drawers with a bed has the greatest number of useful functions. Unfortunately, such a structure on the sides takes up a lot of space and is quite difficult to construct on your own.
- A simple table has more modest dimensions. Small products are inconvenient for changing diapers. The choice in favor of such a table should not be made by inexperienced parents.
Preparation of materials
To make a changing table you do not need a large amount of materials. Particularly stringent requirements are imposed on the quality of such products.
The changing table, the dimensions of which are best chosen independently, is made from the following materials:
- natural wood;
- MDF;
- Chipboard.
Experts also recommend using laminated boards. Products made from natural materials are the most popular. Unfortunately, the wood for a chest of drawers is quite difficult to process. Therefore, in order to save money and make the work easier, it is better to purchase chipboard or MDF.
Laminated products can cause an allergic reaction in a child. For this reason, it is better not to use this option.
The quality of the chest of drawers will depend only on you. When purchasing materials in a store, be sure to ask the seller for a quality certificate. It is very important that the parts do not contain harmful components.
What material is it made from?
When choosing a manufacturing material, the main criterion is safety, so it must be environmentally friendly and not contain any harmful or toxic impurities. The more natural the material, the better.
Natural wood is preferable, but not every budget can withstand such a load. Therefore, you can use substitutes, such as chipboard (chipboard) or MDF (medium density fiberboard) - they will cost much less, and in terms of safety and reliability they fully comply with the standards.
It is recommended to use the same criteria when choosing coatings - paint, varnish and soft board surface.
Under no circumstances should you use paint with a toxic composition or an unpleasant odor, and the material for the changing board, including the filler, should not cause an allergic reaction.
It is best to make a soft surface from holofiber (it is hypoallergenic) and natural fabric (for the top layer).
Material selection
When choosing a material for making a table, parents should be based on its safety. Thus, the frame of the product can consist of wood, MDF or chipboard. If you have the financial opportunity, of course, it is better to choose natural wood. And for a budget option, MDF and chipboard are suitable.
The changing board can also consist of MDF or chipboard, plus it is equipped with soft filling and waterproof material. For filling you can purchase foam rubber, holofiber and even a terry towel. It all depends on the desire of the master.
Experts advise purchasing hypoallergenic material, since a small child is most susceptible to allergic reactions.
If the structure is subsequently painted or varnished, it is imperative that these products have quality certification. They should not contain toxic substances. In the best case, the paint and varnish product should have a special inscription that allows it to be used in a children's room.
All fittings should be used to a minimum and kept hidden. In this way, you can protect your growing baby as much as possible from damage from bolts and retractable mechanisms.
Construction methods
The assembly principle of different models of changing tables is different.
Folding wall
The changing table, which is mounted on the wall, is almost invisible when folded. Due to the lack of support, it is necessary to make some efforts to create a stable structure.
The wall-mounted table must be mounted on a strong and reliable wall.
This is necessary so that it can withstand a weight of up to 10 kg. The hinged lid of the product must be installed on gas lifts, which will allow it not to close spontaneously. It would be nice to build several shelves in the wall part of the diaper changer. In this way, you can not only organize a storage system, but also provide additional stability to the base.
Suspension
The design of a hanging changing table is made of a board, sides and supporting corners. All these elements must be cut out of chipboard and connected using self-tapping screws. For better fixation, it is better to fill the holes for the screws with glue.
Portable
A portable changing board is good for its mobility. To make it you will need chipboard sheets, an electric jigsaw, self-tapping screws, a primer and paints and varnishes.
The base of the product consists of a board, the length of which is 90-100 cm, and the width is 60 cm. The sides have a length equal to the length of the board, and their height should not exceed 10 cm. You can build an additional side at the head of the structure. Its length in this case should be 60 cm.
The parts are connected with screws or self-tapping screws, and at the end of the work the entire table is primed and painted.
Soft
A soft table can be made from a foam rubber cushion 3-4 cm thick. The top should be covered with a waterproof material, for example, a diaper. Separately for the product it is necessary to sew a cover made of natural fabric, which will have a zipper on the side.
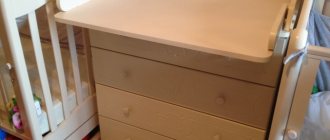
Dresser
To assemble this type of structure, it is advisable to have professional carpentry skills. It is imperative to use detailed drawings indicating all measurements.
Chipboard boards should be cut as carefully as possible. In addition to the boards that come with the kit, you need to check the presence of guides for rolling out drawers, handles, legs, corners, self-tapping screws and self-tapping screws. Tools you will need are a screwdriver, an electric drill, a measuring tape and drills.
The assembly process is quite complex, so it is important to strictly adhere to the drawings and do everything consistently.
Whatever model of changing table is chosen, you need to sensibly assess your own capabilities. A little patience and free time, and an individual diaper for newborns is ready.
Portable
Portable changing tables are convenient because they can be fixed on any surface, be it a crib or a bathtub. They are changing boards with sides on both sides.
To make a homemade portable table, you need to purchase several sheets of chipboard and a mesh for sanding. It is most convenient to cut the parts with a jigsaw. You will also have to use fasteners, primer and paint.
As a base for the changing station, you can take a board about 1 m long and 60 cm wide. The length of the side sides should correspond to the length of the base, their height does not exceed 10 cm. You can also add a third bar at the head of the child.
First you need to sand the frame and prime it, and then apply paint. The structure is held together with screws. The hard surface of the board requires an overlay. This could be a homemade mattress.
Manufacturing process
Having prepared all the materials and tools, you can begin manufacturing. First you need to draw a sketch of the future structure. To do this you will need a sheet of paper and a simple pencil.
To build a changing chest with your own hands, drawings and diagrams for which can be found on the Internet, should take into account the height of the parents. You should be comfortable using the product while changing diapers.
Before assembling a chest of drawers with a changing table, you need to finally decide on the location of its installation. This is required in order to adjust the size of the chest of drawers.
Work order.
- Manufacturing of parts.
- Product assembly.
- Decoration of the building.
Having figured out how to assemble a chest of drawers with a changing table, you can begin making the elements.
- First of all, you need to focus on the sides, cutting them out using a jigsaw. These parts have a rounded shape.
- Then you need to make strong side panels. Making such details is quite simple. To do this, you will need wooden blanks with marked markings.
- Afterwards, pieces of any soft material should be secured to the sides. Ordinary foam rubber is best suited. The easiest way to secure the material to the sides is to use glue. The front and back of the side drawers can be made of less durable material.
- The changing table, which is small in size, can be assembled within a few hours. Folding shelves can be purchased at the mall so as not to waste time making them.
The back wall of the chest of drawers should be slightly higher than the sides. Thus, it will act as a stiffener. The selected mattress for the child should fit into the distance between the parts. At the final stage of work, you need to make notes at the place where the parts are attached.
The strength of the structure will depend on how high-quality fittings you choose. The fasteners will allow you to assemble the table like a simple construction set. You can use furniture handles for drawers. Intersectional ties for parts will add reliability to the structure.
From the outside, the fastenings will be almost invisible. The back wall is fixed with self-tapping screws. Hats can be covered with decorative caps. The dresser parts should not wobble after assembly is completed.
Step-by-step instruction
When planning the assembly of the classic and most functional model of a changing table, namely a chest of drawers with internal drawers and a hinged lid (removable if desired), work begins with drawing up a diagram, selecting and calculating materials, preparing tools and premises. The process itself is divided into separate stages:
- Marking and cutting of workpieces.
- Processing of edges and surfaces. Unlike ordinary chests of drawers, such products have a minimum of protruding corners; their sides are necessarily rounded.
- Sequential assembly of the frame, drawers, fastening of guides and the table itself.
- Preparation of the mattress, decoration.
In the classic design, the chest of drawers is equipped with regular drawers (2 in the top row + 2 or 3 common bottom ones), but there are no restrictions. The general requirements include only the need for a higher back wall and a protrusion of the sides up by 10 cm. When assembled, the folding part of the changing table must be closed.
Marking and cutting workpiecesEdging and rounding corners
Assembling the frame and fastening the guides
Assembling the box
Installing drawers in a chest of drawers
Preparing the mattress
Create a drawing
Ready-made drawings of changing tables for newborns are freely available on various online resources. In the absence of experience in carpentry work, it is not recommended to deviate from the dimensions indicated in them. If you need to make adjustments or design your own model, programs like PRO100, Astra, Basis-Furniture Maker, WOODY are a good help. These same services help calculate the required amount of material and draw up a cutting plan for sheet plates.
The height of the chest of drawers remains standard, the main level is maintained within the range of 80–110 cm. The depth is selected taking into account the height of the child; when unfolded, the length of the changing pad should be at least 70 cm (optimally 90–100 cm). The width of the chest of drawers can be any, but models in the range from 80 to 100 cm are considered the most comfortable.
Preparation of materials
A jigsaw is best suited for cutting blanks for a changing table. If you are confident in the sketch, slab materials can be cut in the warehouse at the time of purchase. Mandatory requirements of the technology include rounding the edges of individual parts, treating open areas with sealing and antiseptic compounds, followed by covering with tape.
The preparation stage ends with drilling holes for fasteners, after mandatory checking of the markings. In addition, the locations of corners, intersection ties, guides or confirmations are marked on the blanks with a pencil. All necessary points on the sides or edges must “mirror” each other; deviations from a single level of more than 1 mm are not allowed.
Lay out the workpieces, make markings according to the drawing and drill holes for fasteners
Frame
The finished parts are assembled into a single structure using a screwdriver or hex key. The table assembly procedure is standard:
- The chest of drawers is assembled sequentially. At this stage, the bottom, sides (if there are separate elements), and the back wall are screwed to the sidewalls with fixed guides.
- Using confirmations, the internal shelves are fixed.
- The boxes are assembled separately and the evenness of each is checked. The second part of the guides is fixed on the outer sides of the drawers along pre-marked lines.
- The smooth movement of the drawers is checked, and if there are no problems, the fittings are fixed on the facades.
Install the guides on the side walls of the chest of drawers Consistently assemble the product box Assemble the drawers Fix the fittings
Table installation
The folding table is assembled and mounted last. Maximum reliability of fastening the horizontal part and sides is provided by ordinary metal corners. Installation is completed by tightening the double-sided bolts, which are finally tightened after checking the stability, evenness and smooth tilting of the shelf-lid.
To avoid mistakes, you should study the video instructions explaining what and how to make a changing table with your own hands. Any defects are eliminated directly at the installation stage. The chest of drawers is put into operation only if there are no distortions or deflections.
Secure the back wall and install the changing table
Decoration
There are several ways to decorate. Most often, the product is coated with varnish or paint.
The size of the table can be visually reduced thanks to dark colors. You can also decorate the chest of drawers with multi-colored material.
The back wall does not need decoration. It simply won't be noticeable. Decorating the chest of drawers will increase its service life. The color of the fabric can be selected to match the wallpaper.
Finishing
If the pelenator was made of MDF or laminated chipboard, it does not need further finishing . If the table was made of natural solid wood, it needs to be given an attractive appearance. After manufacturing and assembling a furniture item:
- Sand all surfaces with a grinder or sandpaper.
- We treat the products with a primer.
- We paint it with paint.
- Cover with varnish.
In addition to making the product decorative, all the above actions will extend the life of the tree . They will protect it from increased moisture, temperature changes, and other negative factors.
Whatever version of the changing table you choose, you can always decorate it, adding style and individuality:
What to consider before making a table
There is no need to rush and start assembling the chosen design as soon as such an idea appears. In order to avoid unpleasant accidents and subsequent rework, it is worth considering some points before proceeding directly to production.
Nuances:
- The table must be reliable and stable. Structural strength is one of the primary tasks facing the manufacturer. When choosing a suspended model, this concerns, first of all, the fastening mechanism.
- The dimensions of the table should facilitate a comfortable position for the baby when swaddling. If you make it yourself, you can choose the desired height of the structure and width, but it is better to make the depth standard or a little larger, but not less than 60 cm, since the baby can quickly “outgrow” the diaper.
- It is recommended to make the surface of the table soft, but at the same time, with a fairly rigid base. If you plan to sew the mattress yourself, then you need to lay an oilcloth between the outer fabric and the filling, or, even better, take a water-repellent fabric.
- And, of course, we should not forget about the safety of all materials used, as well as reducing the risk of injury to the structure. To do this, sharp corners are polished, surfaces are smoothed, fasteners are recessed, and a minimum of fittings are used.
Manufacturing of other types of tables
If the room does not allow you to install a changing chest, you can consider the process of manufacturing more compact models.
Folding wall
It saves a lot of space in the room, but you need to make sure that the partition on which the structure will be attached is strong - preferably it should be brick or concrete.
In addition to standard materials and fasteners, this model will require gas lifts, which are installed on the product to prevent spontaneous “collapse”.
For convenience, you can make several shelves in the stationary part of the table. In addition to the necessary function of storing things, they will also serve as an additional retainer, since they increase the strength of the structure.
Assembly instructions:
- Cut the blanks according to the drawing, make rounded corners, and process them with a grinding machine.
- Make markings for fastenings and drill the necessary holes.
- Assemble the frame with shelves using furniture corners or confirmations (any reliable fasteners).
- Connect the frame to the back panel.
- Fix the sides on the diaper.
- Using furniture hinges, connect the frame and the lid.
- Install gas lifts.
- All that remains is to fix the structure on the surface with a reliable fastening. It is advisable that it be designed for a weight of at least 20 kg.
Portable
Even someone who knows nothing about carpentry can handle making such a changing device. The design is a board with restrictive sides (two or three) and a mattress. The size of the board is approximately 60 x 95 cm, and the height of the slats is 6-10 cm.
Description of the assembly process:
- Cut out the blanks: base, side slats and headboard bar (you can do without it).
- Sand the surface and sharp corners.
- Connect the sides to the base using screws or self-tapping screws.
- If you have the desire and opportunity, you can install a fastening mechanism on the base from below or cut out grooves (for secure fastening, for example, on the crossbars of a crib).
- Often this design is covered with fabric instead of painting - this is quite convenient, especially if you sew a removable cover. In addition, due to the fabric, the table will slide less on a flat surface.
The mattress can be either removable or fixed on the surface of the diaper.
How to sew a mattress for a changing station
Such a mattress will be useful not only for those who have a special device for changing. It can also be placed on a simple table.
Sewing a mattress is not difficult, but you must take into account the following points:
- you need to choose fabric with the most natural composition;
- the filler must be made from materials that do not cause allergies;
- The cut must be made from solid fabric so that there are no seams in places of contact with the baby’s skin.
It is better to choose moisture-repellent fabric for the mattress. You can sew an additional cover with a zipper (for easy washing) and line it with oilcloth inside. Foam rubber or holofiber is perfect as a filler.
Required tools and materials
You will need:
- main fabric and for lining (1.5-2 m each);
- filler (1.5 m);
- centimeter, scissors;
- chalk;
- threads, pins, needles;
- sewing machine.
You will also need an iron to steam the fabric and iron the seams.
Instructions for sewing a mattress
Once the fabric has been selected and the dimensions of the mattress have been calculated, you can proceed directly to cutting and sewing the product.
Procedure:
- Cut out blanks for the mattress and sides from the main fabric, lining and filling, not forgetting about the allowance for seams along the edges of the sides.
- Place the filler between the two lining parts and stitch the resulting “sandwich” several times.
- Sew the parts from the main fabric on three sides to make a “pillowcase”, turn the workpiece inside out and insert a “sandwich” into it.
- Fold the raw edge inward and sew. Sew around the perimeter.
- Bend the part of the side along (lengthwise) in half on the wrong side, sew the side seams and part of the longitudinal one, leaving an unsewn gap in the middle about 15-20 cm wide. Finish the seams and turn them inside out.
- Fill the side with filler and sew up the hole.
- Sew the edge to the base of the mattress by hand so that the seam runs from the bottom and does not come into contact with the baby’s skin.
- The mattress can be decorated with ribbons, appliqués or soft toys. The choice of design is at your own discretion. The main thing is that the decor is not traumatic.
LiveInternetLiveInternet
Quote from candra
Read in full In your quotation book or community!
I needed: - Sintepon (thicker) w. 1.5 - 1.0 m - Main flannel (green) w. 0.8 - 1.50 m - Lining flannel w. 0.8 - 2.0 m You can use flannel of the same color, I just had a piece of green flannel and several pieces of white flowered. First I made the main canvas. I took 2 pieces of 65*75 white flannel, laid padding polyester between them and stitched it not very often, just so that the padding polyester would stay between them.
Then I took a green fabric of the same size, placed it on the resulting “sandwich”, and overlocked the edges with an overlocker (for convenience, so that all 3 layers and the padding polyester would stick together. However, after making this mattress, my overlocker broke, after all, the parts are thick, you can see in the photos that the overlock stitches sloppily, but it holds!). That’s it, the base of our mattress is ready, now let’s work on the sides, they should protect the baby from hitting the sides of the chest of drawers, which means they should also be soft, that is, with synthetic padding. We measure 3 sides (which will have sides) of our base, it turns out to be approximately 2.05 (we will add about 15 cm for the folds in the corners). We sew a 2.20*0.20 strip of green parts and the exact same strip of white. For convenience and if we have the same color material, we make a strip 2.20*0.40. Fold it in half lengthwise and lay padding polyester along the entire length. We also sew at a distance of approximately 8cm.
We also process the edge using an overlocker to fasten the layers together for convenience. Then we process one edge of our strip,
whichever one is more convenient for you, I first made the left one and from left to right I started sewing the sides to the base by hand over the edge.
Having reached the corner, you need to try on the mattress on the chest of drawers to determine the size of the fold in the corner. Having completed the sewing, we cut off the excess and sew it in the same way as on the left side. Our mattress is almost ready, I thought for a long time about what to do on the front, and settled on this option.
Having sewn the front side, it is better to put our mattress on the chest of drawers and sew the corners of the sides directly on it so that they do not puff up.
This is the mattress I got, soft and safe.
It’s inconvenient, of course, to describe the production of an already finished item; I may have written something unclear. Everything seems to be clear by itself. Here are some more photos
It all doesn't look very neat from the inside, but it's durable. From the front side everything is very decent. A friend who came to visit recently didn’t believe that I did it myself, but as soon as I turned it inside out, she believed it. So this is my mark of quality, like “made by mom”
My son is almost 4 months old and he still fits on the table.
I specifically pulled out a stack of diapers to show the convenience of the table for a newborn.
Recommendations for making a changing table
In the process of making your own table, you need to remember some important points.
Recommendations for work:
- it is necessary to correctly calculate the design parameters and make a competent drawing;
- if a ready-made diagram is taken as a basis, then you need to strictly adhere to the specified dimensions when cutting out parts;
- if you are not confident in your capabilities, then it is better to entrust the cutting to professionals;
- the design should not be traumatic, therefore all sharp corners require rounding and grinding;
- Sanding work should not be done at home, since flying dust and small wood particles can damage furniture upholstery - a non-residential premises is better suited for this purpose;
- The use of toxic paint and varnish should be avoided;
- fastening with screws and a tie will enable the structure to be “collapsible”;
- Do not forget about the reliability and strength of fastening mechanisms when manufacturing and installing a wall-mounted pelenator;
- It is better to cover all external heads of self-tapping screws or screws with special plastic covers;
- It is recommended to make a changing mattress moderately hard with a soft surface;
- for sewing a mattress, it is preferable to choose natural fabrics, hypoallergenic and moisture-resistant;
- The cover, sewn to be placed on the mattress, will facilitate the process of washing and steaming.
Today, stores offer a huge selection of different models of swaddling pens. However, a table made by yourself will not only cost much less than a purchased one, but will also become an exclusive creation with a piece of the soul invested in it.