/Accessories and decor/Curtains/
If buying new blinds doesn’t fit into your plans or budget, but you have one free evening and a charge of creative inspiration, then we suggest you make your own blinds from available materials.
We have compiled 2 step-by-step master classes on how to make blinds with your own hands and 1 master class on how to update and beautifully decorate horizontal blinds.
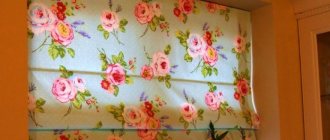
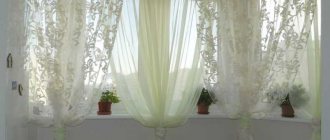
Beautiful blinds made from wallpaper
Make simple and at the same time original window blinds from wallpaper. For example, what was left over from the renovation. A piece of wallpaper is cut according to the width of the window or half of it. Since the wallpaper will be assembled into an accordion, immediately add 30-50 cm to the length. The accordion will “take away” this length.
The width of the accordion strip should not be made too narrow; such blinds will look sloppy and wrinkled. Home craftsmen recommend strips with a width of 3 to 6 centimeters - this will be more beautiful and neat.
The wallpaper is marked, and when the roll is assembled into an accordion, a hole is made in the center. It is needed for the cord with which the wallpaper will be assembled and unraveled.
A knot is tied at the lower end of the lace. There is no need for a lifting mechanism here. Three or four decorative clothespins are enough to attach the blinds to the curtain rod. But the ends along the edges are pulled higher and glued.
The bottom of the wallpaper will look like a fan. And the blinds have a rich, “palace” look. In curtain design, this decorative element is called “swag”. There are many photos of paper blinds on the Internet and it’s easy to choose the design you like best.
If the swag is not needed, it is made along the hole closer to the left and right edges. Two laces are passed through them. Since “creating” such wallpaper is not difficult, beginners who love creative decor usually take on it; below are tips on what tools will be needed:
- Paper wallpaper. Others are not suitable because they do not fold into an accordion.
- Scissors are a must, you can use a utility knife, an eraser, a longer ruler, an awl and a soft pencil (B-2B)
- You will need a decorative twisted rope half a centimeter thick and one and a half times the height of the window.
- Beautiful shiny ribbon
- Tape or glue is a must
Typically, such sun protection is done for the summer, on windows on the south side. As a rule, these curtains are disposable - they quickly fade and tear. It's okay: by next summer you can make new ones from different wallpapers.
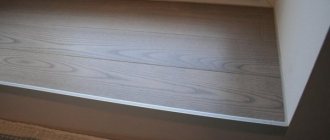
Rolls
One of the most reliable ways to make vertical blinds is to make them from fabric so that they are rolled into a roll.
Here you can choose whether you need sunlight or not and choose the right textile base. It’s worth mentioning right away that the fabric will need exactly twice the window area.
After selecting the base, you need to fold it in half and sew the sides. The workpiece is turned inside out and the entire seam is closed. The fabric sheet is wrapped around a piece of wood and secured with staples. The lower part is completed with a seam for the weight.
DIY fan: how to make a homemade powerful fan. Basic parameters and properties of fans (130 photos)- Why do you need a security alarm, what functions does it perform?
How to choose winter workwear and not make a mistake - recommendations from the pros
The tape is secured to the top using a stapler. To lift the roll, the tape is wound on a rail. All that remains is to attach it to the window. Study photos of blinds installed by yourself to better understand the issue.
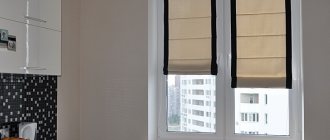
Roman blinds
Material fabric. Preferably dense. Wooden or metal rods are sewn into it at equal intervals across the width - say, 20 centimeters - from each other.
Plastic or metal rings are sewn into the middle and ends of each rod, and laces are passed through them and attached to the cornice. By pulling these laces, the curtain can be raised by divisions - from one rod to another.
The curtains, piece by piece, seem to fold into a large accordion. The most ancient and proven type of curtains. Known back to the times of Ancient Rome. Hence their name.
Materials
Depending on the appearance and type of product, different materials of any quality will be needed. Devices are made of wood, plastic, aluminum or plain paper.
Aluminum will be the most durable. They will last for many years. But they also have disadvantages. Each time you open it, a characteristic sound will be heard.
The most fragile types are paper and plastic. Despite this, they are quite popular and have a long service life.
Do-it-yourself wooden blinds will be environmentally friendly. They are the most harmless to humans.
To make cloth ones, special fabrics are used that repel dust.
Step-by-step instructions on how to make blinds
- Calculate how many strips (lamellas) are needed
- Cut the required number of lamellas with allowance for seams. One finished lamella requires two pieces of fabric
- By sewing two strips of fabric, we get a lamella blank. The cuts at the ends remain open.
- The sections are folded inward and carefully ironed.
- Then a narrow ribbon or braid is sewn onto the ironed slats.
- The braid is sewn to the lamellas, covering the seam.
- Hooks are sewn to the ends of the lamellas.
- Finished blinds are hung from curtain rods.
History and types
Lattice sun screens were invented by the Arawak Indians who lived in the West Indies, on the islands of the Caribbean. The first Europeans to see their blinds were the Spanish conquistadors. They liked the arrangement, but they killed every single one of the Arawaks - because they had less gold and spices than the hidalgos, fooled by greed, wanted to find, and the Arawaks themselves, in the Indian way, preferred death to slavery. However, the history of the conquest, crusades, etc. and so it is known.
Read also: Lenovo all-in-one PC BIOS entry
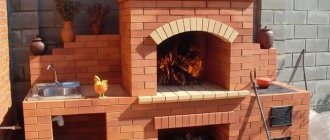
The first historical type of blinds is colonial, pos. 1 in Fig. These are simply shutters with angled wooden slats. In the tropics, where it is summer all year round and the sun is high, they are still in use today, because... simple, reliable and cheap. In a temperate climate somewhere in the middle of the 18th century. Based on the Indian ones, Venetian blinds appeared: the inner long sides of the slats were hinged in the frame, and the outer ones were connected with a cord. By pulling it, the inclination of the slats could be changed according to the time of year and the weather. At the same time, the French name for this device, jalousie, “jealousy,” took root. The coquettes of that time, closing the blinds, brought the fans hanging out under the windows to white heat; especially if a man’s face flashed in the window before.
Note: within the same climate zone (and who takes blinds with them?) the rotating mechanism can be abandoned, making Arawakan-style blinds reliable. How - see below.
Read also: Yellow water flows from nose
The development of the “Venetian” principle is now horizontal blinds, pos. 2 and 3. The first samples, in which all the lamellas could be collected into a tight package and lifted up, appeared on sale in 1841. The bad thing about them, firstly, is the price, up to 5000 rubles. and more for a good model for 1 window. Secondly, steel lamellas, especially the lower ones, are easy to bend to the point of breaking, but cannot be restored to their original state. Replacing the slats costs about 1/5 of the cost of new blinds. And the good thing, in addition to being suitable for any climate, is the ability to install rigid horizontal blinds on plastic windows without damaging them or the walls at all, see below for more on this.
Note: horizontal slats made of Faux material do not break or bend; it is something like MDF with strengthening impregnation. But the price of wooden blinds is much higher than that of metal blinds of the same size. In addition, so that the lamellas do not quickly wear out against each other, the so-called cord drive has to be introduced. ladders, see fig. on the right, which do not add elegance to wooden blinds.