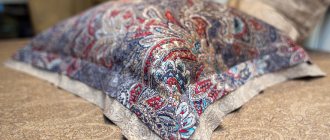
Sewing bed linen at first seems like a very tedious task: why do it, because the stores are full of a variety of sets for every taste! Only now, looking at the prices, we understand that sometimes it’s not a sin to sew it yourself, because the savings are at least doubled! But how to sew a pillowcase quickly and beautifully? In today's master class, we will step by step look at sewing three variants of covers at once: a standard wraparound cover, a zippered cover, and a cover with decorative “ears.” All of them are applicable to absolutely any interior, are easy to perform and will be within the capabilities of novice seamstresses.
What fabric is best to choose for sewing a pillowcase?
When choosing fabric for sewing a pillowcase, you need to pay attention not only to the external attractiveness of the material, but also to its properties.
The fabric should be as comfortable as possible for a particular user and not cause problems in care. All materials for pillowcases are usually divided into “summer” and “winter”.
In summer, you need a lightweight fabric that is breathable and absorbs moisture. In low temperatures, the greatest comfort will be provided by warm materials such as flannel or flannel.
In most cases, the best options are natural fabrics that do not cause allergic reactions. Cotton is easy to iron and wash, has increased strength and is not too expensive. However, over time, the bright colors on the fabric become faded and unattractive.
Linen fabrics are best suited for warm summers, as they have a so-called “cooling” effect. But not everyone will like the rough texture of linen, which can cause significant discomfort to delicate skin. In addition, such material wrinkles quickly and is difficult to smooth out.
Fans of natural silk can opt for this expensive material, which looks great, feels pleasant to the touch and cools the skin. But for a silk pillowcase to last a long time, it needs special care. Regular machine washing and hot ironing can quickly damage the fabric.
Natural satin is quite popular as a material for pillowcases. This is a strong and durable fabric with a very pleasant structure that does not harm even the most delicate baby skin. Satin does not fade over time, does not change shape after heat treatment and is easy to clean.
Thin cambric can provide comfort to the most demanding users, but it quickly loses its properties after repeated washing. For this reason, using cambric pillowcases on a daily basis is illogical.
Pillowcases made of natural wool will keep you warm in cold winters. At the same time, the material also has a number of useful properties, improving a person’s well-being during colds and reducing the intensity of joint pain.
But in order for a wool pillowcase to last a long time without deformation, it must be carefully looked after using special products.
Features of care when growing pears In memory of Yakovlev
Despite the fact that all pears belong to the same genus, each variety has a certain set of characteristics. Therefore, there are always some nuances in the care process.
Watering
Memory Yakovlev pear is a moisture-loving variety, but this does not mean that the roots should constantly turn sour in water. Overwatering can cause the tree to die. Overdried soil threatens crop failure and poor growth.
The seedling needs to be moistened weekly. Watering is carried out in grooves dug around the trunk at a distance of 30 - 50 cm (the older the seedling, the greater the distance). Pour out 2 buckets of water at one time. It is advisable to divide this norm into 2 doses - morning and evening. It is better to water with water heated in the sun.
Until the seedling has taken root, it is watered weekly
An adult pear is moistened not so often, but with a large amount of water, which is poured into 3 - 4 ring grooves. Watering is carried out 1 – 2 times a month, using up to 3 buckets of moisture per 1 m². The frequency of the procedure should be regulated by the amount of precipitation. If the summer is rainy, water only when necessary.
But most often in central Russia, the summer period does not indulge in rain, so it is important to water the pear during the following periods:
- before flowering;
- after flowering, when the ovary is formed.
There is one more mandatory watering - winter watering. But it is produced only if the autumn is dry. Water-recharging watering should be plentiful - for each year of the pear’s life there should be 10 liters of water.
After watering, it is imperative to loosen the soil in the tree trunk circle. This restores oxygen access to the roots and prevents weeds from growing. To maintain a normal level of moisture in the soil, use mulch.
Mulch helps maintain normal humidity
What fertilizers to use
To feed the Memory of Yakovlev pear, both mineral fertilizers and organic matter are used. Fertilizing begins 2 years after planting, provided that all suitable fertilizers have been added to the planting hole.
Root feeding - table
| Season | What to feed |
| Spring | urea per 5 - 7 liters of water. The solution is applied in early spring to moist soil. These fertilizers can be scattered over the snow in a circle near the tree trunk. When the snow begins to melt, they will be absorbed into the soil. Immediately after flowering, use nitroammophoska - 50 g per 10 liters of water. |
| Summer | In order to stimulate the formation of the ovary and increase the yield, 10 g of potassium sulfate is dissolved in 10 liters of water. |
| Autumn | designed for 1 m². In addition, you can use ash for digging - 140 g per 1 m². |
As an alternative, you can use organic matter. It is applied once every 2-3 years for digging. You can use well-rotted manure or humus - 10 kg is enough for 1 m².
Foliar feeding is carried out in the summer. Their goal is to eliminate micronutrient deficiencies and prevent diseases. To do this, use a urea solution of 60 g per bucket of water or Kemira - 10 g for the same amount of water.
Foliar feeding is best done in the evening
How to determine which microelements a pear lacks - table
| Microelement | Deficiency Symptoms |
| Nitrogen | On young trees, the foliage is pale and unable to develop to normal size. On an old pear, the leaves are yellow, lifeless, and fall off early. Ripe fruits are small in size. |
| Phosphorus | There are not enough leaves, they are small and unnaturally green. |
| Potassium | The leaves have a smoky tint and become dry over time, but do not fall off. The fruits have an unsightly appearance. |
| Iron | The foliage loses its natural green color and fades. |
| Copper | The young pear is stunted in growth and dark spots appear on the leaves. Young shoots may dry out. |
The pear itself will tell you what microelements it lacks, for example, with a lack of iron, the foliage loses its natural green color
Trimming and shaping
Despite its small size, the Yakovlev Memory Pear must be subjected to the shaping procedure. It is carried out in the spring after planting.
- The central conductor is cut at a height of 60 cm from the soil surface.
- The first tier is formed from the shoots that develop the following year. To do this, select 2 - 3 developed branches and shorten them by a third. The central conductor is cut by a quarter. The remaining shoots are removed.
- The following year the procedure is repeated.
Pruning a young pear - video
To prevent the pear from getting sick and to bear fruit well, after the final formation of the crown, other types of pruning are carried out:
- Sanitation is carried out as necessary. If the pear is sick, branches that cannot be treated are cut out. In early spring, remove frozen or broken shoots;
- thinning is carried out in the spring. Its task is to free the thickened crown from non-fruit-bearing, weak or inward-growing shoots. Thus, the illumination and ventilation of the crown increases, which helps to improve the quality of the crop.
Thinning of the pear crown is carried out in early spring, before sap flow begins.
Preparing for winter
The Pamyati Yakovlev variety can withstand severe frosts, so a healthy and well-groomed tree does not need additional shelter. In winter, you just need to insulate the tree trunk circle, collecting a lot of snow on it.
Seedlings are another matter. Frail trees need additional protection. The root system should be covered with a 20-centimeter layer of mulch, and the trunk and skeletal branches should be wrapped in any breathable material.
Unlike an adult pear, a seedling needs to be insulated
How much fabric will you need, how to calculate
An important step in preparing to sew a pillowcase is counting the material. You need to decide in advance on the dimensions of the finished product, and then use these indicators to determine the amount of fabric.
When making a standard wraparound cover, you need to add about 25-30 cm to the length of the pattern, as well as at least 1.5 cm for tucking the edge of the pocket. Thus, for a pillowcase 50 by 70 cm we use the formula:
50x2 (sides) + 25 (flap) + 5 (seam allowances) = 130 cm.
For a pillowcase 70 by 70:
70x2 (sides) + 25 (flap) + 5 (seam allowances) = 170 cm.
If you plan to create a cover with a zipper, you just need to add 5 cm to the length of the pattern on each side. In this segment, the fastener will be embroidered.
When designing a pillowcase with buttons or snaps, 4 cm is added to the given length on each side. This is the width of the strap with slotted loops, taking into account the double hem.
Expert opinion
Alexandra Vilisova
Experienced seamstress
I recommend adding an additional 3% of material to the dimensions, allowing for shrinkage of the fabric after the first wash.
In some cases, it is advisable to wash and iron the fabric in advance before sewing the pillowcase. Then we can say that the resulting product will exactly fit a specific pillow.
Shape selection
Before you sew a pillowcase yourself, it is important to decide on the shape of the finished product.
The parameters of the cover depend on the type of pillow it is intended for. In our country, bedding in the shape of a square measuring 70x70 cm, as well as smaller models: 50x50, 40x40, etc., are considered classic. But in recent years, rectangular European-style pillows for adults (50 by 70 cm) and children ( 40 by 60 cm). The shapes and sizes of pillows are so varied that sometimes the only way to “dress” them beautifully is to make a cover yourself.
For example, sew a 75x75 cm pillowcase for non-standard size bedding. Or pack a maternity pillow in a beautiful oblong case of your own making. Also, many housewives independently sew pillowcases 40x40 cm for decorative sofa cushions or rectangular covers measuring 60x40 cm for children's bedding.
Constructing patterns for various types of pillowcases
The most popular pillows have dimensions of 50x70 cm. Traditionally, the cover or clasp is located on the smaller side of the pillowcase. Since the product is quite simple, there is no need to make patterns. Sewing patterns are built directly on the fabric from the wrong side.
Above is a simple pillowcase with a scent for a 50x70 cm pillow. The canvas will consist of two parts of 70 cm, a small part of 5 cm and a 22 cm wrap. 1.5 cm strips are provided on both edges of the part for processing.
On the smaller side, it is recommended to allow 2.5 cm allowances for seams. The result will be a solid rectangle with dimensions of 170x55 cm.
Pillowcases measuring 70x70 cm are created in a similar way. Only one of the sizes changes.
The pattern includes two parts of 70 cm, a small part of 5 cm and a 22 cm wrap. On each side, 1.5 cm is provided for processing the edges. On the smaller sides there is another 2.5 cm allowance. The final rectangle measures 170x75 cm.
Pillowcases with a zipper are cut out without unnecessary elements in the form of a smell. Below is an example of a product diagram for a pillow with dimensions of 50x50 cm.
Pillowcases for decorative pillows are created in the same way. The only differences are in size, since such products are often smaller than regular sleeping pillows and usually have a square shape.
Knitted
Once again I am convinced that knitting is a very useful skill. If you plan to knit or crochet for a long time, winter is the best time to start learning. And don't think this is an extremely difficult stitch, you can do it!
These are knitted If braids and cornrows don't look good on you, don't be mad. Take sectional yarn - the products turn out interesting, and it is better to knit it with stockinette stitch, which is what all beginners start with.
If you don’t know how to knit patterns, take sectional yarn. Still, from a practical point of view, I like crocheted covers better - they hold their shape better.
All this beauty is crocheted. Pillows crocheted with voluminous patterns look great. Despite the beautiful appearance, mastering the technique is not difficult!
Volumetric patterns are beautiful! Round pillows look very cozy and encourage sleep. The model on the right is my favorite from this collection. How sweet, gentle, elegant. Bravo to the author of the idea!
If you don't like angles And another very comfortable type of pillow is a bolster. If you don't have it yet, be sure to do it, you won't regret it.
Very comfortable cylindrical pillows
Pillowcase sewing options
There are many pillow models that use certain types of pillowcases. In order for the sewn product to fit, it is necessary to make all the necessary measurements in advance.
Then, depending on the user’s preferences, one or another type of pillowcase is selected.
Sew a pillowcase on a pillow 50x70 cm
To sew a pillowcase with your own hands, you need to prepare fabric, thread, safety pins, chalk for marking, scissors, a ruler and a sewing machine.
Above we discussed how to mark the contours of the future product on the material. After the drawing is ready, all that remains is to cut out the figure from a single piece of fabric.
Next comes the actual sewing of the pillowcase:
- The sections are bent in width and processed using a sewing machine.
- Now the pillowcase folds. First, the desired rectangle is formed directly, and then the smell is placed on top. The structure is fixed with pins.
- The sides of the product are processed with a sewing machine, retreating the same distance from the edge.
All that remains is to turn out the finished pillowcase and try it on the pillow. If no problems arise, the work can be considered complete.
Simple pillowcase 70x70 cm
In the USSR, the standard products for pillows were pillowcases with dimensions of 70x70 cm. They are still popular today. A distinctive feature of this pillowcase is the presence of a special smell.
Production is carried out using a sewing machine, pre-marked fabric, thread, scissors and chalk.
Procedure:
- Turn the material with the wrong side facing the user and use chalk to apply the required markings.
- The wrap side is hemmed. The seam in this case is always located on the wrong side. The product is basted on both sides to form a kind of pocket.
- The sides are stitched with a strong backstitch.
- The pillowcase is folded right side inward.
- The seams are basted on the sides.
- The product is leveled.
- The basting is stitched.
Now the pillowcase is turned inside out and inspected. If there are no defects, you can immediately put it on the pillow.
How to sew a pillowcase 40x40 cm?
A pillowcase with dimensions is sewn using a similar algorithm:
- Markings are made on the material in the form of a rectangle with dimensions of 42x95 cm.
- The figure is cut out of fabric and overcast on the smaller side with an indentation of 2 cm.
- The overcast edges are processed using a machine. All threads are removed.
- Folds into a square with dimensions of 42x40 cm.
- The edges are overcast on a sewing machine with an indentation of 1 cm.
- The product is turned inside out and placed on the pillow.
For small decorative pillows, it is often not necessary to sew pillowcases with any fasteners or wraps. It is enough just to ensure a tight fit of the fabric to the product.
Decorative pillows for a children's room
Decorative pillows can be used to decorate a child's room. Handmade children's pillows can make a room cheerful, and the child will feel comfortable and cozy in it.
These can be pillows in the shape of fairy-tale characters, animals, or just a regular pillow, but a decorative pillowcase will be bright and cheerful.
How to sew a pillowcase with a zipper: master class
Pillowcases with a sewn-in zipper are extremely convenient products that are easy to use and easy to maintain.
Instructions for sewing a pillowcase with a zipper:
- The pattern of the future product is built on the material. The pillowcase can be rectangular or square. To the dimensions of the pillow you need to add one centimeter on each side and additionally take into account seam allowances. Moreover, the part for sewing in a zipper should be 3-4 cm longer than the first part.
- The zipper is basted to the fabric with the edges of the parts folded and secured with non-woven tape.
- Now the machine stitches are laid, and the running stitch is unraveled. The parts along the edges of the zipper are also machine-seamed.
- The edges of the parts are folded in such a way as to hide the zipper. The material is first fixed with pins and then stitched on a machine.
- Now all that remains is to sweep the four sides of the pillowcase with threads and sew them on a typewriter. After basting, be sure to open the zipper slightly so that you can then turn out the finished pillowcase.
The product needs to be washed, ironed and put on a pillow.
DIY pillow photo
Sources
- https://vsepodelki.guru/podushka-svoimi-rukami/
- https://idd.expert/podushki-svoimi-rukami/
- https://dnevnikmastera.ru/podushki-svoimi-rukami
- https://mydizajn.ru/podushki-dlya-divana-svoimi-rukami-100-foto/
- https://mirpozitiva.ru/articles/2121-podushki-svoimi-rukami.html
- https://lafoy.ru/dekorativnye-podushki-svoimi-rukami-95-foto-86
- https://design-homes.ru/sdelaj-sam/divannye-podushki-svoimi-rukami
- https://7dach.ru/Samdolis/sebe-iv-podarok-ocharovatelnye-dekorativnye-podushki-svoimi-rukami-242584.html
- https://HouseChief.ru/dekorativnye-podushki-svoimi-rukami-foto.html
- https://gidrukodeliya.ru/originalnye-podushki-svoimi-rukami
- https://dekodiz.ru/svoimi-rukami/podushki-na-divan.html
- https://svoimirykamiinfo.ru/podushka-svoimi-rukami/
How to sew a wrap pillowcase
Wrap pillowcases are the simplest products that even an inexperienced sewing machine user can easily handle. For sewing, a single piece of fabric is used without any additional elements.
Procedure:
- Markings of the future pillowcase are applied to the fabric, corresponding to the dimensions of the pillow. The smell is traditionally made about 20-25 cm.
- A rectangle is cut out of the material.
- The sections are folded and stitched to ensure reliability.
- Lay out the rectangle with the wrong side up. Measure 25 cm and fold so that the front side is at the top.
- On the other side, measure 70 cm and also bend it. Fasten the edges of the resulting structure together with pins.
- Hand stitch the sides using a regular linen stitch.
- Turn the structure inside out, not forgetting the valve. Carefully smooth out all corners and sides.
- Sew the sides with a sewing machine, leaving 1 cm from the edges.
All you have to do is turn out the pillowcase and put it on the pillow.
Decoration
There are many ways to decorate pillowcases. Decorating product canvases with appliqués is considered the simplest. They can be sewn on in advance, before final sewing.
Decorating a sofa cushion with a voluminous appliqué “Butterflies”
The same should be done when making covers using the patchwork technique. The scraps are cut out, placed on the fabric of the future pillowcase/paper pattern, and secured. You can even sew them by hand later. Depends on the style of the patchwork. When the patches are sewn, the fabric is ready, the fabric is sewn in the manner described.
Decorative pillow decorated using patchwork technique
If the pillow is decorated with satin stitch/ribbon embroidery, this can be done with the fabric already fully sewn, marking the pattern on the outside.
Volumetric applique of ribbons and buttons for decorating a sofa cushion
Such patterns on pillows look very cute, original and do not require much experience. The main thing is patience, because decorating is a very painstaking job that often takes a long time to do.

