<
>
In every apartment or house you can see a closet, and sometimes more than one. It is impossible to imagine how things would be stored today if people had not come up with a convenient way for this in the 17th century. At first it was a small chest of drawers with several shelves, but over time you can see how radically its design has changed. Today it is quite roomy and neat furniture, which is simply impossible to live without in modern life.
Required materials and tools
To make furniture with your own hands, you can use different materials:
- Natural wood. This is a traditional option for a classic interior. DIY wooden cabinets have many advantages. They are visually attractive, made of environmentally friendly material and can withstand significant loads. The complexity of this option lies in the need to cover the cabinet with paint or varnish, which is not easy to implement in an apartment.
- Chipboard. The most common material. It is characterized by low cost and durability, allowing for different types of construction. Almost all furniture fittings are designed for this, so a do-it-yourself wardrobe made of chipboard is the simplest and most attractive option.
- Plywood. A high-quality material with top layers of birch, beech or valuable species (walnut, oak, ash) is required. The result is very strong and durable furniture. Do-it-yourself plywood cabinets are made using the same technology as assembling furniture from chipboard. The only problem is in the finishing - it is difficult to paint or varnish the apartment. It is also quite problematic to obtain high-quality plywood from good veneer.
- MDF. This is a modern modification of wood fiber. It is believed that MDF easily absorbs and removes moisture without losing its characteristics. In practice this is far from the truth. The main advantage of the material can be considered resistance to loads, it crumbles less and has high mechanical properties.
The most popular option is chipboard. In addition, you can purchase laminated chipboard (LDSP), which does not require finishing. The craftsman himself will only have to cut the material, glue the ends together with an edge and connect them in the correct order. This ease of assembly combined with factory quality has made laminated chipboard furniture very popular.
Natural wood
Chipboard Chipboard
Plywood
MDF
The following tools are required:
- circular saw or jigsaw;
- electric drill with a set of drills;
- ruler, square, tape measure;
- pencil;
- screwdriver with a set of bits, screwdriver;
- set of accessories: ties, loops, handles, stands, hooks and rods.
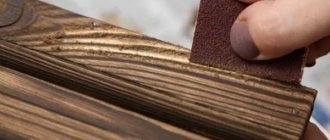
Often those who like to work with natural raw materials use different types of lumber. Assembling a cabinet from planks will require surface treatment - they need to be planed and sanded, and this will require special equipment.
Many people use ready-made coatings as raw materials for wooden products. For example, in this way you can make a wardrobe from clapboard with your own hands. The material is pre-processed and allows you to obtain an original filling of the planes. The disadvantage is the large volumes of sanding and finishing, which create a lot of dust and a strong smell of paints and varnishes. You can use other options that the master will like. It should be borne in mind that making furniture from scrap materials will require great technological effort.
Features of using furniture polishes from popular brands
Circular Saw Puzzle
Electric drill with a set of drills
Measuring instruments Screwdriver
Furniture fittings
Care Tips
Caring for wooden furniture fronts for cabinets is special. In addition to observing the temperature regime, it is necessary to polish the panels with wax with UV protection and humidify the air. Eco furniture that does not have a varnish coating requires periodic treatment with special insecticidal agents against wood-boring beetles.
To care for polished or laminated surfaces made of MDF or plastic, you need a special product with an antistatic effect, as well as rags made of natural fabric, otherwise you can achieve the opposite effect of attracting dust.
Cabinet fronts made of glass or with a mirror surface require more frequent maintenance. A mild glass cleaner and a special microfiber cloth will do. It is strictly forbidden to use abrasive cleaning agents on glass or polished MDF and plastic surfaces.
Wipe metal surfaces with a soft, dry cloth. Wet cleaning is carried out once a month with gel-based cleaning products. The use of abrasive cleaning agents, hard brushes, and metallic sponges is also prohibited.
The use of unsuitable detergents and tools can cause damage to furniture facades.
The selection of facades for furniture is a responsible process; it is carried out taking into account many factors. Having considered the nuances, the available types, their main characteristics, you can choose the best option for the interior of the apartment, and knowing all the subtleties of care, you can significantly extend the life of the furniture.
For glass and mirrors, you should use a mild cleaning agent. To prevent furniture from deteriorating, you need to treat it with polish. To care for furniture, you should use a special microfiber cloth.
A rigid frame and a strong base are the conditions for furniture stability
If the frame is insufficiently rigid, the cabinets sway, and the main reason for this is the lack of reinforcement. Fiberboard sheets for rear walls cannot provide this. We add 25 cm wide chipboard cross ties to each section at different levels and secure the confirmations. This arrangement will provide maximum rigidity.
For a plasterboard cabinet frame, only a metal profile with purchased fasteners is allowed.
Incorrect installation and insufficient number of supports will deform the bottom under load. To prevent this from happening, we install supports every 30-40 mm from each bulkhead. The sliding wardrobe can be installed on supports 25 mm high with the possibility of adjustment through the holes at the bottom. The only drawback is the space between the bottom and the floor, which will be the trash can. The second option is to use kitchen legs with a height of 100 mm.
Wardrobe frame
Preparing parts for assembly, drilling
Using special furniture programs, you can create specifications for drilling parts for subsequent assembly.
This greatly simplifies the process, making it more accurate and accurate. You can also make markings for fasteners manually. The main thing is to have a spatial understanding.
The process of drilling parts is also called “additive”.
For confirmation you need a hole “into the mouth” with a diameter of 8 mm from the front part of the part and a hole “into the end” with a diameter of 5 mm. Under the dowel, as a hidden fastener, the drilling “into the mouth” is done from the inside and with a diameter of 5 mm. The eccentric coupler also has its own nuances in the markings.
The attachment points for hinges, drawer guides and other mechanisms are also marked, and holes for the shelf supports are drilled.
Create a drawing
If you need to make a wardrobe with your own hands, drawings will be the first step towards your goal. You have to decide on the size, design, and configuration of the furniture. First of all, you need to decide what the handmade product will be used for and what its content will be. It is important to determine which compartments are needed, set their parameters and other features.
After this you need to measure the room. If there is a niche, then the distances between the side walls and then between the floor and ceiling are determined. It is also necessary to set the depth of the niche so that the cabinet does not protrude beyond its boundaries. Next, you need to choose the type of structure (cabinet or built-in), decide what kind of doors they will be, and decide on the finishing method. Having completed all the measurements, you need to make a drawing with your own hands in the traditional way (on paper) or in a special program.
If your ideas don’t come up, you can use a description or a ready-made solution borrowed from the Internet. It is important to take into account the characteristics of the material and compare them with your capabilities. The more complex the design, the more experience and skills will be required from the master. It is also important to think through all stages of assembly; there should be no unclear moments. Only then can you start working.
Photos of cabinets in the interior
<
>
When purchasing furniture, you need to make a choice taking into account the types of cabinets based on their purpose, design and their operational features. A wide range allows you to buy a model that best suits your wishes at a very reasonable price.
Selection of accessories
The most important element of a wardrobe, in addition to the usual furniture fastenings, is the door hanging mechanism. Possible options: 1. Monorail design: each door has its own path. 2. The product has a top guide, in which case the entire load falls on the ceiling.
3. The most common design is the bottom guide. The doors don't collide or fall. The choice of rollers is very important as they will need to support the weight of the doors.
You will need a set of 2 guides (top and bottom), rollers for each door, and plugs.
Decorative glass.
Decorative glass is a satin mirror with a matte pattern applied on a mirror background using chemical etching.
Stages of manufacturing different types of structures
A novice craftsman should familiarize himself with information on how to make a cabinet from chipboard with your own hands. This is the most convenient and simplest manufacturing option, capable of giving a completely professional result. It is important to decide which wardrobe to make: a wardrobe or a built-in one. These are structures designed to perform the same tasks, but with different assembly methods.
Making upholstered furniture with your own hands, tips for beginners
The advantage of the cabinet is that, if necessary, it can be moved to another wall. Built-in structures fill niches or the entire part of the room, from wall to wall. They are stationary and cannot be moved elsewhere.
Hull
The procedure for creating a wardrobe from scrap materials:
- Carry out preparatory work. According to the assembly drawing, blanks for the side walls, top and bottom covers, shelves, and doors are cut out. Deviations from the dimensions indicated on the diagram are not allowed.
- We glue the ends with an edge using an iron. Set the temperature to about 2/3, then carefully sand the edge down to the surface. After cooling, the protruding protrusions are cut off with a sharp knife, and the corners are carefully sanded with fine sandpaper.
- According to the assembly diagram, the surface of the parts is marked, holes are drilled for handles, hinges, shelf brackets, couplers and other fittings. It is advisable to make a template that gives the exact position of the center of the hole. It must first be tested on a piece of chipboard so as not to spoil the pieces.
- Assemble the outer walls, shelves and other cabinet elements (without doors). Then it is laid face down on the floor, supports are installed, and the back wall is made of wood fiber. This is a critical step that requires high precision. You need to carefully check the diagonals so as not to warp the body.
- They remove the closet and hang the doors.
- Cabinet handles are installed in them, decorative elements and other auxiliary parts are added.
The process of assembling a sliding wardrobe with your own hands from plywood or MDF is practically no different from that described above. Only finishing or covering the shaft with decorative material is added.
Carry out the preparatory work: take the necessary measurements and drawings Cut the pieces according to the available sizes Use an iron to glue the ends together with an edge
Make the necessary marks and assemble the outer walls and shelves
Install the back wall
Putting the closet in place and hanging the doors
Install handles and add decorative elements
Built-in
The assembly of a built-in wardrobe begins with precise measurements of a niche, room or section of wall. It is important to determine the distance between multi-level walls, since the planes are not always parallel or vertical. If there are deviations, the distance at the lowest and highest points must be recorded.
Next, a wardrobe diagram is drawn up. The peculiarity of such furniture is the absence of side walls, which are the walls of the room. Step-by-step manufacturing instructions:
- Mark the walls under the shelves. Use a hole punch to make sockets for the dowels and attach supports or supports for the shelves.
- The vertical inner panel is connected to the shelves, then attached to the wall with corners. It is important to constantly check the verticality and perpendicularity of the panel to the plane of the wall.
- Install upper horizontal shelves. It is attached to the wall with corners and connected to the vertical panel with self-tapping screws. It is imperative to check the horizontal position with a building level.
- All other parts are fixed in the same way. It is necessary to constantly check the diagram so as not to confuse the design elements.
- Guides for sliding doors are installed on the surface of the floor and ceiling. If the planes are not parallel, support bearings are installed first. Their position is adjusted to achieve complete parallelism.
- I install doors, handles, mirrors and other accessories.
The designs of the cabinets are very different, but the assembly principle is subject to a general logic.
Mark the walls for the shelves and secure the supports for the shelves Install the shelves, checking the levelness with a building level Install the sliding door guides
Install doors, mirrors and other accessories
Step-by-step instructions for making cabinets
The algorithm for self-assembling a standard cabinet includes several stages:
- Make preparations. Prepare your chosen material. Take your measurements and start cutting. If you do not have the experience or the necessary tools, entrust this task to professionals. For little money you will make the most accurate cut of all structural elements. Note! To do this at home you will need a workbench or at least a table. After cutting, sand all edges with sandpaper. There should be no chips, burrs, small cracks;
- Assemble the frame. If you are creating a built-in, the process will be much easier as different pieces of furniture will replace the walls in the room. They are pre-aligned, painted or glued. Assemble the parts according to the diagram - first the internal contents, last - the doors. When assembling the cabinet frame, first drill all the holes. Then attach the bottom to the side panels. The next step will be installing the roof. And only after receiving the frame, secure the back wall;
- Install shelves. Apply markings from inside the panels. Install partitions over them. Attention! Make sure they are perfectly vertical. Install shelf brackets. Drawer support guides. Hooks, rods and accessories are hung last.
- Install the doors. If you have a coupe, install the top rail first and then the bottom. If they don't lie horizontally, the doors won't fit. Install stops and rollers. Insert the facades into the gutters until they click slightly. Do not press too hard, otherwise the mechanism will fail. Hinged facades are attached to the elements with self-tapping screws and the absence of distortions, overlaps and friction is checked.
A simple budget cabinet made from scrap materials
Try building a small pantry. For example, from a rack.
Decide on the size of the product, draw a picture.
The standard rack has a simple design. Consisting of shelves and a frame, to get a piece of furniture, you just need to hang doors on it.
Calculate the dimensions of future doors, decide on the method of fastening.
Take chipboard as a raw material - a cheap and practical material. Buy the hinges and start assembling:
- To attach the back wall, a screwdriver and a hammer are enough;
- if you have quick-release hinges, then there is no need to make gaps in the door, unlike standard fasteners;
- mark with a pencil where they will be placed;
- First, screw the screws into larger holes - this will make it easier to adjust the position of the door. Once you have the stand upright and make sure the door is straight, install the other two screws.
Advice! If the cabinet is tall and narrow, attach it to the wall using two corners for greater stability.
Hinged wardrobe with doors
To assemble a wardrobe with hinged doors yourself, draw a drawing or use a ready-made diagram. Further:
- collect fragments of the toilet. If possible, have the blanks cut at a furniture company. All components will be made to your individual size;
- Mark where the holes will be and drill the holes. Work with confirmation exercise;
- secure furniture supports. Check the perpendicularity with a square. To fix the legs, use self-tapping screws;
- draw internal markings. Drill holes in the shelves and ends of the racks;
- connect elements together. Important! Assemble the structure in a horizontal position;
- attack the doors. Use a mask - this will ensure their correct position. Align the facades and secure them.
Wardrobe with shelves
If you plan to make furniture with shelves of different sizes, then you cannot do without a special program that generates a specification for sawing all structural elements for its further assembly.
Make marks for fixation yourself. This requires only the ability to think spatially.
Adding elements makes a big difference. If everything is done accurately, the furniture will be assembled quickly and easily.
Read more: 7 things that every small apartment should have
Instructions for assembling a cabinet with shelves with your own hands:
- prepare details;
- connect the bottom and sides;
- fix the roof;
- screw the base;
- screw the legs or feet;
- mount reinforcements;
- install shelves;
- attach the back wall;
- place the goods vertically and move them to their destination;
- install doors.
The model shown in the figure is easy to assemble with your own hands. For more complex projects, you will need help.
Open wall cabinet
Step-by-step instructions for assembling a wall cabinet with your own hands:
- assemble the frame - use chipboard;
- secure the rear support wall;
- install the façade frame on the façade of the structure;
- insert internal shelves.
Examples of wall mounting options for an open cabinet:
More complex design:
List of tools
Please note that in order to make even a small cabinet with your own hands, you will need an impressive list of tools. They are grouped by categories.
Measuring tools are indispensable at all stages of production. This includes:
- pencil;
- marker;
- manage;
- roulette;
- level;
- furniture models - they are sold in finished form in construction stores.
Devices for sawing and trimming surface edges:
- wood jigsaw and set of needle files;
- edge cutter;
- Bulgarian;
- construction hairdryer As a last resort: iron;
- a set of sandpaper;
- sealant, wax, corrector for surface restoration.
Tool for assembling components of a future product:
- drill;
- vice;
- hammer;
- hammer;
- screwdriver;
- Screwdriver Set;
- punch;
- extension;
- hacksaw or metal scissors;
- hand tools: files, chisels, pliers, wrenches.
Note! In addition to a set of tools, high-quality assembly is impossible without a well-equipped workplace. If it is not there, transfer all difficult stages to the workshop.
Precautionary measures
Safety is a must when assembling home furniture. Failure to follow the basic rules can cause skin burns, mechanical damage, and electric shock.
Read the manufacturer's instructions for working with tools and do not allow moisture to get into electrical equipment. Keep a first aid kit handy in case of injury.
Sources
- https://mebel-sovet.ru/kak-sdelat-samomu/412-shkaf-svoimi-rukami
- https://obustroen.ru/komnaty/mebel/shkaf-kupe-svoimi-rukami.html
- https://shkaf-info.ru/kak-sdelat-shkaf-svoimi-rukami-poshagovaya-instruktsiya/
- https://mebel-expert.info/shkaf-svoimi-rukami-chertezhi-opisanie-poshagovaya-instrukciya/
- https://www.InMyRoom.ru/posts/12949-vstroennyj-shkaf-kupe-svoimi-rukami-ehkonomiya-prostranstva-i-deneg
- https://legkovmeste.ru/remont-i-izgotovlenie-mebeli/shkaf-kupe-svoimi-rukami.html
- https://remoskop.ru/shkaf-svoimi-rukami-chertezhi-i-instrukczii-po-izgotovleniyu-razlichnyh-variantov.html
- https://homius.ru/kak-sdelat-shkaf-kupe-svoimi-rukami.html
Advantages of sliding doors that are equipped with sliding wardrobes
In recent years, sliding wardrobes have become very popular, and this is not surprising, because they are spacious and easy to use. This piece of furniture can be purchased ready-made or assembled yourself.
The most difficult part of assembling such a structure is installing the sliding door mechanism. The closet closing system, despite the complexity of assembly, has an important advantage over the hinged door system - the sliding doors move to the side when opened and do not create problems for the movement of apartment residents. This advantage is appreciated by residents of small apartments. But this design also has one significant drawback - the cabinet cannot be fully opened, it only opens halfway.
The cabinet closing system consists of two main parts: door panels and a special guide system, which can be purchased at a furniture fittings store. This system is a set of metal profiles, roller mechanisms, gaskets, fasteners, plugs and jumpers. Such systems form door frames and mechanisms for their movement.
Where to start?
The initial stage of making a cabinet yourself is design.
You need to take it seriously, for this you need:
- Determine the future location of the structure. The dimensions and quantity of required materials depend on this.
- You should decide what shape the cabinet is planned to be built: straight, corner, built-in, and so on.
- Draw sketches of the exterior and interior contents. Determine in advance how many sections, drawers, shelves there will be. Fix the desired number of doors, sliding and hanging elements. Determine the order of arrangement of hooks, hangers, holders. Even the need to install a decorative facade should be decided at this stage.
- Select the material, determine the color of the product, comparing all the parameters with the style of the interior. If necessary, decide what texture the façade should have. Identify a company that produces furniture fittings, based on reviews from specialists.
- After this, various measurements are performed and calculations are made. It is necessary to understand that calculating the dimensions does not mean measuring the width and length of the cabinet. At the same time, you need to measure the distances between the shelves and the width of the sections. All dimensions are transferred to the drawing for clarity.
When taking measurements, it is necessary to take into account that the standard width of the sash should not exceed one meter. In addition, you should remember about the thickness of the sheet from which the body is made, so 1-2 centimeters are added to the width of the sash. In the same way, the allowance for the height of the door panels is calculated.
The diagram should be clear and take into account all the desired parameters. If it is difficult to complete such a drawing yourself, you will have to turn to specialists.
Where to begin?
So, you decided to do a real manly (and maybe also feminine) thing and assemble a closet with your own hands. The first step is to decide for what purpose you are making it, what it should look like and what functions it should perform - in other words, organize the design.
This piece of furniture will serve you for many years, so you should approach the preparatory stage with special attention:
- Decide in which room you will place the new wardrobe. Whether it will be a living room, a loggia or a corridor is important, because cabinets for different rooms, as a rule, differ in materials, fittings, and components. Then choose a place in the room and find out what size the planned product should be.
- Calculate the design parameters: width, height and depth, space between shelves, number of shelves, hooks, hanger bars or other components.
Decide on the shade and design of the intended piece of furniture.
What goes in the cabinet traditionally determines how the interior space will look. There are the following principles: “raw” things are placed to the side, the most necessary and small things are stored at eye level, “dry” things are on the top shelves, and valuable things are stored in drawers. For example, you cannot place a section for outerwear or umbrellas in the middle - dampness from it will spoil things on the right and left. If it is placed in a corner, then the moisture will escape out. Boxes or shelves for bed linen should not be placed above the floor - there should be a separation of about forty centimeters from the surface to prevent dust and moisture from entering. Better move them to the top section. The more carefully you think about the placement of contents, the smaller the width of the shelves, which means you save space.
It is worth remembering that a successful layout guarantees convenient operation and long service life of a piece of furniture.
Depending on the type of doors, cabinets are classified as follows:
- Sliding wardrobe with sliding doors and rigid frame. There are two subtypes: with a roller door movement mechanism and with a monorail. After appearing on the market, such options gained popularity due to the variety of models, designs, and internal contents. In addition, the advantages are multifunctionality and space saving in the room.
- Models with hinged doors. Long service life is the main advantage of such options. As well as practicality and durability.
- Options with lifting door leaves.
- Open, doorless cabinets.
Designers also divide cabinets according to how they are assembled and style. The style is diverse: folklore, high-tech, baroque, empire, modern, rococo.
In terms of equipment, the following models can be distinguished:
- Standard options are typical for large productions; they are manufactured to standard sizes, without any frills. Practical and functional furniture. Most often used for offices.
- Serial production is a mass option. It is the release of products in one line, with certain characteristics within the framework of one concept.
- Modular cabinets have always been popular. Their advantages are mobility and functionality. Such structures can be divided into separate sections, easily dismantled, rearranged, and combined with each other.
If we consider cabinets by shape, the most common options are:
- Linear, in other words, straight.
- Corner (depending on the shape of the corner, L or U shaped).
- Round. Rounded side or front panels.
- Rectangular.
Depending on the number of doors, there are double-leaf, single-leaf, three-leaf or open doors without doors. Of course, combined options are also popular.
The most important characteristic of cabinets is functionality. Only after a decision has been made on the purpose of the structure, all of the above classifications are taken into account. According to the purpose of use, cabinets are:
- For clothes. This includes dressing rooms, wardrobes, which are characterized by hangers for dresses, suits, ties, and trouser holders.
- For storing things. Here you can note bedside tables and chests of drawers.
- Book. Various modifications are used, from open to combined.
- In the hallway. These models are characterized by shelves for shoes and hats, hangers-hooks, umbrella holders, a mirror, and built-in sections for outerwear.
- For kitchen. Often, such cabinets are equipped with specific mesh or pull-out shelves for kitchen utensils and dishes, hooks for towels and other small items.
Rattan doors
A completely new and unique material for doors is rattan. Cabinet doors made from it are unusually beautiful and practical. Rattan is a natural material, so it has a durable structure, is resistant to abrasion, and is not afraid of moisture and temperature changes. This material brings an extraordinary unity with nature and a feeling of lightness to the interior. It is easy to clean; just wipe off the dust with a damp cloth from time to time.
But according to consumer reviews, such material does not tolerate rooms where the air is too dry; cracks may form on doors made of such material.
Another significant disadvantage is the cost of the material. Furniture with rattan doors has a high price.