Hi all! When buying a kitchen set, we try to adapt it to the shape and area of the kitchen. At the same time, the main task is to make the room practical and comfortable. An impressive part of the space is occupied by countertops. And they don’t always go in one continuous pattern. This raises the question - how to connect the tabletop to each other.
The easiest headsets to install are straight ones, which are located along the wall. There is no need to connect anything here. But U-shaped and L-shaped structures are more difficult to install.
You can install the same cabinet or shelf without any problems. But the tabletop needs high-quality joining. It is necessary to ultimately obtain a solid canvas.
Corner joining of tabletops
The corner tabletop can be made in two different versions, which fundamentally affect the joining of the tabletops.
First option . This is a corner tabletop without a segment. That is, two sheets of countertops are taken and placed on the kitchen cabinets at right angles.
Easy docking
The second option for rotating the tabletop is rotating through a segment. It is more bulky and is done if the kitchen furniture includes a corner kitchen cabinet.
Tabletop segment
Video description
If the piece of furniture consists of several parts, then a screed for the countertop is needed. Fasteners are used for rigid fastening. The part joins the structure in such a way that the individual components do not move apart horizontally. The model is ideal for kitchen furniture. Based on the type of contraction, there are 3 types:
- Nuts. The long steel rod is complemented by washers on both sides.
- Gearbox with cylinder. Consist of a barrel and a stud with double-sided thread.
- QUICK. The structures have a tie with a self-tapping screw and a counter piece.
Paired fasteners are mounted in prepared holes. Holes are made using a Forstner drill and a groove is created with a chisel. The connecting part is placed in the free areas, and the nuts are carefully tightened with a wrench.
Why are they needed?
If nails are used during assembly, the parts may crack or become detached. When installed with self-tapping screws, parts of the furniture delaminate or burst. When the load on the piece of furniture increased, the fasteners came out with “meat”.
Expert opinion
Strebizh Viktor Fedorovich, leading construction foreman
An electric drill, with a Forstner drill with a diameter of 35 mm clamped in a chuck, drills blind holes to a predetermined depth. If you want to clarify something, please contact me!
Joining countertops at an angle without a segment
The joint of the tabletops should be tight, with a minimum gap between the ends of the tabletops. This is difficult to achieve if the end of the tabletop has an oval and rounded front edge.
A simple option is to use a special corner connecting element. It costs about 170-190 rubles and quickly solves such a connection.
A more aesthetic option, with the claim to create a single surface of the tabletop, is an option called “euro saw”. It is suitable for chipboard countertops with any front edge.
Flaws
- Increased reliability. After disassembly, the interior item does not lose strength.
- Design features. A separate element is used for each detail or type of furniture. Often the use of conventional fasteners is not possible.
- Aesthetics. The screed makes the connection almost invisible. The design looks beautiful and complete.
How to treat the surface → Room decoration → How to choose the right paint → Surface treatment technologies → Leveling and finishing the walls → Selecting and applying a primer → Removal from the surface → Stretch ceilings and technologies → Reviews and testimonials
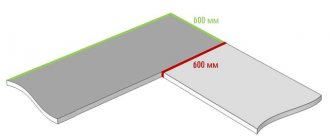
Docking with a segment
A tabletop segment is essentially the top table for a segmented base cabinet. The standard dimensions of the segment are 900 by 900 mm, with a width of 600 m. Along the front, the edge of the segment can be straight or semicircular.
Since the ends of the joining of the table tops are sawn off smoothly, wood glue is used for joining. If such fastening seems insufficient, use special metal connectors for countertops (see photo).
By the way, similar parts are used for household trimming of countertops.
Characteristic
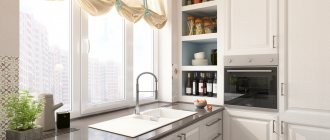
A countertop plank is a product that is responsible for the aesthetic characteristics of the structure as a whole, for its visual perception. And it’s not worth separating even such a seemingly abstract moment as the coloring of the plank from the tonality of the main element. Traditionally, lunch in the kitchen is usually spent at a table with a white or very light profile. There is absolutely no point in challenging this old, time-tested practice. But there are times when only professional designers can make the right decision.
Often the color is selected taking into account the colors of the lower hanging or floor cabinets. But the opposite solution is often practiced (with the task of conscious contrast).
They are valued for their visual luxury and sense of good taste.
What is important is that such effects are achieved very simply and without any significant additional effort.
But you should think about choosing this or that color later, but for now it’s useful to go back a little and figure out what the design itself is. A universal sealing block is in demand because the tabletop is continuously exposed to intense mechanical (and other) influence. And apartments often lack the basic production length of countertops, which is 3-4 m. Of course, they are extended, but the places where they are extended are always subject to destruction, and this will be confirmed by any engineer or a person who simply understands physics. The flexible wall profile solves the same problem as the front edge material, but its placement is somewhat different, as the name already says.
Joining tabletops through a connecting element
You can join chipboard countertops through a connecting element. To connect the tabletops through a special connecting element you need:
- Treat the open cut of the tabletop with acrylic sealant to prevent water penetration. The sealant is applied with a rubber spatula in one or two layers.
- The connecting element is attached to one of the ends of the tabletop. To protect against water ingress, sealant can be applied to the element shelf before fastening.
- The second tabletop can also be sealed (video 2).
- If necessary, the tabletops are pulled together (video 1).
Choice
But limiting ourselves to size alone is not everything.
In order for the plank for the end of the tabletop to fulfill its function clearly, you need to pay attention to other subtleties. So, along with aluminum products, plastic structures can sometimes be used
But they are not durable enough and are easily damaged by sharp objects, so you can choose such models only as a last resort when there is an acute shortage of funds. Metal structures should ideally have a matte appearance so that any roughness is less noticeable; Otherwise, it is enough to consult with sellers or countertop manufacturers.
Types of materials for corner countertops
According to the type of materials, corner countertops can be:
- acrylic stone;
- marble or granite;
- glass surface;
- metal;
- natural wood.
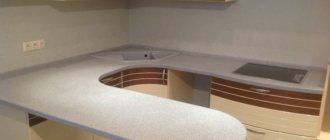
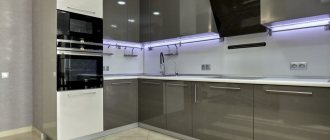
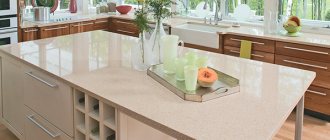
Interior of a modern kitchen with a corner set.
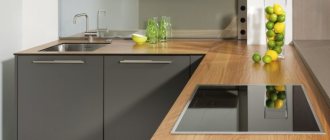
Corner table top made of laminated chipboard
Furniture made from chipboard and MDF is very afraid of water, and tabletops are no exception. The most popular type with an affordable price. Top width: 60 – 62 cm. These tabletops are made of chipboard (postforming) and covered under pressure with a wear-resistant laminate. Manufacturers provide a guarantee for waterproof laminate flooring, but not for chipboard. This type has a low moisture-repellent level. If water gets on an untreated area, it will immediately swell. To eliminate such situations. It is necessary to cover the non-laminated ends with sealant (construction silicone).
Corner countertop in kitchen design made of chipboard.
Corner table top made of wood
It is considered an environmentally friendly and relatively democratic option. The most durable part is considered to be the part of the kitchen covering that was assembled in the workshop. And the corner joint is made on wooden rods with chamfers and glued under a press. Assembly is also possible at home, but then all parts of the tabletop will have to be secured with ties - clamps. For self-assembly of a corner kitchen countertop. It is advisable to order ready-made parts, evenly sawn and trimmed to size in the workshop. Wood glue should be applied at the joint.
Corner table top made of wood.
Corner countertop made of stone or tiles
Stone countertops are the most luxurious and expensive option. The stone comes to production as a single slab and is then used to make elements of the required size. It is easier to make a dining table and a countertop with a complex angular shape from natural stone. The glued joint on the top is almost invisible after polishing.
Table top made of artificial stone.
A corner kitchen table made of tiles is an impressive, but not a cheap or complex technical solution. To lay out a perfectly flat tiled surface, you need to find a right angle between two walls; if you make an error, then unevenness will be immediately visible along the tiled seam.
Other materials
To make a corner tabletop, inexpensive materials can also be used, such as acrylic materials imitating stone, glass materials or metal.
Acrylic stone or artificial. This is a relevant solution for all times, thanks to the variety of textures and colors.
This surface has a number of advantages, including:
- impeccable aesthetic appearance;
- ease of care;
- increased strength and environmental friendliness;
- availability of repair and restoration.
Corner tabletop made of acrolic stone.
Glass coating is an effective and competent design solution. Glass countertops are relevant in small spaces; glass does not hide the volume of the kitchen.
Has a number of advantages:
- easy to clean, does not absorb unpleasant odors;
- fire-resistant, not subject to mechanical stress;
- fit absolutely into any interior;
- environmental friendliness;
- large selection of colors and shapes.
Glass countertop in the kitchen.
Metal is one of the earliest coverings for kitchen areas. The distinctive qualities of this type include:
- ease of cleaning and increased hygiene;
- heat resistant;
- wear-resistant, not subject to mechanical damage;
- variety of metals for manufacturing.
Metal countertop in kitchen design.
Using the bar
To make the joint between the tabletop and the apron, an aluminum profile strip is used, which is shaped like the letter T. The ends of the parts are first treated with sealant, connected, and a strip is installed between them, which completely covers the seam.
The advantages of this method are a strong, durable connection that reliably protects the seam from moisture. This is the best option for the junction of the apron and countertop in the kitchen near the sink.
You can create a cozy and uncluttered interior in small spaces by installing kitchen tables with sliding glass tops. In order to make the right choice, it is important to know what glass tables come in shape, decorative and design features.
Which is better: heated floors or radiators?
Warm floorBatteries
Glass countertops look harmonious in interiors of different styles and designs. If used incorrectly, scratches may appear on the surfaces, which can be eliminated yourself using available home remedies.
When choosing the shape of a kitchen countertop (oval, round, square or non-standard), you need to take into account the size of the room, the design and the general style of the interior of the room.
Corner countertop for the kitchen: without joints, materials, selection and installation, tips, photos.
Important: to an even greater extent, all this is characteristic of products made from anodized aluminum. True, it will cost a little more.
Expert opinion
Strebizh Viktor Fedorovich, leading construction foreman
If used incorrectly, scratches may appear on the surfaces, which can be eliminated yourself using available home remedies. If you want to clarify something, please contact me!
Corner kitchen styles
The corner worktop is very practical in the distribution of kitchen space; it will fit well into both large and small kitchens. The assortment of stores offers a great variety of design projects for corner countertops using a variety of coatings. In most cases, the corner tabletop is used as a dining table.
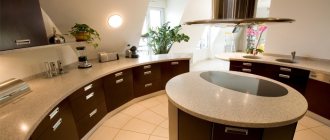
Creative countertop in kitchen design.
The most common styles from store catalogs:
- Classic style. This is an interior with ample space and the use of natural stone in the countertop. The most common colors are light colors, white, beige. Household appliances hidden behind the kitchen facades.
- The “High-Tech” style is a distinctive feature of the models - the severity of the lines, the absence of unnecessary lines, everything is laconic. Light metal structures are used. The most common color palettes: metallic, black, red, indigo, light green, sunny colors.
- The “Country” style is distinguished by the use of natural wood or MDF, chipboard, which goes very well with checkered or tiles.
- The Electric style is suitable for small L-shaped spaces. Possible varied combination of a corner dining table and decor in the whole kitchen. This style is for people who like to experiment and have a rich imagination.
The corner tabletop will easily fit into large and small spaces.
Kinds
A very important role is played by the protective strip of the dishwasher - the same one that is also a sink. Thanks to it, moisture and dirt do not get inside the cut in the form of:
- drops;
- splash;
- condensate;
- fat;
- water vapor;
- cuts of meat, vegetables.
The corner model is used mainly where it is necessary to connect the elements of the tabletop itself. Basically, such products are produced on the basis of aluminum alloys. This guarantees:
- high strength;
- easy cleaning;
- attractive decorative properties of metal surfaces;
- versatility of colors, perfectly combined with a variety of tones in the design;
- resistance to temperature fluctuations and humidity (for a steel model such corrosion resistance is difficult to achieve).
The slot strip in most cases belongs to the already mentioned protective category. Please note: such products may also be called docking or connecting strips. There are no strict standards here. The overlay structure can also play a protective role, but one must understand that it is only suitable for straight surfaces. There are also rear and front, wide and narrow, front and side, T-shaped and U-shaped, right and left plank structures.
The difference may also apply to the base material. Of course, wood and ferrous metal are not used. However, the already mentioned aluminum and stainless steel have serious competitors. In some cases, the bar is improvisedly replaced with a thick silicone strip. This is a practical, but not very attractive solution.
Materials used
To install a kitchen covering, in addition to the corrugated sheeting itself, you will need the following materials:
- Aluminum connecting strip corresponding to the section and thickness and direction of rotation of the slab. Selected according to the characteristics of the slab (thickness, roundness).
- Ties - clamps per joint - 2 pcs. To connect the working surface, ties 100 mm long are needed.
- Silicone wood sealant to protect the ends of the tabletop from moisture.
Connections of table top parts.
Dowel
Connecting tabletop parts using ties
Once the seats for the ties are ready, you can proceed to the final stage - connecting the parts of the tabletop to each other at an angle of 90 degrees. This process is carried out in three stages:
- We screw the connecting end strip
to the tabletop using self-tapping screws (with countersunk heads), after first covering the laminated chipboard end with an even, continuous layer of sealant. - Apply sealant to the surface of the connecting strip
, which will be adjacent to the rounded (front) overhang of the tabletop. It would not be superfluous to apply sealant to the surface of the seats for screeds (on blind holes and cavities). - We tighten the tabletop parts.
To do this, we place the pin in the groove, insert the pin into the hole in the counter part of the countertop, and evenly (one at a time) tightly tighten the parts of the countertop to each other with a wrench. You should not pull too hard; an indirect sign of the end of tightening is the squeezing of the sealant onto the front of the countertop. It is recommended to immediately remove any squeezed out sealant using a previously prepared rag.
At the joint, sealant has appeared from under the end strip, which is an indirect sign that the parts are already well tightened together:
For clarity, here is another photo of how the tabletop parts and the connecting strip fit together:
By the way, connecting ties are used not only for connecting tabletops at an angle of 90 degrees. They can also be used to make more complex connections, such as those shown in this image:
Expert opinion
Strebizh Viktor Fedorovich, leading construction foreman
It is permissible to transport a tabletop connected with ties if high rigidity of the joining point is ensured, for example, by temporarily fastening a chipboard rail at the bottom of the tabletop, which will reduce the likelihood of breaking the seal of the joining seam to a minimum. If you want to clarify something, please contact me!
Which countertop joining option should I choose?
The joining of tabletops can be done in two ways:
- The first is when the tabletop is joined without a segment. Two panels are joined at right angles on kitchen cabinets.
- The second option, docking with a segment designed for a corner cabinet of a kitchen set. This results in a rotation through the segment.
Two parts
The joining of two parts is made at a strict right angle of 90˚ with a minimum gap. If for some reason the gap is large, then you can use a corner connecting element.
Corner tabletop in two parts.
Three parts
Joining the tabletop with a segment for a floor-mounted corner cabinet. The standard dimensions of the segment are 90 cm × 90 cm × 60 cm. The edge along the front comes in two types - rounded or straight.
Corner tabletop consisting of three parts.
Wood glue or silicone glue is usually used for joints, but for a more reliable fixation you can use a special metal compound.
One-piece
One-piece kitchen coverings are made to the measurements of kitchen cabinets. If the measurements are made accurately, then such a tabletop is simply placed on the modules and secured with self-tapping screws.
Solid countertop made of artificial stone.
IMPORTANT! A solid countertop without joints will last longer than its counterparts with joints.
Let's sum it up
So, we found out how to join a wooden tabletop. As you can see, you can perform this operation yourself. However, no matter what kind of countertop connection is used (with or without strip), it is important to take measures for waterproofing. No moisture should be allowed to penetrate between the ends. Otherwise, the service life of such a structure will be short. By connecting the table top with ties according to the rules, you can get a durable and wear-resistant structure. The service life can be more than ten years. When connecting the tabletop with a strip one and a half millimeters thick, the aesthetic characteristics of the structure deteriorate slightly. But thanks to this bar, the gap is closed, and the structure itself does not bend.
Methods for connecting tabletop parts
The ideal tabletop is a solid tabletop. If the countertops are in the shape of the letter “L”, then the modules must be connected to each other.
The most common connection methods:
- joint to joint without euro-saw;
- joint to joint with Euro saw;
- using a T-shaped aluminum profile.
Docking through the bar
The modules are connected without a Euro saw. The joint is closed with an aluminum profile strip. The main thing in this process is to maintain tightness. Before joining, it is necessary to treat the plank stand and the ends of the tabletop with silicone sealants to prevent moisture from entering there in the future.
Joining the tabletop using an aluminum strip.
Connection with ties
It is necessary to secure the tabletop slabs with clamps to the module, avoiding gaps as much as possible; subsequently, water will accumulate in these gaps and the tabletop will begin to swell. You also need to install additional side walls. We make markings for the C-shaped washers of the clamps and grooves for the ties at a distance of 55 mm; we make these markings on the back side of all mounted planes. At the same time, we take into account the presence of a T-shaped profile and the location of the sink or built-in appliances. The distance between the clamps should be within 60 -150 mm. If it is not possible to mount two ties, we mount one in the middle.
Connecting parts of table tops with ties.
IMPORTANT! Install additional side walls to avoid sagging and pushing through the edges.
Connecting kitchen countertops using Euro-sawing
So that the kitchen covering lasts a long time. It must be carefully and correctly connected to each other. To get a perfect joint, you need to use a high-quality milling machine. A well-made joint using a new pattern will leave a barely noticeable gap of a fraction of a millimeter at the end.
Disadvantages of such a connection: for an ideal joint using a euro saw, a proportionally even angle and walls in the apartment are required. If the walls are uneven, then there will be a gap between the end and the wall. When installing the headset in the letter “P”, the curvature of the walls will disrupt the arrangement - there will be gaps along all the walls. The gaps will have to be corrected with special strips. If the walls in the kitchen are not level, then it is better to join the kitchen set in another way.
Connecting a corner tabletop using a Euro saw.
IMPORTANT! The kitchen countertops need to be connected at such an angle that the plane creates the impression of a single whole.
Pros and cons of T-profile
Among the positive aspects it is worth noting:
- Easy to install (it’s quite possible to do the job yourself).
- Possibility of use near a sink and gas stove.
- Possibility of installing the structure on uneven walls.
- Closing gaps in case of non-ideal joining.
- Minimum financial investment.
At the same time, the profile does not rust, does not oxidize and is easy to maintain. As for the disadvantages of such a connection, there are several:
- The profile will protrude above the surface of the tabletop.
- Small variety of colors. Aluminum profiles have few shades, so choosing something to match is very difficult.
Useful tips for care and installation
By following simple tips for caring for your countertop, you can avoid many problems.
- Immediately wipe off water from countertops, especially at joints
- Use a cutting board to avoid scratches and chips
- Wipe off light stains with a napkin or sponge.
- Remove stains as soon as they appear using PH neutral products
- Furniture polishes are not suitable for corner countertops; they leave a greasy film on the surface, onto which all the dirt and germs stick.
When cleaning, you should avoid aggressive cleaning agents.
As for installation, there are also a number of rules that need to be followed:
- To cut holes for a hob or sink, you first need to make holes along the contour, and then use a jigsaw to connect them
- All cutting and sawing areas are treated with silicone sealants
- Places of cutting need to be masked under plastic or metal profiles
- The end of the tabletop must be treated with sealants
- It is easier to saw the tabletop using a machine or jigsaw.
Installation of a corner kitchen unit.
Characteristic
Countertops used in kitchens are mainly made from particleboard. They are additionally coated with a material that increases the wear resistance of the surface. But the problem is that there is no such protection at the bottom and along the edges. If the lower part of the structure is still completely hidden from prying eyes, and can be safely ignored, then it is almost impossible to do without protective end strips for the tabletop. Otherwise, a lot of dirt and dust will collect there; the effects of strong heat should not be ignored either.
Each bar has its own specific work profile. It is customary to distinguish between end and connecting (also known as slot or, otherwise, connecting) modifications. The first type allows you to close insufficiently processed edges. Where there are end strips, the following do not get cut:
- liquids, including water;
- condensate;
- spray.
End strips are considered universal because the same type can be installed on countertops of any format, even with pronounced curved geometry. Installation is usually done using self-tapping screws. They are inserted through special holes prepared in advance. The second type of planks performs such an important task as decorating the junction of two parts of the headset.
Typically an aluminum strip is used. Contrary to popular belief, it is by no means thicker than its steel counterpart. Moreover, elegant appearance and resistance to food acids mean a lot. “Winged metal” is lighter than steel, which may not seem too significant, but saving on weight is never superfluous. The service life of aluminum is quite long, and it can be used almost unlimitedly.
Conclusion: how to join chipboard countertops
If we take into account that any sealant dries out and loses color over time, then the best option for simply joining tabletops is joining through special connecting elements with preliminary sealing of the ends.
The “Euro-sawing” type joint has proven itself to be excellent, only its cost is compared with the cost of the countertop, from 2500-2700 rubles.
Used materials:
https://www.dizainvfoto.ru/interer/kuxnya/uglovaya-stoleshnica-dlya-kuxni-vidy-stykovki-raznovidnosti-poleznye-sovety-po-uxodu-i-montazhu.html https://remont-kuxni.ru /2018/02/kak-styikovat-stoleshnitsyi-iz-dsp-na-kuhne.html
Installation
Or it becomes unusable over time and requires replacement. There is no need to be afraid of such work - it is quite within the capabilities of the most ordinary people. All that is required is sealant and self-tapping screws of a certain cross-section. Only in some cases, when there are no holes in the tabletop itself, either at all, or in those very necessary places, it is necessary to drill it. One way or another, after making sure that all the required holes are ready, apply sealant; Then all that remains is to screw the product with self-tapping screws and calmly use it.
Drilling artificial or natural stone is done with a drill at the lowest speed.
Types and installation of planks in the video below.