Interior decor for people who like to plan and organize everything, or in families with children, can have not only an aesthetic function, but also have a practical application. An excellent solution for placing things that are pleasing to the eye and important reminders is a cork board on the wall.
What is a cork board on the wall?
You can attach children's drawings, important messages for household members or colleagues either on a magnetic surface or on a cork board for notes. The latter is made from cork oak bark, which is first dried, crushed and re-pressed. The tree itself does not suffer during the production process. After about 5-8 years, a new bark of similar thickness grows on it.
Cork is an excellent environmentally friendly natural material with many advantages:
- Very light, elastic and flexible. When you press it and after punctures, the surface quickly returns to its original shape.
- Does not allow moisture to pass through and does not burn.
- It has good antistatic properties, so dust practically does not settle on the cork board on the wall.
- Not afraid of exposure to chemicals and insects.
- It has a long service life - at least 15-20 years.
Why do you need a cork board?
Wall-mounted cork boards were initially used in offices as an information stand. Using pins or needles, important messages for employees, plans for the near future and interesting ideas were attached to it. Over time, cork boards on the wall began to be successfully placed by designers in private homes for:
- planning household chores and important messages for all family members;
- placing keys and other small items in the hallway;
- attaching family photographs, children's drawings and other important things for household members that you want to leave in a visible place;
- interior decoration in Scandinavian style and loft.
Manufacturing options
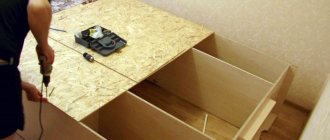
First, let's look at the simplest option for making a cork board from plywood and corks with your own hands.
- First of all, you will need to select the most suitable work surface and lay a sheet of plywood on it, and place wine corks on top. All sizes must be carefully adjusted. If necessary, you can trim the materials with a construction knife.
- After this, the cork and plywood are firmly glued together using a glue gun. After applying the mass, it is better to leave the product to dry, this may take about one hour. The cork layer will act as the front side, and the plywood layer will act as the back side.
- Later, the fabric is taken, it must be thoroughly ironed and steamed. It is laid out on the work surface, a wooden blank is placed on it, and the cork should be at the bottom and in contact with the fabric. The woven base is well straightened, the surface should be perfectly smooth and neat. It should be pulled quite tightly without folds. It is better to first unroll the stand to make sure that the material is evenly distributed on the other side.
- Then you need to glue the fabric on the back side using a glue machine. In this case, it is necessary to ensure that the glue is distributed as evenly as possible over the surface, there should be no lumps. Instead, you can use a special stapler.
- The glue must dry completely, after which you can begin creating the frame. To do this, separate parts are formed from the slats using a jigsaw, and you must first accurately measure all the notes with a simple pencil.
- All cut out parts of the frame must be glued together into a single structure. After the entire product is completely dry, you can paint the whole thing with acrylic paint to give it a more decorative appearance.
The result should be a beautiful stand for notes and announcements. You can also attach several small hooks to the surface, and then the structure will act as a key holder.
Using such a cork board, you can also make an interesting calendar, one large photo frame, or a surface for placing many small photographs at once.
Using this pattern, you can make a cork board for a children's room. To avoid storing children's drawings in a separate album, you can simply place such a structure and attach several sheets of paper to its surface. You can additionally decorate it with stickers with images of your favorite characters.
Let's consider another option for making a cork board.
- You will need to prepare in advance a shallow cardboard box and a lot of wine corks. You will also need a satin ribbon of any color depending on your personal preferences.
- First you will need to adjust the wine corks with a construction knife. They must be the same length.
- After this, a mount is created on which the board will later be fixed when it is placed on the wall. In order to create such a mount, you will need to form a small hole at the bottom of the cardboard box; this can be done using a stationery knife.
- A satin ribbon is carefully threaded into the hole made. It needs to be fixed in the inside of the box with PVA glue. At the same time, you need to thoroughly coat the bottom with the adhesive mixture. It is better to do this in several layers at once. At the same time, pay attention to the appearance of the product; everything should look as neat as possible.
- Later, in order, in several rows, wine corks are installed in the inside of the cardboard box.
- Once they are all inside, you can paint some of them with acrylic paint to make the overall design more vibrant and unusual. You can use different colors at once, but they should all fit well with the shades in the interior.
Cork board material
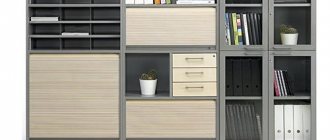
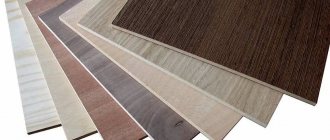
Large furniture hypermarkets and home decor stores sell ready-made cork boards for the wall in a variety of sizes. If you can’t find a suitable option, then you can make a panel of the required dimensions yourself. The choice of what you can make a cork board from is limited to two options:
- Purchasing ready-made rectangular or square sheets in construction stores. Their thickness varies from 3 to 10 mm, and length from 60 to 150 cm.
- A more budget-friendly purchase option would be cork in a roll. Its thickness does not exceed 2 mm, but several layers can be glued together.
Tools and materials
First of all, you should prepare all the devices and materials necessary for the manufacture of such a cork panel. These include the following elements:
- a sheet of plywood or cardboard (you can take any size depending on personal preferences, the board can be made to individual sizes);
- cork (it is permissible to use a special cork backing), it must match the size of the plywood;
- fabric (you need to select a material that will be 2 centimeters larger in area than a piece of plywood, it is better to take a cotton base);
- glue machine;
- jigsaw (you can use either electric or manual);
- stapler;
- knife;
- pencil;
- wood slats;
- PVA glue and a brush for applying it;
- acrylic paint.
Cork board - dimensions
The choice of dimensions of a cork board depends on the functionality it will perform:
- for rare household reminders, A4 format is sufficient;
- to place crafts, photographs and drawings, you can purchase a board the size of a standard Whatman paper in A1 format;
- in company offices, information stands can range in size from 1.5-2 m or more;
- Some designers use cork as a material to decorate an entire wall. This is especially true in children's rooms, as the child will be able to draw on the surface and secure his works and crafts.
Advantages and disadvantages
Cork boards outperform magnetic boards and stands with “pockets” due to their light specific weight. Buttons for fastening are cheaper than magnets, and forms of any format can be placed (unlike standard “pockets”).
Among the disadvantages, some may note the fragility of the board, however, high-quality cork is elastic and quite dense. If the material is framed or glued to the wall, nothing will happen to it, of course, if you don’t pick at it with a knife. When cutting, the edges may crumble, but if you use a sharp stationery knife, this can easily be avoided.
The material itself is reliable and durable. And the naturalness from nature itself will fill any corner with comfort and beauty.
Author of the article Evgeniy Bridsky, expert on cork coverings
Still have questions? Write to the site chat, order a call back or call tel.
Source
How to hang a cork board on the wall?
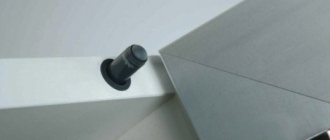
Thanks to its low weight, a cork board for notes can be attached to the wall extremely quickly and easily using several options:
- Ready-made stands in stores have special hinges that fit onto nails or screws driven into the wall. Homemade items can also be equipped with hooks and hung on metal wall mounts.
- Another installation option is to use liquid nails. Small drops of glue are applied along the entire perimeter of the pre-greased cork at a distance of approximately 1 cm from each other. Then the board is pressed against the cleaned surface and held for several minutes until the composition “grabs” the wall.
- Self-adhesive cork board can be equipped with double-sided tape, which also easily adheres to a variety of surfaces.
Wooden note board: buy or make it yourself
Note boards made of wood also do not go out of active use. Those, the prototype of which are the classic school ones, were once only brown, but are now green and gray. Despite their limited functionality (you can only write on them with chalk), they also have a number of positive characteristics:
- surface upgrade available;
- unlimited decorative possibilities;
- low price;
- the ease of creating such a note board with your own hands.
Both solid wood and wood boards can be used as materials for manufacturing. The main requirement for the material is a polished top surface. A wooden board does not always require framing; it already looks aesthetically pleasing if the cuts are processed.
Both solid wood and wood boards can be used as a material for making wooden boards.
To hang the product, you can use traditional loops, openings, or drill two through holes in the upper part and thread a decorative rope or cord through them - the design will be very original.
The interesting design of the finished products should also be noted. They can be combined with key holders, photo frames, and shelves. Some models imitate easels.
When making your own note boards for the wall, you need to properly apply the top coating. It is best to use special Tikkurila paint for these purposes, which is intended for school boards. When applying, the following requirements must be observed:
- prepare the surface: remove peeling layers of previous paint, sand the remaining layers until matte;
- remove dust and degrease the board;
- Apply paint using a brush or spray and dry.
For the top coating of wooden boards, it is better to use special Tikkurila paint.
Note! Do not paint over a damp surface!
Cork board design
So that the boring brown color of the cork board does not discord with the stylish interior of the room, you should approach its design with a certain amount of creativity:
- One of the simplest options for decorating a cork board is to use panels of non-standard shapes. A circle, oval, star or cloud looks much more original than a regular rectangle. In children's rooms you can hang a board in the form of a map or puzzle pieces.
- Another option for decorating a cork is to cover it with fabric that matches the color and texture of the interior.
- You can simply paint the cork with acrylic paints in one color or get creative by creating unusual patterns.
- Even an ordinary cork board on the wall, decorated in a stylish frame, looks much better than its “naked” counterpart.
Buttons for cork boards
Separately, it is worth noting that the information cork board itself will not be able to hold sheets without an adhesive layer. To use it as functionally as possible, you need to purchase special push pins or needles. Modern models are equipped with original plastic holders of various shapes. They help you attach and remove snaps easily while adding style. Family photos can be decorated with needles with handles in the shape of a heart or flowers. Children will have fun attaching their drawings using the multi-colored buttons.
How to decorate a cork board?
In most cases, a cork board with photographs is not so much an information stand as a stylish piece of furniture. In order to make it individual, you can use several techniques:
- Decorate with fabric and make some pockets into which even small photo albums can be placed.
- Create small shelves from wooden slats that will serve as stands for small items and dividers into zones.
- Decorate with beautiful inscriptions and meaningful quotes.
- A colored cork board on the wall in unison or contrast with the entire interior will become a simple and effective decorative element.
Main stages of installation
Step-by-step wall cladding with boards consists of several main stages:
- Surface preparation.
- Frame installation (if required).
- Fastening boards.
- Padding.
- Opening with varnish, stain or painting.
Surface preparation
Surface preparation is an important stage of finishing work. It consists in:
- cleaning walls from heavily crumbling plaster elements;
- sealing cracks and crevices;
- treatment with special antiseptic solutions;
- thoroughly drying the working surface;
- securing a vapor barrier film if installation of insulation is involved.
Preparing the wall surface for finishing with boards.
Frame and frameless methods of fastening boards
The boards can be attached to the frame or directly to the walls. The frameless cladding method implies a flat surface, with minor level differences. The advantages include ease and speed of installation.
The frame method involves the preliminary installation of sheathing - metal from PN and PS profiles or wood, which, in principle, is much more economical. This method allows you to insulate walls, but if the boards are installed with gaps, you should not use mineral wool-based insulation.
Before installing the sheathing, you should calculate the dew point and its possible displacement, taking into account the presence of insulation and the main external material. If it is shifted to the inner surface of the wall, the design should be reconsidered to avoid the appearance of mold and mildew, or careful external insulation should be carried out.
Wooden sheathing. Installation features
To install wooden sheathing, you should prepare dried bars of 30×30 mm or 50×25 mm, pre-treated with an antiseptic. Before installation, they must be kept indoors for at least 5-6 days on a flat surface for acclimatization.
You will need the following tools:
- Carrying (if using an electric drill).
- A jigsaw or wood saw.
- Electric drill or screwdriver.
- Chisel.
- Pencil or chalk.
- Dowels 10x130 mm, if the base surface is concrete or brick.
- Wood screws (if the base is wooden).
- Level or level.
- Backing blocks.
The sheathing is attached horizontally, if the boards are attached vertically and vice versa.
Rack pitch - 50 cm, self-tapping or dowel pitch - 45-50 cm, distance from the ceiling/floor - 10 cm.
If the length of the sheathing bars turned out to be small, they can be increased; if, on the contrary, they are large, after measurements and marks, we cut off the excess with a jigsaw or a hacksaw.
Using a level, we fix differences and install backing bars of suitable sizes to level the frame.
It is important at this stage not to forget to remove the wiring. It is better to do this during the day if it is connected to the mains, since you will have to turn it off for safety reasons. Care must be taken to ensure that each exposed wire is thoroughly insulated until work is completed.
For hidden wiring, it is necessary, using a chisel, to cut holes in the sheathing of a suitable size if they somehow intersect, which often happens when boards are installed vertically.
Installation of sheathing.
After installing the frame, you need to once again make sure that it is fixed exactly level, fix the insulation, if used, and you can start screwing the boards. Thanks to anonymous transactions and the absence of problems with the law, more and more casinos for cryptocurrency without investments are appearing online. This is a casino where you can play with any currency or Pin-Up casino payment system convenient for you. By the way, everything is fair here, the casino operates under a federal license, and everyone can win a tidy sum. Pin Up Casino is a crazy casino, as any of the more than a thousand players who regularly withdraw their winnings will tell you.
Installation of boards
It is important to first inspect the material for the presence of woodworm tunnels and immediately, at the initial stage, reject the planks on which they are present.
Inspect the boards for cracks and woodworm passages.
Before installation, the boards must be allowed to rest indoors for at least 5 days.
Boards prepared for wall finishing.
Then treat with an anti-beetle agent, for example, “Barrier”, and a fire retardant.
Pre-treatment of boards with antiseptic solutions.
Before cutting elements of suitable length, all measurements are taken very carefully; the planks that will be attached above the doorways should be left with a slight allowance and cut flush with each other after screwing.
For installation you will need:
- Self-tapping screws for wood. You can use nails, but in this case, repairing the coating will be more problematic.
- Carrying (again, if using a drill, and also for even cutting boards with a jigsaw over doorways).
- Electric drill or screwdriver.
- Wood crowns, if there is a need for round holes for any pipes.
- Wood saw or jigsaw.
The method of fastening the boards depends on the presence or absence of tongue-and-groove joints and can be either hidden or open.
Tongue and groove fastening
Tenon and groove is a special type of hidden fastening, implying a tight connection of elements with a minimal joining seam. On one end of the material there is a longitudinal vertical notch - a groove - along the entire length, and on the second - a ridge - a tenon.
The starting and finishing board usually only has a groove, but if they are not available, the ridge can be cut with a jigsaw, and then the surface can be carefully sanded.
Cork Board Ideas
In addition to storing notes and photographs, a white cork board in the interior of a creative family can be a kind of inspiring stand on which sketches, clippings from magazines and newspapers, beautiful pictures, unusual fabrics and everything that brings inspiration to its author will be attached. In decor, such a board even got its name - inspiration board.
A wish card on a cork board can also be placed in a prominent place. It represents a kind of projection of the desired future, in the center of which you need to place your photograph, and on the sides of it are drawings and magazine clippings of how you want to see your life in a few years. According to psychologists, such visualization can maintain “morale” in moments of loss of strength and depression, and it also helps to clearly plan steps to achieve your goals.
Old barn board is a durable and original material for exterior and interior decoration
Today, in the age of plastic, glass and metal, we so lack materials with history, rich texture and complex color.
For those who want to fill the interior with a breath of antiquity, the modern market offers barn boards. The idea of reusing wood is by no means new. Already 15 years ago on the market you could find cabinets, doors, frames and other interior items made from time-worn boards. Such unusual raw materials were collected during the demolition of old wooden houses, piers, barns, etc. This is why the material got its name.
The reader may have a completely logical question: why, in principle, buy recyclable materials if you can age a “young” board? The reason is the amazing beauty of wood with history. Over many decades (and even centuries) of use, time leaves many imprints on it, turning it into a real antique. Darkening, cracks, woodworm passages, paint residues, warehouse stamps - all this gives the barn board a unique charm. No stains, paints or brushing technologies can achieve this effect. No matter how you process a freshly planed board, it will still remain a new piece.
Another reasonable concern: How durable is a board that has lasted 30, 50, or 300 years? Will it fall apart when cutting and hammering nails? As hard as it may be to believe, wood can remain strong for many centuries. Proof of this is the piles on which medieval castles stand to this day. In those distant times there was no need to rush. Houses were built slowly, allowing the wood to dry naturally. Since the moisture was released gradually, the material did not deform (which happens today when drying in ovens). And after a few years, builders were provided with a stable and durable material that no longer “performed” with fluctuations in temperature and humidity.
Barn board has stood the test of time and is much stronger and more stable than modern lumber.
Of course, not every plank from a dismantled barn is a precious fossil. Most of the old wood - warped, cracked and rotten - is rejected at the harvesting stage. And what is suitable for use undergoes long and labor-intensive processing.
First of all, the boards are thoroughly disinfected. Old paint, if any, is removed from them, nails, staples and other fasteners are pulled out. The material is then sent for sawing. Since previously they did not save on lumber, sometimes it is possible to make three from one old board (much wider and longer than is customary today). Finally, to further reveal the texture of the material, some companies use brushing technology.
The barn board is sanded to give it a smooth finish. But individual features - darkening from paint, scratches, cuts - are preserved
Of course, there are no standards for barn boards: each product is unique and inimitable. The length, thickness and width of the lamella are determined based on the tasks assigned. So, where can you use time-tested wood?
First of all, in interior decoration. Note that the floor will require lumber with a thickness of at least 50 mm. For walls and ceilings, the requirements are not so stringent. By the way, false ceiling beams made from old wood are very popular. And if you wish, you can order a mosaic from this amazing material.
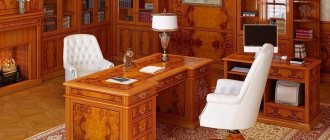
Of course, barn wood is great for making furniture. And not only cabinets, cabinets and other complex products. A simple shelving unit with “antique” shelves will become a real decoration for your office or living room. The same goes for mantels, mirror frames and other decorative items.
Theoretically, external walls can also be covered with barn boards, but such a finish will be truly “golden”. The first, main and, perhaps, only drawback of this amazing material is its high price. One square meter costs an average of 2000-5000 rubles. And the cost of products made from centuries-old wood amounts to tens, and sometimes hundreds of thousands. However, it is not necessary to cover the entire house with antique wood from roof to base. Sometimes a few boards are enough to turn a faceless modern interior made of plasterboard, glass and plastic into a cozy home with history.
DIY cork board
When you need a cork board for notes of a non-standard shape or size, you can make it yourself. For this, the following materials are purchased in the store:
- cork sheet;
- hardboard for the substrate;
- frame;
- glue or liquid nails;
- materials for decoration and fastening.
Stages of work:
- Cork sheets and hardboard are cut to the desired shape and size.
- They are connected to each other using especially strong glue or quick-drying liquid nails.
- Then the future stand is decorated at the discretion of the author.
- The board will look more complete if it is enclosed in a beautiful frame. An inexpensive framing material can be a cable duct of suitable diameter painted in the desired color.
- Fastening materials are installed at the very end of the work, when the product can already be placed on the wall.
- You can also make an original board using wine corks.
What to create from?
“Handmade aces suggest assembling a note board with your own hands from wine corks, hoops, and making it from an old mirror”
You can get a platform for posting notes from anything. Absolutely anything will do:
- tree;
- cardboard;
- plywood;
- metal grid;
- a metal sheet;
- glass;
- textile.
Note board
Handmade aces suggest assembling a note board with your own hands from wine corks, hoops, and making it from an old mirror. Use your imagination and look around - maybe you will come up with your own idea of what to make an exclusive home organizer from.
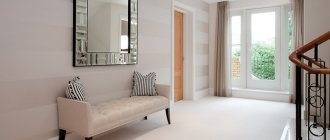
Cork board in the interior
In the design of offices, bedrooms, children's and teenage rooms, a cork board can become a functional decorative element:
- Its advantage is that over time the content can be changed, creating an interior with a completely different focus and mood.
- Separately, it is worth noting cork as a material for storing small items. Designers turn it into real open boxes, on which every bracelet and necklace is visible, so there is no need to waste time searching for the right accessory.
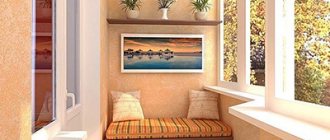
- In the hallway it can store keys, wallets and documents. Positive affirmations on the surface will create a good mood when leaving home.
Areas of application for cork boards
Kindergartens and educational centers are increasingly ordering cork stands for information for parents. They are lightweight, easy to install, and pushpins are cheap and readily available. In schools, classrooms and corridors are equipped with blackboards. Offices, medical centers, cafes and other establishments are also increasingly purchasing a device for important information.
Those who work from home and are parents of schoolchildren also do not want to miss out on the trend. A cork board in your workspace allows you to keep everything important in sight while leaving your desk clear.
Several sheets of technical cork on the wall become the center of the interior. After all, the design of this wall can be constantly changed! A collage of photographs, an exhibition of drawings, a wall of sports or other achievements and victories, motivational quotes, spectacular posters and everything that your imagination can handle.
Advantages of cork wall information stands
Cork boards have become a popular means of informing, planning and even zoning interiors. What did she do to deserve such popularity? The following advantages speak in favor of using a cork stand:
In addition to all the benefits, you decide how to design and decorate your cork note board. Thus, it is suitable for any interior and various tasks. In our online store you will find stands with soft surfaces from the brands Boardsys (Bordsis), Brauberg (Browberg), Nobo (Nobo).
Important! Information for individuals: Dear customer, from August 20 to September 6, ordering through the online store and its further pickup will be suspended due to high seasonal load. You can pick up your order from the store shelves yourself. We apologize for the inconvenience, we look forward to seeing you in our stores!
Source