A clamp for lining is a kind of fastening bracket, which is usually made of spring or galvanized steel. Quite often used as the main fastening element of wooden lining. It should be noted that this type of fastener allows installation to be carried out as hidden as possible, without revealing traces of fastening at all, while making it as fast and convenient as possible. But to carry out the highest quality fastening, you need to know all the features of this element, which will be discussed further.
Marking the base
The markings should be applied depending on the direction in which the lining will be located. Directionality can have both a decorative and practical function. For example, in baths and steam rooms it is recommended to give preference to the vertical cladding method, so that moisture settling in the seams between the boards does not accumulate and is able to flow down freely.
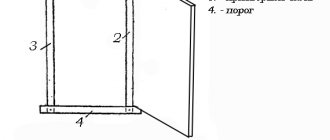
Horizontal markings should ensure that the bracket is located so close to the floor as to create access for a hammer to attach the clamp. To enhance the decorative effect of the finishing, diagonal laying is also used, or several methods of installing lining are combined to obtain unusual patterns on walls or ceilings. These methods are typical for residential premises. In this case, the work is difficult to complete without experience and training. The sheathing is usually installed perpendicular to the direction of the boards.
Mounting bracket selection method
The choice of clamps depends on the type of lining used in finishing work. Varieties of material differ in the thickness and weight of the sheets, so the fastening brackets must have the required size and tongue height appropriate for the task.
Lining made of plastic and finishing elements made of MDF can be mounted on clamps having a height of about 1-2 mm. Hardware with a three-millimeter tongue is used for installing chipboard materials.
To fasten eurolining, clamps are used, the height of the tongue is 4 mm. If ordinary wooden lining is used to decorate the house, then staples 5 mm high are used to secure it to the working surface. The most powerful fasteners are needed for a block house. It should be fixed with hardware staples with a tongue 6 mm high.
The most reliable are clamping staples, the thickness of which is 0.5 mm. They are made of zinc-coated steel, so they are not afraid of corrosion and are durable. Thanks to this, the parts can be used equally successfully for both interior decoration and exterior work.
Today, clasps with spike-shaped hooks are also on sale. Such staples are driven into the ends of the lining, creating the effect of additional fixation of the wooden board. There are several varieties of such elements. You can choose the right option based on the thickness of the board on which the part will be attached. For eurolining, clamps No. 3 and No. 4 are selected, for aspen and linden boards - No. 5 and No. 6, for plastic lining, clamp No. 2 is used.
Price issue
How justified is the overpayment compared to finishing nails? The answer is in the table below.
| TYPE | Price, rub. * |
| Kleimer thick. 2 mm 100 pcs. packaged | 88 |
| Claymer for thick lining. 3 mm 100 pcs. packaged | 120 |
| Clamp for lining thick. 4 mm 100 pcs. packaged | 128 |
| Copper-plated finishing nails 1.2x25 price per 100 g | 45 |
| Galvanized finishing nails 1.4x30 price per 100 g | 40 |
* Prices are valid for autumn 2022.
As you can see, the cost of clamps is 2-3 times more expensive than finishing nails.
Is it worth overpaying? After all, many take on the cladding of bathhouses and balconies on their own only because they want to save on work.
It's still worth paying extra for several reasons.
How to attach lining to clamps
When the lining and type of fastening are chosen, the question usually arises of how to fasten the lining with clamps. This process is quite simple, but to make the work easier, you can watch special training videos.
Carriage panels can be installed both horizontally and vertically, everything will depend on personal wishes. Vertical panels, for example, will visually enlarge a room, while horizontal panels will visually make a narrow one a little wider. And the installation method will be selected depending on the type of fastening of the lining.
When a vertical mount is chosen, the first plank is mounted in a corner, leveling it with a level. In the middle of the carriage panel, in a special groove, a bracket is fixed, which is attached to the frame with nails or screws. The third part, which is picked up, is cut off from the subsequent plank and attached under the first. The element that remains is mounted in the groove to the first panel.
For each carriage strip, fasteners for the carriage are installed, about 4 pieces. All of them must be screwed to the frame to avoid deformation of the entire coating in the future.
The second and subsequent carriage panels are inserted into the grooves of the already installed ones, and on the reverse side, they are mounted with special fasteners to the sheathing.
When it is customary to sheathe walls with panels horizontally, the planks must be attached with the tenons facing upwards. This will promote better ventilation, and therefore mold and mildew will not be as dangerous, as well as preventing the collection of water or dust between the carriage slats. Car panels are mounted with horizontal lining from bottom to top. On the bottom row, the staples should be fixed a couple of millimeters above the floor. And the edge panel is cut so that the remaining distance is completely covered.
This work is quite painstaking, so there is no need to rush here. And in order for the wall cladding to turn out perfectly smooth, it is necessary to regularly check with a level how all the cladding elements are laid.
Frame structure
Installation diagram of MDF panels.
If the rough ceiling in the room is made of prefabricated reinforced concrete panels, you must first carry out preparatory work. The rustles between the slabs are cleaned of everything that does not hold well. The aesthetic properties of the rough base are not important, so the easiest way to fill the seams is with polyurethane foam. For wooden plastered floors, it is enough to ensure strong adhesion of the finishing material to the base. If the strength of the plaster is in doubt, it is better to knock it down. After all, during the installation of suspensions, the quality of adhesion will further deteriorate. And this already threatens the strength of the future structure.
Next, you need to apply horizon marks at the corners of the room, i.e. serifs that will be located strictly at the same level. The easiest way to do this is with a laser level. But a regular water level with a tube of sufficient length will work just fine. It is not advisable to use a bubble level on the staff for this; this can lead to significant errors.
Related article: Mint-colored wallpaper in the interior
Scheme of an open slatted ceiling.
Using the marks obtained, we determine the lowest corner of the ceiling of the room. The rough base is rarely horizontal; the discrepancies usually reach several centimeters. We retreat 5 cm from the level of the lowest point of the rough ceiling. At this mark we will make the base of the finished ceiling. Using horizon marks and a tape measure, we transfer the mark for the placement of the future frame to all corners of the room. Using a construction cord, draw a horizontal line around the perimeter of the room at the selected height.
Then you need to make sure that there is no electrical wiring in the room at this level. There are special devices for this. If they are not available, you will have to carefully look for grooves covered by builders using a hammer and chisel. An indirect indication of the position of the electrical wiring is the placement of wiring boxes. It's easiest to start from them.
We fasten the UD profile around the perimeter of the room so that its bottom shelf is flush with the horizontal line. It is attached to a concrete or plaster base with “quick installation” dowels into holes drilled with a hammer drill. For walls with a wooden base, “press washer” screws are suitable for this. Their length is chosen so that the thread enters the wooden base by at least 25 mm.
Next, you need to decide on the direction of installation of the MDF panels. Because The panels have a finite length; it is advisable to choose a direction in which they would not have to be extended. In addition, keep in mind that placing panels along the long side of the room visually lengthens it, and across it shortens it.
Marking of suspended ceiling.
At the locations of future load-bearing rails, draw straight lines on the ceiling. Along the lines, perpendicular to them, we attach straight hangers, also in increments of 30 cm. They are attached to concrete bases with driven dowels, and to wooden bases - with press washers of sufficient length. It is selected in the same way as for attaching the UD profile to the wall.
Related article: Beautiful and comfortable living room 30 sq m: design of a combined space
CD profiles or 25*50 mm wooden slats are inserted across the grooves on the UD profile. They are fixed to the bent legs of straight hangers with LN 9.5 mm self-tapping screws. The extra length of the paws is simply bent upward. It is convenient to lay sheets of polystyrene foam insulation on the bent legs if insulation is being carried out. If necessary, profiles or slats need to be extended using connectors. All lightweight galvanized profiles can be easily cut with metal scissors. If you use wooden slats instead of galvanized profiles, try to find ones that are even and dry, which is not at all easy. Before cladding, you need to lay all the necessary electrical wiring along the frame.
Installation of sheathing
Lathing helps you begin installing panels without having to perfectly align the walls. This is especially true for concrete or brick foundations, which simply are not 100% level. We level the wall as best we can and proceed to the next stage.
It is important to use a building level during installation. Otherwise, curvature of the decorative lamellas may appear, which will be noticeable and spoil the aesthetic properties of the finish; The distance between the bars should be at least 60 cm, this will help prevent deformation or sagging of the lining strips
The distance between the bars should be at least 60 cm, this will help prevent deformation or sagging of the lining strips.
Fixation of clamps
At the moment when it is time to start fixing the fasteners, the sheathing of the surface and leveling of the wall should already be prepared. To fasten with nails, you need to prepare the nails themselves, a building level and a hammer in advance; if self-tapping screws are used for these purposes, you need to take a screwdriver or screwdriver.
It is important to understand that the installation of wooden panels and fasteners is carried out alternately. It is very important to remember the accuracy of the calculations and the correct position of the hardware
The most important thing is to pay attention to fastening the first element, and then installing all other parts will not be difficult
For those who use self-tapping screws, the lathing will also not be superfluous. With its help, it will be easier to record all the details. For convenient installation, we make marks in advance in the places where you need to screw in the screws, or you can pre-drill holes that are smaller in diameter than the screws. The work goes like this: clamps are installed, the lining is attached to them, then hardware for the next lamella is installed.
Where to start
First of all, before starting this kind of work, the surface is marked. To do this, they use special measuring instruments and make marks on the wall so that later the fastenings are as even as possible.
Therefore, special attention should be paid to this stage, since the final result and the general appearance of the lined surface will depend on this
To achieve the best result, a wooden frame is fixed to the wall, and the lining is fastened to it with clamps. The distance between the parts of the sheathing should be about 50 cm. All wooden parts are pre-treated with antiseptics, since this material is most susceptible to external climatic conditions. If necessary, insulation is placed in the cells of the sheathing. And only after all the preparatory work is completed and the frame is installed, you can begin fastening the lining using clamps.
Before attaching the brackets to the sheathing, you will need to prepare the necessary tools and materials:
- nails and hammer,
- or self-tapping screws and a screwdriver or screwdriver.
To understand the entire technology of fastening with such brackets, you need to know that you will need to fix the fasteners and car panels one by one. This process is quite simple, but it is necessary to follow the correct technology and adhere to the calculations made, since absolute accuracy is important here. After installing the first clamps, you can begin installing the first carriage planks, and then reattach the brackets. Continue this process until the entire surface is covered.
What it is
A clamp is a specially shaped metal bracket to which the covering material (plastic, wood) is attached. In turn, the clamp is installed in the battens using nails or self-tapping screws (depending on the frame material). You can select clamps based on the type of coating, the thickness of the lining and based on the material of this fastening element. Mainly, staples are made of alloy steel or iron coated with a layer of zinc.
Photo - gluer for chipboard
Mainly, fastening the lining with the help of clamps is done in order to hide the installation site. When fastening, a small recess is cut into the board, which is inserted into the protrusion of the bracket. This is an excellent alternative to classic self-tapping screws, which cannot always be used for installing eurolining or MDF sheets on walls.
Photo - installation example
This fastener has many advantages
:
Separately, it is necessary to say about the service life. On average, staples made of steel and galvanized iron will last from 20 to 40 years, the service depends on the characteristics of the room (moisture level, condensation, temperature changes). The disadvantages of fastening include the relatively high cost of the elements. The prices of lining clamps can be two to three times higher than the cost of standard screws and nails.
Rules for calculating gluers and their use when fastening
Experience in using clamps shows that for reliable and durable fastening of one square meter it is quite enough to select about ten pieces.
- For a more accurate calculation, it is necessary to measure the length of one panel. After this, we measure the pitch of the sheathing frame. Typically this distance ranges from 40 to 60 centimeters. Divide the length of the panel by the pitch of the sheathing and add one. We multiply the result by the number of panels. This will be the required amount for fastening.
- When choosing the type of product used for fastening the panels, it is necessary to take into account that each element must be fastened with two or three self-tapping screws. It is not worth saving on their quantity, as this may affect the reliability and quality of installation as a whole. To fasten heavy panels, thicker reinforced elements with a large number of attachment points are used.
- After calculating the number of gluers, you can begin installing the panels. The wall on which installation is planned is pre-treated with special antiseptic solutions to eliminate the possibility of fungus formation. Subsequently, clamps are installed on the wall or installed sheathing using nails or self-tapping screws. In this case, nails are used only if lathing is used.
- Since the use of lining requires a flat surface, if there are uneven walls, you should calculate the best way to level them. Perhaps leveling the wall surface using a special solution or installing sheathing.
- Very often in such cases, lathing is used, which is installed on the wall surface quickly, and installation can be carried out on it immediately. Usually the sheathing is made of wooden beams of the same thickness, which are fixed at a distance of about one meter from each other. When installing wooden lining, this distance is somewhat smaller and is about 50-60 cm.
- When installing the sheathing beam, you need to constantly monitor the plane of the resulting surface, which should be flat. If necessary, to obtain a flat surface, plates of the required thickness are placed under the beams.
- Applying leveling solutions takes a lot of time, after which they also need time to dry. Therefore, this option is used much less frequently and when such work is necessary.
- Having installed the fasteners for the first panel, they begin to install it and then attach the clamps for the next one. The first board is tightly inserted into the hooks of the clamps, the rest are mounted in the same way. This method ensures that each panel fits accurately and securely against each other.
- To ensure high-quality installation with natural further ventilation, it is necessary to take into account that the boards should not touch the wall surface. Otherwise, this will lead to limited ventilation, moisture accumulation, and the formation of mold and mildew.
- When working with lining and clamps, it should be noted that work should be carried out at an ambient temperature of at least 10 degrees, since deformation of the panels may occur at lower temperatures. The clamps must be made of stainless materials and are treated with a special protective coating, since rust can spread over the surface of the lining.
- Liquid sealant cannot be used at the joints of wooden panels, but it is better to choose a moisture-proof film for this. Its use during temperature changes can lead to cracking of the panels. After installation is completed, the surface of the lining should be treated with special protective antiseptic materials that increase its resistance to precipitation and ultraviolet radiation.
- Taking into account all the requirements for choosing clamps for lining will ensure reliable and durable installation, as well as a long service life of the installed coating.
To learn how to attach clamps for lining, see the following video.
Definition
Often when installing eurolining you hear the word “kleimer”. Let's take a closer look at what it means and how it can help in finishing.
So, a clamp is a special fastener that allows you to quickly and conveniently install wall panels, without compromising their quality and appearance. In other words, clamps are called hidden staples. The fastening method using these elements guarantees convenience and, most importantly, ease of installation. This is one of the most important criteria by which fasteners for wall panels are selected.
Among the many advantages, one can highlight the fact that the clamp does not destroy the integrity of the wood, as an ordinary self-tapping screw can do. Imagine, when a nail is screwed in or driven in, the solid structure of the tree is disrupted, which means that various defects can arise from this place, depending on the quality of the wood. Moreover, starting from an ordinary crack, ending with a split in the panel.
Selection and installation
Installing clamps is not difficult. It is enough to show a little attention and patience, then things will go, as they say, “like clockwork.” For ease of installation, you can use the instructions. At the same time, the reliability of fastening to the clamp has been tested by numerous finishing options, including eurolining.
You need to choose clamps carefully. Parts are separated by numbers. Each room is adapted for a specific type of lining. If you take the wrong size, you can achieve a poor quality finish. The lining may begin to “walk”, which means there will not be a solid coating, which in some situations will not have the most favorable effect on all materials.
A simple example is installing lining in the kitchen, where it is possible to work with water, as well as variable humidity. If the panels do not fit tightly together, moisture may accumulate under them, which will ultimately lead to dampness and the development of mold and mildew. That is, the clamp number tells not only about the size of the panel, but also about their material. That is, if a part is designed to work with wood, it cannot be installed on plastic, etc.
Clamps are made from galvanized steel with a thickness of 0.55 mm. This suggests that the material is not afraid of rust, which means it can be used for both interior and exterior decoration.
The standard consumption of clamps for eurolining is 200 pieces per 10 m2 of clapboard finishing. The cost of the parts is low, and it absolutely pays off in the simplicity and quality of the work. Elements are sold in packs of 100 or 200 pieces. The clamps must be attached to the sheathing with self-tapping screws or nails. Moreover, it is necessary that there be at least 2 of them, since the lining can be deformed.
Eurolining has a tongue-and-groove type lock. The kleimer is put on every 50-60 cm along the sheathing pitch. Thanks to special claws, the clamp securely holds the panel, securing it to the groove.
So, let's summarize. The installation process of eurolining consists of the following steps:
preparing the sheathing: for wooden lining, the optimal material is timber or planks at least 1 cm wide;
- fastening the first panel (guide);
- installation of eurolining using a tongue-and-groove system with fixation with clamps;
- screwing each clamp onto the sheathing material (nails with a wide head or self-tapping screws can be used for this);
- installation of the remaining panels according to the same principle.
As you can see, the work is not difficult, it is important to maintain the required level, for this you can make marks or stretch a string or fishing line along the edge, along which you can align the panels.
The result is a complete, neat coating without coating defects. Therefore, using clamps, you can purchase lining made from noble wood and high grades
This material has high aesthetic qualities and can be used in living rooms.
How to choose the right clamps
You can select clamps for installing lining and plastic according to the dimensions of the panels and their materials. Brackets are classified by the size of the tab or tab that is used to support the mounting plate. There are these types:
- For installing chipboard. The thickness of the elements is 4 mm;
- For installation of plastic lining and MDF. Up to 2 mm;
- To fasten eurolining panels, staples up to 4 mm thick are used;
- For classic wooden lining, 5 mm fasteners are used;
Also, in some cases, sheet sizes are selected individually, depending on the thickness and material of the panels, as well as the location of their installation. It is most convenient to buy fasteners in bulk, this will significantly save your time and money.
In construction stores, the classification of clamps is carried out by numbers. For example, when installing aspen panels, brackets 5 and 6 are used for the ceiling, and for eurolining 4. Check the information directly with the seller so as not to confuse the fasteners.
Photo - steel clamp
In the process of choosing clamps, a prerequisite is that you need to take into account the thickness of the material used for finishing work
It is very important to use only those brackets for lining that correspond to the dimensions of the product that you plan to use for cladding a particular structure
If we talk about the consumption of these fasteners, then you will need about 20 pieces to finish one square meter. Clamps have a relatively low cost, so you can safely purchase these parts with a reserve - in any case, it will cost you less than buying other types of hardware.
The main requirement when choosing clamps for lining is size. Based on the parameters of your panels and the type of material, determine the appropriate fastener option so that they provide the expected reliability of the coating, but are invisible after all finishing work is completed.
Having decided where to buy clamps for lining, consider the following recommendations for their intended purpose:
- staples up to 2 mm - the optimal solution for assembling structures from plastic panels and MDF boards;
- 3 and 4 mm fasteners are purchased when clamps are needed for eurolining or chipboard;
- 5 mm fasteners - to solve the problem of how to fasten lining made of wood, especially species such as aspen, linden;
- 6 mm products are used for blockhouses.
- steel strength;
- integrity of galvanization;
- consistency of dimensional parameters of the entire batch.
The described fasteners for lining are so common among consumers today for many reasons. Among others, we can highlight the possibility of carrying out installation work in a room whose conditions are characterized by a high level of air humidity. Among other things, such fasteners are quite simple to use; even a worker who does not have enough experience can perform the manipulations.
The main requirement when choosing clamps for lining is dimensions.
Based specifically on the characteristics of your panels and type, determine a suitable fastener option so that they provide the expected reliability of the coating, but are invisible after all finishing work is completed.
Having decided where to purchase clamps for lining, consider the following tips for their intended purpose:
- staples up to 2 mm average solution for assembling structures from plastic panels and MDF boards;
- 3 and 4 mm fasteners are obtained when clamps are needed for eurolining or chipboard;
- 5 mm fasteners to solve the question of how to fasten lining made of wood, especially species such as aspen and linden;
- 6 mm products are used for blockhouses.
- steel strength;
- integrity of galvanization;
- consistency of dimensional characteristics of the entire batch.
size table
When choosing a universal element, you should focus on matching the height of the bracket and the type of cladding board, in order to avoid poorly performed installation work.
Fasteners are available in several types, which depend on the thickness of the groove into which the bracket is to be attached. The sizes of clamps for lining are as follows:
- No. 1 – used for fastening PVC lining and panels 5 mm thick;
- No. 2 – used for panels 8 mm thick made of PVC or MDF;
- No. 3 – purchased for installation of eurolining and wall panels made of chipboard;
- No. 4 – mainly used for fastening eurolining;
- No. 5 – used for installation of clapboard boards;
- No. 6 – recommended for indoor block houses.
The ease of installation work and the reliability of the structure as a whole depend on how correctly the size of the metal plates is selected.
The dimensions of the clamps for lining are a very important parameter. To fix the hardware, you will need to prepare small nails or screws. Before starting work, you should decide on the number of fasteners and its dimensions. Thus, to manipulate flat areas, it will be necessary to prepare four fastening elements, the dimensions of each of which vary from 1 to 2 millimeters.
In order to decide which brackets you will need for the lining, you need to know the height of their tongue. By visiting the store, you can purchase lining of different thicknesses, each of which corresponds to a clamp of its own size. Thus, for lining made of plastic or MDF, fasteners should be used, the height of which varies from 1 to 2 millimeters.
If you plan to use eurolining, then the only correct solution is to use brackets whose height is 4 millimeters. Before attaching the lining to the wall, you will need to choose the right fasteners. For example, to fix chipboard panels, staples with a height of 3 millimeters will be needed.
Useful tips
It is recommended to buy clamps for lining in trusted construction stores. This eliminates the possibility of getting a fake instead of high-quality material, which will lead to rapid failure of the clamps.
It is also not recommended to use liquid sealant to form joints; this can affect the condition of the fasteners and cause corrosion.
To protect both the lining panels themselves and the fastening elements, after completion of the work it is necessary to cover the slats with varnish, wax or stain.
Installation of panels in a horizontal manner begins from the top corner. This will help maintain the aesthetics of the last plank, and if, when installing the outer lamella, it needs to be shortened, this flaw can be covered with a plinth.
Holes for sockets and switches are made before covering the paneling with varnish.
To decorate a room with wooden paneling, the wall itself must also be treated with a primer before starting work.
The purchased material (lining) must lie in the room for at least a day before installation. This will help avoid problems after the material expands or contracts as a result of changes in temperature and humidity.
In order to hide the space between the first plank of the lining and the floor, it is necessary to use a plinth specially designed for this.
When purchasing clamps, it is important to pay attention to the material from which they are made. This is especially true when purchasing fasteners for street cladding.
Compliance with the following simple rules will extend the life of the lining and preserve its original appearance for a long time:
- Claimers should be purchased in specialized construction stores, which will eliminate the risk of counterfeiting and prevent corrosion and rapid failure of the fastening brackets;
- to avoid rust and destruction of hardware, it is not recommended to use liquid sealants to form joints;
- after completing the installation work, you should coat the lining with a varnish, oil or wax composition - such a coating will help protect the material from the aggressive effects of sunlight and excessive humidity;
- when installing the lining, do not allow the lamellas to come into direct contact with the surface of the base - this can negatively affect the ventilation of the walls and cause the formation of fungus and mold;
- cutting out holes for sockets and switches should be done using a flared saw immediately after cladding, before applying varnish or wax;
- the space left near the floor is hidden with the help of a decorative baseboard that matches the color and texture.
You can learn the fastest way to attach the clapboard from the video below.
Description of steel clips
Those who are engaged in construction quite often have to attach lining to the walls or ceiling of premises.
This is the most suitable material for covering a loggia, balcony, bathhouse or sauna, both inside and outside.
It is easy to assemble a lining that is attractive in appearance, but this must be done using special fastening elements.
Self-tapping screws and nails should be discarded, as they can damage the material, leaving chips and cracks on it.
The best fastening element for lining is clamps. They can be called steel clips, used in the installation of various building materials, consisting of many individual fragments.
The clamps are made of galvanized metal that is not subject to rust even at high air humidity.
Most often, the lining is secured using simple steel clips coated with varnish, so they cost less.
By their design, the clamps resemble rectangular plates.
Initially, these fastening elements seem complex, but in fact they are very simple - they have curved tabs that fix the front surfaces, and special grooves that allow you to attach the lining.
Clamps come in regular and starter types. Steel clips of the first type are used when it is necessary to join two panels, since they have 4 tongues.
Fasteners of the second type are used if you need to fix materials from the sides, bottom or top of the facade, since they are produced with only 2 tongues.
Fastening the lining with clamps is preferable to fixing it with nails or other fasteners, because it does not harm the finishing material in any way.
The production of steel clips is aimed at making the structure stable and reliable.
In addition, clamps have many more advantages:
In order for all actions for covering a room with clapboard to be correct, it is necessary to purchase clamps that have certain dimensions.
This product parameter is reflected in special numbering. More specifically, when choosing clasps, their distance from the bracket to the base is of particular importance. It should be 2 mm.
It is necessary to take into account other sizes of steel clips, including their thickness. This parameter can be from 0.5 to 0.55 mm. It is also important to pay attention to the height of the tongue.
For example, installation of eurolining requires that the clamps have a tongue height of 4 mm. To fasten thin boards with a rounded front surface, it is best to use steel clips with a tongue whose height is 6 mm.
In addition, you need to know the dimensions of the walls and ceiling in order to equip yourself with the required number of fasteners.
Fastening the lining with clamps
Finishing nails are available in various types of coating and are selected depending on the location and type of finish:
- black – steel fasteners without an additional anti-corrosion layer for work in completely dry rooms;
- galvanized - the inexpensive and most popular variety, the zinc layer provides reliable protection, the products are suitable for use in all types of structures that do not have direct contact with water;
- with copper, brass, chrome or bronze coating - more expensive types of fasteners that can be used in rooms with high humidity and in open spaces, with increased requirements for aesthetic finishing, when working with expensive types of wooden lining.
Any novice craftsman who knows how to use a hammer can handle the job. Also during the installation process, a hammer is used - the device allows you to drown the head of the nail without damaging the material.
Using a Finishing Nail Puncher
When the panels are positioned vertically (the sheathing must be horizontal), installation is carried out in the following sequence:
- Place the first part with a tenon in the corner (for reliability, it is better to fix the first and last parts through with self-tapping screws, cover the caps with decorative caps to match the panel).
- Attach finishing nails to the sheathing beams through the groove at an angle of 45 degrees using a hammer with gentle blows.
- Insert the second panel with a tenon into the groove of the first, lightly tap the panel with a hammer through a piece of clapboard or block. Check the evenness of the masonry with a level.
- Attach through the groove with nails to the sheathing, etc.
Fastening in a horizontal position is carried out using a similar technology.
When using nails, they are driven into the groove of the lining at an angle, completely recessing the head into the wood. To avoid damaging the bar, you can use a hammer. Screws are screwed in in the same way, also making sure that they do not protrude and interfere with “planting” the next board.
Installation of lining with finishing nails. Options
Is it possible to fasten the lining in a bathhouse with finishing nails?
There is another option - simply hammer the nails into the lining, recessing the heads deeply (with or without drilling). Cover the resulting indentations with wood putty. It’s much easier to do this, but not everyone is happy with this option from an aesthetic point of view: making nail/screw marks completely invisible is quite problematic.
You can make your own wood putty that perfectly matches the color. To do this, mix the smallest shavings, or better yet, the dust that is formed when cutting the lining, with a small amount of PVA glue until it becomes a thick paste. Use this mixture to cover all the grooves.
Finishing nails for lining
It is better to take finishing nails for lining in a bathhouse with a copper, brass or chrome coating. They will withstand high humidity and will not collapse prematurely.
The first board is installed in the same way as when installing lining using nails. It's all about how it is fixed. Clamps are put on the tenon, which are attached to the sheathing using nails/staples/screws. There are three holes for fasteners, but you choose whether to use all or only two (it is dangerous to fasten the paneling in a bathhouse with one nail/screw - it can tear it out). Nails or screws are supplied with the clamps. If you are going to “mount” it on self-tapping screws, it is better to have a screwdriver - this will speed up the process significantly.
You can also use a construction stapler to attach the clamps, but you also need to know how to use it. It all depends on how hard you pull the trigger. If you press weakly, the staple will not completely enter the wood; you will have to either shoot another staple, or “finish off” this one with a hammer.
In any case, the fixation scheme is no different from fastening with nails: first fasten the clamp in the middle, then along the edges, and, after checking the vertical/horizontal installation, to all other intermediate lathing strips.
The lining is attached to the ceiling according to the same principles as on the walls: first, a wooden frame is assembled, adjusted to the level. The lining is attached to it - with clamps or nails - it’s your choice. Both methods have a right to exist.
It is more convenient to lay the lining with the tenon facing towards you. The principle is the same: you lay the first board of the lining, retreating 1-2 cm from the wall. It can be fixed along the wall with nails - then a corner or plinth will be attached to the top. Then, on the tenon side, at the intersection of the lining with the sheathing, you either install clamps or drive nails in at an angle.
Conclusion: You can fix the lining yourself. There is nothing super complicated about this. It takes time, accuracy and patience (except for the lining and fasteners).
Nuances of assembling various designs
When it comes to assembling furniture, you need to take into account that it will not be possible to connect elements of different products in the same way - the installation of furniture structures requires special fasteners, fittings and a set of tools.
There are certain nuances in the assembly process itself - you need to know them in order to work quickly, accurately and accurately. Floor installation of a bed is significantly different from the assembly of wall cabinets; the connection of upholstered furniture parts and the installation of a built-in compartment are carried out completely differently. Some nuances and recommendations for assembling various furniture: a chest of drawers with drawers is an example of simple prefabricated furniture with a minimum number of fasteners. You need to install drawer guides on the side panels. Pour a little glue into the blind holes in the sidewalls and ends of the stiffener flanges, insert the dowels and easily hammer them in, connecting the elements, and then attach the confirmations. The top cover is fixed with dowels and minifixes - a pin in the cover, an eccentric in the sidewall, then the confirmations are screwed in until they stop. The next stage is to nail the back wall, having previously checked the diagonal, assemble the drawers, install guides on them, screw the handles into the prepared holes; standard sleeping bed. After checking the presence of all structural parts, the base is assembled - the transverse and longitudinal beams of the frame are connected with euroscrews (confirmations) or self-tapping screws. A cross beam is fixed in the center, the lamellas are installed in specially prepared grooves. The side walls of the frame are secured with dowels and plugs. The remaining elements of the bed are fixed with bolts, the legs are screwed in, if there are any, and the mattress is placed in the base box. The double model is assembled according to the same principle; bed with lifting mechanism. The standard model consists of a frame (base), a lifting mechanism, a mattress and internal drawers. You will need a screwdriver with a full set of attachments, a screwdriver, a wrench, euro screws with countersunk heads and an internal hexagon, a tape measure and a level. Assembly diagram: connecting three drawers and headboard parts with brackets, corners or ties with screws. In the upper part of the drawers, shelves, corners, a lifting mechanism are mounted - a gas shock absorber (cylinder upwards) is secured with nuts with a stopper, handles and a limiter for the mattress are installed; Stationary cabinets are the easiest furniture to assemble. Sequence of actions: connecting the shelves with the side panels using confirmations and screwdrivers, installing the back wall made of fiberboard, for which furniture nails or a furniture stapler with staples are used. After assembling the box, check the same level of diagonals and compliance with the right angle between the elements. The next step is hanging, adjusting the facades, then all that remains is to install the shelves. If the model has drawers or roll-out shelves, guides for them are installed first; sliding body - a stationary sliding wardrobe with a plinth begins to be assembled by screwing the plinth to the bottom with minifixes and dowels, and then driving in support nails
The body is also assembled on minifixes and duplicate dowels; it is important to check the correspondence of opposite holes. Next, fix the back wall (nails, staples, installation in a groove), check the diagonal and angle
After this, you need to install shelf supports, guides for drawers, install shelves and a bar. If the cabinet is without a base and trim in the lower rear part, the plinth is dismantled; sliding door system – used for all coupe models. Built-in products do not have side walls and are often made without a roof or bottom. Installation consists of attaching shelves to the walls of the room and installing a sliding system. First, install stoppers and limiters, secure the upper guide rail, there is no need to screw the lower one. The door panel is inserted into both guides into the far grooves, the second leaf into the near grooves, and adjustments are made. After this, you can fix the bottom rail and glue the sealing brushes; elements of a kitchen set are complex installation; a full set of tools, diverse fasteners, and special fittings are required. Assembly begins with the preparation of the lower sections - the bottom is connected to the side walls with euroscrews, the planks are installed under the tabletop, the back wall made of fiberboard is secured (stapler, nails in increments of up to 10 mm), and the legs are fixed with self-tapping screws. This is followed by installation of hinges in the mounting slots, hanging of hinged facades, and adjustment. Drawers are assembled using the same principle. After screeding the “bottoms,” the tabletop is installed, checking the horizontal level with a building level.
How is the need for clamps calculated?
Since clamps or staples must securely fix the panel in the intended place on the wall, their number depends mainly on the length of the lining. For eurolining, manufacturers usually complete the specified volume of material with the required amount of fasteners, which is easily installed according to the included instructions. In other cases, follow the following practical recommendations:
- For every 400-500 mm of wall, at least four fasteners with a length of at least 1.5-2 mm are required.
- To fasten the lining to complex surface elements (protrusions, bay windows), at least five units of fasteners are required for a length of 300-400 mm.
- To fasten lining in corners (for example, at window or door openings), the number of clamps increases to six, while the length between adjacent fasteners for lining should not be more than 250 mm.
- To fasten the material at the points where it is attached to the frieze, the amount of lining fasteners is taken at the rate of: four clamps per 250-400 mm of panel length.
Thus, based on the row of installation of the lining, as well as the complexity of the perimeter of the premises, it is possible to fairly accurately determine the need for these hardware.
Installation using clamps is very neat
In addition to the products under consideration, you will also need screws or self-tapping screws with which the clamp is attached to the sheathing. Their number is determined by the design. Typically, the construction bracket and clamp have three mounting holes, although another design may occur (in particular, for eurolining).
Recommendations for finishing the ceiling
Ceiling made of lining
The ceiling is sheathed with the material in question in the same order as the walls. The only note is that the lining should begin to be attached from the window opening to the opposite wall. With this placement, the shadows between the cladding elements will be less noticeable.
Ceiling made of lining
Thus, there is absolutely nothing complicated about installing the lining yourself. To extend the service life of the cladding, re-treat it with an antiseptic and fire retardant every 2-3 years. Otherwise, follow the instructions and you will create the highest quality, durable and aesthetically pleasing finish.
Good luck!
Advantages
The hidden method of fastening lining using clamps has gained increased popularity not without reason. Thanks to its use, the finishing process has significantly accelerated. In addition, the use of clamping hardware reduces to zero the risk of damage to the material, the appearance of splits and cracks, which often happens when using standard fasteners made of nails and self-tapping screws.
Claypers are selected individually for the type of lining used in the work. The high degree of fixation of such hardware guarantees that in the future the boards secured with such staples will be motionless, will not give play and will not become loose.
The use of clamps does not require the use of any additional components. For installation, the staples themselves and nails or self-tapping screws are sufficient to complete the fixation.
All products of this type have an anti-corrosion coating or are made of stainless steel. Due to this, the reliability and service life of parts increases many times over.
Installing the lining and dismantling it in this way is done quite quickly. The clamps are practically invisible, so the structure has a complete appearance, without gaps or indentations, any damage or protruding fasteners such as nail heads and screw heads.
Installation using such hardware is simple and does not require the use of special tools.