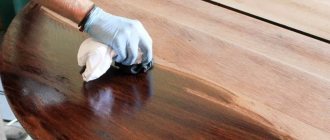
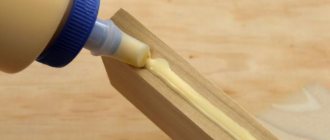
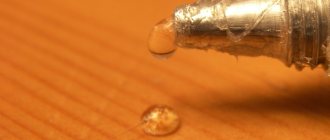
Thanks to MDF glue, you don’t need staples, a drill, or screws to secure the panels. If the panels are light, glue is applied to them in a dotted manner and pressed tightly to the surface. It must be dry and grease-free for the coupling to be reliable.
Despite the wide variety of MDF adhesives on the market, they all meet a number of requirements:
- the purpose of the composition has specific purposes - for working with chipboards or for universal use;
- the coupling with any base is strong and reliable;
- resistance to humidity, chemicals, temperature changes - increased;
- strong or super strong adhesion.
There are no frost resistance requirements for MDF glue, since the panels are most often intended for indoor use.
Expert opinion
Strebizh Viktor Fedorovich, leading construction foreman
Furniture facades made of MDF are supplied to a vacuum center, where a special PVC film is applied to them under the influence of temperature and vacuum; after trimming the excess film, a finished furniture facade is obtained from MDF under the film. If you want to clarify something, please contact me!
Content
This is where the confusion begins. For hundreds of years, only natural wood was used in furniture making. Such furniture was available only to the nobility and the highest strata of society. With the development of industry and mass production, substitutes appeared. In the 40s of the last century, chipboard, 20 years later - MDF.
Unlike wood, these materials require decorative surface finishing. The advent of MDF revolutionized modern furniture design. The dense and uniform structure of MDF (almost like that of natural wood) allows you to create a relief surface and cover it with a thin material. This explains the widespread use of PVC films in facade finishing.
MDF adhesive: characteristics, review of the best manufacturers, instructions for use
Multifunctional adhesive is applicable not only for gluing MDF, but also for other types of repair work. It is characterized by heat resistance (from -30 ⁰С to +60 ⁰С), quickly sets, and is resistant to moisture.
Expert opinion
Strebizh Viktor Fedorovich, leading construction foreman
Liquid nails based on organic acids have an unpleasant odor, so personal protective equipment should be used. If you want to clarify something, please contact me!
Why do you need lamination?
Laminated surfaces, created on the basis of special films, significantly reduce the hygroscopicity of plywood and provide resistance to abrasion and mold growth. Often used for:
- Finishing of wooden sheets necessary for installation of formwork;
- Ensuring protection of the coating from slipping;
- Giving the surface a certain shade.
Many protective films suitable for lamination are made with decorative patterns, which makes it possible to improve not only the technical but also the aesthetic qualities of plywood. The photo shows several types of such products.
So how to make an economical façade?
Regardless of how freely the average family can manage their budget when renovating and updating their premises, everyone tries to shop around and choose the most profitable options.
Initially, blanks are cut from MDF sheets, then they are milled at a milling center according to a ready-made template (the appearance of furniture facades made of MDF is almost unlimited), after the blanks are manufactured with milling.
Which is better: heated floors or radiators?
Warm floorBatteries
Furniture facades made of MDF are supplied to a vacuum center, where a special PVC film is applied to them under the influence of temperature and vacuum; after trimming the excess film, a finished furniture facade is obtained from MDF under the film.
Furniture facades with PVC film have been widely used in the furniture sector not so long ago, but they quickly conquered our market.
The main advantage of furniture facades is that MDF board is somewhat cheaper to produce and is environmentally friendly compared to other furniture boards that are used for the production of furniture facades.
The ease of production and production of any size has led to the massive use of furniture facades in the furniture industry and allows reducing the production time of furniture for the consumer.
Also, the use of cheaper raw materials for the manufacture of furniture facades from MDF reduces the cost of the final product by approximately two to two and a half times, which allows for a greater expansion of consumption of products made from MDF facades to a wider number of consumers on the market.
PVC film is a rolled polymer material based on polyvinyl chloride, intended for cladding smooth or embossed surfaces. The film is used for finishing MDF and chipboards, furniture facades, door panels, baseboards, window sills, and window profiles.
The film can be matte or glossy, smooth or embossed. Our assortment includes facades with various colors of films (both plain and fancy) and with decor - wood, metallized, etc.
PVC films, as a material for finishing furniture facades, are characterized by resistance to precipitation and temperature changes, and ultraviolet radiation. PVC film for finishing MDF products is also resistant to mechanical and chemical stress, staining and discoloration.
They are easy to clean: furniture facades, doors, tabletops made of MDF, covered with PVC film, can be cleaned with a damp cloth and liquid detergent.
In recent years, the use of furniture using MDF furniture facades has increased by an average of 15 percent. Our company offers furniture facades to both wholesale and retail consumers; our furniture production also offers ready-made furniture using furniture facades made of MDF.
Currently, there is a real boom in kitchen furniture on the market. A huge number of types of kitchens, bright colors and a variety of materials - all this can lead to confusion for the buyer.
Applying glue
The surface is polished with sandpaper No. 320. This procedure is carried out if a glossy film is to be glued. It is not necessary for matte and grooved coatings.
The part with the film is placed on the table, where it is exposed to heating elements. All air is removed from under the film. When the temperature reaches the specified values, the film fits the surface and the materials begin to be joined with heated glue. High pressure ensures uniform pressing over the entire surface.
Vacuum pressing technology for the production of MDF door trims allows you to obtain decorative elements of any level of complexity.
Expert opinion
Strebizh Viktor Fedorovich, leading construction foreman
So, the most successful combination is gluing the plastic on both sides, using PUR glue, and using a hydraulic, pneumatic or screw press without a vacuum for compression. If you want to clarify something, please contact me!
Lamination and lamination of chipboard. Chipboard technology.
Chipboard lamination and lamination technology. Production of laminated chipboard. Decorative coating for furniture boards.
To use chipboard in furniture production, sanded chipboard is subjected to decorative processing - a decorative coating of laminated paper (melamine) films is applied.
At this production site, sanded chipboard is converted into laminated chipboard. The production of laminated chipboards is the process of lining sanded chipboards with paper-based films (laminated paper films).
There are two methods for decorative processing of chipboards with paper-laminated films:
- Chipboard lamination.
- Chipboard lamination.
The main difference between lamination and lamination of chipboards is that during lamination, a decorative coating is created by chemical pressing and is a component of the board, while during lamination, a ready-made solid paper-resin film is glued to the board.
Rules for using adhesives when gluing PVC film
At home, the best option would be to use PVC film with a self-adhesive layer. With careful work, a reliable connection to the base will be ensured, in addition, such a film will look good.
If it is intended to use PVC film without an adhesive base for the sticker, the work must be carried out in compliance with certain rules.
When choosing an adhesive, you need to make sure that it does not contain toxic substances. The best option is the choice of adhesives based on vinyl chloride when working with rigid structures, for soft ones - based on thermoplastic polymers.
When applying the adhesive layer, it is extremely important to ensure a uniform thickness of the layer over the entire area; any excess protruding along the edges must be removed immediately.
The surfaces to be pasted require careful preliminary preparation - cleaning, degreasing, drying. The surface should be as smooth and free from defects as possible.
Expert opinion
Strebizh Viktor Fedorovich, leading construction foreman
So, the most successful combination is gluing the plastic on both sides, using PUR glue, and using a hydraulic, pneumatic or screw press without a vacuum for compression. If you want to clarify something, please contact me!
Chipboard lamination.
Chipboard lamination is the process of covering board surfaces with paper-resin films impregnated with resins. The combined effect of pressure (25-28 MPa) and high temperature (140-210 ̊ C) causes the film to practically “grow” into the surface of the chipboard. The word “lamination” itself is of English origin and is translated as “layering, rolling, layering.”
Chipboard lamination line, made in China. (photo from website: china1.ru)
Fast lamination line. (photo: elo.ru)
| Feeding the slab into the press. | Multi-vacuum device with reversible strip for film laying. |
Preparation of blanks
The first step should be taken when calculating the detailing. We calculate the details with a margin of 2 cm in height and width. Moreover, I would advise beginners to make a reserve of 3 cm. It all depends on your confidence in the growth of your arms from the right place.
Previously, I cut plastic on an ordinary table. He carefully swept away small specks from the table and carefully unfolded a sheet of 3005*1300 format. Then I laid out the laminated chipboard blanks on it in rough size. Then he outlined the workpieces with a sharp knife.
When I have a computer at hand, I enter the dimensions into Basis Furniture and the program gives me a cutting map. If necessary, I edit manually and print it out. In just 15 minutes, on a format cutting machine, I cut the sheet into rough pieces.
Please note that I carefully cleaned each part from dust and arranged them to size. This way you will prepare the parts as much as possible for gluing. A small speck under plastic, especially under glossy plastic, looks like a decent lump.
Expert opinion
Strebizh Viktor Fedorovich, leading construction foreman
Furniture fronts are kitchen doors or cabinet doors, drawer fronts, decorative elements of facades created to decorate furniture, or simply visible parts of the body that should not look like a rough chipboard panel. If you want to clarify something, please contact me!
Main questions
What is "chipboard"?
Chipboard stands for “chipboard.” From the name you can understand that this is not a separate type of wood, but a mixture of wood shavings, held together with glue and placed under a press. This material is inexpensive and is used instead of scarce wood, it is easy to work with and durable, which is what arouses interest. Thanks to modern decorating techniques, chipboard will become a worthy replacement for expensive wood, the extraction of which, moreover, causes enormous harm to our environment.
ADVICE! Laminated chipboard can be immediately purchased at the factory, it can be made to order, but you can independently process a regular pressed board using laminating agents.
Why laminate chipboard?
Looking at a product made from chipboard, it becomes clear why it is recommended to laminate the raw material. Firstly, it does not look very beautiful, its decorative qualities leave much to be desired. Secondly, lamination will smooth the surface, make it more pleasant to the touch and help avoid the danger of splinters, scratches or snags on thin fabric. Thirdly, the procedure will significantly improve the quality of the product, making it more moisture resistant, which is very useful for kitchen furniture.
How to Apply Glue to MDF for PVC Pressing
- What is plastic glued to?
- How to glue plastic
- Preparation of blanks
- Cut the plastic
- Manual method of applying glue (VIDEO)
- We glue plastic using a compressor (VIDEO)
- How to throw plastic on a large workpiece
- How to peel off plastic
- Conclusion
How to peel off plastic
There are situations when the plastic is stuck in the wrong place. Under no circumstances should you pull on the plastic, you will break it. Take a technical hair dryer and, while heating the plastic, cut the glue with a knife. At the same time, at half strength, pulling the plastic away from the chipboard.
It is important to be extremely careful when working with plastic. Because Sheet furniture plastic is a fragile material until it is glued. It is essentially pressed paper. Keep sawdust and small debris away. And then you will be pleased with the satisfied smile of your beloved wife, and in the near future a customer with a big wallet!
If you need detailing of cabinet or built-in furniture, please contact us. We will definitely discuss the terms of cooperation and come to a common opinion. For a moderate percentage of my work, I will prepare a detailed project for you on time.
How to treat the surface → Room decoration → How to choose the right paint → Surface treatment technologies → Leveling and finishing the walls → Selecting and applying a primer → Removal from the surface → Stretch ceilings and technologies → Reviews and testimonials
Do-it-yourself furniture lamination
So, laminating furniture is quite easy. The main thing is to buy a suitable film for the occasion. In order for it to stick well, you must first wash and dry the surface well. Sometimes you can go over it with fine sandpaper, but this is not at all necessary. If the surface is clean and dry, there are no unreliable areas in the form of cracked varnish or paint, you can start laminating.
Laminating furniture with film is no more difficult than gluing a sticker on it with glue. It’s just that in this case the sticker will cover the entire surface of the furniture. The film, as you might guess, has a protective layer on the other side. If you detach this layer, underneath you will find that the main, decorative layer has enough glue, with the help of which the film is glued to the surface of the furniture. In other words, there is no need to use foreign adhesives, which is very convenient.
Using heating devices
If the PVC film peels off from MDF kitchen facades, you can try replacing it with a new film or gluing the old material in place using available electrical appliances. This could be an iron, a powerful home or construction hair dryer. The film needs to be carefully warmed up: it should become quite soft and blurry, but not start to melt. If you have something to try, use these pieces or on an inconspicuous place on the façade. The device is pressed against the edge that is not glued for a few seconds. The film should stretch, the glue should warm up at this moment, and the material should protrude towards the back side of the facade and adhere firmly. If this can be done, then it will be possible to glue the entire facade in this way, in places where the film has retreated.
Advice: the film itself cannot be heated with a hairdryer at close range, as this will curl it and be damaged.
This DIY restoration of kitchen facades requires some skill, but is quite simple to perform and does not require the use of expensive tools or materials. If the inside and corners are poorly glued, you can use a metal rod comparable in size to the frame. First you need to warm it up. For this, you can use, for example, a gas burner.
Restoring coating using friction
Restoring kitchen facades from MDF using this method does not require any available tools at all. In order to glue the separated section of the film, you need to cover it with a rag and start rubbing it with your fingers, pressing the film. If there is adhesive underneath, the temperature from friction in a small area will be enough to activate a chemical reaction and cause the film to stick.
Advice: this method should be used carefully, as there is a high risk of damaging the film, exposing its edge or removing the top layer, which will ruin the appearance of the coating.
Application of glue
Restoring a glossy kitchen can cause some difficulties, since gloss does not tolerate strong physical impact, which is why it should not be roughly rubbed with your fingers or heated closely with any appliances. You can try a safer method - gluing the separated film using “Moment”. Most often, such a film peels off in the kitchen, since it is not affected by hot steam. It is necessary to restore the coating as quickly as possible, otherwise the furniture itself will be damaged. The glue must be applied to the untreated area of the facade and to the film itself along the edge so that it can isolate the seam from negative influences. All this must be done carefully, as the glue easily sticks and gets dirty.
Let's start installing the frame
- 1.
Let us note in advance that hangers are not needed here, since this frame is assembled a little differently than the structure for drywall. Namely: along the intended line, the batten is applied to the wall and holes are drilled in the wall with a hammer drill directly through the batten in increments of approximately 60 cm (more is possible, act according to the circumstances and depending on the evenness of the batten). If the rail is uneven along its entire length, then take a smaller step to level it. - 2.
Next, plugs are inserted into the resulting holes in the wall, and self-tapping screws are inserted into the rail. Fixing the slats begins from a predetermined place - the one that sticks out the most on the wall surface. At this point the batten is screwed tightly to the wall; at the remaining points it will be necessary to additionally use wedges to level the batten and maintain the plane. - 3.
After the wedges are installed, the rail is tightly fixed at the opposite end.
There is another option - attaching the frame to the wall using hangers, but there are several disadvantages. The first is that repair costs will increase. Second (in our opinion, more important) - the rail is only 2 cm thick; when installing on hangers, you need to screw the screws into the end, and this will lead to the fact that every 3-4-5 screws will split the rail and thereby reduce the strength of the entire structure. You can, of course, avoid this by first drilling holes for self-tapping screws in the end, but is it necessary to bother yourself and waste time and effort on this if you can mount the frame without hangers? Yes, you will have to work hard and suffer with the wedges, since there will be a lot of them and all of different thicknesses, but since professionals use this method, then apparently there are good reasons for this.
Since the slats still have to be adjusted to length, there shouldn’t be a shortage of material for the wedges, and it’s even better to make them in advance - saw off blocks 5-6 cm long and chop pieces of different thicknesses with a chisel. If you need to remove a couple of millimeters from the length/thickness, just trim them with a knife.
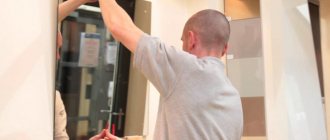
Finishing walls with MDF panels, like other repair work on leveling walls, requires mandatory leveling of the plane already at the stage of installing the frame. This is done as follows:
- 1.
On both sides, along which the rail is located, the thread is pulled and fixed with self-tapping screws, which are screwed in until the end. - 2.
One match is placed under the thread along the edges. Now you can follow the taut thread.
Next we move on to installing the frame; this process consists only of screwing in the remaining screws with sorting the wedges and their quantity. As a result, the rail should be tightly fixed and have a millimeter indentation from the thread along its entire length. Next, we mount the second rail, the pitch is set depending on the length of the rule, the ends are set according to the level, other fastening points are set according to the thread. And so on, we do the same with the remaining slats, placing them in the same plane as the first or previous one, focusing on the rule.
One point - the lowest rail must be fastened as close to the floor as possible, this will guarantee a strong connection of the panel at the bottom of the wall, in addition, there will be something to attach the plinth to after the work is completed. You should do the same with the topmost rail - attach it as close to the ceiling as possible. However, if you plan to make a suspended ceiling, then you need to install an additional rail at the same level at which you plan to install the corner for the ceiling.
Another tip - we recommend that at the stage of installing the frame, you transfer onto paper the location of the slats on the wall, observing the coordinates. So in the future you will be able to hang something on the wall, and since you absolutely cannot attach anything to the panels, these notes will help determine the location of the slats, which will become the supporting structure for your paintings and lamps, and you won’t have to patch up bad holes in panels.
So, we’re done with the frame, let’s note finally that if you need to go around the outer corners, then do everything according to the same principle, only the slats will be shorter.
Choosing a loft bed with a work area and wardrobe design options
There are several ways to solve the problem. For starters, this is a complete replacement of facades that are no longer suitable for restoration. If you just want to put the film back in place, there are several solutions you can use. For starters, this is the temperature effect. By heating the glue, it returns its characteristics, begins to cling to the surface, and thereby the facade is restored. An alternative is to use glue. Moreover, the experts advise first to try the first method, and then switch to glue.
Let me separately and as briefly as possible try to talk about restoration methods.
Friction recovery
This may seem strange to some, but the method really works.
It is best to use this technique in the early stages, when the film has only recently peeled off.
The meaning of the procedure is to perform the following sequential actions:
- it is advisable to remove the problematic door or facade;
- prepare a clean, dry cloth;
- place the facade on a flat horizontal surface;
- apply a rag to the problem area;
- start moving the rag with slight pressure back and forth;
- try to wipe away the peeled off area;
- the temperature due to friction will gradually increase;
- the dried glue will warm up;
- its adhesion properties will return;
- the film will return to its place.
Just don't rub too quickly or vigorously. Take short breaks, don't put too much effort. Otherwise, the film may be damaged.
Heating with a hair dryer
An alternative would be another method of heating the film, but using an appropriate device.
A regular hair dryer may work, but it is better to use a construction hair dryer.
In this case, the sequence of operations is as follows:
- remove the façade;
- lay on the surface so that it is convenient to work;
- turn on the hairdryer;
- select medium heating mode;
- start warming up the film and facade;
- when the glue warms up, take a clean rag in your hand;
- start rubbing the film into the facade, working from the center to the edges.
The method will help if the glue has really dried out and lost its properties. Having melted it, it is often possible to restore it without using a new layer of glue.
Restoration with glue
Often home craftsmen first start with this method. But here everyone decides for himself.
To work, you will need quick-drying glue. Choose any one at your discretion.
The composition must be applied to the inner surface of the film and to the MDF facade itself. Then press and gently rub.
How to glue MDF - features of installation work
MDF panels are an excellent decorative finishing material, which is characterized by high installation speed and the absence of the need for “wet” work at all stages of finishing.
The panels also have their drawbacks (for example, MDF, like any wood, is afraid of water and high humidity, is less resistant to mechanical damage compared to synthetic materials, repairing damage to it involves a number of difficulties, etc.).
Fastening MDF panels depends on the type of base and the desired result. The most common type of fastening is mechanical (on the base, a frame is often equipped with wooden or metal guides, to which MDF panels are attached using nails, screws or clamps) and chemical - using adhesives.
The latter method assumes a flat monolithic base, since in this case there is no frame made of profiles or guides.
Which lathing to choose. Inspection of walls
The easiest way to cover walls with MDF panels is to use wood, since you can use staples or nails for this. When installing on a metal profile, you will need metal screws, and in this case you cannot do without a screwdriver. When using a frame, a gap is formed between the cladding and the wall, in which there will be no air circulation. Such conditions are attractive to fungus and mold.
Before installing the sheathing, you should inspect the wall. If it is wet, it is first dried and then treated with an antiseptic composition. It is better not to install such cladding on external thin walls, as it will quickly become unusable and an unfavorable microclimate will be created in the room over time, which can contribute to the formation of allergic reactions.
Varieties
Everything is clear with the requirements, now I’ll move on to specifics and consider the products offered by manufacturers, which can be divided into three conditional groups:
Group No. 1: universal compounds
They perfectly hold together heavy products made of materials such as stone, metal, glass, wood, rubber or polystyrene.
That is, they cope with almost any fixation. Here are the most prominent representatives of this group:
- "Titan Wild" is used for gluing almost any building materials. Its approximate price is 164 rubles per 1 liter bottle. Technical data:
Examples of different containers of Titan Wild glue
- Titebond Multi-Purpose also has a very wide range of applications. Its cost starts from 130 rubles for a three-hundred-gram tube. Technical data:
Tube of Titebond Multi-Purpose glue
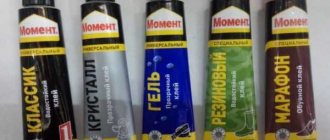
- "Moment-1". In this case, for a 750 ml jar you will have to pay from 190 rubles. The technical characteristics of this composition are as follows:
Jar of glue "Momen-1"
But before you decide on the question of what glue to glue MDF panels with, you should also think about your own skills in this area. So, for example, the group described above, although highly effective, is not the easiest to use. So, I turn to the analysis of the following adhesives.
Tip: When gluing your own medium-density fiberboard trim, be sure to ensure there is a draft in the room and a respirator on your face. Otherwise, you risk serious poisoning from toxins.
A respirator will help you avoid toxin poisoning
Group No. 2: “liquid nails”
This option is especially popular among both professional builders and home craftsmen due to its ease of use.
Advice: I recommend that when purchasing “liquid nails” you immediately buy a special iron structure called a “gun”. Thanks to this device, applying glue will be very simple and quick.
"Gun" for "liquid nails"
Here are the main proposals in this direction:
- "Makroflex MF220 Super strong." A four hundred gram tube costs around 158 rubles. Technical data:
Sample of adhesive “Makroflex MF220 Super strong”
- "Liquid Nails LN-910". The price of such a composition in specialized stores is usually about 220 rubles. Technical data:
Liquid Nails LN-910 glue sample
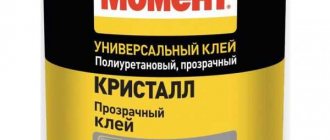
- "Moment Crystal". Here a tube with a volume of 125 ml costs around 110 rubles. Characteristic:
Tube with adhesive solution “Moment Crystal”
So we can safely say that “liquid nails” are an excellent answer to the question: how to glue MDF to MDF, brick, concrete or other building materials for people who deal with construction work only during periods of home renovation.
Group No. 3: polyurethane foam
Construction foam is typically used most often for the purpose of sealing seams or filling voids, but specialists can also adapt it to install sections of medium-density fiberboard to walls and even ceilings. As an example, consider the Orra brand:
Adhesive foam for MDF panels of the Orra brand