Regardless of the fuel type and design, every fireplace looks stunning. An integral element of the design is always the top shelf, on which various decorative elements can subsequently be placed.
You can plan and install the countertop both at the initial stage of building the fireplace and after all the work has been completed. However, before you begin the process itself, you need to get acquainted with the types of shelves and understand how best to build them.
Interesting wooden portal
Fireplace shelf - what is it for, where can it be hung?
- The shelf decorates the fireplace; you can put photographs, souvenirs and other decorative elements on it. In appearance, it is practically no different from an ordinary shelf attached to the wall.
- In addition to decorative functions, such a shelf is needed to maintain cleanliness, because... After a fire, smoke comes from the fireplace, which can damage the walls with soot. The shelf prevents soiling of the walls and prevents ash from getting onto the floor near the fireplace.
- Another important advantage is safety. Since the fireplace beam prevents the spread of heat, thereby minimizing the risk of fire, as well as possible burns.
- In addition, such decoration is useful for storing all the necessary equipment that is used to maintain the fire.
WE ENSURE FREEDOM OF MOVEMENT
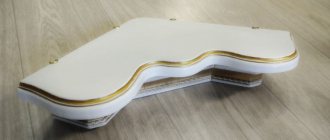
Being above a heat source, due to changes in temperature and air humidity, the shelf parts will either dry out or swell. To compensate for changes in size, I connected element B to the cover using self-tapping screws with a semicircular head, allowing the parts to move relative to each other (Fig. 3), rather than gluing them together along their entire length. Later I did the same with the rest of the parts.
To ensure that the parts of element B fit tightly in the outer corners, on the back side of the joint I sawed a joint from the inner corner (photo C) to approximately half the width of the parts. This gap will be closed by the next element C.
The front ends of the side parts of element B were glued to a length of only 50 mm. The rear end of each part was secured with a screw with a semicircular head, placing a washer under it (photo C).
Photo
Next in the photo you can see what the fireplace mantels look like.
Interesting solutions in interior design
Many manufacturers offer a wide range of corner fireplaces.
You can choose exactly the option that will look perfect in the interior of the living room or bedroom. As previously mentioned, you can choose a symmetrical or asymmetrical portal.
They cope with the function of heating the room with a plus rating.
An asymmetrical type of corner fireplace is suitable for zoning a room. If your room has a large area, this portal will look perfect in any interior. Glass models serve only the role of a decorative object, enveloping the room in comfort and warmth.
This option will look good in a wooden house or in a country house.
The Rococo style is not as big, but it also has columns and gilded details.
High-tech style is suitable for modern rooms
The corner portal in the Art Nouveau style is made from modern material. It combines glass and heat-resistant plastic. The U-shaped portal and open firebox are reminiscent of the classic version. If your home is dominated by a modern interior, choose this type of fireplace.
The right style and shape of the fireplace will help make your home unique and chic.
How to make it from wood?
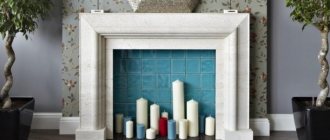
It is not difficult to make a mantel with your own hands , using wood, artificial or beautiful natural stone. The first option is the most affordable. Considering that wood is easy to process, it is easier to make and install a wooden beam.
As for stone, a shelf made of it can only be installed, since its processing requires skills, as well as special equipment.
Materials, tools
To make a wooden fireplace beam you will need:
- One board measuring 216 x 1219 mm (for the top panel).
- One board 111 x 1010 mm (for the bottom).
- One block measuring 64 x 1048 mm for making the front part.
- Two bars 64 x 130 mm (side).
- One beam measuring 44 x 1007 mm (will simultaneously act as a support and rear wall).
- Screws.
- Dowels.
- Cornice: front – 89 x 1270 mm, two side – 89 x 254 mm.
- Finishing nails (38, 51, 64 mm).
At the same time, the thickness of the boards is 19 mm, and the thickness of the cornices is 17.5 mm.
Drawings/scheme
Manufacturing instructions
- First, make the top and bottom panels. The front beam and sides are also cut out of wood (at an angle of 45 degrees, taking into account the dimensions).
- Then the holes for the screws are drilled. A router is used to create edges in the top and side panels. (The distance between the edges is no more than 30 centimeters).
- Treated workpieces must be cleaned with sandpaper.
- Consolidation. How to secure the workpieces? The connecting elements are lubricated with glue. Before the glue has had time to dry, the side, bottom and top structural elements are connected.
- Secure them with slate nails.
- The top panel made of wood is attached, like the bottom, according to a similar pattern.
- Next, the side cornices are cut. They need to be cut at a forty-five degree angle to connect to the side and bottom panels. The blanks are attached using glue and 40 mm nails.
- Cutting side and top cornices.
- Installation of the support beam. First of all, you need to locate the stud inside the wall (to do this you will need to use a magnetic finder). Mark a horizontal line on the wall with a pencil. Then beacons are made. The timber is secured to the rack (with 2-3 screws).
- The shelves are attached to the timber (using 65 mm nails).
This completes the manufacture of the wooden mantelpiece. The only thing that remains is the decorative design.
Types of materials
Most often, the following materials are used to create these products:
- Various types of natural wood.
- Artificial stone fireplace shelf.
- Shelf made of natural stone.
The first two options are the most accessible. To create a countertop made of natural stone, you will have to spend a considerable amount of money, but as a result, the owner will receive a luxurious product that emphasizes the refined taste and high status of the residents. For the first experiment, if you plan to make a shelf with your own hands, it is better to stick with wood. It’s easier to work with because the material is malleable.
If you want the shelf above the fireplace to be made of natural stone or its imitation, then you will have to buy a finished product, or order it according to the dimensions of the structure. The fact is that to process stone and create any elements from it, special equipment is required.
Made from artificial stone
such a shelf immediately during the construction of the fireplace . The easiest way to install it is if the fireplace is open (entirely located in the room, not in the wall). Then its front upper part will be a good platform for adding a stone shelf. The entire installation boils down to laying the material on the solution.
If the fireplace is built into the wall, then the shelf will also have to be built in. It must be laid so that it protrudes by at least 10 cm, and the rear end is hidden a few centimeters in the brickwork.
Step-by-step instruction
To install, you need to do the following::
- Create a horizontal channel with a recess of 5 cm (the thickness should correspond to the width of the beam).
- Clean the groove from dust. Install a shelf in it. Secure with wedges.
- The joints are covered with putty.
Another option is using columns:
- They are installed on both sides of the fireplace mouth.
- Attached to the walls.
- A shelf is installed on top of the columns, fixed with glue or cement mortar.
Decoration for the holidays
To ensure that the fireplace always remains the main part of your interior, you need to decorate it correctly. This is especially true for holidays.
New Year's version
Decorating a fireplace is not at all difficult. First you need to decide how you will decorate the fireplace. You can buy the necessary toys and tinsel for the New Year in the supermarket, or you can rummage through the pantry and find many interesting things there. If you wish, you can make decorations yourself.
When creating a New Year's mood in your home, you should remember two things:
Safety precautions. During the winter holidays, many people prefer to decorate their homes with garlands and candles.
Color compatibility
You can decorate a fireplace in completely different ways. In this matter, everything depends on your imagination and your capabilities. Here are some good examples of a New Year's fireplace:
The decor of the fireplace is made in red and white colors. Minimum decoration - maximum beauty. Photos in beautiful frames, homemade snowflakes, candles, garlands - that’s all you need to create a New Year’s mood by the fireplace.
Valentine's Day
Since ancient times, it has been customary that Valentine's Day should be filled with delicate pink and bright red tones. Both red and pink symbolize love. On this bright and gentle holiday, you can easily create a romantic atmosphere at home with the help of hearts, balls and beads. By February 14, you can purchase all the holiday attributes in the store, or you can try and make them yourself, putting love and warmth into their creation.
What decorations can be made from improvised materials:
- Wreaths of rosebuds, peonies and lilies;
- Garlands of hearts;
- Large hearts with cardboard arrows;
Several interesting options:
The decorative fireplace is stylishly decorated with rag hearts, which organically combine with teddy bears and fresh flowers.
Easter
You can create a festive atmosphere even on Easter. It is on this bright day that fire has a special meaning, because the whole family gathers around the hearth. A mantel is ideal for holiday decorations. You can place both traditional Easter cakes and eggs on it, as well as themed garlands.
Examples with photos:
The very beautiful soft yellow decor of the fireplace is made using fresh flowers and baskets of eggs.
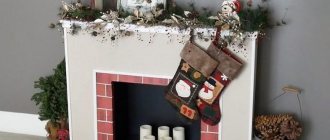
Christmas
At Christmas, as on any other holiday, households love to decorate their homes. The fireplace occupies the main place in the house, so it is necessary to decorate it. Festive attributes can be laid out on the mantelpiece, or you can hang a wreath or picture on the wall. The main attributes of the winter holiday are candles, decorative socks, ribbons and garlands. Small candles and mistletoe sprigs will fit perfectly into the Christmas interior.
Here's a great example of how you can decorate your own fireplace for Christmas:
The fireplace is decorated in traditional red and green colors. Decorative candles and socks with gifts go well with the nearby Christmas tree. A huge clock decorated with a wreath of living branches looks very original.
Wedding motives
At a wedding, the fireplace is decorated no less than on any other holiday. The hearth is a symbol of a new family, so it must be highlighted on this day. Large candles, fresh flowers, wide ribbons and much more are suitable for decoration. You can hang photographs of the bride and groom on the wall, arranging them in bright frames with satin ribbons. There are a lot of options, the main thing is not to get out of the general style of the celebration.
From plaster
Many people would like to have a fireplace, but not everyone can afford it. In this case, you can make a beautiful decorative fireplace from plasterboard.
Everything you need for making
To make such a fireplace you will need:
- Drywall (the quantity is determined individually, according to the completed sketch).
- Metallic profile.
- Drywall screws.
- Screws for metal.
- Putty.
- Bulgarian.
- Screwdriver.
- Building level.
- Roulette.
- Pencil.
Manufacturing:
- First, a sketch is made, displaying a drawing of the future fireplace on the wall.
It should be noted on the plane the location of the base and fastening of the frame. The base can be made of concrete; it will raise the body above the floor and create additional thermal insulation. If this option is not suitable, then you can use a profile. It should be taken into account that the walls also need to be insulated, this will prevent excessive heating. This can be done using brick, asbestos or aerated concrete. - On the drawn drawing you should mark points for the frame, which are attached using self-tapping screws. It is required to make holes with a needle roller to a depth of five millimeters.
- The workpiece is moistened with water and fixed to the template (you need to let it dry). After this, the drywall takes on the desired shape and is ready for further work.
- Afterwards, a U-shaped profile of the required size is cut (for this, use a grinder or metal scissors). Dowels are used for fastening. Holes in the wall are made with a hammer drill.
- The frame is assembled with self-tapping screws, attached to the main frame. The parts are cut out from a sheet of plasterboard and attached to the base.
- The fireplace beam is made in the same way. If the portal is made for a fireplace from plaster and a deep finish is used, then the blanks on the sides should be treated with the desired material according to the finished shape and the corners should be rounded. Next comes the installation of the foot. For this, silicone or mounting adhesive is used. Particular attention should be paid to the reliability of the shelf fastening, because... a load will be placed on it.
- Next, the surface is puttyed. All holes and cracks are covered. The screw heads are hidden. Putty should be applied in three layers.
- Then the surface is completely reduced to zero.
- After which the fireplace is decorated to the taste of the owner.
Design options
You can make decorations yourself. But why rack your brains if designers have long come up with modern solutions for decorating a wooden mantelpiece. Here are some tips:
- Place large items on the shelf. It is better to place massive decorative elements on a wooden shelf, as they look more impressive and attract attention better. Follow the combination of colors, they should fit harmoniously into the overall design;
- Use items made from the same materials. That is, if you decide to make an original design for a shelf above the fireplace, then it is advisable to select all decorative elements from the same material: glass, varnished wood, plastic or ceramics.
- Paintings with images of trees are considered ideal for decoration.
On the sides of the picture The design of the fireplace shelf can be furnished with other decorative elements - small toys, family jewelry or handmade interior items. - “Neat clutter” is another unusual idea that will help make your mantel more attractive and unique. In this style, the main thing is not to overdo the “more is better” rule. Advice from designers: if you want to put a lot of items on the shelf, then in this case you should select things and objects of the same color. Multi-colored objects scattered carelessly on a shelf are not a “neat mess”, but ordinary clutter.
- Three items. Designers are confident that the magic number three should not be underestimated even in design. Practice has shown that a unique design can be made using any three objects - just put them on a shelf. For decorations, it is better to use one large object in the center and two small ones on the sides.
- Two colors. A wooden shelf is distinguished by its versatility - it can be combined with most decorative elements.
Placing objects on a shelf
For example, if you have varnished a shelf above the fireplace, then in this case you can decorate it with dark objects; if the varnish has a black tint, then designers recommend decorating the shelf with light colors. - Use unique handmade items. If you managed to make a shelf yourself, then why not try making other decorative items for it? These can be any trinkets made of wood, metal, plastic or paper.
- Minimalism is a universal style. Designers are confident that minimalism goes with all styles. Practice and time have confirmed the designers’ guesses. You can put various small objects on the shelf and look at the result from the outside. If you like the decoration, then you did everything right.
- Place items only at the edges of the shelf; this arrangement of decorative elements visually increases the space between them and creates the optical illusion of a large shelf.
- Add a few decorative elements to the room and to the shelf. In this simple way, you can make a unique design for a wooden shelf above the fireplace without much effort or purchasing decorative elements.
After completing the decoration of the wooden shelf, you can exhale calmly - your fireplace and its image are completely ready. Now you can gather around it with friends or family for pleasant gatherings with a guitar or watching a movie.
How to decorate?
It is important to fit the fireplace beautifully into the interior and arrange it in an original way . Even the most ordinary one is easy to decorate, because this does not require any special knowledge or skills.
Creative ideas
- The area near the fireplace and above it is not difficult to decorate with fresh flowers or flowerpots. They are displayed on the mantelpiece or next to the fireplace itself. (It is advisable to choose the most heat-loving plants).
- Dry bouquets or wreaths. But when using such decorations, you must place them out of the reach of fire.
- Wire. For artificial fireplaces, grates are made from it, which are painted in various colors.
- Polyurethane (imitation stucco for walls).
- Mirrors. They are hung on the wall or attached to the fireplace beam.
- Photos, figurines, souvenirs. They are placed on the mantelpiece or in niches on the wall.
- Panels or toys.
- Pictures in frames.
We invite you to watch a video on how to decorate your fireplace mantel:
Dismantling the old portal
So, without getting ahead of ourselves, let's figure out step by step how to turn all these ideas into reality.
First you need to dismantle the old portal, it is advisable to do this carefully, since someone may need it for other purposes. Next, we remove the bricks, this process is the easiest, the principle applies here - “Breaking does not build.”
General Tips
To assemble a fireplace mantel with your own hands, you need to consider that:
- The selected material should be easy to process with available tools and tools.
- Fasteners must be purchased that are strong enough so that they support the weight of the structure well and do not sag or deform.
- You should first create a detailed drawing and think through in detail the structure of the mantelpiece.
- Before installation, the surface must be insulated.
- The shelf is made of fire-resistant materials. If it is wood, then it is better to treat it with fire-resistant impregnation.
- The mantel should match the interior.
Making a wooden fireplace shelf with your own hands does not take much time and does not require large expenses. All you need is a couple of wooden boards, a sheet of chipboard, one beam and screws with slate nails. As for the design of the shelf, everyone can come up with their own design.
Selection and preparation of facing materials
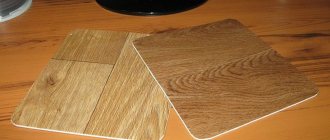
Unfortunately, all lumber, without exception, burns. But, resistance to critical temperatures is determined by the density of the rock.
For example, oak, cherry and other species with high density and hardness ignite much later than less dense birch, pine, spruce, etc. You can see the density and hardness parameters of various rocks in the following table.
Lumber Density Table
Despite the difference in ignition rates, all lumber is fire hazardous to one degree or another. Therefore, before starting facing work, lumber should be properly prepared.
There are two types of fire safety training:
- Applying a fire retardant coating involves surface treatment of surfaces with heat-resistant paints and varnishes, coatings and pastes. Of course, the cost of wooden products after such treatment will increase significantly, but the safety of using wooden finishing is worth it.
- Treatment with impregnating compounds is a more popular method, since the wood not only becomes resistant to critical temperatures, but also practically does not change its appearance.
The essence of the treatment is to apply impregnations containing fire retardants. Considering that the structure of all lumber is porous, the compounds penetrate into the thickness of the wood approximately 1.5-2 cm deep, forming a protective layer.
It should be noted that the lower the density and hardness of the lumber, the more effective their treatment with protective compounds.
So, we found out that when choosing materials for finishing fireplaces, it is not so much the type of wood that is important, but its subsequent processing. But it turns out that even lumber not treated with special impregnations can be used to decorate a fireplace.
The fact is that really high temperatures during the operation of these heating devices are recorded directly in the firebox and 5-10 cm from the edge of the firebox. That is, if the firebox frame is moved these 5-10 cm from the hearth, the wooden lining will heat up within acceptable limits.
Tip: When using lumber for cladding heating appliances, do not cover them with carpentry varnishes for painting wood. Wood varnish forms a dense, hard crust, which is likely to become deformed as a result of regular heating and cooling of the fireplace.
Features of the use of wood in cladding heating devices
This is what a wood fireplace mantel looks like
The widespread expression “wooden fireplaces” is incorrect, since the manufacture of the main structural elements in the design of heating equipment is impossible.
Such wooden fireplace portals can be ordered in specialized workshops
Only decorative elements that do not provide functional benefit can be made from wood.
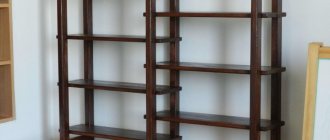
Among these elements, we primarily note the portal, beam (shelf above the fireplace), etc. In addition to the cladding itself, stands for firewood, banquettes, mounts for pokers and other tools, and various hanging shelves installed in close proximity to the heating device can be made from lumber.
Tip: To achieve an optimal aesthetic effect, you can combine different materials when making decorative elements. For example, wood goes well with ceramics or metal.
Making a shelf around the fireplace
Now let's look at how to make a wooden shelf by the fireplace. To perform this work you will need a 150*100 mm timber and a metal strip. You will also need screws and dowels to assemble all the elements into a single structure.
Performance
Creating decorative fake fireplaces, although not a difficult task, requires precision, accuracy, and patience. For creative people, this is simply a holiday, because you can give free rein to your imagination, creating your own, unique, magical fireplace, from which on New Year’s Eve Santa Claus will appear and fill the socks hanging on the fireplace with gifts or put boxes under the Christmas tree standing nearby. There are a lot of options for false fireplaces, the creation of each of them differs in some nuances.
Mini fireplace from one box
This idea is perfect for people who want to decorate a small apartment. Even a small toy fireplace, decorated with tinsel or a couple of Christmas tree decorations, will create the feeling of the approaching New Year and Christmas. Such a structure can be placed on the windowsill, and it will fill the room with a mystical expectation of a miracle.
To make the structure you will need:
- shoe box;
- 3 small oblong boxes;
- dye;
- decor;
- a piece of thick cardboard;
- glue.
Step-by-step instruction:
- The bottom of the shoe box is secured with glue and tape.
- The long blade is bent to the outer side. Subsequently, it will become the protruding base of the mini-fireplace.
- The second long sash is fastened to two short ones. There should be a window.
- Small boxes are placed along its entire perimeter and markings are applied.
- The boxes are removed, the window is enlarged by removing excess cardboard.
- Small boxes are glued to the marking site, creating a hearth portal.
- A shelf is cut out of plastic or foam, which should form a canopy, so it is made 5 cm longer than the false fireplace itself.
- The resulting small fireplace is painted on each side. Wallpaper or self-adhesive film “like a brick” is glued inside the fireplace.
Fireplace with arched cutout
To make this type of artificial fireplace, you will need two boxes of the same size. They are connected together to form a large box or box. All joints are glued and additionally secured with tape.
In order to make a fireplace out of cardboard with your own hands for the New Year, step-by-step instructions involve performing the following steps:
- A podium for the fireplace on which it is installed is formed from polystyrene foam.
- Separately, an arch of the portal for the false fireplace is cut out of a sheet of paper. The size of the window should correspond to the size of the artificial fireplace itself.
- The template is applied to the front of the structure, positioned symmetrically so that the future portal is located exactly in the middle.
- They outline it with a pencil, and then cut out the fireplace firebox in the form of an arch with a sharp stationery knife or scissors.
- The mantelpiece and decorative plinth are glued on top.
At the end, the entire structure is covered with paper, and then an imitation of brickwork is created using “bricks” cut out of cardboard, wallpaper or self-adhesive outside and inside.
Corner fireplace made of cardboard sheets with a chimney
This will create the feeling of being pressed into a corner.
To create a corner fireplace, you will need several sheets of durable cardboard. Instructions:
- 4 semicircular triangular blanks are cut out of cardboard. A wide strip of cardboard (border) is glued to one of them along its entire length. It turns out to be a box.
- Thick cardboard or wooden shingles are inserted inside for structural rigidity. The second part of the structure is glued on top.
- The same is done with the other two blanks. For reliability, all joints are additionally taped with tape.
- After the top and bottom of the future fireplace are ready, they are connected by side walls made of thick cardboard (several layers of cardboard can be folded together).
- The junction of the two “sides” is secured with a glue gun and additional tape.
- From the inside, the joint is covered with a strip, which acts as an additional stiffener, and then with a rectangular piece of cardboard.
- The structure is primed and painted with white paint.
- “Bricks” are carefully cut from cardboard. Moreover, to create contrast in the pattern, it is better to make the internal “bricks” shorter and wider, painting them in a pale pink color. And for the exterior design, the “bricks” need to be cut narrower and longer, painting them red.
- They begin to create a fake chimney. To make it you will need 2 corner rounded parts. The lower one should be the same size as the surface of the fireplace, and the upper one should be slightly narrower, since the chimney should taper upward.
Third manufacturing method
For this method you can use an old uncut board:
It is necessary to remove the bark from the surface of each element. This must be done using a drill equipped with a brush with metal bristles.
It is very important to work carefully and perform uniform movements in the direction along the growth of the fibers;
After which the surface must be coated with paint (it is recommended to use stain);
We re-treat the surface after the stain has completely dried. To do this, again take a brush with metal bristles;
We cover the surface of each element with a varnish base;
We attach forged supports to the wire fixed to the wall
For this we use welding.
Artificial creation of unevenness
Artificial creation of unevenness, roughness and abrasions on a wooden surface
Do-it-yourself aging of a wood surface
Do-it-yourself aging of a wood surface
Decorating a mantelpiece with an aged surface effect
Decorating a mantelpiece with an aged surface effect
A mantelpiece made using one of the methods presented in the article will not only complement the appearance of the heating installation, but will also make the portal as functional as possible in use.
Performance
Creating decorative fake fireplaces, although not a difficult task, requires precision, accuracy, and patience. For creative people, this is simply a holiday, because you can give free rein to your imagination, creating your own, unique, magical fireplace, from which on New Year’s Eve Santa Claus will appear and fill the socks hanging on the fireplace with gifts or put boxes under the Christmas tree standing nearby. There are a lot of options for false fireplaces, the creation of each of them differs in some nuances.
Mini fireplace from one box
This idea is perfect for people who want to decorate a small apartment. Even a small toy fireplace, decorated with tinsel or a couple of Christmas tree decorations, will create the feeling of the approaching New Year and Christmas. Such a structure can be placed on the windowsill, and it will fill the room with a mystical expectation of a miracle.
To make the structure you will need:
- shoe box;
- 3 small oblong boxes;
- dye;
- decor;
- a piece of thick cardboard;
- glue.
Step-by-step instruction:
- The bottom of the shoe box is secured with glue and tape.
- The long blade is bent to the outer side. Subsequently, it will become the protruding base of the mini-fireplace.
- The second long sash is fastened to two short ones. There should be a window.
- Small boxes are placed along its entire perimeter and markings are applied.
- The boxes are removed, the window is enlarged by removing excess cardboard.
- Small boxes are glued to the marking site, creating a hearth portal.
- A shelf is cut out of plastic or foam, which should form a canopy, so it is made 5 cm longer than the false fireplace itself.
- The resulting small fireplace is painted on each side. Wallpaper or self-adhesive film “like a brick” is glued inside the fireplace.
Fireplace with arched cutout
To make this type of artificial fireplace, you will need two boxes of the same size. They are connected together to form a large box or box. All joints are glued and additionally secured with tape.
In order to make a fireplace out of cardboard with your own hands for the New Year, step-by-step instructions involve performing the following steps:
- A podium for the fireplace on which it is installed is formed from polystyrene foam.
- Separately, an arch of the portal for the false fireplace is cut out of a sheet of paper. The size of the window should correspond to the size of the artificial fireplace itself.
- The template is applied to the front of the structure, positioned symmetrically so that the future portal is located exactly in the middle.
- They outline it with a pencil, and then cut out the fireplace firebox in the form of an arch with a sharp stationery knife or scissors.
- The mantelpiece and decorative plinth are glued on top.
At the end, the entire structure is covered with paper, and then an imitation of brickwork is created using “bricks” cut out of cardboard, wallpaper or self-adhesive outside and inside.
Corner fireplace made of cardboard sheets with a chimney
To create such an artificial structure, it is extremely important to first measure the angle in which the fireplace will be installed. It is necessary to ensure that it does not protrude, as it will constantly interfere, but you cannot make the fireplace shorter than the protruding walls
This will create the feeling of being pressed into a corner.
To create a corner fireplace, you will need several sheets of durable cardboard. Instructions:
- 4 semicircular triangular blanks are cut out of cardboard. A wide strip of cardboard (border) is glued to one of them along its entire length. It turns out to be a box.
- Thick cardboard or wooden shingles are inserted inside for structural rigidity. The second part of the structure is glued on top.
- The same is done with the other two blanks. For reliability, all joints are additionally taped with tape.
- After the top and bottom of the future fireplace are ready, they are connected by side walls made of thick cardboard (several layers of cardboard can be folded together).
- The junction of the two “sides” is secured with a glue gun and additional tape.
- From the inside, the joint is covered with a strip, which acts as an additional stiffener, and then with a rectangular piece of cardboard.
- The structure is primed and painted with white paint.
- “Bricks” are carefully cut from cardboard. Moreover, to create contrast in the pattern, it is better to make the internal “bricks” shorter and wider, painting them in a pale pink color. And for the exterior design, the “bricks” need to be cut narrower and longer, painting them red.
- They begin to create a fake chimney. To make it you will need 2 corner rounded parts. The lower one should be the same size as the surface of the fireplace, and the upper one should be slightly narrower, since the chimney should taper upward.
Biofireplace
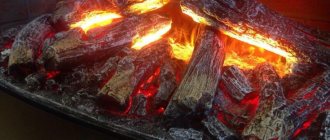
Having a fireplace in the living room is the dream of many of us. However, it is not always possible to place a fireplace at home, for example because a chimney has not been installed or because its installation is too expensive. Recently, biofireplaces have become a very fashionable solution that can be installed even in an apartment located in an apartment building. It does not need a chimney because it does not emit fumes.
Before you start decorating, you should make sure that the brickwork around the fireplace is in good condition. If there are any cracks or broken brick, now is the time to call a professional to repair it, or do the repair yourself - but this will largely depend on the type of damage that needs to be repaired. Also be sure to clean up any ashes.