Decorating children's rooms with bunk beds. Varieties of bed designs. Approximate prices for ordering according to your sizes. Photos with examples of children's bunk beds.
- For one child
Recommendations for choosing beds
The following nuances need to be taken into account:
- It is not recommended to choose these models for a child under three years old.
- It is advisable not to skimp on the design, mattress and other bedding.
- The second tier must be equipped with sides.
- You should choose high-quality products made from natural and environmentally friendly materials that are not harmful to health.
How to choose a safe model for a child?
When purchasing this product, you need to pay attention to its stability, practicality, safety and build quality. There should also be a fairly strong and high fence and preferably wide steps. Various fasteners and bolts should not protrude from the structure.
How to choose the right material
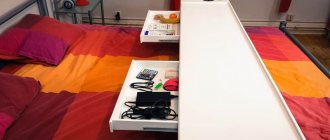
Comfortable classic bunk bed “Kuzya” for a comfortable rest for your children
It is recommended to consider manufacturers who have proven themselves well in the market. Their products, including the ones you need, must be reliable, safe and durable. Only environmentally friendly materials are used in production. It should not cause allergies or irritation on the child’s body.
The following materials are used in production:
- metal;
- tree;
- Chipboard, MDF or laminated chipboard.
Metal ones are not popular. The advantage is practicality and long service life. Metal models are simple and expensive. It is the lack of abundance of design that provokes low demand.
Wood products are distinguished by a wide range and rich variety of designs. Working with wood is easy. The material is natural and safe. Oak or pine are most often used in production. Wooden products need special attention. They cannot easily tolerate strong temperature changes.
White transformable Slipper bed made of solid alder
High indoor humidity is detrimental to them. When choosing a wooden one, the described features should definitely be taken into account.
Products made from chipboard or MDF have a low cost. They feature the widest range of designs. You can choose ones that suit any interior. In production, reliable manufacturers use only safe materials and paints. Therefore, they turn out to be of high quality and practical.
Advantages and disadvantages
Advantages and disadvantages of two-tier models for children's rooms.
| pros | Minuses |
| They take up little space and save space. | On the second tier, it is more difficult for both parents and the child to make the bed. |
| They are multifunctional and can be equipped with a work area, play area, cabinets, shelves, drawers for bed linen and more. | When sleeping on the second floor it can be hot and stuffy. |
| A huge variety of materials are used for their manufacture. | These products are characterized by large dimensions and significant weight, due to which they are limited in mobility. |
| They can have a wide variety of thematic designs and appearance. | The risk of injury increases. |
How to ensure safety for those who operate two-tier structures
The numerous advantages of compact designs do not exclude some of the disadvantages of such beds. The main factor to consider when installing furniture is the issue of safety. There are frequent cases of falls from upper floors or injuries when climbing stairs. What is important to pay special attention to?
- Correctly calculate the size of the stairs, allowing you to move comfortably along it.
- Install railings around the perimeter of the bed (it is recommended that they also be installed on the stairs).
It is also better to equip the stairs with railings - Provide covers at handrails and steps to prevent slipping.
- All components must be designed in such a way that connecting parts or frame parts cannot cause harm to children or adults. High-quality polishing of the material, removal of sharp areas and rounding of edges will significantly increase the safety of structures.
- Classic double bed
Types of bunk beds
There are several varieties.
Standard
The classic two-tier design, equipped with two parallel sleeping places located above each other, is a more simplified version that does not have shelves, cabinets, drawers and other additional elements.
Transformer
They differ not only in their rather original appearance, but also have a highly functional design, due to which it is possible to achieve maximum space savings.
The photo shows a transformable bunk bed with a horizontal lifting mechanism in a children's room.
Retractable
A roll-out model or matryoshka bed assumes the presence of an additional bed that can be pulled out if necessary. It is low, so it is perfect for rooms with low ceilings and poses less risk of injury.
Loft bed
It is a sleeping bed located at the top and a free lower area, which is often equipped with a sofa, workplace, chest of drawers, dressing room, play or sports area.
Bed house
Undoubtedly, it becomes the main furniture element of the entire room and provides an opportunity for interesting, fun pastime and games for children.
The photo shows the interior of a children's room with a bunk wooden house bed in a gray shade.
Instructions for making a classic model
It’s easier to understand the basic principles of manufacturing and assembly using a classic model made of wood and boards - we’ll look at that. By adding and adjusting individual elements, decorative overlays and complementing them with the desired accessories, you can create your own unique and elegant design.
Calculations and purchase of materials
In order not to go to the warehouse for 1 or 2 missing bars and boards, you need to draw the future bed to scale in advance and calculate the necessary materials.
Some elements, such as decorative overlays, railings and stairs, vary greatly depending on the model, while others, such as drawers and trims, remain unchanged
If the wooden frame is covered with MDF or chipboard, boards for the headboard and footboard, fences and railings will not be needed.
For the model shown above you will need:
- timber 38x76x1730 mm - 8 pieces, for vertical posts and decorative cladding;
- lumber 38x38x1850 mm – 4 pieces, for longitudinal strips;
- boards 38x140 - 4 pieces of 2030 mm each (side boxes) and 4 pieces of 914 mm each (end boxes);
- boards 20x90 mm - 4 pieces of central slats 914 mm from the head and foot; 1 pcs stair railings 1510 mm, 2 pcs. 1800 mm and 4 pcs. 2030 mm for railing slats;
- boards 20x140x914 mm – 4 pcs., top plank for headboard and footboard;
- boards 20x64x482 mm - 3 pcs., stepladders;
- boards 20x76x1000 mm - 24 pcs., on cross slats.
Scraps of wood and boards, and even shavings left over from processing and sawing will also come in handy. Take dowels, screws, sandpaper and other small things in abundance. Don't forget a new sharp file or wooden disc for your jigsaw or grinder.
Step 1 - cutting and preparing parts
When all the materials have been purchased, they need to be cut into pieces of the required length using a grinder or jigsaw. It is not advisable to use a handsaw as it will leave an uneven, sloppy edge.
In this model, only the top slats of the headboard and footboard need to be profiled. Before cutting the corners, mark to ensure all 4 boards are the same size.
If the wood has been cut, all harvested parts should be planed. Corners and long edges of boards must be rounded with a router or hand plane, and the finished parts must be sanded.
Step 2 - assembling the side part of the drawer
The fastening of the beam to the frame should be as reliable as possible - it is the first to take on the load from those who sit, lie and jump on the bed.
Glue a beam on the bottom edge on the inside of the board - a longitudinal beam on which the sheets will be laid. Apply wood glue to both pieces, press and clamp until dry. Then additionally secure with self-tapping screws 6 cm long, screwing them in from the side of the beam.
On top of the longitudinal planks, glue or nail spacer bars made of pieces of wood or boards 8 cm long. A total of 13 pieces, cut at a distance of 8 cm from each other. The slats will be placed in the resulting holes.
In the same way, assemble 4 side longitudinal drawers.
Prepare the boards for the sheathing: cut a step at both ends, half the board thick and 4 cm deep. Therefore, it will rest more firmly on the beam and take up less space in height.
Step 3 - assembly and finishing
Once all the details are done, it's time to drill or gouge holes for the dowels in the headboard, footboard, rail and end drawers, as well as on the stair posts and rails, under the named sides. Connections of load-bearing elements - side handrails with studs, as well as stairs - are more securely made with glue and self-tapping screws.
The first stage of assembly is the sides of the future bed, headboard and footboard. Lay 2 rafter posts in parallel, lay 6 boards between them - the upper and middle headboard and footboard, end drawers. Mark the connection points on each piece with a pencil. Drill holes for dowels.
For the first time, please assemble all the parts without glue and do not fully tighten to ensure that the holes are positioned accurately and there is no distortion, and then disassemble
The headboard and footboard should be assembled evenly, without distortions, and be absolutely symmetrical to each other. Then they are completely disassembled and reassembled, but this time coating each fastener with glue. For a tighter fit on the pegs, use a wooden or rubber mallet or mallet.
The second stage is the assembly of the side longitudinal elements. First, long railings are inserted into the stud posts, separating the sleeping area from the wall. Next, attach the side drawers that were assembled earlier to the face of the studs.
For convenience and checking the level, they are pre-fixed with clamps. For each connection, 4 self-tapping screws are screwed in under the sweat, slightly sinking the caps into the wood. To do this, small slots are pre-drilled in the gaskets along the diameter of the hardware cap.
The third stage is the installation of railings and second-level fencing. The handrail is attached with glue and self-tapping screws to the side rails, and the fence is attached to the dowels.
If you are using flat (oval) wood dowels, drill several holes next to each other and then align them with a chisel
The final fourth stage of assembly is the installation of steps, decorative overlays and sheets. The steps can be placed on the frame, inserted into pre-prepared recesses, or secured with metal corners, turning them horizontally. Decorative overlays are laid on glue and fixed with clamps. They should fill all the gaps between the horizontal elements and level the surface of the rack at the front.
The planks are simply placed between the spacers, without fixation. This way they will retain some elasticity. To strengthen the frame, one - the central transverse rail - is attached with self-tapping screws. The clamps at all joints are not removed until the glue has completely dried.
To complete the frame, cover the screws with wood rounds, wood putty of a suitable color, or wood shavings mixed with glue.
Use ready-made carved railings for a sophisticated design. The high back of the first level will make it a comfortable sofa
Sand the entire piece, paying special attention to joints, corners and steps. Wipe off dust, prime and dry the bed. Cover the wood with stain, varnish or paint, and apply decor if desired.
The litter is ready! All that remains is to bring it into the room, secure it to the wall with a bracket, and lay out the mattresses and bedding. Place a few large pillows under the wall on the main floor and it will serve as a sofa.
Cover the sides with fabric like a canopy and get your own corner, hidden from prying eyes and drafts.
Side boards and stairs
For the side walls, divided into a head and a back, you will need two sanded boards (one slightly narrower than the other) and four side slats. The header is attached as follows:
- Installing the headboard on the side rail.
- Connection of the back and head.
- Implementation of slats, gratings or nets to support the mattress.
- Attaching the rail to the inside of the box.
- Preparation of the frame for the lamellas and their location in the internal plane of the stand.
- We overlap the slats on the frame in increments of 5-7 cm.
- Chamfering the outer ribs using a hand plow.
Finally, the side railings and stairs are made.
When laying the backrest, you need to change the arrangement of the boards, installing a narrow board at the top and a wide one at the bottom. Therefore, the height of the narrow headboard should correspond to the height of the wide backrest.
The staircase can have a different number of steps, be located straight or at an angle, and also be located on different sides of the bed. Its assembly consists of the following steps:
- Installation of two parallel bars, which are the bases and guides of the stairs.
- Attach the steps. First, the bottom one is attached to the back, and then the rest are placed on top of each other. The steps must be inserted into the bars.
The staircase is made in two stages.
There are such types of connection of steps as recess, external corner and metal. In any case, the fastening must be hidden, which will protect the child.
The staircase is also equipped with a handrail, which is a board attached to the frame. It is selected taking into account the comfortable grip of a child's hand.
Legs
The legs can be of different sizes and shapes, designed for maximum structural reliability. In most cases, round, square or carved legs are used, which can be attached to the outside, inside or inserted into the frame.
The legs are made from bars and can be of any shape.
To make the legs, bars 50-100 mm thick are used, which are connected in pairs. The result should be a shelf-type end, and the length of the leg coincides with the height of the upper level fence.
What materials are they made of?
For manufacturing, higher quality materials are chosen, for example:
- Wooden.
- Metal.
- Fiberboard.
- Chipboard.
In the photo there is a children's room for a girl and a boy and a bunk bed made of fiberboard.
Rating of the best manufacturers
The following manufacturers offer the highest quality options:
- Furniture formula.
- Redford.
- KarIVi.
- Fiesta IVF.
- Domus Mia.
- IKEA.
These manufacturers present various models from the simplest, costing about 5,000, to expensive, stylish options for 20,000 - 25,000 rubles. Each manufacturer offers models with different frames - from metal to wood.
The cost of such beds for children depends on the manufacturer, the material from which it is made and the model version.
All manufacturers have proven themselves for a long time, judging by the reviews, the furniture does not cause any complaints. These manufacturers have certificates for their products.
Shapes and sizes of bunk beds
A model that is too high is more dangerous for babies, so it is better to choose low matryoshka beds to avoid injury in case of a fall. Two-tier corner structures can be either left- or right-handed, which allows you to install them in any free corner of the room. In a non-standard narrow room, a bed built into a niche would be an excellent solution.
The photo shows a wooden bunk bed with a corner arrangement in a room for teenagers.
Safety of bunk beds
Taking into account the large height and small supporting area, one of the main safety factors is the stability of such furniture, and many models are lame on both legs in this matter, it is difficult to imagine the possible consequences of the bed falling due to children playing too much.
Rest assured, your offspring will give the bed space overload on the very first day, so do not hesitate to make an effort in the store to check for stability, this furniture is not an element of decoration and whatever the design of the bunk bed, it will be used intensively and at least not do any damage children.
Thus, due to the increased safety requirements for this furniture, it is not only logical, but also most correct, if the assembly of a bunk bed is left to specialists.
Read here: Red furniture in the interior - the best overview of modern ideas. Instructions on how to combine bright furniture!
- How to arrange furniture in the living room - photo review of interesting tricks
Furniture in a modern style: TOP 100 photos of new models
- Sliding wardrobe in the interior - 70 photos of beautiful and aesthetic models. Review of recommendations for choosing and combining furniture in the interior
Colors of children's 2-level beds
Decorating a girl's bedroom mainly involves lilac, pink, pale yellow or other soft pastel shades. For a boy's nursery, blue, blue, green, light green, or orange colors are often chosen. The universal white model will look equally good in the room of a child of any gender and age.
The photo shows a children's room for girls with a pink bunk bed.
When choosing a color, first of all, take into account the color scheme of the entire room. A bunk bed should have a color combination with the overall tone of the decor or with some furniture and decorative elements.
Design examples of bunk beds
Photo of the design of two-tier structures.
Bed-bus
It provides not only a cozy place to sleep, but also for active games. A bus bed can come in a huge variety of different designs, such as a school bus or fantasy cartoon models.
Car bed
Sometimes a car bed is equipped with lighting, drawers, shelves and other elements. Such models have both open and closed versions with windows and doors.
House
This product has a truly fabulous, unusual look and radically changes the environment of the nursery, both boys and girls.
In the form of a ship
A ship bed equipped with movable anchors, ropes, a rotating helm, lowering and rising sails, a real pirate flag or other special details will make spending time in the nursery even more interesting and exciting.
Forged
They are distinguished by a strong frame and reliable sides that ensure safe sleep for the child. In addition, these iron products can have a more laconic design or be made with elements of artistic forging with amazing curls and patterns.
The photo shows a black wrought-iron bunk bed in a Scandinavian-style children's interior.
With canopy
Thanks to such a spectacular addition as a canopy, it is possible to give the nursery’s interior a special charm and create a secluded, cozy and calm atmosphere.
In the form of a castle
Most often, a castle bed is used to decorate a girls’ room. This design has special stairs, high towers and playgrounds that will create an ideal sleeping area for little princesses.
With drawings
They will become a real interior decoration and will add a certain mood and originality to the nursery environment.
Assembly Tips
First of all, the product must be checked in the store. Here you can carefully examine the sample and check whether it is wobbly and whether the fastenings are securely held.
Even at the purchase stage, it is important to check the bed for the presence of all the necessary parts and the reliability of the fastenings.
Assembly instructions are included with each kit. But to make this process faster and simpler, several rules should be followed:
- First, the base is assembled.
- Then the bottom slats are attached and the lower part is assembled.
- After this, the ladder is attached and the upper part is assembled.
Important! When assembling, be sure to check the secure fastening of each element and tighten the nuts tightly. Otherwise, over time, the fastenings will weaken and the bed will begin to wobble.
Examples of beds for children of different genders and ages
Interesting options for decorating various children's bedrooms.
For girls
For girls' rooms, parents often choose classic two-tier designs in pastel colors or products in the form of a magic castle and dollhouse. In the bedroom of more active young ladies, you can equip the beds using a rope ladder or rope.
For boys
Standard models with original design and execution, functional transformable beds, structures combined with a work area, closet, sports complex with a rope ladder, wall bars, horizontal bar or slide would be appropriate here. The main thing is that the products are safe, reliable and durable.
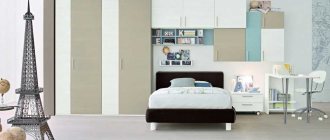
One child
A loft bed will be an indispensable option for a bedroom in which a preschooler lives. The sleeping area, located on the second tier, allows you to equip the first floor, for example, with a work area with various shelves and cabinets for storing books or toys.
The photo shows a bunk loft bed with a workplace in the nursery for one girl.
Two children
In a room for the same age or twins, these products are especially relevant. They allow you to create two full-fledged places to sleep or a play area, while maximizing the usable area.
The photo shows a children's room in the attic for two boys, decorated with a gray metal bunk bed.
Two children of different sexes
More laconic options with a neutral design that fit harmoniously into the overall concept of the room are suitable here. Most often, children's sleeping places are decorated with bed linen or bedspreads of different colors.
Two children of different ages
In the case of children of different ages, bunk beds are also a fairly optimal solution. As a rule, the upper level is given to the older child, and the lower level is equipped with a crib for the youngest or a playpen or cradle for a newborn baby.
For three or more
For three children, compact transforming beds with a pull-out additional unit or models with a folding sofa located on the first tier are used. If four or more children are expected to be accommodated, then the size of the bed should be double and have ladders on both sides, low handrails and railings.
For teenagers
In a teenager's room, the structures, in addition to useful functions, are distinguished by a more thoughtful and original design. The product may have a standard appearance, a corner arrangement, a retractable or transforming mechanism.
Design of multi-level furniture
Bunk furniture is every child's dream, and it is not necessary that it be used by two children at the same time. In children's rooms with one owner or mistress, such multi-level structures combine a sleeping area and an area for games and relaxation.
There are also options with two bunk beds, mirrored and connected by a common ladder. This is an ideal choice for two or three children, who can use the free tiers as they please.
In the case when the grown-up owners leave the children's bed, it is easy to transform it with your own hands, turning the vacant space in the bunk bed into a playroom for the younger ones or equipping it with modular cabinets.
Curtains and additional sides can transform the bed into a ship or a tower for a princess. There are also interesting design solutions for cases where a story-based play area is created on the lower level in the form of a fire engine or steam locomotive, with a sleeping area on the roof.
- Children's chests of drawers - the best collections and stylish decoration solutions (116 photos 2019-2020)
Chandelier for the nursery: 90 photos of designer lighting options for children of different ages
- Design of a small children's room - visual enlargement of the nursery - 110 photos of modern projects
Bunk beds themselves are a good exercise machine for children. They can be additionally equipped with sports equipment: ropes, horizontal bars, elastic bands. Little ones will be delighted by the children's slide, which you can go down right from the bed.
A minimalist wall with an unusually high sleeping place will satisfy the original taste of any teenager. An original idea - placing the lower berth level with the floor can appeal to children of any age.
Organizing the daily life of children at different levels of the room requires appropriate lighting that will not interfere with the upper tier and will provide sufficient light below.
Photo of combined bunk beds in a children's room
Several original photo examples.
With a slide
Thanks to the gentle slope, which is a kind of attraction, it is possible not only to add variety to the gameplay, but also to endow the environment with a special personality for children.
With a table
The design, combined with a desk, allows you to save useful space and create a truly cozy and functional corner.
With stairs
For a more comfortable and safe climb, children's bunk beds are equipped with a side, front ladder or steps.
With drawers
Due to the drawers, it is possible to complement the design of a two-story product and organize an additional system for storing clothes, toys, bed linen, etc.
The photo shows a white bunk bed equipped with drawers in a girls’ nursery.
With a sofa
With this design, you can achieve a more rational layout of the children's room, save square meters and place other furniture items in it.
With wardrobe
It combines two pieces of furniture at once, which is a very convenient and ergonomic solution, especially for small spaces.
The photo shows a children's room for boys and a blue bunk bed combined with a built-in wardrobe.
The simplest wooden design for children on chains
To assemble the beds you will need: timber (glued) 90x90 mm, plywood (18...21 mm thick), boards 25x55 mm for making stairs and railings, protective impregnation and paint for wood, as well as fittings.
Table. Accessories for making a bed.
| Name | Photo |
| Metal corners | |
| Dowels | |
| Bolts (180 mm) for attaching the frame to the wall | |
| Ring head screws (with washers) | |
| Chain | |
| Carbines | |
| Eye nuts | |
| Anchors 12x150 mm | |
| Confirmations | |
| Self-tapping screws |
To produce a structure, you need a minimum of tools, which every owner usually has. The only thing is that there must be a place for the work, for example, a garage, since neighbors in an apartment building are unlikely to like work related to wood processing.
Important! Since the beds will be attached to the wall, the floors must be strong and able to withstand significant loads.
Step 1. Prepare two identical bases for the upper and lower beds. Timber and plywood are sawn to size.
Wood slicing
There are no special drawings for this two-tier structure, which is distinguished by its simplicity. You just need to assemble two frames from timber of the required size. In our case - 1800x800 mm.
Sample drawing
Longitudinal cuts are made in the timber to create a groove for laying plywood.
Longitudinal cuts are made
The result is a recess in which the base will be securely fastened.
Photo of the finished cut
Small defects can be eliminated with a chisel.
Important! Wooden blanks must be treated with a wood preservative. It is recommended to use slatted flooring rather than plywood as a base, which allows for better ventilation of the mattress. It is important to treat all prepared elements with a grinding machine or sandpaper to eliminate the risk of splinters. It is also recommended to process the edges with a router to protect children from bruises.
The frame elements are fastened with glued dowels and corners (2 dowels are required for each connection).
Each connection requires 2 dowels
The corners are fixed with four self-tapping screws on each side.
Fixing metal corners
After this, you can begin fixing the frames to the wall.
Step 2. To fasten the beds to the wall, bolts 180 mm long are used (4 for each frame). To recess the bolts in the timber, since protruding heads will interfere with the installation of mattresses, it is also necessary to make a shallow cut with a feather drill.
The result of working with a feather drill
Four such holes need to be made - on each beam adjacent to the wall. The outer sides of the bed will be fixed to the wall with a chain. To do this, you will need screws with a head bent into a ring (such hardware is called a ring screw or a hook screw).
Ring screw
Frames ready for installation must be painted. For this purpose, any decorative coating (for wood) intended for indoor use is used. The lower base must be installed at such a distance from the floor that it is possible to place drawers for storing things. For convenience, the base is installed on a temporary support.
It is best to start fastening by fixing the outer wall of the bed with a chain. This makes it easier to later align the horizontal. Holes are drilled for installing anchors. Both chain mounts are fixed.
Fixed mount
Eye nuts are mounted through the washer. The chain is suspended from a carabiner. The lower end of the chain is also fixed to a ring screw using a carabiner.
Hanging chain
Dowels for fastening the part of the frame adjacent to the wall are installed in holes made with a 16 mm drill. The anchors are screwed in.
Anchors are screwed in
The plywood base is fixed to the frame with self-tapping screws.
Fixing the plywood base
The upper bed is attached in the same way.
The upper bed is also mounted
Step 3. Installation of the stairs. In order for a child to climb up, a durable structure is necessary. It can be assembled from 25x55 mm boards. In our case, larch was used. The ladder is attached to the upper and lower beds. Ladder dimensions:
- length of steps - 36 mm;
- the distance between the crossbars is 31 cm.
- number of steps - 5 pcs.
To fasten the steps, confirmats measuring 7x70 mm are used. You will need 2 Euro screws on each side. The ladder is secured to the timber of the upper and lower bases using long self-tapping screws, the heads of which are slightly recessed into the wood.
Self-tapping screws must be of sufficient length
The design is reinforced with metal corners.
Reinforcement with metal corners
To protect the child from falling, it is necessary to make a fence. It is also made from boards. The height of the railing is 20 cm (above the mattress).
The result is a simple but attractive design that does not clutter up the room.
Finished bunk bed
Design ideas in various styles
The appearance and design of the structure must correspond to the overall style of the nursery. For example, for classics and Provence, products made from environmentally friendly natural solids are suitable, and metal structures will perfectly complement loft, hi-tech or modern style.
The photo shows a bunk bed made of natural wood in a children's room in Provence style.
Models made of MDF or chipboard will decorate almost any interior, as they can differ in a variety of shapes and colors. For example, a ship-like bed or a boat will fit perfectly into a nautical-style nursery.
Do it yourself
The manufacture of any product begins with the development of a drawing diagram with dimensions. The sleeping places can be placed one above the other, or you can make a corner bunk bed. The choice depends on the size of the room and its geometry in plan (rectangular, square).
In order to decide on the size of the bed, you need to decide what size mattresses you will buy for your children. The standard size of a children's mattress is 60/70x140 cm, for teenagers 80/90x190 or 80/90x200 cm. To avoid surprises later, it is better to take care of purchasing mattresses in advance, and based on their sizes, develop a design for the future product.
The easiest way to make a bed is from timber and edged boards. The frame consists of four vertical posts, which in the narrow part of the bed are connected by horizontal elements using wooden dowels and wood glue. The headboard and footboard pieces are then joined together by long side panels using screws. For the stairs you will need an additional stand. The step pitch should not exceed 250 mm.
You can make a bunk bed from sheets of plywood or MDF. Below is a diagram of a bed with a wardrobe and a drawer. The upper berth measures 800x2000 mm, the lower one is sliding: folded 800x1600 mm, unfolded 800x1870 mm.
The next model is made with an extension ladder, which, if desired, can be made in the form of drawers. Sleeping places are the same size 800x1900mm.
The wooden product must be processed with a grinder or regular sandpaper, and then painted with varnish or paint of the desired color. The ends of MDF products need to be covered with an edge.
If you do not have the necessary equipment for cutting parts made of plywood or MDF, use the services of companies that provide similar services based on customer sketches. You can assemble it yourself from ready-made elements.
Make your children's room cozy, individual and imbued with your love and care.