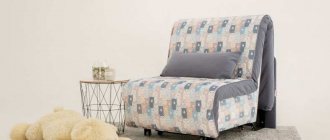
+7 Submit an application
Reupholstering chairs at home and in the studio allows you to give new life to furniture and save on the purchase of the product. Our specialists repair structures of any type: office, computer, hairdressing, home, etc.
We provide a 12-month warranty on work and materials.
Preparation
First you need to determine what material will be used. The chair can be upholstered with fabric or leather. Working with one and another material has its own characteristics.
There are several requirements for the skin:
- It should be elastic and thin. It will be better if its thickness is no more than 3 mm. Thicker material is very difficult to work with. This is especially true when you have to connect several separate pieces together.
- Also, the material must be dry. Wet skin first stretches, and then dries out and becomes smaller. You can wet this material if there is a need to tighten it more.
With fabric the situation is a little simpler. It is not necessary to buy special upholstery fabric. You can take the simplest tapestry. It has several advantages:
- Low price compared to upholstery fabrics.
- Almost complete lack of opportunity to take a puff. If it does appear, you can simply cut off the loop. In this case, the integrity of the fabric and the pattern will not be damaged.
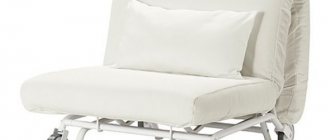
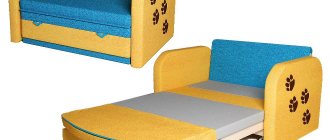
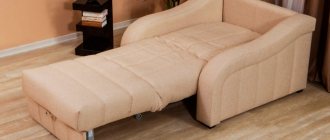
After the material has been selected, you need to inspect the chair-bed. It is important to determine in advance which parts need to be replaced or updated. These can be foam pads, staples, tie straps and, in fact, the upholstery itself.
Chair reupholstery cost
Of particular value are those pieces of furniture to which we are accustomed or those that were inherited from our beloved grandparents. As noted above, restoring a chair is cheaper than buying a new one. But there are some nuances here too:
- The price is influenced by the format of the service - with a specialist visiting your home or performing work in a workshop;
- For furniture restoration, different fabrics and fillings are used; some pieces of furniture still require repair. You have the opportunity to choose budget materials for restoration or something more expensive, for example, genuine leather. The difference, again, will be in performance properties and service life;
- The volume of work also affects the price of restoration services. A restoration project for a classic office chair will cost less, while restoration of an antique piece of furniture, which actually requires replacing all materials and fittings, will cost more.
The cost is calculated after the fabric and filler have been selected and all stages of installation or replacement of accessories have been agreed upon. If necessary, you can replace the fabric for the dental chair.
Disassembly
The next stage after preparation is dismantling the furniture. It requires the following tools:
- pliers;
- keys;
- screwdrivers (Phillips and regular);
- pliers.
Disassembly consists of several stages:
- Remove the back cover and the plywood that is located at the bottom of the chair. If the plywood is in good condition, you need to remove it as carefully as possible so as not to damage it.
- Remove the foam pad that is located at the bottom of the chair.
- Remove the upholstery and pull out the soft layer from the backrest. A flathead screwdriver and pliers will help you do this. With their help you need to pry and pull out the staples.
- Gradually remove all fasteners (brackets).
- Remove upholstery and foam from all parts of the chair. It is worth remembering that old foam rubber can crumble. Therefore, it is necessary to cover the floor with paper or film in advance.
In the process of restoration
After the furniture has been disassembled, it is necessary to inspect its frame. If necessary, strengthen loose parts and renew the paint.
Recovery process
First, the back is restored. Here it plays the role of a headboard. To work, you will need a furniture stapler and staples for it. Experts recommend stocking up on 6 mm and 10 mm staples.
The first to be inspected are the tightening belts. If they are loose, they need to be tightened a little. To do this, one end of the belt must be disconnected from the headboard and tightened. Then secure it with a stapler. The staples must be driven in in any order. If they are placed in one row, the plywood may crack or delaminate.
If the belts are damaged, they can be replaced with new ones.
If necessary, in addition to the belts, you can also replace the soft gasket. To do this, the headboard is placed on a softener. A few centimeters are measured for bending. Next, you need to outline the back with a felt-tip pen and cut out the resulting part. Glue it to the old fabric on the chair and trim off the excess.
Removing the upholstery
The next step is removing the old upholstery. In most cases it is glued, so removing it will not be difficult. If you still have difficulties, you can use a stationery knife.
If the old material is in good condition, it will have a use. It can be used to secure a new foam gasket. The upholstery must be secured with tension. It should not sag or form wrinkles. Counter folds should only be at the corners. The staples are attached on both sides of them.
Stages of reupholstering upholstered furniture
You can send a photo of a worn-out chair. Our specialist will contact you shortly and inform you of the estimated cost of the work.
Seat reupholstery in Moscow is carried out according to the following scheme:
- A technician will visit you to take measurements, approve the material, and estimate the volume and cost of the work.
- Removing the old upholstery from which the patterns will be made.
- Sewing new material.
- Replacement of fasteners, parts and other functional parts in case of their breakdown.
- Installation of new filler.
- Reupholstering the chair with new upholstery.
- Checking the quality of work.
The repair period depends on the size and shape of the structure and the technical condition of the furniture. When carrying out work in the workshop, we can organize the removal of furniture and return delivery to your home or business.
Working with seats
The seats, like other parts, must be handled carefully. You need to remove the upholstery fabric and pull out the old foam rubber, remove staples, screws or nails. It is also important to remove all excess fabric, threads and dried glue from the attachment points.
As with the backrest, old upholstery can be put to good use. Soft padding can also be used. It needs to be glued to the seat in a diamond shape. Cut off protruding pieces. You can also attach the old backrest gasket here. The joints of the gaskets must be carefully taped, otherwise they will separate during operation.
Advantages of reupholstering chairs in the SteelCom studio
A large selection of fabrics and a wide palette of colors allow you to return furniture to its original appearance or beautifully fit it into a new interior design;
Favorable prices due to direct purchase of materials and parts from reliable manufacturers;
Free visit of a measurer in Moscow and consultations on furniture care;
Chair reupholstery at home is carried out at a pre-agreed time;
We repair furniture of any year of manufacture, regardless of its condition;
Insurance of the product for the period of work;
More than 10 years of experience in repairing chairs of various configurations.
Find out more information from the manager by phone: +7 (925) 087-47-08.
Consolidation
Reupholstering a chair-bed begins with securing the material to the side of the backrest. The staples are located at a distance of approximately 10 cm from one another. It is advisable to start from the middle.
When you finish one side, move to the other. Stretch the fabric and secure it in the same way. It is important to avoid wrinkles. Excess fabric is trimmed. The corners are formed. They are also secured with a stapler. Holes are cut for self-tapping screws or bolts.
The seats are reupholstered in the same way. For a chair-bed, it consists of two parts.
Prices for upholstery of chairs
| Repair work | Price, rub) |
| Leather chair | From 6900 |
| Computer chair | From 2700 |
| Armchair (carriage screed) | From 7500 |
| Chair-bed without armrests | From 4800 |
| Armchair-bed with armrests | From 6200 |
| Office chair | From 1600 |
| Manicure chair | From 3500 |
| Dentist chair | From 3000 |
| Rocking chair | From 3100 |
| Barber chair | From 2800 |
| Garden chair | From 1500 |
| Massage chair | From 4000 |
Examples of completed work:
Any questions? Call and our operators will be happy to answer them: +7 (925) 087-47-08.
Assembly
After all parts of the chair are tightened, you can begin assembling it. This process takes place in several stages:
- The seat and backrest are connected.
- Legs are attached to the structure.
- The plywood from the back and bottom is installed in place. Plywood can be sheathed. It is worth remembering that sometimes staples are not enough to secure plywood parts. Therefore, it would be advisable to use a hammer.
- Finally, it is recommended to check the quality of the fasteners.
Reupholstering a chair-bed is a process that you can do yourself. It is necessary to prepare tools, upholstery material and foam rubber, and then proceed according to the instructions. If done correctly, an old recliner will get a new lease of life.
Source: ibeds.ru
Choice of upholstery fabric
Self-upholstery will help restore the product's attractiveness and save money. A standard chair becomes unique and designer. If you organize the process correctly, the entire work will take no more than one day. Restoration is necessary in certain situations:
- the filler has already changed shape;
- depressions appeared in the seat and back;
- there are stains or damage on the upholstery;
- The product does not match the style of the room.
First of all, reupholstering old chairs is needed to change the type of piece of furniture. The leading role is played by upholstery fabric. It must be durable, wear-resistant, and retain consumer qualities for a long time. The fabric must also keep its shape well, be cleaned of dirt, be dense and tear-resistant.
To re-tighten a product you do not need to have any special skills or experience, just follow the instructions carefully.
You can restore an old chair using any textile, leather, denim, flock, velor and other materials. If there are cats in the house, select raw materials that do not form snags on the surface (flock). For the children's room, where the risk of potential contamination is high, soft fabrics that are resistant to cleaning and abrasion (chenille, matting) are selected.
In the living room, more attractive options made of nubuck, tapestry, leather, and jacquard are appropriate. If there is a lot of smoking in the room, you should give preference to fabrics that do not absorb odor. The latter include chenille. An additional advantage of the upholstery will be moisture-repellent properties, Teflon or acrylic impregnation. The denser the product, the longer it will retain its original appearance.
Materials for upholstering an office chair
Office chairs are subject to serious loads during use. Let's dwell on the materials for reupholstering them. Most often, the following types of fabric are used for upholstering furniture:
- Textile. As a rule, it is made on the basis of synthetics. The most budget option in terms of price would be series C fabric and make a new cover. Polyolefin will be a more expensive option, but it will last longer due to enhanced strength and wear resistance characteristics;
- Acrylic mesh. Budget option for reupholstery. Provides comfort to the user and is considered wear-resistant. Requires taking into account the maximum load on the part of the user;
- Natural and artificial leather. Faux leather is easy to care for compared to fabric materials and lasts a long time. Genuine leather upholstery requires special care, but with proper care it retains its attractive appearance and is pleasant to the touch.
To implement an office chair reupholstery project, the main filler is foam rubber. The differences between foam rubbers with different markings will lie in their properties: density, hardness and thickness. For soft chairs, the thickness of foam rubber as a filler should be 30 kg/m3. You can also reupholster your dental chair.
Materials and tools
The complete set of tools seems extensive, but most items are found in the home toolbox. Reupholstering chairs with your own hands will require the following devices and consumables:
- matching threads;
- stationery knife;
- sewing machine;
- adjustable wrench;
- hammer;
- nail puller;
- pliers;
- furniture stapler;
- filler.
If the chair is equipped with wooden legs or arms, these can also be changed. To do this you will need sandpaper, a brush, varnish or furniture paint. You can also replace wooden parts with metal ones if the former do not fit into the interior.
A corrosion removing spray will also be useful. Old products often develop rust, which makes it difficult to remove brackets and fasteners.
To work with upholstery fabric, you will need a soap, tailor's chalk or marking pencil. If the process lasts for several days, it is better to choose a material that is resistant to abrasion and frequent use. With constant use, fitting and friction, the markings may become erased.
To remove the upholstery and filling yourself, you need to have a flat-head screwdriver to help pull out the staples. Foam rubber is often glued, in this case it is carefully cut off with a stationery knife. They act gradually, first removing the top layer, then the bottom.
Sewing supplies
Tools
Stages of work
Upholstering the product at home is not difficult. The whole process comes down to disassembly, fabric cutting, trimming and assembly. Even novice masters can do it in a day. Recommendations will simplify the process.
If the design of the chair is too complex, it is useful to watch the rules for disassembling the product in the video instructions.
Step-by-step instructions are a complete guide to action. Before starting work, you should read it to the end, then organize your tools. After completion of the work, the product can be decorated to your liking.
Do-it-yourself chair reupholstery
Let's take a step-by-step look at the process of reupholstering a chair
Replacing foam rubber
The next stage of do-it-yourself chair restoration will be replacing the foam rubber. List of brands used in furniture production:
| Album | Brands of foam rubber-1 |
| Album | Brands of foam rubber-1 |
| Album | Brands of foam rubber-1 |
| Album | Brands of foam rubber-2 |
| Album | Brands of foam rubber-2 |
- ST – standard type,
- EL – has a medium degree of hardness,
- HS – soft type,
- HL – super hard,
- HR – low degree of rigidity, most often used in the manufacture of upholstered furniture.
In our case, HR is the best option.
It is best to cut foam rubber with a knife with a long blade sharpened on an abrasive stone. We cut in several stages.
Replacing passes (belts)
After we have decided on the foam rubber, we check the passes. They can be made of rubber or thick canvas fabric.
They are fixed to a wooden frame with nails, and in rare cases they are punched through with staples.
We remove the old belts, measure their length and, with a little tension, replace them with new ones. The edges of the belt must be folded (folded at least in two). In this position they will last a long time and will not stretch under heavy weight.
The straps are tight, now you need to secure the foam. We coat the passes with foam glue and carefully adjust the seat first, and then the back.
After we have the frame ready, we proceed to choosing the fabric.
Chair upholstery with fabric
Today, the textile industry offers a wide range of fabrics for repairing and upholstering chairs.
Fabric for upholstery:
You need to remember one simple truth: if the fabric has a pattern or abstraction, you need to make sure that the image does not move during the pattern.
We cut out the front and back parts of the backrest from the first meter of fabric, and the seat from the remainder.
Having made the cut, we need to check whether we have maintained the dimensions correctly by covering the seat with a cut piece of fabric. Having set the angles correctly as shown in the figure, we begin to “shoot” our cover to the frame of the chair.
We fix the rest of the fabric with staples, and make sure to pull it towards ourselves.
The corners can be sewn by machine or, if not essential, by hand, using a fine seam.
At the moment of fixing the cover to the frame, we punch the staples at intervals of 3-4 cm. If these are nails with a wide head, then the distance should be slightly less.
Once we have changed the seat upholstery, we do the same with the backrest.
You should always remember that restoring a chair with your own hands always requires consistency in work, as well as attention.
When removing each of the parts, you need to remember where and how it stood. Some craftsmen use a camera for such purposes.
Chair reupholstery at home
There are also situations when your favorite chair has a worn and torn seat, but you have become accustomed to it. Furniture restoration can also be done at home. Then you won't have to waste time and effort trying to lower a bulky piece of furniture down and load it into the car. The advantages of reupholstering a chair or a regular one with an on-site technician include:
- There is no need to load the chair or take it to the workshop;
- Saving time by having a technician come directly to you;
- Possibility to select fabrics on site for repairing a piece of upholstered furniture.
From a specialist you can get acquainted with the catalog of fabrics, leathers and fillings, get advice on the features of certain upholsteries, and choose the appropriate solution for your case. It takes a little time to complete the operation of updating the chair. Immediately after completing all the stages, you will be able to use your favorite chair again, believe me, it will serve you for a long time and will cost much less than buying a new one.
Restoration of frame parts
The concept of “restoration” includes not only reupholstery, but also restoration of the wooden parts of the chair. Over time, decorative parts (armrests, turned elements, curly chair legs) become unusable, that is, they become dull, the varnish surface wears off, and small cracks appear on the furniture frame.
What can be done in this case?
To solve this problem we will need:
- Sandpaper,
- Scraper,
- Blade from a stationery knife.
- Varnish, stain.
Every part needs to be sanded. You need to start with coarse grains, gradually moving to smaller ones.
- After the parts have been sanded, carefully remove the dust with a damp cloth or foam sponge.
- Apply nitro varnish with a soft brush until completely dry.
- After the varnish has dried, you can run your hand over the surface and feel how the pile rises. Using the finest sandpaper, we carefully “knock down” the raised fibers, that is, we make the surface smooth.
- Then you can apply a stain (alcohol, water or white spirit based) and only then cover it with any commercially available varnish.

