Standards for installing a mixer in a shower
Standards for the installation of plumbing in Russia are given in SNiP 3.05.01–85 “Internal sanitary systems”. It is recommended to install bathtub faucets at a height of 120 cm from the level of the finished floor, that is, from the surface formed after laying the finishing coating. For the bathroom this means from the surface of the floor tiles.
The document recommends moving on to installing sanitary fixtures after installing pipes and sewers, but you will have to calculate the mounting height of the fixture a little earlier. Otherwise, it is not clear at what height to install the pipes. If you are not sure that the measurements were made accurately, it is better to remove the pipes with a reserve, because cutting them is much easier than extending them.
For shower mixers, the installation height recommended by SNiP is 120 cm to the bottom of the shower tray or bathtub. But it is important to remember: these rules were created not for apartments, but for showers in institutions and sports complexes. In addition, at the very beginning of the document there is an important clause - the installation of plumbing must be carried out in accordance with the requirements of not only SNiPs, but also the instructions of the manufacturers. Therefore, the main document containing the installation standards for a specific mixer is the installation and operating instructions attached to it.
What should the height of the mixer be? In practice, installation of mixers is carried out taking into account the customer’s opinion and common sense.
A mixer in a shower differs from a regular one in that it is necessary to take into account two parameters: the distance from the taps to the bottom of the bathtub and the distance between the point where the shower hose is discharged and the attachment of the shower head.
In the first case, it is difficult to talk about standards: people have different heights, some take a bath while sitting or lying down, others prefer to shower while standing. There are families with children, and there are apartments where one or two tall adults live. The comfortable height of the location of the taps that regulate the water temperature depends not only on the anthropometric data of the apartment owners, but also on the type of mixer: you cannot install a single-lever and valve or thermostatic at the same height, for the user the difference will be 15-20 cm.
Customers usually ask to install the mixer 15-30 cm above the top edge of the bathtub. This interval is convenient for most people. As for attaching the watering can, it should be at such a level that it is comfortable for each family member to stand under the shower, everyone can take the watering can, and at the same time the hose hangs freely, but does not hang into the bathtub. This way it will last much longer.
If there are children in the family, the most convenient option for attaching a watering can will be a rod. With its help, each family member will be able to attach a watering can holder according to their height for a shower.
How to attach
Installing the mechanism is not particularly difficult for a person who knows this device and knows how to use tools.
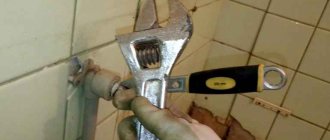
To install, you need an adjustable wrench and a fully equipped mixer mechanism. The old faucet must be removed carefully so as not to damage the application in the room. The mechanism should be installed as follows:
it is necessary to partially assemble the mixer device, firmly pressing the rubber and other gaskets. When installing, make sure that all parts except the lever and the valve part are stationary; Then you need to screw the seal onto the thread. There may be a plastic tape behind it
When screwing, it is important that the thread of the nut is aligned with the winding, otherwise depressurization may occur; You need to secure the device with pipes with nuts. If nuts are not included with the structure, they can be purchased on the construction market
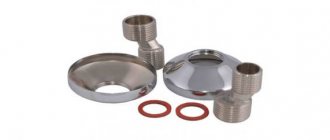
It is often necessary to use special adapters in the form of small metal parts, which are used for a variety of sizes of water supply and the axis of the structure; at the final stage of installation, you need to make sure that the mechanism is tightly installed, and then attach the tap.
Then you can open the valves. Do not apply intense water pressure after opening, first wait for a certain time, gradually increasing it to the maximum. If, with the mechanism completely open, the amount of spray is not very large, it means that the installation height has been chosen correctly.
What determines the installation height of the mixer?
Often, in an attempt to save money, people plan to install a single bathtub faucet and an adjacent sink. It seems that they are not used at the same time; shower mixers are often equipped with long spouts that fully reach the sink, which means that one device is enough. This is a serious mistake. Firstly, constant turning will wear out the spout faster and will require at least annual repairs or even replacement. Secondly, the installation height of the mixer in this case is calculated based on the highest object. That is, according to the washbasin, which is usually installed no lower than 85 cm from the floor along the upper edge, and as a strict norm, SNIP recommends this only when installing a single mixer on a bathtub and sink. But it still turns out that the sink is located significantly higher than the top edge of the bathtub. As a result:
- the shower mixer is too high;
- the sink has to be installed at a height convenient for people 160-165 cm tall; everyone taller will have to bend over it, overloading the lower back muscles;
- you are limited in choosing the depth of the sink and the shape of the spout;
- installation under the sink of a washing machine becomes impossible.
The dubious benefit of purchasing one faucet instead of two is offset by significant inconvenience and increased costs for plumbing repairs.
Types of racks
In their appearance, design, size and additional functions, shower racks can vary greatly from each other. The choice here is practically unlimited - manufacturers take into account all possible, even minor, customer wishes, and everyone can find an option that would fit perfectly into the bathroom. Therefore, we will consider only the main, basic types of shower racks.
Shower column with rain shower and mixer tap
This shower stand can perhaps be called one of the most convenient. It is more convenient to use than a separate shower and mixer, and in addition, the entire set is made in the same design style. By the way, this option is often cheaper than varieties without a mixer.
Recommendations for choosing the height for installing the mixer
Planning the installation height of a shower is a task that is feasible for people without engineering or even plumbing education. This device forgives minor errors during installation. But there are several rules that must be followed:
- Having planned exactly how the mixer and watering can will be fixed, before starting installation, attach the already purchased device to the wall, stand in the bathtub or shower and evaluate how convenient this arrangement of the watering can and spout is for you;
- you need to count the distance to the attachment points of the mixer and watering can from the bottom of the bathtub or cabin, the distance from the floor is an unreliable value, it depends on the height of the legs of the bathtub and the thickness of its bottom, and as a result the shower may be fixed too low, which will negatively affect your comfort;
- however, it is necessary to measure the distance to the attachment points from the floor, lower surface and bottom of the bathtub; this data will help in other work;
- do not attach the device to the joint of the tiles and especially to the tiled border, otherwise the device will not be fixed well and will not last long, and high-quality reinstallation with such initial data will not be easy;
Measure twice, cut once - this proverb accurately conveys all the nuances of installing a shower faucet. Act slowly, think through everything down to the smallest detail, follow the technology - and then the device will last a long time, the device will look neat, and replacing it when the time comes will not cause difficulties.
Bath
Types of water socket mounting
- In the pocket. In the case of concrete or brick partitions, when the thickness of the wall allows, it is necessary to make a recess in it to completely recess the water outlet. As a rule, this requires about 40-50 mm. If necessary, the partition can be increased or the device can be left protruding from the wall.
- In a lined pocket. This type of fastening is suitable for gypsum partitions with a thickness of 40-60 mm. To do this, it is necessary to install a wooden lining up to 15 mm thick in the pocket made, and attach the water socket itself to it. It is recommended to soak the lining with a solution to reduce the rotting process.
- Lined. This fastening option is used for plasterboard partitions. A sheet of drywall is installed on a metal or wooden frame. After this, a lining of the required thickness is attached, and the device itself is attached to it. The next layer of drywall is attached so that the fitting is flush with it.
Floor standing bathtub faucet pros and cons
Regulatory Requirements
Regulatory requirements for the installation of pipeline fittings in accordance with SNiP 2.04.01 clause 10.5 are given in table No. 2.
Table 2. Regulatory requirements for the installation of pipeline fittings for cold and hot water supply
When purchasing plumbing fixtures, the presence of invisible cracks is determined by ear by tapping the product, located on a wooden stand, with a wooden hammer weighing about 250 g. A product that has cracks makes a rattling sound when tapped.
The presence of nicks and scratches is determined visually by wiping the surface of the product with a cloth soaked in a 0.1% solution of methylene blue solution. If there are nicks or scratches, they are filled with a blue solution and are detected visually without the use of magnifying devices.
Source
Location of the tap in the bathroom according to SNiP
The rules for arranging a water supply point in a home bathroom are regulated by special standards (SNiP 3.05.01-85), which are recommended to be followed, taking into account the design of the mixer and the method of its installation, the location and dimensions of the plumbing equipment (bathtub, shower cabin, sink), as well as the features bathroom.
Established standards determine two main installation parameters: the height of the faucet above the bathtub and the distance from it to the floor.
The following indicators will depend on these coordinates:
According to regulations, the faucet must be located at a height of at least 25 cm from the surface of the bathtub.
An important point when installing the mixer is maintaining a distance from the floor (standard - 80 cm), because the pressure in the system and, accordingly, the water pressure will depend on this. If the device is installed in the shower, it should be at a height of 120 cm from the shower tray.
The standards for the location of mixers are regulated by SNiP 3.05.01-85.
Materials
Construction and repair of a ball mixer
On sale you can find mixers that have very different looks. Made of silver metal, gold plated, with ceramic or marble-like handles - in general, lovers of a wide variety of styles can choose the appropriate option and install a faucet over the bathtub. However, the gold-plated faucet is not made of gold at all. To produce such equipment, two metals are most often used;
- brass;
- stainless steel.
Brass plumbing
Brass is a traditional material for faucets and other plumbing fixtures that must be made of metal. We can say that this is a classic of the genre. Brass, that is, an alloy of copper and zinc, has many useful properties:
- strength;
- durability;
- noble appearance.
A decorative galvanic coating is usually applied over the brass base. The brass surface is usually yellow, but the coating can be greenish or reddish.
Stainless steel
Stainless steel is a cheap, practical and very reliable metal. Plumbing manufacturers especially love it because it does not corrode or deform. In addition, deposits form more slowly on parts made of this material than on brass parts.
Features of system care
The main problem with the operation of a rain shower system can be the low quality of water, which contains various impurities. They negatively affect the operation of even the highest quality equipment. Clogged holes in the watering can restrict the flow of water and it stops working. This is not the manufacturer's fault. To avoid deposits, it is necessary to install an effective main water purification system in the house.
To avoid the accumulation of sediment in the holes of the watering can, it must be periodically cleaned with special chemicals or folk remedies. The part is removed and placed in the product for a certain time. The patency of the holes will be restored and the shower will start working.
Users often complain about low water pressure. Instead of the expected tropical downpour, there is a stream barely oozing from the watering can. Perhaps it's all about the pressure of the water supply. With different water supply systems in apartment buildings, there may be an increase or decrease in pressure on different floors. To solve the problem, try contacting the service provider or management company, or install a pump on the water supply pipes.
Equipment and dimensions
Standard equipment for a simple shower bar includes:
- barbell;
- flexible hose;
- watering can;
- soap dish;
- two brackets with plugs;
- mounting screws and dowels;
- instructions for assembling the product.
We invite you to familiarize yourself with the icons on clothes for washing: explanation and summary table
Depending on the modification, the kit may include a shelf, overhead shower, and mixer. The standard rod has a round shape, a diameter of 22-28 mm, a height from 60 to 175 cm. All parameters are specified in the standards (GOST 25809-96), and the products of leading manufacturers fully meet the established standards. The external design of each brand has certain differences in design and type of coating.
