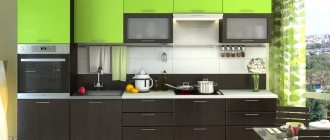
Current building codes and regulations provide for mandatory ventilation in kitchens. The standard solution in the form of ordinary vertical ventilation ducts with grilles under the ceiling does not suit all residents; the majority want to install special autonomous hoods above the kitchen stoves.
Extractor fan in the kitchen
Important. If a gas stove is used in the kitchen, then it is strictly forbidden to connect hoods to the ventilation ducts without special devices.
This is explained by the fact that in the off position natural ventilation does not work. If there is a leak, the gas accumulates under the ceiling and when the lights are turned on, an explosion is highly likely. By the way, it is for this reason that tragic incidents occur in apartment buildings. Another problem is that a powerful exhaust hood connected to a common ventilation duct can supply exhaust air to neighboring apartments. In old houses, the cross-section of the ducts is not designed for powerful air flows; it does not have time to escape outside and fills the nearest connected rooms.
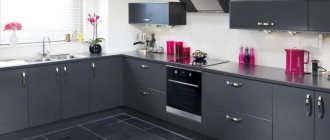
Hood with outlet for kitchen
We will tell you how to solve these problems below in this article.
Stages of installation of an exhaust unit
How to fix the hood?
First of all, you need to make markings for mounting the hood on the wall or ceiling. To carry out markings, use a building level. Then you need to use a drill with a Pobedit drill bit to make holes for the holders on which the device will be installed. Drywall cannot support the weight of the unit structure for a long enough time without additional fastenings. Therefore, spoilers are provided as additional fastenings. They are required when installing the exhaust unit on drywall.
Then you need to install the corrugation. Sometimes, when installing a hood in the kitchen yourself, the question arises: is it better to use corrugated or special air vents made of plastic, which has high strength and resistance to high temperatures? The difference lies in the cost of the products.
When installing corrugations and using special air vents, strong bends, sharp corners or narrowing of the air vent system are not allowed.
Installation of corrugations is performed in the following order. First, insert the panel with the socket into the ventilation hole. The panel socket must correspond to the diameter of the corrugation. Then the panel is fastened. Fastenings are made in 4 places using dowels. The dowels are installed with self-tapping screws.
After this, the corrugation is installed to the hood outlet on one side and to a special protrusion of the ventilation grille on the other side.
Then fastenings are made using clamps. The clamps are assembled to the required sizes. After this, install the casing, which is included in the hood kit. If the hood kit does not include a casing, it must be ordered separately.
You can also order the air vent with a hanging cabinet system. Sometimes these cabinets are made independently. Part of the corrugation should be in the cabinet. This completes the installation of the kitchen exhaust system. The unit is ready for use.
Before you start using the hood, you need to check how it works. To do this, you need to turn on the device for testing, while you can place a mug of boiling water on the gas stove. If the steam is removed correctly, you can begin operating the unit.
About fastening the exhaust system
If the system operates according to a flow-through design, then an air duct with a diameter of at least 120 mm must be brought into the ventilation shaft. It cannot be narrowed, bent or attempted to be lengthened, otherwise power loss is guaranteed. You can use either a round or square duct.
Nikonorov Vladimir
Our expert. Specialist in the field of air conditioning and ventilation with 10 years of experience.
Ask a Question
Please note: it is better to purchase an air duct not with a corrugated surface, but with a smooth one. This will significantly reduce the noise level of the device in operating condition.
If the hood is circulation, then there is no need to connect it to the ventilation shaft. The main element, the filter, will have to be purchased separately.
Installation of a fireplace hood 2 key stages
Stage #1 Chimney
Installation of a fireplace hood begins with the installation of a chimney. When creating a smoke exhaust channel the following can be used:
- Brickwork, inside of which there is a smoke exhaust pipe, erected on the base. This could be a load-bearing wall or foundation. A brick chimney needs to create anchors in increments of 30 cm and lay a reinforcing belt. Reinforcement with cells 150x150mm is mounted across 3 rows of masonry. Thanks to it, the chimney gains strength and reliability. The main disadvantage of a brick chimney is its short-lived period of operation, which is no more than 10 years. You can extend the service life if you insulate the chimney using mineral wool.
- Light weight stainless steel elements.
- Ceramic pipes for chimneys, connected to each other using vertical reinforcement. Such materials have unique technological characteristics, such as light weight, the ability to choose a diameter, and ease of maintenance provided by the presence of a special hole.
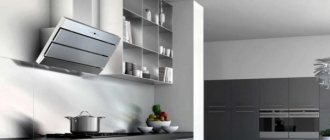
Dome hood design
The chimney must be insulated to retain heat and prevent condensation. The height from the chimney to the firebox using insulation should not be less than 13 cm. When using a chimney without insulation, the figure increases to 30 cm.
Stage #2 Hood
The chimney does not always cope with the removal of smoke. To improve its operation, it is necessary to install a hood.
Installing a fireplace hood with your own hands requires the presence of the hood itself and the tools to perform the work:
- tape measure and level;
- drill, drill bits;
- dowels and screws;
- screwdriver;
- pencil for making marks.
The hood should protrude 2-3 cm beyond the dimensions of the fireplace
Design parameters for supply ventilation
Supply ventilation must be provided specifically for the fireplace. A constant supply of oxygen ensures efficient combustion. The oxygen that is in the room from the fireplaces will quickly burn out without additional supply, which will cause not only a decrease in the performance of the equipment, but also lead to poor health. Comfortable conditions in a room with a fireplace without forced ventilation are out of the question. That is why, before installing a fireplace, it is necessary to take care of fresh ventilation directly into the firebox.
The volume of air masses in rooms with a fireplace should be more than 10 m3/hour per 1 kW of firebox power. For example, the combustion of 1 kg of natural wood requires 30 m3 of air. The volume of supplied air also depends on the size of the firebox.
The supply channel is mounted autonomously using a 100 mm pipe, the outer opening of which is closed with a special protective grille. It will help protect the fireplace from debris and insects.
Important! When creating a supply duct, install a damper that will close the ventilation duct when the fireplace is “idle.”
A fireplace hood can not only purify the air, but also become the main accent in the room. For its impeccable use, not only proper installation is necessary, but also timely maintenance. The fireplace hood should be cleaned once every 6 months. Simple procedures will extend the operating period, increase productivity, and ensure efficient use.
Installation procedure
It is recommended to begin installation of equipment after the completion of the renovation, when the place for the kitchen set, stove and other furnishings has been determined. In this case, it is easy to mark the location for the air purifier. Before marking, the corrugation or air duct is installed on the ventilation hole, after which the main equipment can be hung.
Using corrugation
This is a flexible corrugated pipe made of aluminum or plastic. It is recommended to use it when the ventilation hole is located directly above the installation site of the hood. Along with the corrugation, the kit should include clamps and a ventilation grille with a mounting flange.
The work order is as follows:
- a grille with a flange is placed at the entrance to the ventilation shaft;
- the corrugation, preferably in an unfolded state, is fixed on the flange with a clamp using silicone sealant;
- in the same way, the lower end of the pipe is attached to the air cleaner flange.
Air duct application
The corrugation is easy to install, but will be too noisy at maximum speed of the ventilation equipment. It is not suitable for use when the barrel outlet is located away from the installation site. In this case, the hood in the kitchen is mounted using an air duct. This is a set of plastic pipes with a round, square or rectangular cross-section.
To extend pipes to the required distance, connectors made of similar material are used. Turns when laying the air duct are made using knees. The design is more rigid than corrugation, produces significantly less noise, and requires fewer additional fasteners with a long routing length. As in the previous case, all connections are made using silicone sealant.
Main device
In addition to the listed design elements, for operational work you will need a set of tools that should be at hand:
- tape measure, building level and marking pencil;
- drill for drilling holes with drills;
- screws, dowels and a screwdriver for final fastening;
- sealant for insulating connections.
After preparing everything you need, you can begin work, which is performed in the following sequence:
- In accordance with the above parameters, markings are made along which a horizontal line is drawn, and points for drilling holes are marked.
- With a four-point fastening, the distance from the lower pairs of fasteners to the upper ones is measured and, using the same tools, a line is drawn with drilling points for the second pair of fasteners.
- If the height of the device is higher than planned, the excess exhaust pipe is cut off.
- According to the markings, the required number of holes are drilled into which the dowels are carefully driven.
- The final fastening with screws is carried out starting from the top pair of fasteners with alignment along the intended horizontal line.
- The work is completed by connecting to the corrugation or air duct.
Step-by-step instruction
- In accordance with the manufacturer's recommendations, the installation height of the hood is determined. The marking is done directly on the wall: a horizontal line is drawn at the required height, the evenness of which is measured using a level.
- The height of the device is set. If the indicators show that the hood is longer, then the pipe is cut off, since it is strictly forbidden to install the hood below the required height.
- Measuring work is carried out to determine the mounting locations on the wall. Such points are fixed on the wall.
- In accordance with the “beacons”, holes are drilled into which dowels are inserted.
- The hood is fixed to the wall from the top using screws. Only after complete alignment is the hood fully secured.
- The exhaust pipe is connected to the chimney.
Important! Install a check valve on the exhaust vent, which will prevent exhaust air from entering the room.
Duct selection
There are several types of kitchen air ducts for household ventilation:
The plastic air duct is more compact and inconspicuous
- PVC plastic air ducts are durable, lightweight and silent, as they create almost no air resistance due to their smooth surface. There are both rigid narrow plastic boxes and elastic pipes.
- Corrugated aluminum pipe is a fairly simple material for DIY installation; it can be freely bent to the desired size. Another quality of corrugation is the absence of hum or vibration, unlike rigid boxes. However, an important drawback of such an air duct is its unsightly appearance, so figure out where to hide the ventilation, for example, in a plasterboard ceiling.
How to care for equipment
Cleaning the hood must be carried out according to certain rules. Both the internal and external sides of the exhaust device require proper care. When cleaning the outside of the cabinet, do not use a hard brush, as it may scratch the surface and ruin the appearance of the hood. Use gentle detergents. When cleaning internally, in addition to wiping the housing, the filters should also be treated. The grease filter can be washed with plain water, having previously cleaned it of grease deposits. But built-in carbon filters can only be completely replaced.
Before you start cleaning the filters, do not forget to disconnect the hood from the power supply. The device can only be connected after it is completely dry.
Correct location
The dimensions of the hoods are calculated depending on the dimensions of the stove or hob. It must be remembered that ideally the hood should be 10-15 cm wider than the hob. If the device has a smaller width, this negatively affects the quality of ventilation. Grease and dirt constantly accumulate on kitchen furniture, and the smell of food can be felt in the air.
Self-installation of the hood does not require special professional skills
The mounting height of the device varies between 65-80 cm from the stove. The absorption of fatty impurities and steam directly depends on this value. Heights less than the specified values are not used, since there is a possibility of ignition of fats that have settled on the filters for a long time. And working on a stove with a low-hanging hood is inconvenient. It is not recommended to install the device above 80 cm, since in this case the lion's share of combustion byproducts will pass by.
The device is installed near a grounded outlet. Therefore, already during the repair you need to worry about the location of the electrical wiring and sockets. The cord should not hang above the stove and burners, otherwise it will either overheat or burn out. The wire is hidden in a special cable channel, which is attached to the wall.
In order for the device to work with maximum efficiency, the house must have good supply ventilation. To do this, install forced ventilation devices or use the ventilation function on metal-plastic windows. As a last resort, open the window (just not in the cold season).
At what height from the stove should the hood be installed?
The height of the hood above the electric stove is no less than 70 cm. The device can be installed above the gas hob at a distance of no less than 80 cm.
Before installing the exhaust system, I had to ask the experts for their opinion on this matter. Some said that the distance between the gas stove and the hood could be 70 cm. Allegedly, this is enough for all the fumes to escape.
However, remember that hotter air comes from a gas stove than from an electric stove, so the power of the device may not be enough to draw in combustion products. In addition, filters and other parts of the exhaust system can deteriorate from such a temperature, and this affects the performance of the device. Is it worth the risk, trying to maintain the minimum possible distance? It’s up to you to decide?!
The distance between the hood and the stove also depends on the height of the person who will stand at the hob. The system must be fixed at such a height that a person does not hit his head on the body of the device.
What does a fireplace hood installation mean?
A fireplace hood is an air purifier that works on the principle of the familiar exhaust system. The exhaust air masses entering the dome housing are removed from the room through an air duct into the ventilation shaft - the chimney. A hood of this shape has an elegant appearance and can become a real decoration of the room. It will perfectly complement any decor style and fit under any fireplace.
The fireplace hood is supplied disassembled
Features of fireplace hoods:
- modern appearance, thanks to which the hood becomes a decoration of the room;
- effective air purification achieved through the installation of two engines and reusable filters;
- Affordable and quick installation - ordinary self-tapping screws are used.
Hood sizing
The dimensions of the hood should be as close as possible to the geometric dimensions of the fireplace. Installing a larger hood helps remove contaminated air more efficiently and quickly. The most optimal option is when the dimensions of the hood are 2-3 cm larger than the dimensions of the firebox.
Noisiness
The presence of strong noise irritates human hearing
That is why when choosing, you should pay attention to noise readings. When operating at full power, the hood noise should not exceed 60 dB
The best option is a hood with a noise level of 40 dB.
Modern fireplace hoods come in different styles, for example, modern modern
After some time of use, even the quietest hood can become very noisy. The reason for this is a dirty filtration system. You can eliminate the noise by cleaning the fan and replacing the filter.
Practical purpose
A fireplace hood is, first and foremost, safety.
Fireplace hoods provide:
- optimal air composition in the room where the fireplace is installed;
- elimination of condensate formed during the combustion process;
- removal of harmful substances formed during the combustion process.
The hood is installed when the fireplace is created or when the room is being renovated. With this approach to the event, it is easiest to hide structural inconsistencies, if any.
Important! When installing an exhaust system for a gas fireplace, the creation of a chimney is mandatory. But, since the operation of such a fireplace is not accompanied by the formation of soot, narrower chimney designs with two turns can be used.
To create draft when installing a chimney with turns more than 2 times, it is necessary to install a forced ventilation system.
How to install a kitchen hood with your own hands
Installing a hood over a stove is actually not difficult if you have minimal plumbing and repair skills. You need to start with the electrical part.
Electrical connection
A regular outlet is suitable for connection. But if there are no power points near the installation site, then you need to do the following.
It is necessary to bring the electrical cable to the markings for the hood, simultaneously hiding it in the wall. This must be done in the following sequence:
- First, find the nearest electrical box. From it to the planned installation location of the hood, make a channel using a hammer drill and a special blade.
- Place the new cable into the cavity created.
- Turn off the power supply.
- Using a screwdriver, carefully pry off the round cover of the junction box. Inside this cavity there is wiring. Determine the “phase” using a tester screwdriver, “zero” will be next door. It is to these terminals that you connect the new cable, for example, using a terminal block.
- Install the overhead socket for the hood and insert the bare ends of the cable into its contacts, secure them.
- Assemble the socket. Now you can turn on the power supply.
Grounding for ventilation is usually not used.
How and at what height to install the hood body
Typically, a forced ventilation device is placed above the stove directly on the wall. Most often, two points of support are enough. As a rule, an installation and operation manual is included with the purchased hood.
The optimal height above a gas stove is about 80 cm (above an electric stove, 70 cm is enough). You need to retreat this amount from the slab and draw a horizontal line with a pencil. This is where the bottom surface of the hood will be. Starting from it, you can mark the holes for hanging.
It is enough to use a tape measure to measure the distances from the bottom wall of the device to the marks for fastening to a vertical plane. The same values must be noted on the wall.
Next, drill holes, hammer in plastic dowels, screw in screws and hang the device body on them.
The process of attaching such a product is simple. The housing is screwed with self-tapping screws to the top wall of the wall cabinet in four places. When the door closes, he will remain invisible.
But such devices always have a flat panel with filters at the bottom. She should just stay in sight. Most often it has a retractable part and backlight.
Markings for securing the housing are made according to a template, which must be included in the set of documents for this hood. Check availability when purchasing.
Selecting an exhaust duct and its installation
Without a connection to the common house duct, the operation of the hood is meaningless. Although, if the device is supplemented with a special carbon filter (some models with a recirculation function provide for its internal installation), then you can live like this for some time. But constantly replacing carbon filters will inevitably lead to additional costs, so it is better to still have a hood that allows the installation of an air duct.
There are three options for manufacturing a ventilation duct from standard parts:
- from corrugated soft foil pipe;
- from plastic channels of rectangular cross-section;
- from PVC pipes.
The corrugation is easy to install, but looks unaesthetic.
Channels with a rectangular cross-section are most often used for installing air ducts, since they have many advantages:
- They can be easily cut (to shorten) with a file.
- They are quite aesthetically pleasing and can fit into any kitchen interior.
- There are a large number of different convenient transitional elements - corner, curly and others.
Finally, plastic pipes. They are somewhat inferior to rectangular channels in terms of the variety of transition elements.
How to install air ducts
Installation of the air duct involves the following preparatory work:
- First you need to measure the distance from the hood outlet to the opening of the common house duct. It is also necessary to take into account all turns of the planned line.
- Then make a list of the items you need to purchase.
Let us assume that the distance from the plane of the hood opening to the level of the bottom line of the common house channel grating is 1 meter. In this case, a turn to the left is necessary, after which there remains another 50 cm to the ventilation shaft of the house. So you will need:
- rectangular channel 1 m;
- channel with a diameter of 0.5 m;
- right angle knee;
- adapter from the hood to a rectangular channel;
- adapter for a house shaft grate with a right angle rotation.
Installation of the air duct is carried out in the following sequence:
- First you need to install the adapter on the upper outlet of the hood. Check the tightness of the connection by attempting to loosen the part. The output diameter ranges from 100 mm to 150 mm; for each size you can select the appropriate adapter in the store.
- Next, place a rectangular duct on the side and mark the cut line along the bottom of the ventilation duct with a pencil, since the pipe will have to be shortened a little. Saw off the unnecessary part with a metal cutting tool. You can also use a jigsaw.
- Next, insert the rectangular duct into the adapter, and install an elbow on top to rotate the air duct. These parts fit together easily because they have expansion links at the ends. It is enough to press a little with your hand on top of the inserted part, and it will go into the hole of the other element. There is no need to lubricate the connections with sealant.
- Insert the last channel, and at its other end insert an adapter for the grille in the kitchen wall.
- Check the efficiency of the hood by turning it on and placing your hand near the connections. Air should not leak through.
The rectangular channels used stand well in place without being attached to the wall. But to be sure, you can install at least one fastener.
Usually there is no ventilation grill in apartments. In this case, it is necessary to select it when purchasing parts. In addition to the lowercase cells, it must have a hole for attaching the round end of the adapter.
The grille is fixed on the wall using dowels and screws.
If we talk about a cone hood, then it always comes with its own decorative air duct in the form of a shiny metal box. Inside such an element, a practical part is still installed - a corrugation for ventilation, which connects the upper hole of the cone with the apartment ventilation duct.
The decorative box is built on a telescopic principle. Its upper part slides out from the lower part and is secured according to the attached installation instructions.
The disadvantage of such designs is that they can only be used when the opening of the kitchen ventilation duct is located strictly above the stove. If it is strongly shifted to the side, installing such a device will cause difficulties.
If there is an additional ventilation duct on the kitchen wall, then it can be closed with a regular grille without a hole. Let it simply serve for natural ventilation of the room.
Why does the check valve sometimes not work and close?
On the kitchen side, a check valve is mounted on the tee. In the factory version it will be quite long. In this case, it is better to shorten it so that this “gun” does not stick out too much.
The valve is inserted inside a section of a standard air duct d-125mm, and this air duct is put on and siliconized onto the tee.
If this whole structure seems too cumbersome to you, and the protruding pipe with the valve is not very aesthetically pleasing, you can do it a little differently. You make the air duct not with a round pipe, but with rectangular channels.
In this case, you install the above check valve on a straight section, as close as possible to the turn.
You can't achieve a factory connection here, so you'll have to farm collectively. Buy a rectangular tee with a round outlet on one side. Next, this round timber is cut off and a check valve is glued in its place.
The valve is placed strictly at an angle (2 degrees). Otherwise, it will open every once in a while or not open at all.
Many people have encountered this problem and easily solved it this way.
The damper itself is also mounted with a vertical deviation. The upper turning point, based on the hour dial, is at 13.00 (1 o'clock), and the lower one is at 17.00 (5 o'clock). This is if your flow direction is from right to left.
Otherwise, the circle is placed at the 11 o'clock - 7 o'clock position.
For more reliable operation and stable opening of the damper, you can stick some kind of weighting material (no more than 2 grams) on one side. Glue it close to the edge.
By the way, do not throw away the previously cut round pipe. It is tightly inserted onto the valve from above, after which a decorative grille diffuser is mounted on it.
What nuances might there be with this method? If your hood stands exactly above the entrance to the ventilation shaft, and the duct pipe goes straight, without any turns in the horizontal plane, then the valve installed on such a straight section does not work normally, at least at 1st speed.
You will simply have nowhere to get the increased pressure to close it. The air will fly through this “turn” in a straight line. You definitely need an angle.
The valve cover and its rotating mechanisms are easy to clean and do not be afraid of them becoming overgrown with grease. For this to happen, you will have to fry huge wild boars on the stove and stew them in your oven for several hours a day, no less.
If you don’t want to see a protruding “hollow” under the ceiling at all, then, as an option, you can install a tee so that the middle elbow rests against the wall, otherwise, where the valve is located, it would look to the side. In this case, also close the hole with a decorative cover.
Everything will look much nicer. However, due to the additional rotation, the performance of natural ventilation will deteriorate slightly. And the grill will reduce it by another twenty percent.
In addition, it will no longer be possible to clean the channel by hand or with a vacuum cleaner. But many do this deliberately and even hide the entire structure in a wooden or plastic box.
As they say, beauty requires sacrifice.
Cleaning performance
In this case, these are volumes of air that the equipment can clean per unit of time. To determine what the level of productivity should be, it is necessary to calculate the product of the volume of the kitchen and the air exchange rate. As a quantitative indicator of the last parameter, it is recommended to use the average level of air exchange per minute equal to 12. It should be taken into account that the cleaning efficiency is affected by the number of elbows of the ventilation duct and the rate of filling the room with harmful substances. It is known that one bend in 90 means a loss of 10%, and the filling rate of small rooms is higher than that of larger ones. Therefore, productivity should be selected with a reserve.
Installation of a chimney
The kitchen hood is connected to the ventilation duct using corrugated or plastic pipes. The requirements for the air duct are quite important:
- The optimal pipe length for a kitchen hood is no more than 3 m. If the air duct is longer, the efficiency of the device decreases by 10% with each meter.
- Minimum number of bends, adapters and bends. The more knees, the worse the ventilation. The system resistance increases sharply, and exhaust air has difficulty coming out.
- Bends and turns are exclusively at obtuse angles. An angle of 90 degrees reduces efficiency by 10%. The duct should move smoothly from one wall to another.
- Smooth inner surface. In this case, ventilation will be effective, since air resistance will decrease. The best option is round plastic pipes. The corrugated air duct has ribbing, which creates additional obstacles for the outgoing air.
Exhaust pipe installation process - read the instructions carefully
Almost all models of devices are connected to a round air duct made of corrugated or plastic. Rectangular pipes look better as they fit more harmoniously into the space between the cabinet and the ceiling. The diameter may vary, but the cross-sectional area must be at least 0.1 m2. All connections are hermetically sealed to prevent any possible leakage of exhaust air back into the kitchen.
Plastic air ducts are durable, lightweight and do not create additional noise during operation. Corrugated products also have many advantages: they are flexible, lightweight, do not vibrate and do not make noise. But in terms of aesthetics, they are inferior to their plastic counterparts.
The air duct is hidden in the free internal space of walls, furniture or ceiling. In this case, two-level ceilings are convenient: the pipe can be easily hidden above the lower level. If such options are not suitable, use decorative boxes that match the style and color scheme of the kitchen unit or walls. You can make a plasterboard box in the kitchen for the hood with your own hands. Stainless steel kitchen hoods are also on sale.
https://youtube.com/watch?v=Lcr1lSIzEJY
WATCH THE VIDEO
Instructions for installing the exhaust device are included with each model. The combustion hood for the kitchen has detailed instructions with pictures for installing the device. Therefore, you can find a comprehensive answer from the manufacturer to your questions.
Installation of the ventilation duct
There are several types of air ducts for domestic ventilation on sale:
- PVC (plastic) air ducts. They have good strength and light weight. Thanks to the smooth coating, they do not create noise when flows move along them.
- Aluminum corrugated air duct is free to bend, stretch and is easily adjusted to any size. It does not create vibration or hum, but has an unaesthetic appearance, therefore, it is usually hidden in a closet, a special box, or hidden by a suspended ceiling.
Before installing a hood in the kitchen, make sure that you do not cover the only standard vent in the room with a pipe. In the case of one vent, they often make another exit from the shaft and install a check valve that will close the flow into it when the device is turned on.
In the picture, the installed valve is red. When the fans are turned off, it lies horizontally, and air can freely flow through the box naturally. When the fans are turned on, the valve rises and blocks the air outlet back into the room, thereby directing it into the shaft. The material can be some lightweight material, such as plastic or aluminum. But this option is not suitable if a built-in hood is installed, since it is mounted in a wall cabinet.
For private houses, the best option would be to punch an additional hole in the wall for the channel and not affect the existing vertical one. The air duct from the device must be routed into the additional hole. But a check valve must be installed at the outlet to prevent outside air from entering.
If in an ordinary apartment there is no additional channel, and it is not possible to punch a hole in the outer wall, then this channel can be expanded and a special adapter with two holes can be used.
Through the lower grille, air from the room enters the shaft due to natural draft. At the same time, there is a visor in the upper hole that prevents the air flow from the unit from escaping through the grille back into the room. Although there is of course a return leak, it is minimal compared to the outgoing flow.
The figure below clearly shows how the air duct is connected to the adapter, while maintaining natural draft.
Thus, installing a kitchen hood with your own hands is only possible for home craftsmen. Completing the task requires accuracy and attention. Well, for those who do not have the skills to use tools, or do not have free time, the best option would be to invite a specialist to resolve this issue.
Correct connection of the air duct to the ventilation system
For this you will need:
- plastic air duct
- offset check valve
- tee splitter
In the end, you should end up with something like this.
How does it all work? When the hood is turned off, the valve will be open and warm air from the kitchen will quietly flow by gravity into the ventilation duct. As soon as you turn on the exhaust hood, the valve immediately closes automatically, blocking the air flow into the room.
In this case, all odors from the stove will easily go outside. When switched off, the pressure in the box drops and the valve automatically opens, connecting the ventilation shaft to the apartment.
Installation of hoods by type
The installation technique of the device directly depends on the type of unit selected. There are these types:
- hanging (they are also called standard, visor or flat) - they are fixed above the hob under the cabinet;
- built-in – mounted inside a wall cabinet (the cabinet is made specially based on the size of the device), thus becoming invisible in the interior;
- wall-mounted (fireplace or dome) - you can install such a kitchen hood on the wall, directly above the hob;
- inclined (a type of wall-mounted devices - they have an inclined panel);
- corner - this type of device is mounted in the corner of the room;
- island - can be fixed to the ceiling in any place where the stove (island) is installed.
Types of hoods
The type of exhaust device is selected depending on the technical conditions and the availability of an exit to the ventilation shaft. The most popular remain filtering, exhaust and combined models.
Filter devices operate on the principle of recirculation. The exhaust air mass is drawn into the structure, passes through a filter system and returns back to the room, already cleared of odors and fatty impurities. Installation couldn't be easier since these devices do not require a vent.
Exhaust models are flow-type devices. A metal exhaust fan sucks in the exhaust air mass and throws it outside through the ventilation duct. They are more difficult to install, since the air duct must be routed outside.
Depending on the design features, exhaust devices are divided into 4 types:
- Dome (wall-mounted). These wall-mounted devices are inexpensive, easy to install, but do not always look appropriate in kitchens decorated in a certain style. To get out of this situation, you can install a hood box in the kitchen.
- Built-in hoods. These devices fit into the upper cabinets of the kitchen unit and provide the room with a presentable appearance. These closet hoods are not conspicuous and do not attract attention, as they look more like an element of furniture design. Mounting a built-in hood is not difficult.
- Island (ceiling). Such models are attached directly to the ceiling above the kitchen island. The installation diagram for a kitchen hood is much more complicated.
- Tabletop. These model structures are installed together with the hob. They have a high quality of air purification, as they are located directly above sources of steam, fat and pollutants.
Each type has its own type of installation. Wall-mounted devices are the easiest to install; ceiling-mounted ones are the hardest.
Service
The service life of an air purifier depends on the care of the device. The main thing you need to monitor is the condition of the filter elements, which are divided into three types:
- Disposable padding polyester. Made from paper or non-woven fabric. Such filters have special marks that are clearly visible through the protective grille. Their disappearance indicates the need to replace the grease trap.
- Reusable acrylic. They are washed monthly in soapy water without squeezing too hard.
- Reusable aluminum. Once every 30 days, clean with a degreaser or wash in the dishwasher separately from cutlery.
Purified air in the kitchen space from combustion products and unpleasant odors.
Quality control of filters is necessary not only to increase the performance of the appliance. Concentrated grease may cause the element to catch fire, so periodic cleaning is required to ensure fire safety.
You need to take care of your kitchen hood regularly. This will extend the service life and get a high cleaning result. Caring for the device consists of several stages. First, the hood is disconnected from the power supply. Then disconnect the grease-absorbing filters and wash all accessible parts. It is not recommended to use abrasives, sponges or scourers with hard cloths. The buttons on the control panel are wiped with a damp cloth. The last step is to wipe all the elements dry with a napkin and connect the hood to the power source.
Hood installation process
Of course, installing a kitchen hood with your own hands depends on its type and the location of the ventilation shaft. First, we will look at installation using the example of a built-in device in a cabinet.
Anti-return mechanism
- Anti-return valve will prevent air from returning back into the kitchen
- If you decide to do everything conscientiously, then start by making a box for the firecracker. The body can be made of aluminum, galvanized sheet or tin according to the scheme given above. Or, to avoid hassle, just buy an anti-return valve that opens like a butterfly. It is placed in front of the ventilation shaft.
- For convenience, install the housing on a wall cabinet above the stove. Then secure it more tightly, sealing all the cracks with foam and gluing it to the cabinet to avoid resonance.
- First, just try on the body of the firecracker and make markings on the cabinet for the hole. After this, you can remove the cabinet from the wall and cut a hole for the frame in the bottom wall with a jigsaw. To do this, drill a hole inside the marking area with a large drill bit, then insert a jigsaw blade into it and begin cutting out the shape you want in the cabinet.
- Next, in the same way, make holes in the internal shelves (if any) for the air duct. In the upper wall you need to make a square hole with a margin of 3-5 mm for the firecracker.
Duct connection
- The next step is connecting the air duct. Insert the corrugation into the holes made, and in the upper wall of the cabinet give it the desired square shape. Trim the corrugation with a small margin, cut the corners and bend them outward.
- Now the corrugated cabinet can be hung on the wall. Be sure to seal all duct joints with silicone sealant to prevent loss of power.
- Attach the homemade box to the cabinet so that it connects the corrugation to the ventilation shaft. We also glue it onto silicone, and seal large gaps with foam.
- After this, you can secure the hood in the closet. Screw it onto self-tapping screws, or onto dowels - if the mount is intended for a wall.
- Securely attach the corrugation to the hood and secure it with a clamp. It is not necessary to coat the joint with sealant at this point.
- If you connect the hood directly, then simply connect the air duct to the ventilation shaft. To make it convenient to dock them, use a special grille with a round hole, which is shown in the photo. Attaching the corrugation to the ventilation
- When using PVC air ducts, the installation is similar: we simply connect the pipes with the component corners and carry them through to ventilation.
Accessories for plastic air duct
Wall mounting without cabinet
- Not everyone places wall cabinets above the stove, fearing their rapid deterioration from steam and high humidity. Moreover, wall cabinets are usually narrow, which does not allow wide hoods to be mounted inside. If there is no built-in fastening, then for this purpose a U-shaped frame made of corners on dowels is attached to the wall. This mount acts as a support for the body.
- How to install a kitchen hood if you can’t fix it to the wall with regular dowels? Such problems often arise among owners of gas stoves when the pipe interferes with normal fastening.
- In this case, you can buy long plumbing self-tapping screws, which, on the one hand, look like a self-tapping screw, and on the other, have a thread with a nut. You simply screw them into the wall like dowels, and attach the hood body to them at the required distance from the wall.
Mounting the hood next to the gas pipe
Installing the hood in the kitchen - video instructions:
And in the end, all that remains is to connect the hood to the network, through a socket, or with a permanent connection through a circuit breaker. Don't forget to connect the ground connection first; it will remove possible voltage from the case when the fans are running. If everything works, you can put on a decorative cap and enjoy the fresh air while cooking!
Types of hoods
It is not always easy to choose a hood for a gas stove. There are different types of kitchen hoods, and they differ mainly in the installation method. There are the following types of equipment:
- hanging;
- built-in;
- wall;
- corner;
- island.
above the stove and the features of the room will directly influence the choice of model for the kitchen. The hanging system is usually placed under the shelves, and the built-in system is “hidden” inside cabinets or shelves located directly above the stove. Wall-mounted systems are attached directly to the wall at a certain level above the slab. When the gas stove is located in the corner of the room, it is necessary to install a corner exhaust system. Such a hood is specially manufactured in such a shape that it fully copes with its functions in a given place in the room.
Island exhaust systems are usually attached directly to the ceiling. They are used in places where the slabs are located in the center of the room and it is simply impossible to secure the hood in any other way. This arrangement is most often found in professional kitchens, such as canteens or restaurants, or in large kitchens in residential apartments with a non-standard layout.
Manufacturers
Among the variety of models of air purifying devices, Italian kitchen hoods stand out. For example, devices are characterized by low noise levels, excellent filtration, low energy consumption, fire safety and attractiveness.
WATCH THE VIDEO
Thus, air purifiers have long ceased to be luxury items. Compliance with the installation and maintenance rules for dome devices guarantees clean air and maintains a healthy indoor climate. A kitchen with a fireplace hood turns into a safe and cozy space with a decorative design. A fireplace hood for the kitchen is installed.