Specifics of furniture varnish
Furniture varnish includes substances that, after drying, become a transparent layer. The surface coated with varnish can become either matte or glossy, through which the wood, with all its features, will shine through.
Furniture coated with varnish is always relevant. It looks luxurious and will fit into any style.
Varnish coating has a number of advantages:
- Surfaces become shiny or matte.
- The varnish creates a protective layer against dampness and dirt.
- Externally, the furniture looks more aesthetically pleasing.
- The service life of the product increases.
- The coating prevents cracks and minor scratches.
- Some varnishes are resistant to temperature changes and ultraviolet rays.
- On a varnish surface, small defects are less noticeable.
- It is easier to get a splinter or injury from untreated furniture.
The following precautions must be observed during the varnishing process:
- Work must be carried out in a respirator or using other methods of respiratory protection.
- Work must be carried out with gloves.
- There should be no open sources of fire near the work being carried out.
- When varnishing old furniture, the previous layer must be removed; noticeable cracks should preferably be treated with putty.
- After preparatory work, the surface must be treated with a primer.
The surface is varnished several times; before applying the next layer, you need to wait for the previous one to dry.
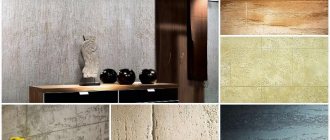
Regarding decoration
Very often, wood boards are decorated with various patterns, ornaments, contrasting inserts and other elements. You can use special napkins for decoupage, straws, colored paper, newspaper and magazine clippings, and more.
It is important to harmoniously combine the overall color of the facade of MDF cabinets and the inserts.
DecoupagePaintingMulti-colored inserts
You can combine contrasting colors, add painting, and if you know how to draw, you can create an exclusive design.
Using sanding, applying a patina or special products, you can provide furniture with a vintage look. That is, you can make antique furniture with your own hands.
Such restoration of sliding wardrobes made of MDF or ordinary wardrobes will look advantageous in any interior, and most importantly, restoration will not require large expenses. Using laminated furniture is very convenient in any home.
Photos of cabinets before and after restoration:
123
Now you know what and how to paint an old chipboard cabinet, which means you can get to work. This method allows you to restore not only cabinets, but also sideboards, cabinets, chests of drawers and other furniture.
Currently, in stores you can find an endless number of various cabinets, chests of drawers, racks, hanging shelves, multifunctional drawers for clothes and personal items. But if you decide not to plunge into a long search, but to follow the thread of your imagination, then with the help of the following master classes you will learn how to update an old cabinet with your own hands beyond recognition.
After reading the article, you should not have any questions about how to paint a varnished, chipboard or wooden cabinet, what paint to paint and make it suit your own style, and you will also learn some of the intricacies of this work.
Types of furniture varnishes
There are many types of varnishes, each of which has its own pros and cons. The specificity of furniture protection products depends on the content of various components in them.
Oil varnish
Thanks to the oil base, the varnish acquires excellent decorative qualities. Furniture varnished with oil varnish will have a golden hue. Resins occupy the main place in its composition.
The oil composition will create a protective layer on the surface, as a result of which the surface will be perfectly protected from environmental influences, moisture or mold. The oil composition will give the furniture a presentable look. Perfect for decorating benches, gazebos and terraces.
Nitrocellulose varnish
The nitrocellulose composition is suitable for any type of furniture. A distinctive feature is that it has no odor.
- The nitrocellulose composition allows the varnish to dry quickly.
- After drying, the surface can be polished.
- The disadvantage of the nitrocellulose composition is that it quickly deteriorates when exposed to weather conditions.
It is not advisable to cover garden furniture with it - the coating will quickly become unusable.
Water based varnish
Such varnishes are considered sustainable and environmentally friendly. Due to their safe composition, they can even be used to protect bedroom furniture. The disadvantage of these types of varnishes is their poor moisture resistance, so you should not use them for garden benches and gazebos.
There are two types of water-based products: one-component and two-component. Single-component ones are easy to use, as there is no need to mix or dilute them. Two-component products contain polyurethane, making them the most durable.
The most common option is acrylic varnish. Its distinctive feature is that it is white in color, but when completely dry it becomes transparent due to the presence of resin in its composition. Pros of acrylic varnish:
- Does not contain toxic substances.
- Without smell.
- Resistant to environmental influences.
- Has quick-drying properties.
- Does not spoil the wood texture.
In order for this type of varnish to dry, the room temperature must be at least 20 degrees.
Polyurethane varnish
Polyurethane compounds include isocyanates and polyphyrs. These varnishes are of high quality, resistant to atmospheric influences, and contain safe substances.
These types of varnishes are suitable for any type of wood. It is appropriate to cover garden furniture with it, since polyurethane is resistant to environmental influences.
The disadvantages of this varnish are as follows:
- High price.
- Unpleasant smell.
- Long drying time.
Alkyd varnish
This type of varnish contains synthetic resins. The advantage of the compositions is that they are highly durable and resistant to atmospheric changes.
Alkyd compositions are suitable for any type of room, suitable for home and garden furniture.
The alkyd coating will reliably protect furniture from impacts and the negative effects of chemical elements.
- One of the disadvantages of alkyd compositions is the drying time.
- The product can be used 3 days after coating.
- The varnish contains xylene and solvent, which are toxic substances.
- Has an unpleasant odor.
Dries quickly and can be used on boats and parquet floors.
Craquelure varnish
As a result of using craquelure varnish, furniture takes on an antique look. The dried layer cracks, which gives the furniture an aging effect. This is because another layer is needed on top of the varnish - a coating.
Is it possible to paint laminated chipboard without pre-matting?
Matting a laminated chipboard surface is a complex process that takes a lot of time if you don’t have a sanding machine. But it can be avoided if you use chalk paint: a mixture of chalk, clay, dyes and a binder. This composition fits well on any smooth surface.
Features of Chalk Paint:
- The natural composition is harmless to health.
- Water is used for dilution.
- The chalk mass is odorless.
- Creates a matte finish with an antique effect.
- Painted surfaces do not fade in the sun.
- Drying time for 1 layer is 8 hours.
- Drying time for 2 layers is 24 hours.
- Compared to acrylic, chalk paint is about twice as expensive.
If milk casein is used as a binder, the paint is called milk or casein paint. It has the same properties, but its decorative qualities resemble acrylic coating. Its color is rich and its surface is semi-matte. This is the best paint for laminated chipboard if you are not interested in creating an antique effect.
Choosing varnish for furniture
Varnish can increase the life of the product and give it a beautiful appearance. Before choosing, you need to understand the future load on it. When the upcoming load is high, it is better to choose polyurethane varnish.
The water-based composition is ideal for lightly loaded furniture or decorative items.
- Varnishes containing a solvent have a pungent odor. One-component varnishes are easier to use. Two-component varnishes have greater wear resistance.
- Transparent products are suitable for expensive wood species. Expensive wood has an excellent texture that should not be hidden under tinted varnish. It is better to use tinting for walnut or pine. A colored product will show such wood in a more favorable color.
To hide small cracks and defects in wood, it is advisable to use products that give a matte effect. Furniture coated with matte varnish is unpretentious and does not require special care.
Master class No. 1. Stencil painting
Everything is mixed in this closet - romanticism, Chinese motifs, and even something from Gzhel. Everyone sees something different in him. Let's learn painting techniques.
Materials and tools
- Prepared cabinet;
- white paint;
- solvent;
- blue spray paint;
- gold paint;
- stencil;
- brushes
Step by step guide
Step 1.
- We remove all fittings, locks, handles, etc. from the cabinet. Using familiar technology, we will prepare a wooden cabinet for painting.
- We spread newspapers or a large piece of polyethylene on the work surface (on the floor) so as not to damage other furniture.
Step 2.
- We take white enamel and solvent. In a small plastic jar, dilute paint and solvent according to the instructions on the paint can.
- The paint consumption is also written on the can; it is better to use this information and immediately dilute the required amount. If you mix too little paint, you may end up with a different color the second time.
- We make the background of the picture - apply the first layer of paint. Leave until completely dry.
Step 3.
- If the color turns out saturated and you like it, then take a stencil and apply it to the cabinet. Carefully glue on the front side and side walls so that there are no bubbles.
- Shake the spray paint well and spray it over the stencil. For an even color, one layer of blue paint will be enough, so we do everything the first time.
Step 4.
While the blue paint dries, paint the hardware removed from the cabinet in gold leaf. After the parts have dried, screw them into place.
We remove the stencil from the cabinet and place it in the most visible place in the room - after all, it now deserves special attention!
You can decorate the closet with a stencil, for example, with flowers.
Photo of the best furniture varnish
An interesting example of developing chipboard painting technology from True Factory
Let's give a practical example from True Factory, which concerns the painting of melamine-coated chipboards. The manufacturer encountered poor adhesion of the paint and varnish coating, which is, in principle, expected for surfaces with low porosity.
The low-quality soil from a little-known manufacturer used by the company did not help. True Factory technologists conducted a series of tests using different options for adhesive primers.
The best results were obtained using the following combination: Sayerlack TUL3530/00 Adhesive Primer for Melamine Paper (100%) + TH0790/00 Hardener (10%) + DT0452/00 Solvent (40%).
See the results in the photo below, in the photo test before and after using the TUL3530/00 adhesive primer. For testing, we used a familiar adhesion test - lattice cuts.
What does this experience from True Factory show us? First of all, do not be shy and contact the technologists of paint suppliers in case of problems with painting chipboard, laminate in terms of adhesion and more, to select the required adhesive primer and obtain stable painting results.
| Rice. 3. Adhesion of paintwork materials before applying adhesive primer |
| Rice. 4. Adhesion of paintwork after applying adhesive primer |
Feedback from site visitors:
I’ll tell you about my own experience in painting chipboard and film facades in furniture production.
Painting chipboard
Chipboard was painted, but rarely when the project indicated that, for example, the outer side wall of the kitchen or the details of the portal had to be the same as the painted or patinated facades.
In this case, the surface of the chipboard was sanded with paper of P220 grit or coarser in order to break the top protective layer of the laminate on the chipboard to a matte surface. Next they applied paint, but more often they worked according to the scheme - sanding, one layer of primer, sanding, finishing. No adhesives were used.
Problems arose if the edge was poorly glued and after finishing the paint fell into places where the edge did not fit well, worse if it peeled off, but again this was due to poor performance of the gluing equipment, a violation of the gluing technology.
Painting facades covered with PVC film
We had to resort to the technology of painting film facades in order to simplify the technology of painting facades with complex internal milling.
What were the difficulties: the main ones were the labor intensity of grinding complex milled profiles and the risks of damaging the profile itself, which already required reworking the facades.
In addition, it was necessary to apply sealing primer, sand it, apply base primer, sand, apply primer again, and sand again. In the case of film, the surface and profile of the MDF facade in PVC film were simply pre-grinded and finishing layers were applied.
It turns out that the technology was reduced to a minimum, well, sometimes they could apply primer to the film before painting, but sanding the primer in this case was much easier than sanding unlined MDF.
An important point in all this is how well the film is glued to the MDF facades. If the film peels off from the edge, if there are inclusions under the film, glue sagging, poor-quality milling, poor preparation of the facade surface before pressing, then we will get not the advantages, but the disadvantages of this technology.
Therefore, the technology for pressing facades in a membrane vacuum press must be at a high level.
In addition, the film itself must be selected for the facades. Firstly, it should be white, and secondly, it will be better if it is intended just for painting, that is, without a protective top coating.
Film suppliers called this film primer. In principle, you can use just white film, but a trial application and an adhesion test are necessary.
Interestingly, no adhesive primers were applied to the film facades; it was enough to matt the film by sanding. But, in any case, experiments are always needed, and then mass application of the technology, otherwise primer may be needed to improve the adhesion of paint to film or chipboard. For such primers, contact your suppliers, they will help you select the necessary paints and varnishes.
The chipboard cabinet in the hallway has lost its decent appearance. The design is successful and functionally it is still in fairly good condition. Is it possible to apply varnish to chipboard to refresh the look of “tired” furniture surfaces?
Is it possible to apply varnish to chipboard?
You can apply varnish to chipboard, but surface treatment will take a long time, since a perfectly flat surface is needed for the varnish.
The chipboard cabinet in the hallway has lost its decent appearance.
If this is a cabinet, then we are not talking about simple chipboard, as in the photo above, which is purchased as a raw material for construction work; chipboard was used for the cabinet, but it was additionally processed with something to give a good appearance, which was already “lost.”
Work order:
Closet.
At first I wanted to paint it like this without removing the door, then I realized that it would be inconvenient. So I took a risk. and took it off. It turned out not to be difficult. True, worries about how to put them back on were present until the last moment. In the end, I also screwed it myself; I didn’t have the patience to wait for my husband))).
I pulled out the built-in lights and wrapped them in a suspended state with masking tape. The same tape was used to protect the walls on the sides of the cabinet, the floor, and the mirrors on the doors. Prepared the workplace. I decided to paint it. on the bed)))! I covered it carefully with polyethylene. And I have never regretted this choice. The bed was large and high, everything fit, there was no need to bend over and crawl on all fours. I prepared approximately equal stacks of books and wrapped them in cling film. They are needed as substrates so that the doors can be lifted and painted as if suspended; the painted edges will not come into contact with a flat surface.
Stage 2.
I sanded all surfaces that needed to be painted. It is necessary to sand lightly, without fanaticism, with the finest sandpaper. Light circular movements. Purpose: to create roughness without removing the laminated layer. If there are dents and scratches, they should be filled with putty at this stage. After sanding, thoroughly wipe all surfaces with degreaser. It will remove dirt, grease marks, and everything that can disrupt the adhesion of the primer and paint.
Stage 3.
Primer. I went through hard-to-reach places with a brush, the rest with a roller. A thick layer is absolutely not necessary; it must be covered with primer without drips and in a thin layer. Uneven coloring is not a problem, but there should be no gaps. I didn’t prime the rattan inserts; the paint applied well to them anyway.
They are easy to paint - just roll them with a roller; with a brush it is more difficult not to go beyond the edges. Wipe off any blemishes immediately with a cloth. Each layer was dried, as recommended, acrylic dries in an hour and, in principle, you can carefully turn it over and paint the door on the other side.
Stage 5.
I assembled the closet. I screwed the doors and handles. I removed the masking tape and cleaned everything up. At first I planned to keep the doors open for two days, I was afraid that they would stick. Nothing like that - you can close it right away.
Dresser.
Mirror.
Important!
Acrylic paints dry quite quickly “touch-free”, but polymerize for at least a month; with a primer the process can take even longer. The painted product can be used almost immediately (or it’s better to wait 2 days) and even wiped with a damp cloth. But within a month, the coating remains very vulnerable; it must be handled carefully, not scratched or rubbed with force. If shelves or horizontal surfaces are painted, then it is better not to immediately place things on them that may “stick”, wait until the paint “sets”. Although I immediately put everything I needed on the chest of drawers, nothing stuck).
Here you go. The work is labor-intensive, but I was pleased with the result. The paint job ends up looking no worse than the factory paint, no brush marks are visible. It holds up well too. I haven’t tried scratching, I use the furniture as usual. But usually I don’t scratch it))). Although I will conduct an experiment in a month. The room has been pretty updated). Alas, the photos after compression leave much to be desired; in fact, the colors are brighter and cleaner, but this is not so important.
If you also want to redo furniture and have questions, write and I will answer. And if such a rework seems complicated to someone, I assure you that it is not, labor-intensive - yes, but quite doable without any experience. You can just start with internal, unnoticeable parts, or with small furniture, a chair, for example. The rework took three days. At the same time, I managed to cook and... suffer from bronchitis + my leg is still slightly lame after the cast. The “disabled painter” was able to paint, which means you can too))).
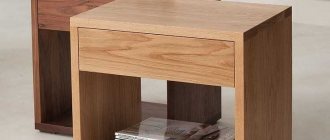
Table top made of chipboard or MDF
To finish a sheet of chipboard or MDF you will need plastic (laminated paper, polycarbonate, polystyrene).
Work progress:
- We cut out the necessary parts from the chipboard and connect them with a stapler.
- The joints between the chipboard base parts must be identical. If this is not the case, smooth them out with sandpaper.
- We make facings for the ends.
- We cut the facing part using a grinder.
- We glue the finishing material and secure it with light blows of a rubber hammer.
- We install the end trim level with the bottom edge of the tabletop.
- At the same time, coat the base and apron with glue.
- When installing laminate flooring, we use separators. After installing the sheet, remove the dividers.
- Smooth the surface with a roller.
- Using a router, cut a hole under the sink.
- When the structure is assembled, we sand all the edges.
Remove grease and dirt
The surface of laminated furniture must be thoroughly cleaned of any dirt and degreased. Use liquid detergents that dissolve grease. Afterwards, rinse the surface well and wipe dry.
If the furniture consists of many decorative elements and drawers, then it is better to disassemble it before painting. If the shape of the furniture is very simple or only the facades need to be painted, then we don’t touch anything.
Sand the surface
The laminated coating on furniture is made of PVC, so it is practically not wetted by water and, accordingly, paint. To improve the adhesion of the paint layer to the laminated layer, it is necessary to treat the surface with sandpaper, ideally with “zero” sandpaper. Use some form of respiratory protection or a respirator because the dust from this type of coating is very harmful.