Kinds
A very important role is played by the protective strip of the dishwasher - the same one that is also a sink. Thanks to it, moisture and dirt do not get inside the cut in the form of:
- drops;
- splash;
- condensate;
- fat;
- water vapor;
- cuts of meat, vegetables.
The corner model is used mainly where it is necessary to connect the elements of the tabletop itself. Basically, such products are produced on the basis of aluminum alloys. This guarantees:
- high strength;
- easy cleaning;
- attractive decorative properties of metal surfaces;
- versatility of colors, perfectly combined with a variety of tones in the design;
- resistance to temperature fluctuations and humidity (for a steel model such corrosion resistance is difficult to achieve).
The slot strip in most cases belongs to the already mentioned protective category. Please note: such products may also be called docking or connecting strips. There are no strict standards here. The overlay structure can also play a protective role, but one must understand that it is only suitable for straight surfaces. There are also rear and front, wide and narrow, front and side, T-shaped and U-shaped, right and left plank structures.
The difference may also apply to the base material. Of course, wood and ferrous metal are not used. However, the already mentioned aluminum and stainless steel have serious competitors. In some cases, the bar is improvisedly replaced with a thick silicone strip. This is a practical, but not very attractive solution.
Profiles for processing furniture edges
You can trim the edge of furniture not only with edge tape. There are also furniture profiles that are attached mechanically. They are available in two sections - T-shaped or U-shaped (also called C-shaped).
For T-shaped furniture profiles, a groove is milled in the edge being processed. The profile is hammered into it with a furniture (rubber) mallet. The edges are cut at 45° to make the angle look attractive. It is brought to perfect condition with fine sandpaper. This type of profiles is produced from PVC and aluminum; with the same installation method, they look very different, and the differences are significant.
T-shaped furniture profile for processing furniture edges
In width they are available for laminated chipboards of 16 mm and 18 mm. There are also wide ones, but they are much less common, since they work less with such material.
Characteristic
Countertops used in kitchens are mainly made from particleboard. They are additionally coated with a material that increases the wear resistance of the surface. But the problem is that there is no such protection at the bottom and along the edges. If the lower part of the structure is still completely hidden from prying eyes, and can be safely ignored, then it is almost impossible to do without protective end strips for the tabletop. Otherwise, a lot of dirt and dust will collect there; the effects of strong heat should not be ignored either.
Each bar has its own specific work profile. It is customary to distinguish between end and connecting (also known as slot or, otherwise, connecting) modifications. The first type allows you to close insufficiently processed edges. Where there are end strips, the following do not get cut:
- liquids, including water;
- condensate;
- spray.
End strips are considered universal because the same type can be installed on countertops of any format, even with pronounced curved geometry. Installation is usually done using self-tapping screws. They are inserted through special holes prepared in advance. The second type of planks performs such an important task as decorating the junction of two parts of the headset.
Typically an aluminum strip is used. Contrary to popular belief, it is by no means thicker than its steel counterpart. Moreover, elegant appearance and resistance to food acids mean a lot. “Winged metal” is lighter than steel, which may not seem too significant, but saving on weight is never superfluous. The service life of aluminum is quite long, and it can be used almost unlimitedly.
PVC strip
A more progressive and aesthetically pleasing way. True, its implementation requires some skill, but after practicing on scraps, you can master this method.
The edge, resistant to abrasion and moisture, will ensure long-term use of the tabletop in any interior.
When gluing the PVC edge, follow the following sequence.
- Cut a strip of finishing material 2 cm longer than the edge to be processed.
- Heat the edge with a hair dryer on the glue side or with an iron on the front side.
To glue the edges, use an industrial hair dryer with a heating temperature of 250 degrees.
If you are using a material without an adhesive base, use “88-Lux” glue or something similar.
Apply to the cut strip and wait for the time specified according to the instructions. In 2-3 minutes. Before the end of the period, cover the end of the tabletop with a thin layer of glue.
The blade of the knife should go along the plane of the part, thus evenly cutting off the protruding part of the edge.
The edge treated with fine-grit sandpaper will be even and smooth.
A properly selected and glued edge will give the tabletop an attractive appearance, and it will serve you for many years.
You can also get such a smooth and neat edge yourself.
What are they?
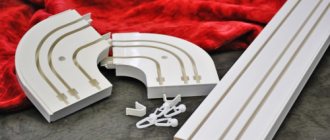
In the assortment of modern manufacturers, corner profiles play an important role. Of course, they are used to connect parts of the tabletop mechanically end-to-end at a certain angle. The name “docking” is usually assigned to an element that is mounted at a right angle and plays an increased decorative role. The end product covers the initially uninsulated end and prevents negative impacts on it from the external environment. The thickness and radius of a particular option always play a key role in selection.
But it is always necessary to clarify what exactly the manufacturer or supplier means by a certain item in the catalogue/contract, receipt or price tag (label). So, slotted strips are just an alternative name for connecting profiles. It’s just that the terminology in this area is not yet well established, and one cannot count on uniformity of names. Another example is that the concepts of wide and narrow bars have little to say to the consumer.
The T-shaped model has an important specific feature - it ensures the most accurate and careful connection of the parts of the tabletop. Even if these parts are very heterogeneous in terms of geometry and mechanical qualities, the creation of an integral composition is guaranteed
Most often, profiles are made from aluminum alloys, since this particular substance - not ferrous metal, not plastic or stainless steel - has a number of important advantages:
- chemical inertness;
- ease;
- strength;
- reliability;
- pleasant appearance;
- resistance to high and low temperatures, water vapor, fats and organic acids;
- hypoallergenic.
A very relevant characteristic is the size of a specific bar. You can often find designs with a thickness of 26 or 38 mm. Such products in many cases have a length of 600 mm - and this size ratio was chosen by engineers based on familiarity with the practice of use and reviews.
But many companies are ready to offer profiles of other sizes. Thus, planks with a thickness of 28 mm are regularly found in the catalogs of furniture companies. These can be simple connecting, end, and corner structures. But models with a size of 42 mm usually need to be ordered additionally - they are a rarity in manufacturers' catalogs. However, with the modern variety of furniture workshops, this, of course, is not a problem.
What is important is that a rounded bar, regardless of its dimensions, is the safest. This property will be most appreciated by those who have small children at home.
However, even for the most brutal adults, an unnecessary collision with a sharp angle is unlikely to evoke positive emotions.
Finally, it is worth considering the topic of painting the connecting strips. Like the countertops themselves, in most cases they are black or white. But the choice of users naturally does not stop there.
Thus, in interiors that are neutral in spirit, many users consider a beige tone to be the best solution. It perfectly suits the “kitchen” mood and does not excite the nerves too much. Sand color is suitable for rooms with light wooden facades. It is also good where the design is different, but there is a lot of light.
Other main options:
- metallic - for practical people who love to cook in their kitchen;
- dark brown color - an expressive rich contrast in a very light interior;
- green (including both herbal and light green) is an excellent choice for romantics, for families with children, for those who are not used to being discouraged and upset;
- red - a bright accent against a white or moderately dark background;
- orange is an excellent combination with brown or other moderately saturated colors of furniture;
- pink - creates a spectacular and at the same time devoid of any aggression mood;
- oak - expresses traditionalism, solidity and respectability;
- A milky white shade is suitable for diluting a very dark-looking kitchen.
So, what do you need for gluing?
Firstly, you need special stops into which the part is inserted.
They are usually made from waste chipboards yourself (they can be clearly seen in the photographs).
At a minimum, there should be two of them, in case the part is large.
Secondly, you need an iron.
It should be heavy and on a spiral (old versions). In this case, it will maintain a high temperature for a long time (it is measured visually with a finger on which there is saliva).
Such irons can be bought at flea markets.
Warm it up and try it.
It should not burn the edge, but it should also melt the glue that is applied to its reverse side well.
The measure of all this, of course, is experience. You just need to try it a couple of times and everything will become clear.
Next, you need to have either a sharp knife, or a scalpel, or a razor, etc. They trim off the excess edge hanging from the edges of the part.
And the last thing you need is a block with small “knife” stuffed on it. The processed ends are smoothed with it.
This is done so that the glued edge cannot be accidentally torn off.
Yes, I forgot. You also need a piece of felt to press against the newly glued edge.
And the process itself is quite simple
The part is installed on the stop.
According to its size, a piece of the edge is broken off (cut off) (with a small margin) and placed on the desired edge.
After this, a heated iron is passed over it “under pressure”, while at the same time rubbing the glued part of the part with felt with force.
When the edge has “set”, it is cut with a knife.
This operation must be done correctly.
The blade of the knife should go along the plane of the part, thus evenly cutting off the protruding part of the edge.
If it goes at an angle to the plane of the part, it will constantly “cut” into the corner edge, and this will leave chips.
After the remains are cut off from the part, all edges along the edges of the part are rubbed down with a sandpaper.
If the part is , or with curves, then the situation is more complicated.
First, you need to process such a part with a router so that it has the correct edges, and only after that proceed to gluing.
But in this case, the whole procedure, of course, will be more complicated.
Therefore, I repeat: order these things “outside”.
That's all.
In furniture production, edging is necessary to protect the end edges of the product from chips, cracks and other damage, and it also protects against moisture and formaldehyde vapors.
You will learn about what types of edges there are, as well as methods for gluing them and how to glue the edges with an iron and hairdryer from this article.
Tabletop connection
Required Tools
Whatever the type and color of the plank for the countertop and the countertop itself, it will have to be carefully installed. Connecting a pair of chipboard panels together is the only option for obtaining a corner structure. For work you will need, in addition to the bar itself:
- a pair of clamps (ties) for the tabletop;
- silicone-based sealant (colorless composition is recommended);
- household electric drill;
- metal saw;
- metal drills;
- Forstner drills of various sections;
- Phillips screwdriver or screwdriver;
- 10mm wrench;
- pliers;
- stationery pencil (the hardness of the lead is not important);
- a soft scrap cloth to wipe off excess sealant.
Technology
Let's say you need to join a pair of chipboard panels at an angle. In this case, a “no segment” connection can be practiced. Simply place 2 sections on the kitchen cabinet at right angles. But docking “through a segment” can also be made. This solution is more cumbersome. They resort to it so that they can install a corner cabinet.
In any case, the joint should be as tight as possible. The smaller the gap separating the ends, the better. Of course, it is difficult to achieve such a result on oval or rounded countertops. But even in this case, it is not necessary to call installers. You can simply install a special corner connector - its cost is much lower than the cost of the services of a specialist (who, moreover, will most likely buy a similar product).
A more aesthetically pleasing option for installing prefabricated countertops is to attach them using the so-called Euro-sawing method. This approach is suitable for products regardless of the edge shape. In such a case, the plank will have a more auxiliary and decorative role. It will only provide additional reliability for the connection of elements. The main fixation will be done by sealant and wood glue.
But euro saw is rarely used due to its high cost. In most cases, functional joining profiles are still used. Before marking the positions of the clamps, you need to make sure that the fastening will not interfere with the installation of the equipment in the countertop. And not only appliances, but also built-in sinks.
Another circumstance is that even if there are several ties, the prefabricated product will definitely be inferior in rigidity to the monolith. Therefore, the tabletop at the bottom will have to be firmly supported. After marking the screed points, the connecting strip will need to be attached to the end of the tabletop. Next, future new slots are marked with a pencil. A metal saw will help you make cuts along the lines.
Next, the internal excess is broken off with pliers. Using a hacksaw, saw off the plank to the desired size, leaving only a margin of 1-2 mm. The last thing to worry about is the reliable immersion of the screw heads. They should fit flush into the bar; if this is not ensured automatically, resort to additional countersinking. Next steps:
- using a 35 mm Forstner drill clamped in a drill, knock out blind holes to a predetermined depth, which guarantees the placement of the clamp pin exactly in the middle of the thickness;
- Having prepared blind holes, make 8 mm holes in the tabletop for studs;
- for the sake of increased accuracy, this hole is passed sequentially with a pair of drills;
- open longitudinal grooves are prepared in the countertop;
- tighten the connecting strip on the tabletop with self-tapping screws;
- cover the strip with sealant;
- insert the pin into the groove and into the hole of the mating part;
- evenly (one by one) tighten the parts of the tabletop with a wrench;
- As soon as the sealant begins to stick out, stop tightening and wipe the stain with a cloth.
Features of connecting strips for countertops in the video below.
Tools
If you decide to glue the edge yourself, check that you have the tools. Prepare before starting work:
- Iron, which is necessary for gluing with melamine edge;
Furniture edges can be glued at home using a regular iron.
A hair dryer is the most convenient method of heating the edge.
It will become a convenient device for pressing the edge tightly.
The processed ends are smoothed with it.
You will need scissors to cut the desired length of the edge.
It cuts off the excess edge hanging from the edges of the part.
Use glue if your material does not have an adhesive base.
With a solvent you can easily remove traces of glue.
It is convenient to remove excess glue with a rag soaked in solvent.
To fix the PVC edge, you can use a clamp and a wooden block. If possible, use a hand router to finish the edging.
The router is expensive and it is not profitable to buy it for one-time pasting.
Prepare your workspace, taking into account the space for turning the tabletop. And, most importantly, buy the appropriate melamine tape or PVC edge.
Choose a ribbon that matches the color of the countertop.
Fastening
In the vast majority of cases, the installation of countertop slats is carried out during furniture assembly. But sometimes people try to save money or there is a need to replace products. Then you should install them yourself. For work you will need a sealing agent and self-tapping screws. Please note: if there are no holes for fixing, drill them yourself.
The sealant must be applied around the entire perimeter of the installation. The standard installation method implies that the strip will be secured with self-tapping screws last, when the sealant has already set tightly
Important: do not confuse left and right products, as in this case they will look unaesthetic. Another subtlety, which, unfortunately, is often forgotten, is cleaning the surface before applying sealant.
You should not categorically cover the joint between the apron and the tabletop using a flexible plinth. This approach immediately reveals very greedy people with poor aesthetic taste. The best option is to order the baseboard along with the tabletop itself. If for some reason this is impossible, you should at least contact the same company where it was made with such an order. Then no problems can arise. There are also other options:
- medium-length plinth ("apron without apron" system);
- an improvised side from the apron itself;
- use of epoxy-based grout;
- use of sealant (helps when joining products from a variety of materials).
The end of the bar often needs to be modified. This is expressed in the removal of a hard rib. It can be very annoying later on. Screws and self-tapping screws should be screwed in carefully, but all the way. If this is not possible, you will have to enlarge the hole or change the hardware.
How to glue an edge without adhesive
If you have an edge without an adhesive layer, then the glue will have to be purchased separately. After cutting the edge to the desired length, apply adhesive. Moreover, it is better to lubricate both the edge and the end with glue to ensure better adhesion. Then press the edge using a stiff roller.
If you do not have the opportunity to purchase an edge with an adhesive layer, you will have to buy glue along with the edge.
Gently roll the roller along the edge several times. If excess glue appears, remove it immediately with a damp cloth. After the glue has completely dried, carefully trim the edge.
Installation
Or it becomes unusable over time and requires replacement. There is no need to be afraid of such work - it is quite within the capabilities of the most ordinary people. All that is required is sealant and self-tapping screws of a certain cross-section. Only in some cases, when there are no holes in the tabletop itself, either at all, or in those very necessary places, it is necessary to drill it. One way or another, after making sure that all the required holes are ready, apply sealant; Then all that remains is to screw the product with self-tapping screws and calmly use it.
Drilling artificial or natural stone is done with a drill at the lowest speed.
Types and installation of planks in the video below.
Characteristic
A countertop plank is a product that is responsible for the aesthetic characteristics of the structure as a whole, for its visual perception. And it’s not worth separating even such a seemingly abstract moment as the coloring of the plank from the tonality of the main element. Traditionally, lunch in the kitchen is usually spent at a table with a white or very light profile. There is absolutely no point in challenging this old, time-tested practice. But there are times when only professional designers can make the right decision.
Often the color is selected taking into account the colors of the lower hanging or floor cabinets. But the opposite solution is often practiced (with the task of conscious contrast).
They are valued for their visual luxury and sense of good taste.
What is important is that such effects are achieved very simply and without any significant additional effort.
But you should think about choosing this or that color later, but for now it’s useful to go back a little and figure out what the design itself is. A universal sealing block is in demand because the tabletop is continuously exposed to intense mechanical (and other) influence. And apartments often lack the basic production length of countertops, which is 3-4 m. Of course, they are extended, but the places where they are extended are always subject to destruction, and this will be confirmed by any engineer or a person who simply understands physics. The flexible wall profile solves the same problem as the front edge material, but its placement is somewhat different, as the name already says.
Where should edging be done?
As mentioned earlier, edging is necessary not only to make the product look beautiful. In addition, it helps protect furniture from moisture and households from exposure to chemical elements. Based on this, we can conclude that edging is necessary:
- in the kitchen - during family meals, household members should not inhale fumes of resins that are in the chipboard material, as well as in the kitchen space there is high humidity and water is often used, therefore, in order to avoid premature failure of furniture, swelling of surfaces from moisture and other unpleasant consequences from interaction with moisture, be sure to trim the ends with an edge.
- in living spaces - a table made of chipboard can be in a children's room, and children will study lessons behind it, or it can be in a study or office - it doesn't matter, in all these cases safety and protection from formaldehyde is important, which edging can provide.
Description and purpose
From time to time, when arranging their homes and during major renovations, people try to update their furniture. In this case, it has to be modified frequently. This also applies to kitchen sets and their components. You can do this work yourself without any problems. Of course, for this you will need just the connecting strips for the countertops.
Such products are designed, as their name suggests, to connect dissimilar parts of the structure with each other. It should be noted that the docking assistant, along with a purely practical function, is no less responsible for the aesthetic filling of space. Where they are installed, the edges do not crumble or swell from drops and water vapor. Similar products are placed at the joints; They are also usually used to decorate the corners of furniture.
You should purchase the planks in the same place where the furniture itself was purchased. This significantly reduces the risk of error and technical failure. It is recommended not only to get acquainted with the catalogs, but also to consult with specialists. In favor of special connecting products they say:
- attractive appearance;
- excellent resistance to corrosion and mechanical damage;
- long period of operation;
- Suitable even for wet conditions, for contact with sharp objects and caustic, aggressive substances;
- compatible with postforming countertops.
Useful tips
Every furniture maker has little tricks that help get the job done quickly and efficiently:
- The purchased edge may or may not have an adhesive applied. The list of tools and materials, as well as the work algorithm, will depend on this. If there is an adhesive layer, then, placing the edge against the end, go over it with an iron (at low temperature or in the “synthetic” mode), or with a hair dryer. Be sure to ensure that the cut surface is completely covered by the edge.
- Start heating only after you are sure that the edge lies flat and there are no waves or bends. The material is ironed until the edge has cooled completely.
- If you are unable to purchase special glue, use universal glue. For a strong connection, the surfaces must be clean, free of dust and crumbs.
- To make the connection as strong as possible, apply glue to both surfaces. And for smoothing, use a hard roller; it is better if the rolling surface is small.
- The protruding parts are removed only after the adhesive has “set.” And the chipped areas are treated with fine sandpaper.
Remove any remaining edges with a utility knife.
This kind of work can be done even without special skills and professional equipment. There are simply certain rules and features of the work process that you should have a clear understanding of.
Do-it-yourself tabletop edging at home is a simple process
Let us immediately note that if you use high-quality materials and adhesives, the work process will not be difficult for you. It is quite possible to use ordinary household appliances (iron, for example) as tools.
But furniture made or repaired by yourself is guaranteed to create coziness and comfort in your apartment.
Choose a quality edge!
Choice
But limiting ourselves to size alone is not everything.
In order for the plank for the end of the tabletop to fulfill its function clearly, you need to pay attention to other subtleties. So, along with aluminum products, plastic structures can sometimes be used
But they are not durable enough and are easily damaged by sharp objects, so you can choose such models only as a last resort when there is an acute shortage of funds. Metal structures should ideally have a matte appearance so that any roughness is less noticeable; Otherwise, it is enough to consult with sellers or countertop manufacturers.
Chipboard end for painting
In this case, cutting can be carried out without much danger, since chips and defects can easily be corrected with putty. If we are working with laminated chipboard, but still want to paint it, then we apply primer to the entire product. Primer GF-021 or Otex from Tikkurila is suitable. If sanded chipboard is used, then priming is not necessary, although it is advisable. We putty the end. I use acrylic putty with fine filler. We skin it. We should get a smooth rectangular edge. Sometimes this requires several iterations of sanding and putty. When we are happy with the edge, it needs to be secured, otherwise it will chip or crack. Putty is not a very durable and reliable material. We glue the edge with a construction bandage 4 - 5 cm wider than the end. We use PVA glue. We bend the bandage so that it sticks to the end of the chipboard and extends onto the upper and lower planes. See picture. After the glue has dried, we fill the construction bandage with fine acrylic putty. Usually one putty is used for all these works.
We especially pay attention to the strip where the bandage ends and the chipboard itself begins. Here you need to putty especially carefully so that after sanding and painting the transition is absolutely not noticeable
We dry the putty, sand it with fine sandpaper, and paint it.
Despite the monstrous appearance on the diagram on an enlarged scale, in reality the presence of bandage and putty on the end of the chipboard, if everything is done correctly, is completely unnoticeable.
Unfortunately, errors are periodically found in articles; they are corrected, articles are supplemented, developed, and new ones are prepared. Subscribe to the news to stay informed.
If something is unclear, be sure to ask!Ask a question. Discussion of the article.
More articles
Do-it-yourself arc welding. Electric welding. Self-instruction manual. Weld seam... How to learn welding yourself...
How to make a reliable heating burner using waste oil? Scheme... Let's make a reliable heating burner for testing ourselves. Homemade o…
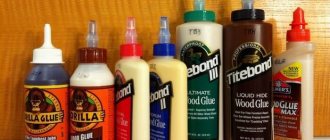
We glue firmly, firmly, correctly. We choose, select the good one, the best one, ... Let's learn how to choose the right glue and glue it. The best glue is suitable and correct...
Homemade extension ladder. With my own hands. Prefabricated, collapsible, sc… How to make a reliable folding ladder yourself….
Close the junction of the bathtub + walls, tiles, tiles. Glue, glue, glue b... How to reliably and durablely close the junction of the bathtub and the wall? If the wall is made of panels, slabs...
How to paint furniture with varnish. A table, a wardrobe, shelves... There is old lacquered (polished) furniture that is seriously scratched, the varnishing is...
Reasons for the flame going out, the stove burning weakly or too strongly.... Review of kitchen gas stove malfunctions. Weak or too strong combustion,...
Welding, electric welding, machine, welder. Transformer, rectifier... How to choose a welding machine....