The edge is used to protect the end edges of parts made of MDF, chipboard, PVC from abrasion, moisture and impact. This finish performs a decorative function, and also gives the edges and corners of furniture strength and protects people from the harmful effects of substances such as formaldehyde, which is used in the production of compressed wood boards.
If the border is damaged or peels off, urgent repairs are required. And in this case, the primary task is to select the material and glue for the edges made of PVC, melamine paper or other material.
What types of edges are there for furniture?
Edge materials hide the inside of the chipboard and extend the life of the furniture. Another task of the edges is to reduce the evaporation of the resins with which the slab material is impregnated. There are several requirements for edge materials:
- decent appearance - aesthetics;
- strength and durability;
- reliable fixation on the edge of furniture;
- ease of installation.
The materials offered by the industry fully comply with these requirements. All that remains is to choose.
Paper and melamine
A border made of paper impregnated with a special resin (melamine) is the most economical option for edge processing. Thick grades of paper are given additional strength and resistance to external influences using melamine. It is easy to work with such material - it does not break and bends at any angle.
The most common material thickness is 0.2 and 0.4 millimeters. For ease of use, the melamine edge is coated with adhesive that is activated when heated.
Melamine paper is not afraid of water and does not fade under the influence of the sun, and is resistant to scratches and household chemicals. The main disadvantage is that it wears out due to friction and is not durable. It is advisable to install such edges on areas of furniture that are not constantly exposed - on the back of shelves, tabletops.
PVC
Polyvinyl chloride is a durable material that has found application in various fields of activity, including medicine. PVC edges are suitable for finishing façade areas of furniture. The manufacturer produces the material in different colors, it is easy to choose an edge that matches the color of the product or a contrasting one.
Advantages:
- strength, long service life with high-quality stickers;
- flexibility - the ability to attach to furniture with any edge curvature;
- resistance to any type of influence - chemicals, sun, friction.
See also
Description and technical characteristics of Uranium glue, rules of use
A large selection of materials in thickness (from 0.4 to 4 millimeters) and width allows you to create different types of furniture design. Polyvinyl chloride edging materials are available with an adhesive component or simple. The disadvantage of PVC edges is their sensitivity to temperatures - furniture should not be left in the cold, and when gluing it should not be heated too much.
Made from ABS plastic
Expensive types of edge material include ABS plastic. It is usually used on more expensive furniture models. The advantages of thermoplastic edges include:
- high quality material, absence of harmful components in the composition;
- impact and wear resistance;
- does not lose color or appearance during long-term use.
The edge is available in matte and glossy versions. The disadvantage of the material is the high price. ABS plastic is used when high durability is required, operation in aggressive environments - temperature, chemical exposure.
Veneer
Veneered edges are made from a thin layer of wood, in most cases, in the production of furniture. Working with the material at home is difficult - it requires experience and knowledge. The material is expensive; it is used to decorate veneer furniture.
Acrylic or 3D
A two-layer edge is made from acrylic - the lower part has a three-dimensional pattern that performs a decorative function, the upper part is removed after gluing and serves for protection.
The 3D effect around the edge adds beauty and continues the pattern of the main part of the furniture. Things look more cohesive, the edge works to create the overall look and doesn't look like a simple edge treatment. The downside is the high price, but there are many advantages - from aesthetics to high strength.
Hot melt adhesive
Hot melt adhesives have long taken a strong place in professional furniture production. Therefore, if you are going to put production on stream, it is better to switch to this type of adhesives and the corresponding equipment, which provides a fairly high speed of execution and more stable quality.
According to their physical properties, hot melt adhesives are classified as thermoplastics. This means that when they are heated, they become highly elastic and quickly turn to a solid state when cooled. High fluidity and strength when hardening are given to this type of adhesive by the presence of ethylene vinyl acetate polymer (EVA) in their composition. They also have excellent compatibility with different types of materials.
It is necessary for specialists who manufacture furniture at a professional level to know the properties and technological features of using these adhesives. The main disadvantage of their use is that you need to have the appropriate equipment for the job. The application and heating of hot melt adhesives to parts that need to be glued is done using hand guns or special machines.
Types of profiles
The edges of furniture are not only processed with edgebanding. One of the decorative and protective methods of finishing cuts is profiles - special linings that are put on the cut or inserted into pre-cut grooves in the chipboard. Profiles change the look of the furniture, serve as an additional decorative element, and effectively protect the inside of the chipboard from the effects of the external environment.
T-shaped
To process the edges with a T-shaped profile, a groove is pre-cut in the slab using a milling cutter. At the final stage of furniture assembly, the profile is inserted into the prepared hole (hammered with a soft hammer). T-shaped profiles are made with a girth or with simple overlays on the edge. Typically aluminum or PVC is used.
U-shaped
C- or U-shaped profiles do not require cutting a groove in the slab; they are simply put on the edge and secured with glue. It is important to choose a good adhesive and attach the trim tightly to avoid voids. U-shaped pads are produced from soft and hard materials. Rigid parts are stronger, but installation on rounded edges is more difficult. The profile will have to be heated to give it flexibility and secured with tape until the glue dries.
Important: the edges on the profile hide poor-quality edge cuts and small chips on the surface of the facades. The profile not only protects the chipboard, but also decorates the furniture.
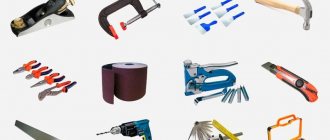
How to stick it yourself
For work you will need a sharp knife, gloves, glue or a heating device, depending on the selected edge parts. You also need to stock up on a rag or roller to press the parts together.
See also
How to use foil glue correctly and a review of the best brands
Using an iron or hair dryer
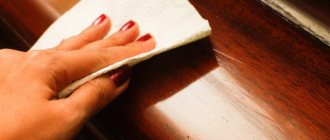
The melamine and PVC edges are coated with hot-melt adhesive, which becomes sticky when heated. To work with such products, you need an iron or a hair dryer. The surface on which the edge is glued is installed horizontally. Cut a piece of material 2-3 centimeters longer than the length of the cut. Set the iron to mode 2 (“Silk”) and put on a protective cover (cover the sole with a cloth if there is none).
Run the iron along the edge, melting the glue. It is better to start work from the middle and move one by one to the edges of the part. Do not press too hard on the sole so as not to move the edge and squeeze out the glue. After the glue has melted along the entire edge, the iron is removed and the part is pressed with a rag, ensuring a tight connection.
The edges are cut close to the end with a sharp knife. If the edge is wider than the part, it must be cut lengthwise. Use a knife and a metal ruler. For PVC it is better to use a manual milling machine; melamine can be easily cut with a knife. The cut edges are smoothed with sandpaper to remove burrs.
Sticking tapes without glue
Experts consider non-self-adhesive edges more convenient and reliable. You need to purchase glue that is recommended for this material and follow the instructions exactly.
The technology is simple:
- apply glue without excess to the cut and edge;
- wait the recommended time (if required in the instructions);
- carefully combine the parts;
- Using a roller or folded cloth, press the edge firmly against the edge of the furniture;
- Any leaked glue is quickly removed so that you don’t have to use a solvent.
The parts must be pressed tightly and ironed with a cloth until they stick together to prevent bubbles from forming. After completion, remove the glue particles, trim the ends, and sand the edge with sandpaper.
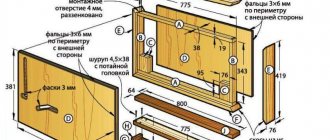
Material and tools for work
To glue the edge to the tabletop with your own hands, we need the following tool:
- The iron is a household iron, it will be used as an edge heater. Can be replaced with a hair dryer;
- Construction knife with new blades;
- Fine-grained sandpaper;
- Scissors.
We prepare from the material:
- The tabletop itself;
- ABS edge according to the color and thickness of the tabletop.
How to glue on chipboard and chipboard at home
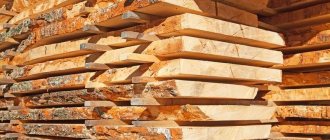
The structure of particle boards is loose, it is sawdust and shavings mixed with glue and pressed. Due to this looseness, the material is resistant to deformation and splitting, as well as flexibility.
See also
Technical characteristics of Bustilat glue and instructions for use
The unsightly interior is visible on the chipboard cut; the material is uneven and often crumbles. Experts recommend putting putty on the cut before applying the tape to level the surface and ensure a strong connection to the edge. Use universal acrylic putties.
The cut is puttied, wait until it dries (carefully remove excess product from the facades). Then it is treated with medium-grain sandpaper. If there is no glue on the edge, choose the one recommended by the manufacturer. It is also worth stocking up on glue solvent to remove dried smudges if necessary.
From the author
The background to the work described in this article is as follows. For the kitchen, a 2400 mm long kitchen worktop was ordered. Since the tabletop is sold in 3000 mm pieces, the manufacturer received a completely finished tabletop 2.40 cm long and the remainder of the tabletop 60 cm. It was this remainder that had to be glued to the edge of the tabletop.
Installing a countertop is a complex and time-consuming job that requires special tools and practical skills. Installing a countertop without practicing such work is almost impossible. Therefore, I recommend that if you do not have similar work experience, you invite professionals to install the countertops. The craftsmen of the company santex-mastera.ru, who can be invited on the website https://www.santex-mastera.ru/, will carry out professional installation of the countertops, using modern tools and linking them to your kitchen furniture.
Common Mistakes
The most common mistakes made by inexperienced craftsmen include:
- Bubble formation. Occurs due to weak heating of the adhesive base or poor pressing of the edge to the part. You will have to reheat it with the iron and press it more carefully.
- Edge offset. It is important to eliminate this defect quickly by returning the part to its place. Otherwise, you will have to tear off and glue a new piece.
- There were pieces of dried glue left on the furniture. The adhesive must be removed while it is hot, before it dries and hardens. This is done with gloves to avoid damaging your hands.
Hardened glue is removed with sandpaper or solvent. It is important to choose the appropriate remedy.
Tip: edging is necessary even for invisible areas of furniture - it will protect the chipboard from absorbing moisture and deforming the material.
Edging technology at the manufacturer's factory
In production, edge gluing is carried out using specialized equipment; the following machines are popular:
- Straight-line model.
- Curvilinear samples.
In the first version, craftsmen fix the strip exclusively in a straight line, the detailing method is taken as a basis, and the process starts immediately after cutting the chipboard slab.
The second case is more complex; professional work requires cutting out parts; a manual milling cutter is intended for this stage, and at the moment of implementing the plan, specialists use pre-thought-out diagrams.