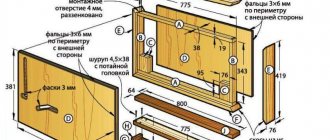
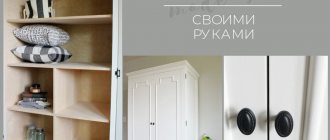
Furniture board is a specific type of wood material, created by gluing standard planed wooden blocks. It is effectively used to create various types of fittings and coatings. Making a furniture panel with your own hands at home is not at all difficult, so this work can be done independently by every person. The resulting structures are natural and environmentally friendly, and at the same time much more attractive than chipboard or MDF.
Selection and preparation of materials
Creating a furniture panel with your own hands at home involves the use of different types of wood. Most often, birch or oak, beech or aspen are used for this, as well as larch and various conifers.
Each type of wood has its own characteristics, so before making a specific choice, it is recommended to determine in advance the operating conditions under which the resulting contract will be used.
Furniture panels are most often used to create various furniture and doors. They are distinguished by the presence of specific internal stress, so during the work you need to be careful so as not to damage the integrity of the structure. Improper work can lead to deformation of the finished product.
The main advantages of furniture panels are:
- environmental friendliness due to the use of natural ingredients and high-quality glue;
- the exquisite appearance of the resulting furniture and other structures, but this is only possible with proper processing of the panels;
- high practicality, since wood has a homogeneous structure, which allows you to restore broken or unattractive elements;
- making furniture panels is an incredibly simple task, and a small amount of money is spent on this process;
- furniture made from panels is durable and attractive;
- the products do not have any cracks or other deformations, and are not subject to significant shrinkage.
The main factor in obtaining a high-quality shield is the competent choice of material for these purposes. Typically, furniture panels have a thickness of 2 cm, so blanks of the optimal size, as well as those with the required thickness, are initially prepared. Since the boards will certainly have to be planed and then sanded, they should be purchased with a reserve, so their thickness should be 2.5 cm.
When choosing a material, you should focus on the type of wood, as well as the quality of the boards. The wood must not be uneven or warped. It must be of high quality, properly dried and completely free of any rotten areas. Therefore, you should carefully inspect the boards before purchasing. Additionally, the accompanying documentation for the material is studied in detail.
Pine
Aspen
Larch
Oak
Beech
Birch
Subtleties of application
Wooden blanks are less capricious; the fibers actively absorb resin-based compounds and liquid or semi-liquid glue. A furniture façade made of MDF is durable, pressed cardboard; it will swell due to humidity, and when it dries, it will deform and “shrink.” Veneer has similar properties; like MDF, it is glued with plastic compounds: PUR, plastic PVA (for example, from Elmers or Titebond).
It is best to glue plywood parts with epoxy glue; it is quite strong, but in some cases it is difficult to use due to its high density. An alternative is Moment glue or a rubber-based composition. They provide a strong seam that will withstand regular vibrations.
For chipboard, contact adhesive or PVA is used (using a press or clamps), but with laminated chipboard it will be more difficult. Parts made of laminated chipboard need to be sanded and glued with the same contact adhesive, however, not every varnished coating can be sanded. If the coating cannot be removed, you can use PUR hot melt adhesive.
How to use glue correctly?
The technology for gluing furniture is based on the general rules for joining wood blanks:
- The surface is cleaned of any contaminants and thoroughly dried (for using PUR, humidity, on the contrary, will speed up the gluing process).
- The adhesive layer should not exceed 5 mm, but different manufacturers have different recommendations. The optimal seam thickness is 3 mm.
- Consider the color of the glue - the white or yellow composition will be visible under a layer of varnish or stain; for decorative work it is better to purchase transparent glue.
- The composition is applied to both sides with a wave, unless otherwise indicated in the instructions, leveled with a spatula or brush and compressed tightly (placed under a press, tightened with self-tapping screws, clamps).
- Most often, the time for complete polymerization/hardening is a day; contact adhesive dries faster - from 5 seconds to 15 minutes.
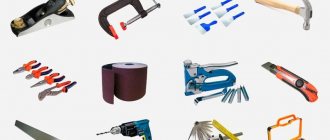
Required Tools
Do-it-yourself furniture panel gluing is done using standard tools. Usually they are available to every man who prefers to do numerous housework on his own. Therefore, only the elements are prepared:
- planing machine that ensures optimal preparation of wood;
- a tool for joining and gluing individual wooden blocks;
- belt type sander;
- construction level, allowing you to get really even panels;
- coarse sandpaper;
- flat sander.
These tools will be enough to make a shield, so no expensive devices will be needed anymore.
Rule 6: Compression Force
If you tighten the clamps loosely, the shield will not stick together well - the seams between the workpieces will be “weak.”
If, on the contrary, you tighten it, the shield may become deformed. Therefore, you need to find a middle ground.
This is very easy to do: pay attention to the joints being glued.
If the glue appears as a uniform strip or droplets equidistant from each other, then the compression force is sufficient.
Manufacturing rules
As soon as the tools are completely ready for the planned work, the actual production procedure begins. How to make a furniture panel? This process is not considered too complicated, but in order to eliminate possible errors or problems, it is recommended to study the correct instructions in advance. To do this, follow the following steps:
- Initially, wooden boards are cut into separate bars of the required size, and it is important to make the cuts in such a way that they are strictly at right angles;
- The presence of any unevenness or other defects is not allowed, since in this case it will not be possible to properly glue the furniture board together;
- if minor distortions are detected, they can be eliminated with a conventional planer;
- An important point in production is the combination of the resulting blanks, since they must be the same in texture and color, as well as in other important parameters;
- After selecting the elements, they are marked so that during the gluing process there are no difficulties with their correct location.
To ensure that all stages of the process are completed taking into account the main nuances, it is recommended to watch the training video in advance.
Making bars
We process with a machine
We mark each block
DIY laminated wood
Before gluing, the parts are processed; this is done not only to clean the surface, but also to open the wood pores. When applied, the adhesive composition penetrates through the pores into the wood structure, into the intercellular space, and when hardened, it forms many thin threads (webs) that reliably “stitch” the workpieces together. The strength of a correctly executed seam exceeds the strength of the wood itself; when testing for fracture, the part breaks not at the gluing site, but along the whole wood.
Gluing wood allows you to obtain products with better parameters than solid ones. During the gluing process, elements that are suitable in texture and shade are selected, damaged, cracked and knotty areas are rejected. As a result, the glued parts have greater strength than ordinary wood, and by gluing the finest veneer onto the front surfaces, the products are given the appearance of the most valuable species. Wood glued according to all the rules is much less likely to warp, crack and dry out than solid wood.
Element gluing technology
After all the bars have been prepared, you can begin gluing them directly, which will ensure a high-quality shield. This procedure is also divided into successive stages:
- a device is selected that makes it possible to glue the bars together, and it must be even, and usually a regular sheet of chipboard is used for this;
- strips are fixed along the edges of the sheet, and their height depends on the parameters of the prepared bars;
- bars are laid between these slats, and they should fit tightly to each other and an attractive pattern should be formed from them;
- if there are cracks, they can be easily eliminated with a standard jointer;
- then the bars are glued together, for which different types of glue intended for wood are used, but the use of PVA glue is considered optimal;
- the entire surface consisting of bars is completely spread with glue, and it is important that the product is evenly distributed over the surface;
- the lubricated elements are pressed tightly against each other;
- two more such planks are laid on the slats, fixed to the chipboard sheet, after which these elements are connected with self-tapping screws, and this is necessary to prevent the resulting shield from bending;
- the resulting blank is left for about an hour, after which the shield is released and left for a day.
Thus, having figured out how to glue elements to obtain a furniture panel, this process will not require significant effort. The procedure is easily carried out on your own, and the result is structures that are effectively used to create numerous furniture, doors or even full-fledged coatings, characterized not only by high strength, but also reliability, as well as an attractive appearance.
Fastening the slats
Lay out the bars
Gluing the bars
We lay two more planks
Leave to dry
The best glue manufacturers
Among the masses of various manufacturers, companies that specialize in the production of glue are especially popular:
- "Moment",
- Tytan,
- Soudal,
- Elmers,
- Titebond,
- Bostik.
We recommend: Is Belizna suitable for disinfection and in what proportions should it be diluted?
The products of these companies include hundreds of different types of furniture glue, differing in composition, properties, packaging and application method. However, for a small amount of work or for gluing technical furniture elements that are not visible to the eye, domestic PVA or epoxy glue is perfect.
Final processing
Shields are made in such a way that they are not only strong and durable, but also quite attractive. To do this, attention is paid to some finishing stages, which include special processing. To do this, follow these steps:
- a preliminary grinding procedure is carried out. For these purposes, it is recommended to use a standard belt sander. It is necessary to insert special sandpaper into it, and it must have large fractions, since the initial processing is being done. It allows you to eliminate large defects and differences remaining on the surface after the process of creating the shield. You must act carefully, and also carry out the process in consistent and even lines;
- secondary processing - involves the use of a flat grinder. It ensures the removal of the slightest differences, irregularities and other defects present on the surface of the wooden furniture panel. Also, due to this process, lint is removed from the surface. It is recommended to pre-moisten the base with a small amount of water, and start sanding only after the structure has completely dried.
After competently implemented processing, it is possible to use the resulting panels to create a variety of tables or shelves, bedside tables and other furniture. They can be used to form doors or coatings that have high strength, reliability and durability.
Thus, furniture panels are quite popular and in demand designs. They are used to create numerous interior items. If you wish and have the time and opportunity, you can make such shields with your own hands. For this, different materials are used, represented by different types of wood. They undergo special processing and are then glued together using a special technology. This ensures a truly high-quality, durable and attractive shield that can be used for a variety of purposes. To give it high strength and reliability, we must not forget about the special processing performed after the procedure for creating the structure.
Primary processing
Secondary
Stages of production of oak furniture panels
When producing furniture panels, we strictly adhere to technology and use high-quality materials. Strict quality control is carried out at each stage. This allows us to guarantee the quality and high performance characteristics of our products.
The main production stages include:
- Oak edged boards are dried until a moisture content of 8% (+/-2%) is obtained and stress is relieved.
- The boards are being calibrated.
- Calibrated boards are cut into blanks of a certain length.
- Eco-friendly wood glue is applied to the blanks for joining the lamellas.
- In order to achieve a perfectly flat surface and precise shape of the slab, the connected lamellas are calibrated.
- The slabs are placed in special presses, where they are pressed under pressure until the glue completely hardens.
- Additional surface treatment of the finished slabs is carried out - grinding, polishing (depending on the customer’s technical specifications).
Arrange boards for strength and beauty
You may not be able to completely prevent warping, especially if you use planks to save money, but you can reduce the effect by positioning them correctly in the board. You can choose one of three options:
1. Orient all the boards so that the growth rings on the ends resemble hills (top picture). Result: the lid will bend in an arc across the width, and its edges will rise up.
2. Arrange all the boards so that the tree rings look like a series of waves or troughs. The result will be the opposite - the shield will become convex in the middle.
3. Alternate the orientation of the growth rings (bottom picture). Result: The lid will be wavy as each board warps in the opposite direction. Which location is considered the best?
If the lid will be attached to the drawers (boards that form the frame and connect the legs of the table), we recommend choosing option No. 1, since the drawers will hold the edges of the lid, limiting their upward movement. If the lid is secured in the middle, like on tables with a center support, option #2 will help deal with warping. The fasteners will hold the necklace without allowing it to bend upward.
Having determined the orientation of the boards to achieve stability, do not forget about the appearance of the future cover. Keeping the order of the annual tracks, swap the boards and turn their ends 180 degrees to achieve the best result when the texture pattern at the joints of adjacent boards becomes continuous and the glue lines are not noticeable.
Quick tip! Once you have determined the final orientation of the boards, mark them with letters or numbers. If you need to move or remove them, you can easily restore the previous order.
How to glue a wooden chair
When working with a chair, you need to take into account that almost all parts are held together in a small area. The bond must be rigid and able to support the weight of a person. Epoxy glue can be useful if the surface is uneven. But more often furniture glue is used that is inelastic, otherwise the bond may not be reliable enough.
The following compositions are most suitable for stool:
- Kleiberit PUR - designed for gluing many materials, including wood. Made from polyurethane. Water- and heat-resistant, high-strength, one-component.
- “Moment Carpenter” from Henkel is a quick-drying furniture adhesive designed for wooden surfaces. Provides a strong connection of parts, excess is easily washed off with water.
- Titebond is a professional polyurethane wood adhesive made in the USA. Withstands any temperature, retains adhesive properties for a long time after application to the surface.
