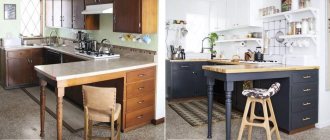
Kitchen furnishings quickly become outdated and, subject to constant exposure to moisture and heat, lose their appearance. Purchasing new furniture for the kitchen is an expensive pleasure, so many are considering the opportunity to update the kitchen set with their own hands. Such a procedure may take a significant amount of time and require investments, but they will be smaller, and the result will be a personal design work.
Restoration of kitchen furniture
To determine the direction and degree of changes in the style and type of kitchen set, it is necessary to highlight the purpose and overall scope of the reconstruction. In the case of a simple renovation of coatings, simply gluing the facades with self-adhesive film may be a sufficient option. Vinyl coating, when pasting facades, will hide any damage, and will also completely update the look of the kitchen set.
If significant changes are planned, with replacement of fittings and repair of individual elements of the headset, then appropriate measures are needed. The procedure for a full reconstruction includes the removal of certain parts of furniture, their repair and painting of surfaces with possible decoration in various ways (decoupage, moldings, replacement of the original decor).
Why is restoration of an old cabinet necessary?
The wardrobe, like no other furniture, is subject to all sorts of loads.
The doors are constantly opening, causing them to become loose; in the kitchen and bathroom, condensation settles on the outer surface of the cabinet or water splashes. And transporting and rearranging furniture is almost always fraught with scratches and loose legs. There are plenty of problems with furniture, but there is a solution for them. This is a cabinet restoration. Regardless of the causes and extent of the defects, you can seek qualified assistance from the workshop at any time.
Restoring an old cabinet solves several problems at once:
- ✔ there is no need to dispose of old and buy new furniture;
- ✔ after restoration, the cabinet completely restores its functionality and aesthetic qualities;
- ✔ cabinet restoration is an effective way to save money (the more rare the item, the more significant the savings).
Accessories
Restoration of a kitchen set should begin with an inspection of all the fittings and their working condition - cabinet doors in the kitchen are constantly used, which often leads to them becoming unusable. Often the hinge fastenings are not easily loosened, but are also completely torn out of the façade fabric or sidewalls. If there is such damage, you need to move the fastening elements to new places, which requires the following tools and consumables:
- screwdriver;
- emery cloth;
- putty knife;
- drill;
- wood putty;
- accessories for replacing broken ones;
- screws;
- paint or varnish of the intended shade.
All old parts that act as part of the door fastening must be completely removed. If the hinges are moved, the mounting holes must be covered with putty. After the composition has completely dried, the area is sanded flush with the rest of the surface. Places that need to be renovated are painted with the planned paint and varnish composition. Before installing new fittings, the holes are prepared with a drill according to preliminary markings.
Attention!
If the drawer guides have become unusable, it is recommended to replace them with modern roller or ball analogues. Such systems are more reliable.
The nuances of working with natural wood
Furniture made from real solid wood is a classic option that does not lose its attractiveness and practicality over the years. Wood is a very durable, environmentally resistant, environmentally friendly material that has a presentable appearance and a long service life.
When renovating kitchens made of natural wood, you must adhere to a few simple but effective rules:
- Having discovered scratches or small cracks on the wood, we immediately restore the surface using furniture wax. Otherwise, there is a risk that the tree will begin to dry out in the damaged area;
- if you need to eliminate a chip, wood putty will help. Apply it layer by layer until the surface is level. After complete drying, sand the defect area and coat with varnish;
- restoration of a damaged varnish layer - this often happens in places where the wood has been subjected to severe mechanical damage. Simply fill the deformed area with a layer of clear varnish and let dry.
Natural wood is an expensive material, working with which requires special knowledge and skills. In order to be sure of the correct approach to repairs, it is better to turn to professionals.
The main condition for extending the life of wood furniture and maintaining its visual appeal is proper care of the products:
- Do not use abrasives or solvents. To clean the surface, use only soft cloths soaked in a mild soap solution;
- Do not allow hot steam or moisture to accumulate in the kitchen. The optimal humidity percentage for natural wood is no higher than 70 percent;
- do not place hot dishes on the surface of solid wood furniture;
- regularly carry out minor repairs to furniture - rub out scratches, coat the wood with mastic, check fastening joints.
By restoring kitchen furniture with your own hands, you will not only save your family budget, but will also be able to realize your artistic ideas and ambitions. Original decor, choice of colors, and your own design will turn the work not into a banal furniture repair, but into a real creative process.
Facades
When an in-depth renovation of the kitchen with the purchase of new furniture is not planned, but there is a desire to completely update the decor, when it comes to reconstructing the kitchen unit with your own hands, the main work is aimed at replacing the facade panels. This technique will help to modify the interior with minimal investment, and given the large number of methods for designing facades for kitchen furniture, the result can become a personal design project. A good option for modifying the façade design of a kitchen is considered to be rattan fabric, which should be mounted in this way:
- a piece of rattan to size, soaked in water;
- after 30 minutes the canvas must be stretched on the facade panel;
- The edges of the segment are fixed using a construction stapler.
If the edges are located on the visible part, they can be covered with wooden dies. This fixation technique will help to securely fix the rattan fabric and hide the imperfections of the cuts along the edges. After drying, the material will stretch and become more rigid. This material can also be used as a replacement for glass elements of facade panels.
Pasting facades with self-adhesive film
Pasting the facades of kitchen furniture with self-adhesive film is considered one of the simplest reconstruction options. The range of such material is quite wide - matte, glossy, embossed films, covered with a pattern or plain colored. Vinyl, which is used as a base, has increased resistance to a humid environment, so it will last 3-4 years, especially since the option with glued facades is universal. To carry out restoration in this way you need the following:
- scissors;
- hard ruler;
- measuring tape;
- self-adhesive PVC film;
- plastic spatula or scraper.
Attention!
Vinyl film with an adhesive base is securely attached to any material, so it is suitable as an option for updating MDF panels, wood, or covering plastic.
Before purchasing film, you need to take accurate measurements of all facade panels that are planned to be covered. This will allow you to determine the required amount of material. It is necessary to take into account a tolerance of 1 cm on each side of an individual panel - +2 cm to the length and +2 cm to the width. After this, the facade panels are removed, numbering each part for proper assembly after the restoration of the kitchen set. You can paste over facades using the following algorithm:
- Immediately before pasting the parts of the kitchen unit, you need to cut the film according to the measurements taken. The cutting process will be simplified by markings on the protective coating of the film.
- The facades are carefully cleaned of contaminants - grease stains, dust, dirt and soot are not suitable as a base for the film, which is why it may come off or be glued unevenly.
- During gluing, you do not need to completely remove the protective layer - gradual removal of the coating will simplify the application of the vinyl film to the facade. Using a spatula, you need to smooth out the bubbles during application.
- If the gluing was broken in any place and the result is crooked, the film can be re-glued. But the stability of the adhesive layer is not unlimited - 2-3 attempts at gluing and the cut is unusable.
The uniformity of gluing can be corrected only in the next 4-5 hours; later, the glue will completely attract the coating to the surface of the facade, then changes will not be possible. When the film has dried, the facades are secured to the furniture in the reverse order and the external fittings are screwed into place. Kitchen set handles are replaced with new ones - it is better to find models that are similar in style and color to self-adhesive film.
Decoupage
To decorate a kitchen setting in an ethnic style, you can use the technique of applying images to surfaces - “decoupage”. This technique is classified as an art, since the procedure requires care, accuracy and taste. The ornament that is transferred to the surface of the facade can be selected from various sources - napkins, plastic film, textured fabric or fabric with a pattern. For decoupage you will need the following supplies and tools:
- solvent (White spirit or acetone);
- emery cloth;
- putty knife;
- brush for painting;
- PVA glue solution;
- putty.
Attention!
After complete drying, the paint and varnish composition is applied in 3-4 layers. To do this, it is better to find a brush with long bristles, which will ensure greater uniformity of coverage. Each of the individual layers must be dried for 2 hours before applying the next one. Complete drying of the coating takes 24 hours.
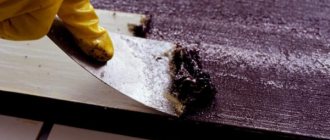
Immediately before updating the façade fabric, the coating is sanded with sandpaper. First, the procedure is carried out using coarse sandpaper, and then the surface is leveled with fine sandpaper. A grinder or grinder with a grinding wheel is used as an auxiliary tool. When there are deep cracks or chips on the facade, it is better to repair them with putty, and then smooth them out with sandpaper. The image from a napkin or fabric is glued with PVA glue.
Decoration with molding
Molding is a type of decoration that is often applied to facades during the restoration of kitchens. The technique involves attaching decorative overlays to the canvas. Decorative parts can be figured, carved, or straight. Such elements are ordered from specialists, bought in construction stores or made at home. Most applicable to wooden furniture.
Methods for updating and restoring kitchen facades
It is advisable to carry out restoration work if the furniture is well preserved, has a strong frame, and the cost of repair measures does not exceed the cost of new products. By getting rid of old stains, removing and masking cracks and chips, and replacing the cladding, you can transform the kitchen façade, which will be visually in no way inferior to the new models.
You can restore an attractive appearance in different ways. For example, scratches can be easily painted over with a furniture pencil or hidden under decorative stickers; the damaged coating can be repainted or varnished. In some cases it will be appropriate to combine different methods to obtain the best effect. Let us dwell in more detail on the most popular restoration options.
Decorating with interior stickers
Interior stickers will help disguise minor local scratches, cracks, chips, and indelible stains. They can be used to decorate not only the facade, but also the walls of the kitchen room. They tolerate moisture, steam, temperature changes well and are easy to care for. The elements adhere well to plastic, wood, veneer, MDF, chipboard, glass, and metal.
The gluing process itself takes very little time; you just need to clean the surface from dust and dirt and degrease it. At the same time, stickers will help hide minor defects, and will also become an excellent addition to the interior of the room, giving the home atmosphere a feeling of comfort and warmth.
If the wood or veneer is not painted, not varnished, or has a very cracked finish, then problems may arise with gluing the elements. They simply will not stick to such a surface. You can do a preliminary test using regular adhesive tape by sticking it on the furniture to be restored.
Pasting with self-adhesive film
Along with interior stickers, vinyl films allow you to carry out inexpensive repairs, for example, in a small area of a Khrushchev-era building. They are resistant to moisture, do not fade under the influence of sunlight, and do not lose their color over time. The average service life is 3 years. When caring for them, it is recommended to use a soft cloth and soap solution, since abrasive substances and mechanical friction will damage the material and will have to be restored.
It is easy to glue the product to the facade. The fittings are removed from the surface selected for restoration, it is thoroughly washed, cleared of grease and plaque, degreased, and dried. At this time, the film is prepared. It is cut out with a margin of 2 cm on each side, taking into account the bends. Afterwards, part of the protective layer is removed from the sticker, its wrong side is pressed and glued to the door, straightening and smoothing with a spatula. Places where air bubbles have formed can be pierced with a needle.
If something goes wrong during the work, a bevel occurs, the material can be immediately detached from the surface and re-glued, but no more than 2 times. Complete setting occurs after 5 hours.
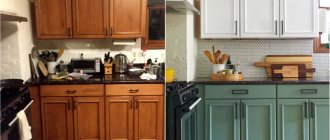
Painting with chalk paint with a detailed master class
Updating the kitchen facade can be done by painting. This is one of the best ways to restore and completely change the color of a product. Restoration should begin with preparatory work: doors are removed from the cabinet, shelves and drawers are removed, fasteners are checked, broken elements are replaced with new ones.
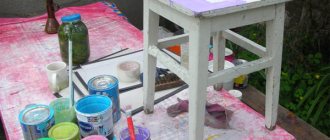
Next, they decide on the color and begin to prepare the materials and tools necessary for the work. To carry out the activity you will need:
- kitchen set;
- film, masking tape;
- screwdriver;
- sandpaper;
- chalk paint, primer, varnish, degreaser;
- brushes for applying paint, rubber gloves.
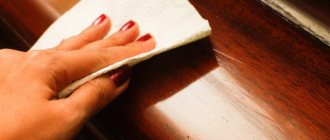
Surface preparation
The first step is to remove the fittings and decorative elements. After which all parts are thoroughly washed and degreased. There should be no dirty spots left on the surface. If there is glass on the door, they must be protected from paint using masking tape.
Usually there is no need to sand the facade or remove the old coating from it. In some cases, when the paint is peeled off or applied in a thick layer, it is better to scrape it off with a knife, or use special removal products. Afterwards, rub the top with sandpaper until rough and remove dust.
Sand or prime
Manufacturers of chalk paint write on the packaging that before applying it there is no need to putty the surface or remove the old layer of paint from it. But in practice, especially in the presence of defects, these actions cannot be avoided, otherwise the defects will be visible on the painted facade.
It is better to apply alkyd primer in two layers. Before covering the next layer, the first one must be completely dry. This process takes up to 12 hours. On top of each layer, after it has completely set, you should walk with fine sandpaper, which will ensure the best adhesion of the material.
Coloring
Chalk paint developed by Annie Sloan is great for upgrading furniture. It is chalk dissolved in water, mixed with various additives, but the original recipe is kept secret. When applied, a patina is formed, which gives the item a unique look. This is the best choice for a shabby chic interior.
Using a brush, roller or sponge, apply the first layer. It must be remembered that, unlike other painting analogues, if stripes remain during painting, then the facade will eventually have a striped appearance. The paint dries within one hour. Experts do not recommend speeding up the drying process yourself, for example, using a hair dryer. Before applying the second layer, you should sand the previous one a little.
Treat with varnish
After drying, the painted surface is covered with a layer of varnish. For these purposes, you can use polished or acrylic options. It is also applied in several layers with sanding of the first. The second one is not rubbed, otherwise the product will not be smooth.
Instead of varnish coating, the attractiveness of facades can be restored with wax. It is applied to a dry surface using a soft brush, sponge, or textile. After 15 minutes, it must be rubbed into the surface with a cotton cloth without pressing on it. After the facade dries, it will become smooth and a satin shine will appear.
Returning fittings and facades to their places
After the facade has completely dried, it is inspected for the presence of thick spots of paint and minor defects. When they are discovered, they are cleaned up or eliminated. Next, the masking tape is removed from the glass, and decorative elements and fittings are installed in their places.
After making sure that the frame is strong, the prepared doors are attached to it. Using a screwdriver, adjust the position of the element and level it. At the final stage, the functionality of the fastening mechanisms is checked.
Decoupage
An old kitchen set that has already served its purpose does not necessarily need to be replaced with a new one. It is enough to revive its facades with the help of decoupage. If the internal hinges and fittings are in working order, they do not need to be changed. The work will not take much time, in just a day, the doors will be updated with all kinds of pictures and will delight the owners.
First of all, you need to remove the facades and wash them well. It is necessary to get rid of stains and dried drops of fat. Now we wipe the surfaces with alcohol for better adhesion to adhesives. All cracks and chips must be treated with sealant.
At the next stage, we measure all the details and transfer the numbers onto paper and cut out the pattern. You can transfer the drawing to the sheet yourself or choose a suitable one and reprint it in a printing house or photo studio. We cut out the finished picture and proceed to decoupage the surfaces.
Place the workpiece in warm water for a few minutes. While the paper is softening, apply glue to the surface. We transfer the decor to the door and smooth it with a roller, carefully removing air bubbles. After 12 hours, the parts can be mounted in place.
Varnishing
An excellent option for restoring facades made of solid wood, wood materials, and MDF is varnishing. As with other materials, when remodeling, work should begin with preparing the surfaces. If there are shallow chips or cracks, they should be filled with putty with a special compound for natural materials and cleaned well. For ease of operation, the door of the headset should be removed.
Before applying the finishing coat, the surface should be degreased and treated with a primer and stain. This will help protect the wood from moisture and other negative influences in the kitchen. After drying, varnish compositions can be applied to the surface. For reliability and greater shine, you can paint in several layers, reducing the volume of each subsequent one. After drying, we collect all the elements and place them in place.
Use of moldings and decorative overlays
You can give your furniture a completely new design using moldings and other decorative inserts. Facades can be restored using plastic and wooden overlays. If the furniture has lost its beautiful appearance, it should be refreshed with paint before decorating. Do-it-yourself restoration takes place in several stages:
- Preparation - removing doors, protruding elements, fittings. Cleaning from dirt, removing old coating if necessary;
- Priming – treatment with special mixtures, depending on the material of the set and the type of finishing coating;
- Preparation of overlays, moldings - the decorative material must correspond to the type of surface. For plastic doors, plastic elements are chosen, wooden facades are decorated with appropriate details;
- Decoration – surfaces can be updated with rectangular strips, smooth or carved, with imitation stucco. They can simply be glued according to the intended pattern or using clapboard nails;
- Painting - the mixture is selected based on the door material (natural wood, MDF, plastic). Apply paint with a roller or brush in several layers.
Painting the kitchen with chalk paint
Among the methods of painting kitchen furniture there is the option of using chalk paint. This technique involves the use of acrylic-based paint compositions with the addition of chalk. This type of dye was invented by Annie Sloan and can be used without preliminary surface preparation - sanding and priming (depending on the type of coating available).
This paint can be purchased in specialized stores. The composition lays on most surfaces in a dense layer and dries quickly, forming a dense coating with high decorative qualities. The paint can be selected according to the color scheme. If the color is not as planned, it is always possible to add dye to the white base or mix different tones.
Preparation
Before painting all kitchen furniture with chalk paint, preliminary preparation of the set is carried out. To do this, you do not need to organize serious measures - degrease with soapy water and then allow to dry. If the furniture has a glossy coating or a large layer of old paint, it is better to clean the surface, for which use:
- emery skins;
- grinding machine;
- industrial dryer;
- hard brush.
Attention!
The use of compounds that facilitate the peeling of coatings from furniture is allowed. After removing the top layer, it is recommended to wash the façade and inspect it for chips or cracks—if any, cover it up. The fittings are removed from the furniture, and elements that do not require painting are covered with masking tape.
Primer and/or sanding
It is not necessary to remove all layers of the original coating by sanding. This procedure is carried out only for glossy coatings. In order for the paint to adhere better to the facades, you must first apply a primer in 2 layers. Each of them is carefully polished to level the surface and increase the adhesion of the paint composition. Drying the primer layer takes from 20 minutes to 2 hours, depending on the variety - this information is included in the instructions.
Coloring
When the primer coat has completely dried, begin painting the furniture. For this procedure, you must first prepare - a paint composition, gloves, a brush or roller, a solvent and a respirator. The paint is applied in 2-3 layers, treating each of them, except the finishing one, with fine-grained sandpaper. If the surface has a significant difference in the original color, more layers may be required - 5-6 from white to black.
Varnishing
After painting furniture with chalk dyes, be sure to varnish the surfaces. This is due to the need to increase the stability of the coating. For the procedure, wait until the chalk paint dries completely - 30 minutes, and then prepare the appropriate tools - a brush, a respirator, gloves. The best type of varnish in such cases is an acrylic composition.
Restoration of natural wood facades
You can update natural wood facades using self-adhesive film or varnish mixtures. Since it is not advisable to hide the beauty and naturalness of solid wood furniture in an apartment, most restorers prefer transparent compositions.
Surface repair includes sealing areas with cracks with a special wood putty and sanding. If there are stains on the facade, they are cleaned with fine sandpaper. Particular care should be taken when working with carved items that have many indentations. The resulting sawdust should be swept away with a brush and the door wiped with a damp cloth. Now the part needs to be degreased and treated with a primer. The varnish is applied in several layers.
If the wood is swollen, jointing should be done, manually or on a special machine. Doors that are deformed from excess moisture are trimmed by removing excess. Special seals are glued onto shriveled doors, between which gaps have appeared.
How to update kitchen furniture
When updating a kitchen set, you need to focus attention not only on the cabinets and their facades, since other items also become unusable from long-term use - handles become loose, the coating peels off, the lining is worn out. But, if necessary, restoration of this furniture can be carried out by analogy with facade surfaces. You can repair and update the appearance with your own hands for the following units:
- chairs;
- countertops;
- kitchen tables.
If you approach this issue correctly, the restoration procedure does not cause any particular difficulties, and the final result will be no worse than design developments. Ideas for modifying and decorating pieces of furniture can also be gleaned from designer master classes or using your own imagination and attention to detail.
Tabletop
The countertop in the kitchen, as the main work surface, is constantly exposed to negative influences during the cooking process. Such factors lead to destruction of the surface and the appearance of scratches, stains, holes and other types of damage. To update the kitchen countertop, replace the surface with a new one, for example, made of artificial marble or porcelain stoneware. If you are restoring a work surface with your own hands, then you often take into consideration the option of ceramic tiles:
- The surface must be leveled with a sharp tool, for example a knife, cutting off all swollen or deformed areas.
- A metal profile of small height is fixed along the perimeter of the plane as a side for placing tiles.
- The glue is applied directly to the degreased surface of the table, this will enhance adhesion and fix the new coating more firmly.
- The tiles or fragments are laid tightly so as not to leave gaps, leveling the surface.
- When the tile surface has already been assembled, you need to fill the seams with epoxy and level the resulting coating.
Attention!
After hardening, epoxy resin acquires a dense structure, this will preserve the condition of the surface for a long period. This composition, after removal, does not pose any health hazard, so it is used as a coating in the manufacture of bar counters or tables in cafeterias.
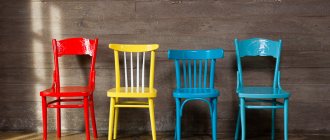
Chairs
Chairs, like stools, are among the most common units of kitchen furniture, especially when the kitchen is combined with a dining room. The seats that are most susceptible to wear and tear require replacement of the filling and upholstery. Of course, scuffs or tears can be hidden under specially sewn covers, but this approach will not correct the deformation of the filler. Repairing a chair involves the following algorithm:
- Removing the old trim - usually on the reverse side there are simple fastenings of the seat to the frame and clips holding the material.
- If the filler is completely unsuitable, you should simply throw it away after disassembling the seat.
- The base must be cleaned of any remnants of old filler and, if necessary, leveled (wetting with water and pressing with a weight until completely dry).
- It is recommended to clean the frame from the old coating by sanding, and then cover it with varnish or paint.
- New material is cut out using a template from the old one. After placing fresh filler, it is fixed to the base with a construction stapler.
The fabric for seat upholstery must be durable and non-marking. Depending on the intended style, they buy material of a neutral tone and sew ordinary covers. It is worth abandoning options with leatherette, since this type of covering is short-lived and, with minor damage, will quickly spread into long tears, which is why you will need to perform the entire updating procedure again.
Cabinets
Of the kitchen furniture, cabinets suffer the least during use, since the use of these parts of the kitchen furniture is not widespread. But, cabinets sometimes also require restoration. The weak points of this kitchen unit are the legs, doors, and shelves. Often the entire body becomes loose. To restore a cabinet in the kitchen with your own hands, perform the following types of repairs:
- Replacing legs. New support parts can be purchased at a hardware or furniture store. To replace a piece of furniture, turn it over, remove the old legs and screw in new ones. If the previous fastening points are very loose, it is recommended to fill the holes and screw the screws into new places.
- If the housing becomes loose, you need to check the condition of the fasteners. When the bolts or screws are loose, just tighten them, then everything will be fine. If the attachment points are damaged, buy corners of the appropriate size, and then fix them in new places to strengthen the body.
- Drawer guides and bottoms suffer. These elements must be completely replaced with new ones - the fittings are purchased at a hardware store and fixed in new points. You can try to level the bottom, but usually this method does not allow you to completely restore it - it’s easier to cut it out or order a new one.
- Shelf fastenings that have come loose and are lost are replaced with new fittings. If the previous places are broken, you need to fill the chips and fix the fittings on the entire part of the wall. Shelves are also replaced when broken - they can be cut out yourself or ordered from a furniture workshop.
Attention!
The doors act as the front part of the kitchen - such parts of the kitchen unit are restored in the general manner - sanding, painting, drawing and replacing fittings. The front panels of the bedside tables can also be completely replaced with others.
Kitchen table
A table located in the kitchen also requires restoration after prolonged use - its legs may become loose and the surface of the tabletop may be damaged. In the case of the legs, they need to be tightened more tightly, which requires a screwdriver, wrench, hexagon or pliers, depending on the structure of the fastener. To restore the countertop, you can lay ceramic tiles or paint with acrylic. For stencil painting you need:
- paint of the required colors;
- brushes with long bristles;
- stencil with the intended pattern;
- foam sponge.
The main tone is applied to a cleaned, sanded surface in 2-3 layers to obtain an even tone. After the initial table covering has completely hardened, you should apply the stencil in the right places and apply a different color with a sponge, ensuring that the edges are blurred. When the design has dried, you can coat the surface with a polyurethane-based varnish, which will ensure the durability of the design, as well as the smoothness of the table.
Tabletop restoration
If there are chips, scratches and other damage on the countertop, then restoration of this part cannot be avoided. The methods and options for carrying out manipulations directly depend on what material it is made of.
The question of how to update a kitchen countertop is one that comes up most often, since the surface is systematically subject to mechanical damage and quickly becomes unusable.
Old stains on artificial stone countertops can be removed with special chemical mixtures; they are sold at any household chemical store. Small scratches are sanded using a special sandpaper, after which the surface should be polished and it will look like new.
Polishing a tabletop is an important stage in its restoration.
Materials such as chipboard and MDF are low in cost and are often susceptible to the influence of external factors, but repair work on them is much easier to carry out. Chipping of small areas is restored by gluing the part using a special glue. If the chipped part cannot be restored, then you can make a special mixture, apply it and wait until it dries completely.
The final touch is sanding the coating.
Natural wood can also be restored quite easily; scratches and chips can be sanded, and chipped areas can be glued on.