Stools with three or four legs, attached to a hard or soft seat using threaded metal axles through a metal frame or curved metal plates, have become widespread. Usually, to make the stool more stable, the legs are installed at an angle, which leads to uneven load on the threads, the legs unscrew, the threads deteriorate, and they begin to wobble and fall out. To avoid damage to the threads, if any weakness is detected in the fastening of the legs, they must be tightened in a timely manner.
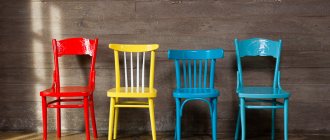
When beautiful kitchen fronts became available, I replaced all the doors and drawer fronts with modern MDF ones. The color changed and Soviet-made stools with rectangular seats the color of blue sky and dark legs began to stand out, introducing disharmony into the kitchen design. I decided not to buy new stools, but to remake the old ones; fortunately, the old kitchen façade still had doors in good condition made of laminated chipboard in a suitable color.
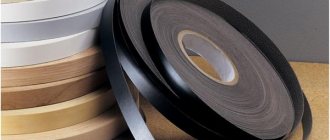
According to the shape of the seat, the stools could be made round or rectangular, with right corners or rounded. The choice fell on square-shaped seats with rounded corners. It is more comfortable to sit on stools with seats of this shape, they are easier to manufacture, the corners do not damage the walls and doors of kitchen cabinets when they touch, and it is easier to cover the ends of the seats with furniture edges.
Preparation of tools and materials
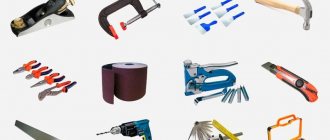
To restore a wooden stool, you need high-quality tools; you don’t skimp on this to get a good result.
For painting work you will need:
- brushes for painting, primer;
- handles for rollers and replacement attachments for them;
- construction hair dryer;
- scrapers - removing old layers;
- rubber spatulas - sealing minor wood defects;
- emery No. 40, 120, 240 - sanding after puttying;
- containers for diluting paints, rags;
- Prepare a respirator, safety glasses, and rubber gloves for work.
Brushes are common tools for painting; when painting a stool, most of the work is done with them, and with a roller they pass over the surface of the seat. Choose natural hair brushes for any paints, and artificial bristles are suitable for water-based compositions. The shape of the tool can be flat or round.
Nozzles for the roller are chosen with a velor coat or with a little fur. Foam rubber paints work with water-based compounds, while oil, nitrocellulose, and alkyd paints will corrode the material halfway through the job. Instead of emery, you can take diamond meshes (the numbers are the same), which are put on a special machine.
Materials you will need:
- dye;
- primer of the paint type;
- wood putty (ready-made in small jars);
- paint remover;
- paint thinner;
- varnish, wax
If they are doing decoupage , they prepare newspaper pictures, text, magazine clippings, and ornamental compositions on paper. Special napkins with patterns and colors, which can be purchased at a regular household store, are suitable.
To replace the trim you need a stapler, tape measure, scissors, upholstery fabric and filler. New upholstery is sewn together using a sewing machine if pieces need to be joined.
How to paint a chair
By changing the color of the chair and repainting it, you can completely change its style. Here we will turn an ordinary old wooden stool (and there is probably one in almost every home) into a stylish element of the apartment interior.
What paint to paint a wooden chair
Any wood paint from enamel to alkyd or acrylic.
- Acrylic paint - can wear off over time and leave streaks when cleaned with a damp cloth. BUT it is odorless.
- Enamel and alkyd paints have a strong odor, so it is better to paint in a ventilated area. But they are waterproof and won't wash off!
Painting an old wooden stool
Restoration of a Soviet stool begins with surface preparation.
The process includes:
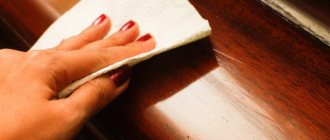
- Stripping old paint if the layer is falling off. The layer that holds tightly is not removed. Use a remover and heat it with a hairdryer. After one of the methods, the softened film is scraped off.
- Putty the surface . Only seal the cracks or use a spatula to cover the entire surface of the seat.
- Sanding dried deposits and primer for painting.
- Repeated puttying and priming if the mass retracts when drying and there are depressions on the surface.
Ivan Bokorezov
Furniture columnist and designer
Ask a Question
Painting begins from the bottom; to do this, the product is turned over with the seat down. Brush over the surfaces of the legs from different sides, cover the crossbars and slopes so that there are no unpainted gaps. It is better to work in daylight, otherwise the reflection of the paint from the lamp will prevent you from seeing the uncoated areas.
Don’t wait for it to dry, but carefully turn the stool over to its standard position and continue painting:
- pass along the plane of the seat with a roller;
- with a brush, those parts of the legs, lintels, and drawers that were not covered the first time are painted.
Use a multi-color version, for this you need masking tape. They separate the boundaries of different colors. They work with the second shade only after the previous color has dried - remove the tape and re-glue it along the new contours.
Sometimes the surface is decorated like marble or wood. To do this, paint the main background, when it dries, apply a contrasting or tint color. Use crumpled rags, shaped rollers, foam sponges, and other available items.
Repair of stool leg fastenings
Before moving the legs from the old stool, you need to check the reliability of the legs, depending on the fastening design, to the mounting frame or slats. If, when screwing the stool leg until the thread stops, it continues to turn, then you can try to restore the rigidity of the fixation by winding a thick thread or flax fiber onto the thread, which plumbers use when threading metal pipes.
If you cannot firmly fix the leg in the mount using thread sealing with thread or flax, it means that the thread is completely damaged and the stool mount needs to be repaired.
Repairing the stool fastening can be done in two ways, using a stud with an M10 metric thread and a nut, or using an M10 bolt instead of a threaded stud. The final result of the repair will be the same and which method to use depends on the presence of nuts or bolts.
Fastening the stool leg with a nut or bolt
Depending on the hardness of the materials from which the stud and fastening strip are made, the threads may be damaged either on the stud or in the strip and this can be easily determined visually. If the thread is damaged in the bar, but is in good condition on the stud, then simply unscrew the stud from the stool leg by 10 mm, insert it into the fastening bar and screw the nut onto the stud.
You need to unscrew the stud using pliers, placing a piece of leather between their jaws and the thread of the stud so as not to damage the thread. If you can’t unscrew the pin from the leg with pliers, then you need to make edges for an open-end wrench on opposite sides at a distance of a few millimeters from the end of the pin, or, by holding it in the pin in a vice, unscrew it.
If the thread on the hairpin is completely damaged, you can unscrew it from the leg and screw the damaged end back into the leg. Thus, the thread at the fastening point will be new again, and if the thread in the fastening strip is still good, then it will be possible to do without fastening with a nut.
If, when repairing a stool using an old pin, it was not possible to securely fasten the legs, then you can fasten the leg to the seat of the stool using a bolt.
The thread in the stool leg is metric M10. Therefore, it is enough to tighten a bolt about 80 mm long instead of a stud. Thanks to the presence of a hex head, the bolt can be easily tightened with an open-end wrench with the required force.
After repairing the fastening elements of the stool legs, you can begin installing them on the new seat that was made. Usually, when removing the fastening elements of the stool legs from the old seat, the screw slots deteriorate, and often the screws themselves are covered with rust. It is better to replace them with new modern self-tapping screws 12 mm long. Before screwing them in, it is advisable to drill out the places where the screws are screwed in to the depth of its length with a drill diameter equal to half the diameter of the screw. Then, when screwing, a bump will not form around the screw, and the fastening strips of the legs will fit snugly to the plane of the seat.
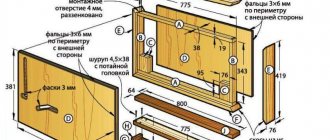
The gap between the mounting strip of the legs and the seat of the stool is usually small and you will need to make a hole in the seat for the heads of bolts or nuts. The sample can be drilled using an electric drill with a perk-type drill. But be careful not to drill through the seat. If you don't have a drill, this job can be done with a chisel.
Repairing a cracked stool leg
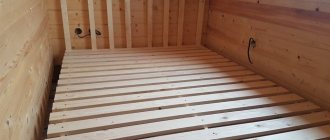
After modernization, the stools served for more than 10 years, and suddenly I discovered that the leg of one of them began to sway.
When analyzing the cause, it turned out that the wooden leg had cracked at the thickened part along its length. As a result, the pin was not firmly fixed in the leg.
The hairpin was about eight centimeters long, the leg had a crack on only one side, and therefore in this case the easiest way to repair the stool was with epoxy resin.
Five milliliters of epoxy resin was prepared in a plastic bottle cap. Epoxy resin hardens within a few hours, so you can work without haste.
Next, all the prepared epoxy resin was poured into the threaded hole of the cracked wooden stool leg. The resin is quite thick, so I had to help it flow off with the flat blade of a screwdriver.
Now all that remains is to screw the leg onto the hairpin. At the base, the stud also needs to be lubricated with epoxy resin. A day later, a check showed that the leg was firmly held on the pin, and I hope it will last for many more years after repair.
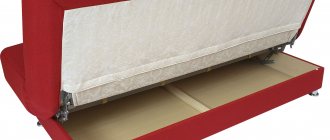
Upholstery of a soft seat
Stools are most often covered with a material that is easy to clean and does not absorb water (leather, artificial substitute) - ordinary kitchen furniture. In the rooms there are models with fabric upholstery.
Use for new seat:
- vinyl artificial leather, stretch leather, eco-leather, dermantine;
- drape, tapestry, velor, silk;
- genuine leather.
First, remove the old fabric; to do this, pry the staples from the back of the seat with a knife or chisel, and use an anti-stapler. The material can be glued - to soften the composition, areas are treated with steam or ironed with a heated iron. Old material is not thrown away immediately; it will still be useful. Remove the soft gasket.
Step-by-step reupholstery procedure:
Smooth out the removed sheathing with an iron and use a spray bottle on the folds to even out the sample.- The finished pattern is applied to the new fabric and pinned.
- They trace the outlines with chalk, remove the pins and the old piece.
- According to the size of the seat surface, a soft padding from batting, foam rubber, padding polyester is cut out.
- You can place the padding on top only, or roll up the edges to get soft sides.
- Glue the filler to the plane, wait for it to dry, you can do two layers.
- New upholstery is placed on top, the edges are turned over, the stool is turned over with the seat down.
- They are nailed with a stapler so that the step between the staples is 20 - 25 mm, the staples are placed parallel to the edge.
- Sometimes the surface under the folded part of the fabric is coated with glue.
For the top, you can sew an original version from two or three pieces of fabric or leatherette. They use the patchwork technique if they want to make a geometric pattern. It is recommended to sew removable covers to prevent the upholstery from getting dirty.
Features of restoration of metal chairs
Unlike wood, metal chairs are more durable. If they break, they are more difficult to repair, and during restoration the product needs to be protected from only one “enemy” - corrosion. For metal, they buy a special primer and paint that have an anti-corrosion effect. Enamels are applied in several layers, and colorless compounds are coated in three to four layers. It is not recommended to use chairs and stools with a metal frame in kitchens and bathrooms, where the humidity level systematically increases. To remove the old layer of paint or varnish, the chemical treatment method is ideal for metal, since the material is not afraid of aggressive agents.
Decoupage technique
The method involves gluing drawings, pictures, or a cut-out pattern to the surface. The resulting collage is treated with varnish to secure and extend its service life. The work is performed in one of the styles: Victorian, Provence, ethno, military, country, simple city, shabby chic.
Step by step execution:
If the coating is porous, it is puttied to make it smooth. For grinding, first use mesh nos. 240, 320, and finally finish with mesh nos. 600 and 800. Be sure to prime the surface.- The base is usually painted in a light shade, for example, beige, baked milk, dull blue, but it all depends on the chosen style; most often they choose a white color.
- On the flat surface of the stool, the napkin is glued whole; if there are uneven spots, this will not work; you need to cut or tear the edges of the pattern.
- For gluing, use varnish, PVA glue, pencil glue or egg white; it is more convenient to work with a polyvinyl acetate composition.
- The glue is diluted 1:1 with water or the pattern is placed on the undiluted composition; in the first case, the napkin will get wet and tear faster.
- The picture is pasted on, carefully smoothed with a soft brush for drawing and fingers; after straightening all the folds, the collage is dried and varnished.
Ivan Bokorezov
Furniture columnist and designer
Ask a Question
For work, acrylic paints and similar varnish are often used. Inspired natures additionally tint the drawing after drying with paints and add bright details. A primer before gluing is needed to reduce absorption - in this case, the napkin will slide and align more easily.
Creative furniture decor solutions
- To give an old stool a vintage touch, you can paint it pink, blue or cream. Gold or silver paint is useful for painting. On top of everything, apply craquelure varnish to the entire area. The antique effect is created by small cracks from the varnish.
- An old stool will be saved by upholstery made of multi-colored straps. Intertwine them according to the “basket” principle and secure them at the bottom with self-tapping screws.
- Let your kids get creative with acrylic paints. Cover the result with varnish. You will not only receive designer furniture, but also possibly a future family heirloom.
Now you know how to restore an old chair, turning it into an exclusive thing for mere pennies. If you have other modernization ideas and restoration experience, share with readers in the comments.