Over the past 10 years, industries in various areas have undergone great development. Consumer goods with various paraphernalia and accessories are flying off store shelves with a bang. Clothing, home textiles, country and tourist products - have such an element as eyelets. In order to find out what eyelets are, how to install these products yourself, what they are used for, when they originated, what they are, and many other questions, read this article.
The grommet is designed to strengthen the edges of holes used for threading braid, cords, ropes or cables
Punch for eyelets: description, scope of application
To install eyelets, round holes of a certain diameter are required, which are very difficult to make at home with improvised tools.
Experience from industries where accessories are used in the production of footwear, printing, textile products and leather goods came to the rescue. The main purpose of the grommet is to protect the edges of the hole from destruction.
Large companies use the grommet stapler as a tool for filing documents, and the rivets are often decorated with corporate symbols. Industrial enterprises use punches for grommets. Today, many companies offer for sale variants of punches for home use. This hole punch allows you to solve several problems at once: it perforates the material, bends its edges, so no additional processing of the edges is required.
Compatibility with instruments is checked individually each time.
There are the following types of punches for eyelets:
- manual;
- semi-automatic;
- automatic.
The choice of tool for installing grommets depends on what products you want to install.
Let's try to figure out which option you should choose.
It is important to understand the material, how strong the work will be, what the grommet itself will be made of, its shape and range of sizes. The choice of ring size will depend on the functional load of the product
Products come in different colors, shapes and materials.
The variability of the grommet itself will also affect the choice; you can use a metal version made of brass or steel, wood, plastic, coated or uncoated, of various shapes and sizes. Regardless of the type and shape, the fittings consist of two components: a bushing and a washer, so the principle of operation of the punch is approximately the same everywhere.
A hole is made with a punch, a sleeve and washer are applied and secured with a tool.
At the same time, the manual version of the hole punch is in great demand due to its low cost and ease of use in the original version. Usually it includes a punch, with the help of which the hole itself is made directly, a matrix into which the sleeve and washer are inserted, and embossing, by pressing which they are fixed components of the eyelet on the material.
Experts recommend purchasing devices in whole sets, but using universal, multifunctional ones is no less convenient.
Disadvantages of the manual option:
- for different grommet options you will need appropriate attachments for the embossing;
- with a high density of the material used, the process of piercing the material is labor-intensive;
- Not suitable for leather goods.
For “small things”, a hand tool with capabilities limited in terms of the size of the installed products is suitable.
Pros:
- availability;
- use at home.
In order for any eyelet installer to last as long as possible, it must be kept clean, visually inspected periodically, and lubricated with machine oil.
A semi-automatic hole punch is suitable for working with materials of increased strength, since the hole itself is punched automatically by the sharp edge of the sleeve itself
If we choose this option, then the choice of the eyelets themselves is especially important.
Hole punch eyelets must have a sharp edge.
Minuses:
Purchasing specialized eyelets.
Pros:
- versatility (suitable even for working with tarpaulins);
- availability;
- minimum effort;
- performance.
Installation pliers are not universal - the clamp for eyelets and blocks of different sizes is selected individually.
In industrial production, automatic punches are used.
Pros:
versatility in materials and eyelet sizes.
High performance.
- minuses:
- high price;
- weight and dimensions of the punch.
For large eyelets you will need more serious equipment.
How to choose a mounting option
You can install eyelets yourself only if they are plastic or wooden rings. These products are designed to be installed manually. The bushings are easy to unfasten and, conversely, snap into place. Metal fittings are attached using special tools.
The choice of the type of eyelets depends on the material on which they will be attached. For light and elastic fabrics, plastic rings are suitable. They can also be used to attach paper and laces to summer shoes.
Wooden fittings are installed on dense materials, for example, cardboard, leatherette, or curtains of medium thickness. Metal eyelets are used to make holes in rough and thick materials such as leather, jeans or canvas, as well as for thick blackout curtains.
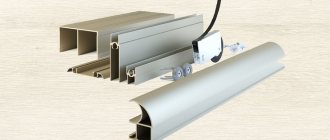
Special tool for installing eyelets
The most powerful and reliable unit for framing through holes in various materials, from plastic to silk, is a mechanical press, for example, TER-2. This heavy unit sits on a solid, non-wobbly surface and allows you to instantly secure grommets, whether they have a washer or a simple one. The walls are torn into separate petals and slightly twisted inward - you get a neat circle on the front and back sides. Spare parts are sold for the device, which allow you to work with blocks of different diameters. The main disadvantages of the device are its high cost and bulkiness.
Operating procedure:
- Place the grommet in the finished hole.
- Place on the bottom platform, face down.
- Place the washer on the protruding walls.
- Press the lever to engage the press.
Pliers are the most popular specialty tool for grommets. They are compact, relatively inexpensive (although there are samples for several thousand rubles) and do the job perfectly.
The best and popular tongs:
- Crop-A-Dile is a reliable, high-quality and stylish device made in America, the only drawback is the high cost, about 3 thousand rubles;
- Crop-A-Dile BigBite - large tabletop tongs, an intermediate option between a press and tongs, allows you to place blocks at a greater distance from the edge of the material, cost around 4 thousand rubles;
- Micron is a tool made in Taiwan (and of Russian origin) and in the middle price category. Both simple tongs-press and tongs-punch-press, revolving type are produced (change is made by rotating the circle with attachments clockwise until it clicks). A distinctive feature of the latter option is the rubber “lips” in which the grommet is fixed and which protects from scratches. Disadvantage: after some time, the convergence of the platforms becomes insufficiently accurate.
- “Zubr” is a Russian brand instrument that is produced in Taiwan. Belongs to the middle price category and the same quality segment. Reviews about the forceps are mixed, so it is difficult to recommend them for professional use.
- Punch is a Chinese company that produces, among other things, pliers for installing eyelets. Average price, but quality is far from perfect. Many users note the inconvenience of the tool.
What to look for in the store
When choosing pliers for blocks, you should be picky: evaluate the quality of the steel, the power of the design (the force should be on the levers, not on your hands), a big plus is the rubberized or plastic handles, the material of which does not smell. For revolving models, the drum should rotate with little effort, but without interference. As a counter-example, with some Chinese pliers you have to loosen and tighten the safety screw in order to turn the wheel from the hole punch to the press - this is extremely impractical.
Eyelets and hole punches
An important nuance in the edging is the eyelets themselves, or rather, their rigidity and design, as well as the tool to make the holes. The softer the steel, the easier the block will rise and the less effort will be needed to rivet it. One of the companies that has won the trust of needlewomen is ScrapBerry's. You should not take the cheapest fittings - they will not fit well and there is a high risk of damaging the product.
The curtain eyelets have an unusual design - they do not unfasten, but snap into place, so there is no need to look for a large bumper.
Advice! When purchasing eyelets, pay attention to the presence or absence of washers. They are needed for thick fabrics and delicate items, such as loose materials.
Holes for eyelets are prepared using a hand punch, a punch-tweezer, a stationery hole punch, an awl, as well as manicure or regular scissors, focusing on the thickness of the material being processed and the desired diameter of the lumen.
In the case of ordinary blocks, the hole should be made a little smaller - otherwise the grommet will not close the edges securely. However, in the case of curtain, snap-on blocks, a circle is cut with a radius 5 mm larger than the inner diameter of the back part.
Edging with eyelets looks stylish on textiles and impressive in scrapbooking, and in addition, it allows you to protect the edges from fraying and wear. To install the fittings, both special and improvised tools are used - you should choose based on how often you have to work with the blocks and how much you are willing to pay for the fixture.
Installation instructions yourself
Having all the necessary materials and tools at hand, anyone can independently make an awning or canopy with eyelets at home, which can be used on the farm. This product can be used in various areas, from a tarpaulin curtain at the entrance to a garage to covering an outdoor pool from foreign objects and dirt.
Eyelets are great for securing canvas curtains to gates
Regardless of the area where you plan to use an awning with grommets, first of all, you should acquire high-quality blocks and rings; the overall strength of the grommets will depend on them. Experts recommend purchasing ready-made kits in specialized stores.
Typical eyelet sizes
As for tarpaulin, its choice should be made based on its intended purpose, based on the characteristics of strength, moisture resistance, frost resistance and the like. The shape and size are selected individually.
Preparing the tarpaulin for installation of eyelets
Having prepared all the necessary components and selected a tarpaulin for installing eyelets, you can move on to the next stage - punching holes in the tarpaulin, for which you will need the following tools:
- Ruler.
- Pencil, marker.
- Punch.
- Hammer.
Using a pencil and ruler, you need to find and mark the areas on the tarp where the eyelets will be placed. The mark should be made according to the diameter of the ring, evenly, at the same distance from each other. After this, using a punch and a hammer, holes are made in the tarpaulin in accordance with the marks.
It is necessary to accurately determine the location of the eyelets so as not to make unnecessary holes
If the tarp is thin, you can use a piece of durable fabric or use plastic or brass washers
Before punching holes, a wooden board is placed under the tarp to serve as a shock absorber when the hammer and punch collide.
Installing eyelets on the awning yourself
Having completed all of the above manipulations, all that remains is to secure the grommet in the tarpaulin awning, which, if all conditions are met, will not be difficult.
To do this you will need the following tools:
- Flaring.
- Hammer.
A block and a ring are placed in the previously prepared holes on the tarpaulin on both sides, opposite to each other, after which they are securely fixed to the material using a flaring tool and a hammer.
A furniture bolt with a wide head is suitable as a flaring tool.
This method allows you to quickly and efficiently install eyelets on the awning for further use for their intended purpose.
As you can see in the photo, flaring can be done quite efficiently even without a special tool
In addition, there are special manual presses for installing eyelets, which allow you to install eyelets on any type of material as quickly and easily as possible. This method is more suitable for installing grommets for commercial purposes.
Installation on leather materials, shoes
When fixing the eyelets on the rings, it is better to use pliers or a press. It is important that the hole is smooth, so you should punch it with a special nozzle. It will not be possible to carefully cut it out with scissors, as creases and cracks will appear on the skin.
Algorithm of actions:
- Strengthen the area where the fittings are installed by folding the material in half, with the wrong sides facing each other.
- Mark the location of the rings with a marker.
- Select a punch of the appropriate size and make a hole.
- Insert the matrix tool of the required diameter, place the eyelet and secure it.
You need to work with leather only on a hard and flat surface so that the material does not deform and the fittings are fixed correctly.
Installing eyelets: features
Installing eyelets on curtains.
Such an element is attached to curtains without much difficulty. The following tools and materials will be useful for their successful installation:
- the eyelets themselves;
- hole punch, which can be easily replaced with scissors for thin fabric;
- small ruler;
- pencil;
- product.
A piece of special tape is attached to the top of the curtain. Then you need to pick up the edge of the curtain and iron it
It is important not to overheat the iron in order to maintain the original appearance of the product. The folded edge can be ironed well.
Place the eyelets in the desired position and use a pencil to draw a circle using the inner base
The marked area must be cut out, making a 5 mm indent from the edge.
Place the existing washer-lining on the curtain and join it to the circle cut out earlier. There should be some fabric left over. It is important to ensure that there are no gaps left. The final step is to apply the decorative element and squeeze it all the way, you should hear a click.
Calculating the required distance
To install the eyelets correctly, it is important to accurately calculate the required distance between them. Need to do some calculations regarding the width
6 cm are subtracted from its numerical indicators; they will be used to finish the sections in the side part. Subtract 5 cm from the resulting number, then divide by the number of loops and subtract one. The resulting number will determine the distance between adjacent eyelets. So, it often happens that small elements have a border of 10-12 cm, large ones - 15-20 cm.
Useful advice from experienced craftsmen
So, we answered the questions asked about how to install eyelets without tools on leather, paper, fabric.
Still, there are some useful tips that you might want to read:
- Always remember that installation of fasteners of low height is much easier.
- Products made of non-ferrous metals are best suited.
- Steel eyelets are the most wonderful option, but quite difficult to install. If sufficient impact force is applied to it, the ring can be deformed. Therefore, leave the steel for specialists in the workshops.
- Do not install eyelets on soft rubber - if you miss, you risk breaking them.
Eyelets are used almost everywhere these days. They decorate clothes and shoes, they play an important role in the practical side of use, they are used to fasten curtains. Even male drivers know how to install eyelets without tools on a car awning. There are a lot of options, and they all play a vital role in our everyday life.
Technology for making curtains with eyelets ↑
Curtains with rings are valued for their beautiful, uniform waves of drapery, to obtain which you need a lot of fabric - usually 2.5-3 widths are taken, you should not save and take less than 2.5, this will noticeably affect the appearance.
To decorate such large windows you will need a large amount of fabric.
A span of more than 4 may also not give the expected decorative result, because they can turn out to be bulky and heavy, more like shields. The choice of length is individual - in the kitchen the length varies more freely - from the floor to the windowsill or to the middle of the window.
We must not forget that the edges of the fabric will have to be folded and stitched, add another 3-4 cm on the sides and bottom and a little more on top - it will not be possible to install the rings well on one layer of fabric. To calculate the amount for the top hem, you need to take into account the density of the material - the denser it is, the more you can fold (professionals recommend leaving 13 cm on thick fabric). It is imperative to take into account the diameter, because it is directly connected to the cornice; for unhindered movement of the curtains it must be 1.5 cm larger. Otherwise, the eyelets will cling to the cornice and get stuck on it.
In order to sew, you need: fabric, eyelets, scissors, a pencil, eyelet tape (it can be replaced by interlining or dublerin), an iron for gluing it and skills in working with a sewing machine (entry level is quite enough).
Determine the distance between them in advance, based on the desired depth of the folds - if you need deep relief folds, then install the rings at a distance of 22 cm from each other, if the folds need to be softer, then 15 cm is enough. Large intervals between the rings can lead to sagging fabrics, especially dense ones, and small ones will not give the expected aesthetic effect. The optimal distance is 18 cm.
The deep relief wave allows you to take a fresh look at their design
It is important to determine the distance from the top edge; here it is better to focus on the density of the material. Soft fabric holds its shape worse; the bend at the top edge is about 5-6 cm for organza or tulle, if the fastening rings installed on them have an outer diameter of 3.5-4 cm
You can install eyelets on loose fabrics, but place them closer to the top edge
Feel free to cast aside all doubts - organza, mesh, voile, tulle can adequately compete with other types of fabrics for curtains and will harmoniously fit into the interior of the room.
On such fabric, the main condition is the location closer to the upper edge of the product.
If the combination of lightweight fabrics and fastening rings does not inspire confidence, you can make an original trim from a denser fabric, and at the same time show off your design abilities.
Such a bright trim will emphasize the elegance and sophistication of organza
Before installing them, you need to make sure that the curtain is completely ready - the edges are processed and the top of the product is reinforced with grommet tape or its equivalent. Now you can begin the most important part of the work - marking the fabric. Marks are made where the rings will be installed, and holes are carefully cut out.
When marking fabric, you need to take into account the possibility of its displacement.
Eyelets are installed on both sides and snapped into place, or pressed through with a press, if ordinary.
After the markings have been made and the holes cut, you can safely install the mounting rings themselves.
If professional manufacturing is not part of your immediate plans, then you will not need a special tool for installation. But a punch and flaring tool will greatly facilitate and speed up installation.
Where are eyelets used?
To answer the question of how to install eyelets without tools, you need to know in which household items and clothing this product is used. They are widely used for:
- T-shirts, sweaters, jumpers, jackets;
- jackets, windbreakers, sheepskin coats, fur coats, capes, raincoats;
- trousers, jeans, shorts, breeches;
- boot, sneaker, sneaker, shoes, moccasin;
- hats, caps, hats with earflaps;
- belts, belts, bracelets, straps of bags, watches;
- notebooks, books, calendars, decorative gift items, craft bags;
- truck awnings, tents, general purpose awnings;
- sails of sea ships;
- curtains, curtains, porters, lambrequins;
- decorative finishing of home furnishings, as well as clothing.
This list can be continued indefinitely, since the product is truly very popular.
For paper/cardboard products, blocks (piccolo rings) are used. Their main difference from eyelets is the absence of an additional washer on the back side of the rivet. The blocks have one sleeve, rounded at one end in the form of a cap. A special tool is used to install the rings.
The block is secured by breaking the sleeve into several teeth
How to install grommets without tools
It is quite possible to rivet the grommet so that it closes the hole without special units; in some cases the result will be better, especially when compared with cheap, low-quality pliers.
Ways to install eyelets using improvised means:
- A bolt with a round head slightly larger in diameter than the grommet. Instead, a bearing, steel ball, etc. are also used. The striker is placed on the walls of the grommet and hit once or twice with a cloth, then the “petals” are bent with the same hammer, striking from the center to the edge of the grommet.
- Phillips screwdriver (or screwdriver bit). The sting is placed in the center of the grommet, on the wrong side, and the handle is lightly struck with a hammer, as if it were a hand punch. It turns out to be a quadrangle - the part is rotated 90 degrees and the blow is repeated. The walls move apart and are tapped with a hammer to make the edging flatter.
- A blade from a stationery knife. It is placed across the block and hit from above with a hammer so as to cut the walls almost to the fabric (or other material). Rotate 90 degrees and repeat the operation. You will need 3-4 such cuts. Then the “petals” are bent and flattened with a hammer.
Eyelets: history of appearance
The likely timing of the grommets' appearance remains unknown. It is known that this happened a very long time ago, perhaps during the times of Ancient Greece. Scientists do not know the language in which this word appeared, much less the inventor of this device. The appearance of the grommet is associated with the use of wind power, and the term itself refers to the hole in the sail for threading the fastening threads. In ancient times, this is how the rigging of a ship was formed. Nowadays, the term has expanded its meaning. Now this is an option for strengthening the edges of holes that are less strong than the cable passing through them.
The grommet is often used as a decorative device rather than a means to strengthen the material. Examples include linings in leather products, fiberboard, and foam board. A modern grommet is a mechanism made of a washer and a shaped sleeve. In this case, the material used is mainly metal or plastic.
Types of grommet rings
The materials from which this type of fastening is made are varied - from metal to plastic of various shapes and colors.
Installation methods also directly depend on this. A plastic eyelet is much easier to install, but a large load on it is unacceptable! If desired, you can remove it and use it again, but the fixation of the edges of the fabric will be very poor - they crumble and become deformed, and the product looks sloppy.
Colored metal eyelets are much more reliable than plastic ones - they hold the fabric perfectly, preventing it from tearing.
Steel fasteners are considered the most reliable for fastening fabrics, leather parts, and cardboard. But before you install eyelets without tools on clothes or shoes, you will need to practice on unnecessary pieces of material. This is necessary to understand how the work is going and not to spoil the thing.
The most popular way to use eyelets is to attach them to curtains. To do this, you additionally need grommet tape, which is sold in specialized stores. It is used to glue the edge of the fabric, creating rigidity.
The mount itself can have a completely different shape - from circles to animals. The color palette is also huge.
Curtain eyelets will help to form smooth, interesting and neat folds. In order to move such a curtain on the eaves, you do not need to apply any force. The fabric does not wear out on the cornice, and, accordingly, its service life is longer.
Description
A grommet is an element that allows you to strengthen the edges of any material. It is a bushing with a cap on one side and an overhead washer on the other. There is a hole inside the product that is used for threading thread, rope, bowstring, or simply as a decorative decoration.
The eyelet consists of two parts - a ring and a bushing, also known as a block
Installation of eyelets is carried out in factories or manufacturing plants of various products. This element of attributes of each individual item has been widely used in several industries. Without this amplifier it is impossible to imagine ordinary shoes, or a modern notebook with recipes for a housewife.
Eyelets are used:
- in the production of outerwear;
- for making shoes;
- when producing home furnishing goods;
- for tourism and holiday purposes;
- in commercial activities;
- in the manufacture of shipping and maritime products;
- in office and printing.
As can be seen from the description of the areas of use of this wonderful accessory, it is widely used in almost all industries producing goods. Basically, the device is functional in nature, which consists in strengthening the edges of the material for subsequent threading of rope, cable or thin thread through it.
To install eyelets yourself, you need to know what hardware factories make them from.
- Steel.
- Aluminum.
- Brass.
- Copper (rare).
- Silver.
- Gold.
- Tree.
- Plastic.
- Stitching with thread.
Amplifiers are made from expensive metals by jewelry craftsmen or jewelry factories. Such elements serve as decorations for bracelets, shoulder straps of bags, shoes, and designer clothes. Aluminum products, as well as brass, are used for office/printing activities. Quarterly calendars, scrapbooks, notebooks and other products can be modified using eyelets.
Interesting. In the office, such a strengthening attribute is called a block. The printing industry workers themselves call it a “piccolo” ring.
A block is a grommet without a ring
Store-bought or homemade?
A wide variety of models of roller, Roman, pleated and other compactly assembled curtains on sale does not necessarily guarantee that among the entire offered range there will be a perfectly suitable product. The main characteristics of industrially produced options are:
- standardized sizes. The typical size range - length, width - is designed for the popular dimensions of metal-plastic and wooden windows;
- neutral colors. For the most part, ready-made curtains have calm, soft colors that are suitable for different interiors. Colored and printed products are more expensive;
- using non-woven or woven synthetic materials as a base fabric. Their advantages are resistance to ultraviolet radiation, ease of cleaning, durability, and strength. The main disadvantage is the synthetic nature;
- standard opening/closing mechanisms;
- standard finish or lack thereof.
For many users, all of the above features are advantages. But if you have a non-standard window size, a desire to create an individual design, or a desire for natural materials, it is better to try to order a suitable model or create roller blinds for plastic windows with your own hands.
What types of eyelets are there?
Typically, they are round, with a minimum diameter of 15 mm and a maximum of 60 mm.
You may be interested in: Landscape design of a summer cottage
In addition to a circle, fastenings can have the following shape:
- square, triangle and other geometric shapes;
- snowflakes, stars, silhouettes of animals, as well as other complex configurations.
a) square; b) triangular
Depending on the material of manufacture, they are divided into:
- plastic;
- wooden;
- metal.
Curtains for the hall
The design adds coziness to the room. Made in a single image create a feeling of unity.
Decorations for the hall are designed to bring beauty and aesthetics into the house.
Look great with different interior styles.
Styles:
- minimalism;
- modern;
- Scandinavian;
- Provence;
- high tech;
- madder;
- loft;
- modern
It is important to choose the right patterns, tones, combine, match colors with objects in the room in order to put emphasis on something. Provence supports warm, pastel colors
Multi-layering of products is appropriate in country and modern.
A minimalist style is perfect for the living room. Refinement and sophistication are its basis.
The right combination of decorations in the style of the room is the right choice for decorating your home. By combining the colors of the product and the rings you can completely transform it.
Features of working with the product on a gazelle or truck
If you need to glue a damaged section of an awning on a cargo truck or gazelle, you will need to observe a number of nuances. Before carrying out work, the vehicle must be driven into a garage or other room where the optimum temperature is maintained and there is enough space to access the defect on the canvas.
For convenience, it is better to remove the awning from the car so that you can apply force when fixing the patch and do not have to reach for the damaged areas, but if the design of the vehicle does not allow for the removal of the canvas, then you will have to carry out the work in the existing conditions.
DIY sewing
Ready-made models are sold, but you can sew them yourself. Sewing will not take much time and will not be a huge task.
Step-by-step instruction
When purchasing rings, you need to focus on the color of the fabric. If you select decorative elements, for example, tiebacks, then you need to focus on them. In special kits to complete the installation on the cornice, there are not only eyelets, but also clips, tiebacks, and pins.
You need to choose natural materials, high quality and durable.
Installation will not be difficult. You can also string them onto your own curtains. Count a certain number of rings. Compare with the width of the material. The number is divided by the length of the canvas. The distance is from 15 to 25 cm.
Important! Sealing tape must be used when installing elements. Fabrics for sewing:
Fabrics for sewing:
- thick curtains;
- elegant;
- tulle;
- velvet, velor, wool.
Thick curtain fabric is most often selected for the living room or bedroom. Velvet and velor are combined with the style of the room. Light linen fabrics are more suitable for the kitchen. They do not absorb odors and do not fade in the sun.
When choosing fabric, you don’t need to skimp on the material. Take this into account for the top allowance when hemming. Leave a margin at the bottom, as it should not hang down to the floor.
Important! Good tools make for a quality installation
The style, color, density or lightness of the fabric is selected at your discretion
But it is important that they fit harmoniously into the design of the room
Tools for work
- Hole puncher for creating holes.
- Small tailor's scissors.
- Forceps.
- Chalk or just soap.
- Centimeter.
- Iron or press.
- Sewing machine.
- Grommet tape.
Installation:
- It is necessary to process the side sections of the product.
- Marking is carried out along the width of the canvas. Keep in mind that you need to leave 2 cm from the edge and a little more for the seam allowance.
- The tape is ironed on the reverse side. Use gauze; delicate items require careful handling.
- Folding the seam allowance, sew on a sewing machine.
- Punching a hole in the fabric is done with scissors or punches.
- The excess material is cut out. Using the previously made marks, a crosswise cut is made.
- The diameter of the element should correspond to the cut made in the fabric.
- Eyelets are inserted. There is one piece on the wrong side, and a second piece on top. Excess threads are removed with scissors and protruding material is tucked in. The eyelets are pressed on both sides, and so on every detail.
The methods of attaching to the cornice are not limited to this. They hang it on a bar, use special clamps, and string it on a cornice or rope.
Eyelets combine practicality, ease of use, reliable design, and ensure the durability of the product. Suitable for all rooms, they are wear-resistant. Feel free to choose and combine curtains. Installation does not take much time. At the same time, the resulting design will delight you for many years.
Sometimes even changing one detail can change a room beyond recognition, and beautiful eyelet curtains may well be that.
Characteristics
When choosing new eyelets, pay attention to several important characteristics
Diameter
The main distinguishing characteristic of such parts is the diameter of their holes. Determining the optimal diameter directly depends on the purpose for which the part is purchased. In stores you can find designs with a diameter from three to forty millimeters.
Depth
Another important parameter is depth. To determine it, you need to measure the distance between the end of the sleeve and the top cap. Before choosing a part, it is necessary to determine its depth, since this indicator determines the thickness of the installed structure.
Material
It is known that eyelets are made of various materials and therefore this must be taken into account when choosing them. If they will be installed outdoors, it is better to use structures made of plastic or metal coated with copper. Any materials are suitable for residential premises.
Form
Some people believe that such hats can only have a round shape, but this is not so. There are manufacturers who produce fittings in rectangular, oval or square shapes. There are also unique uniform models made in the form of dolphins or fur seals.
How to sew curtains
This type of window design is considered the most popular today. In addition to the previously listed basic materials for sewing curtains, you will need grommet tape, the adhesive base of which will help to properly attach the product. The tape can be purchased at a specialty store, where it is offered in widths from 5 to 12 cm.
In order for the curtains to have an aesthetic appearance, you need to correctly calculate the number of fastening elements. How to make eyelets on curtains? If an even number of eyelets is installed on the curtain, the edges of the product will be directed in one direction. The standard distance between them can range from 15 to 20 cm. If the distance is greater, then the folds will be larger.
The first and last fastening element is installed 5–7 cm from the edge. If the distance is greater, the curtains will puff up; and if it is less, then the part may get caught on the hem and not be fixed.
Once all the instructions have been carefully read, you can begin sewing. DIY curtains with eyelets step by step instructions.
Master Class.
- The top edge of the curtain is folded inside out 2 cm and ironed.
- The size of the next hem will depend on the width of the eyelet tape. It is wrapped and ironed.
- The eyelet tape is placed between the fabric, under the large hem. It should be shorter than the width of the curtain by the amount of the side hems.
- Having straightened everything out carefully, we proceed to ironing. To avoid damaging the fabric of the curtains with the hot temperature of the iron, you need to place the cotton fabric on top of the curtains and only then iron them.
- To prevent the tape from falling off over time, it must be sewn with a machine stitch along the upper edge of the hem.
- The next step is processing the bottom of the product and the side edge.
- We install the eyelets according to the markings made in advance. To do this, you need to attach a ring and draw its inner circumference on the fabric. When all the elements are outlined, you can cut out the holes with sharp scissors, you will get some kind of loops. In order for the eyelets to be neatly attached to the fabric, you need to cut a slightly larger diameter than the one drawn. Two parts of the eyelet are applied to the resulting hole and compressed until a characteristic click is heard.
Advantages of curtains:
- Many people enjoy the sound of their window curtains sliding and closing. But this only happens when metal is used as the material for making eyelets.
- When the curtains are closed, the wave is uniform - it will not be disturbed after washing.
- Thanks to the eyelets, the fabric wears out more slowly, regardless of how often the curtain is closed.
- The design is very simple: even a child can open and close the curtains.
- If you accidentally pull the curtain, it will not break. The mount is quite strong, the main thing is to install it correctly.
Types and materials
Eyelets can be classified according to several criteria.
The table describes in detail the types of fittings and their characteristics:
| Distinctive features | Description |
| Magnitude | From 4 mm to 8 cm in diameter. Small eyelets (up to 2 cm) are used for sewing clothes, for making shoes, and also in office supplies. Large rings are installed on curtains and awnings. |
| Form | The outer edges may have an unusual appearance. For example, for children's rooms and bathrooms, you can purchase accessories in the shape of a flower or animals. Triangular and square grommets are sold for living rooms. For ribbons and flat laces, you can purchase oval eyelets. |
| Material | The fittings are made of metal, wood or plastic. |
| Color | The rings should be in harmony with the shade of the product on which they will be attached. You can buy matte or chrome metal eyelets. A special coating protects the metal from corrosion. Plastic fittings come in a wide range of bright colors, and wooden rings come in dark and light colors, usually coated with a layer of varnish to ensure good glide over the curtain. |
It is important to select the size and color of not only curtains, but also cords or ribbons. For example, shoe fittings should either match the base material or be the same color as the laces.
Distinctive features
Thanks to them, the curtain can be closed quickly and easily. They are located so freely that they do not impede the movement of the canvas. They move smoothly and calmly along the cornice. They don’t sag, stay straight, and don’t form wrinkles. When moving, they do not affect it, ensuring wear resistance of any model.
A distinctive feature is that it can be attached to curtains. They look installed on special equipment. In fact, even a non-professional can secure them. The time and effort spent will not keep you waiting long. Carefully hung curtains compensate for the work.
In places where there are slits, beautiful natural folds are created along the entire length of the curtains, which allows you to create romantic comfort.
Which rings are better, metal or plastic?
Many people believe that plastic rings are better than metal ones. They explain this by saying:
- they are easier to install because they snap easily into place, requiring no special equipment;
- After prolonged use, there is no trace left on the curtains, as they do not rust.
Proponents of metal eyelets argue that if the rings are made of high quality ferrous or non-ferrous metal, then the above mentioned comments have no meaning. Plus, the following products:
- stronger;
- more reliable;
- may last longer.
Such curtains fit perfectly into a modern interior.
Preliminary work
Preliminary preparation is important in any business to obtain a quality result. Before you think about how to make eyelets for curtains, you should:
- Make the necessary calculations.
- Buy material of the desired color for curtains and lining.
- Buy dublerin or grommet tape, eyelets. The width of the tape should be 2 centimeters larger than the outer diameter of the fastener.
- Find a flat surface to work on: you can work on the floor or use an ironing board.
Fabric yardage calculation
To calculate the required amount of fabric, you should find out the length of the cornice and determine the height of the finished product. The length of the cornice should be multiplied by a factor to give the product beautiful folds. The coefficient will be equal to:
- For light fabrics - 1.5.
- For dense materials - 2 or 2.5.
The calculation also includes material for side allowances (up to 15 cm), top and bottom allowances (at least 25 cm). The calculation looks something like this for a cornice length of 1.5 meters: 1.5 2 + 0.15 = 3.15 meters or 315 centimeters.
Counting the number of fasteners
To purchase the required number of fasteners, a preliminary calculation of materials should be carried out. To calculate the required number of eyelets, you need to measure the internal and external diameters of the fasteners, taking into account the standard properties:
- It is necessary to purchase an even number of eyelets.
- The rings should be attached at a distance of about 18 centimeters. The optimal distance for attaching them ranges from 15 to 20 centimeters. When using a double curtain rod, consider the distance between the rods so that the curtains do not touch.
- The distance between the side edge and the center of the first eyelet should be at least 7 centimeters. This parameter depends on the width of the hem and the outer diameter of the fastening. To securely fasten the fittings, you should place them so that the fasteners do not touch the seam.
Preparing fabric for cutting and finishing seams
The curtain is prepared in advance for installation of eyelets. Before installing the rings, you should:
- Decorate curtain fabric. This procedure is carried out by wetting, drying until damp, and ironing the fabric. After this treatment, the fabric does not shrink after washing.
- Sew on the lining and finish the seams.
The seams are processed in strict sequence. The top seam is treated first. The material is processed in compliance with the technology:
- The material is laid out on a flat surface.
- The wrong side is folded and ironed 2 cm.
- Another fold is made to fit the width of the grommet tape.
- Having released the width of the hem from the edges, lay the tape between the layers of fabric.
- The strip with tape is glued using an iron. Iron small sections of the tape until the sides are completely glued. Only after obtaining a high-quality result do they move on to the next section.
- The fabric is sewn along the edge of the lapel, departing 2 centimeters from the edge.
You can sew the side seams using a hem stitch. It is not necessary to use grommet tape - you can use regular curtain tape, after removing the tension cords from it. You can hem the bottom of the product after installing the eyelets at home in order to measure the desired length of the curtain to the floor. In order not to spoil the fabric due to lack of experience, you can carry out all the necessary work on a small piece of fabric.
Advantages and disadvantages of application
Why eyelets are considered a good invention:
- Curtains with eyelets glide well on a special round curtain. They open silently and easily. The same can be said about paper with eyelets. Such sheets are easy to turn over in a folder.
- Reliable fastening. If curtains on hooks can be accidentally touched and the loops broken, then the eyelets will withstand such a load.
- Aesthetic appearance. Thanks to the fittings, the holes look neat. You can choose eyelets by color, to match the tone of the product, and also choose an unusual shape.
- Clothes and curtains can be washed in a machine without removing the accessories.
The only drawback is that the material on which the eyelets will be installed must be chosen correctly. Many fabrics shrink after washing, as a result of which the hole is deformed, and threads or the edge of the cut material come out from under the fastening of the fittings.
How to sew curtains and tulle on eyelets yourself - step-by-step instructions
Sewing curtains yourself using eyelets will take some time. However, unlike products purchased or ordered from an atelier, making them yourself will cost much less. Costs will be associated only with the acquisition of the necessary material.
Fabric calculation
Having determined the total amount of material, calculations are made taking into account hems, where the allowance is:
- lower edge – 8–10 cm;
- the upper part can be up to 25 cm. Such a margin is required, since the eyelets must be attached to several layers of fabric;
- lateral edges – 3–4 cm.
In the case of sewing a curtain consisting of two parts, in order to fit the pattern, the material is taken with a reserve.
Tools and materials
To attach grommets to curtains you will need:
- grommet tape;
- scissors;
- ruler;
- pins for marks;
- chalk with a pointed end;
- pliers.
To install metal rings, you also need a hammer drill, a hammer, and a rubber gasket. The latter is necessary to soften the blows of the hammer on the fittings during fastening.
Initial material processing
Before securing the rings, the fabric is pre-compacted. After all, even dense material is not able to withstand the loads from the fittings installed on it for a long time. This applies to both plastic and metal products.
Therefore, to reduce the load on the curtain, a grommet tape is pre-attached. However, if it is not possible to use such a tape, then dublerin can be an alternative sealant. Although this material is inferior in its characteristics, it is still quite suitable as a reinforcing element. In any case, the tape is selected so that its width is greater than the outer diameter of the rings.
The upper part of the fabric is folded twice to the width of the installed tape, and the fold is ironed. In turn, on the sides, the seal is cut off with a margin equal to the width of the hem. After the manipulations, the canvas unfolds, and the tape is adjusted along the intended upper fold and secured with an iron. To ensure that no traces of a hot electrical appliance remain on the canvas, the work is carried out through a sheet of paper. To more securely fasten the eyelet tape, a seam is made along the very edge of the hem.
Markings for eyelets
After the grommet tape is secured, dots are applied to the curtains indicating the centers of the fittings. The marked places are marked with pins. Then the contours of the holes along the inner diameter of the eyelets are marked on the fabric, and the intended part is cut out along them with a margin of 2 mm. After that, rings are installed on both sides and snapped or pressed with a press.
Tip: To speed up and make work easier, use a flaring tool and a punch.
At this stage, the main task is to apply the central points evenly. To ensure that the edges of the curtain are in the same position, there should be an odd number of spaces between the eyelets.
Additional tips and tricks
To properly repair an awning, you need not only to follow the standard provisions of the instructions, but also to familiarize yourself with the list of additional recommendations. Among them are the following:
- As a patch, it is better to take fabric from the same material as the canvas itself. The patch should be strong with no frayed edges.
- Do not use tape on the damaged area, since this is an unreliable way to solve the problem. Only certain types of adhesive solutions are able to fix the patch.
- If you doubt your own capabilities, you can always contact a workshop where the integrity of the canvas will be restored. In addition, specialized services can repair even very large defects.
- If the fabric has come apart along the seam, then after sewing with nylon thread it is recommended to apply an additional layer of adhesive solution.
- When performing work, be sure to follow the instructions for using the adhesive composition and the basic rules for gluing the patch to the canvas. In particular, repairs cannot be carried out without first degreasing the surface, since without this the adhesion of the materials will deteriorate.
By following simple tips and recommendations, you will be able to carry out high-quality repair work and restore the condition of the canvas. If the wear is so severe that the awning tears repeatedly with minimal external influence, it is easier to replace the material.
Which is better for tourist awnings: loops or eyelets?
One of the areas where awnings have found their application is tourism. Tents, awnings, and marquees are very popular among those who love outdoor activities. However, tourist awnings are subject to much more stringent quality requirements than ordinary inexpensive products intended, for example, to cover trucks or things on the street.
Tourist equipment must provide high tensile strength during sudden jerks, which largely depends on the design of the attachment points. Usually, eyelets are placed in places where simple and cheap awnings are secured. In order to make a grommet in an awning designed for high loads, you need to strengthen the place where the tent is attached. This can be achieved by installing the grommet through a plastic or additional brass washer. Then the mount will look something like it is shown in the figure below.
But such strengthening and complication of the design inevitably leads to an increase in the cost of the final product. On cheap awnings, they simply punch a hole and secure a ring of two washers in it. Here the eyelets perform not a power function, but a fastening function.
An alternative to quality reinforced eyelets are eyelets, often used in camping gear. These are small pieces of slings sewn into the attachment points, forming devices for awning guy lines. They are, of course, cheaper than high-quality eyelets, but their performance characteristics are lower.
High-quality installed grommets do not have the problems that appear on cheap awnings. Therefore, there are usually no complaints against them. Problems arise when things are used for other purposes. The same shelter canopy is not intended for tourism. Thus, when choosing an awning, think about the conditions in which it will be used.
Stationary
An analogue of a mobile one is a stationary electric press. It is equipped with tools for punching holes and making a grommet mandrel on it. A special feature of this machine is the absence of a mechanism for drawing the awning fabric, which significantly reduces the speed of its operation.
Our company Mostent has been working for a long time in the market for the production of ready-made awnings, used not only in transport, but also in the installation of various lightweight building structures on steel frames. The company's production lines are equipped with the highest quality equipment for installing eyelets - automatic mobile presses, which allows achieving the highest quality of work.
The high speed of installation has made it possible to significantly reduce the time required to complete even the most voluminous orders, which sets us apart from our competitors. At the same time, the advantages described above did not affect the increase in the cost of work, which is very convenient for our regular and potential partners.
Auto
The most productive and high-quality installation is the automatic installation of eyelets using a special mobile electric press. This device allows you to mount up to one and a half thousand rings per hour with the highest quality of work. An electric press allows you to perform the following actions that affect the quality of work:
- load grommet elements into separate containers in large batches, thereby ensuring their automatic feeding;
- Adjust the installation distance for different requirements;
- move the device along the edge of the awning fabric, installing it in the desired place. To control the direction of movement and the distance to the edge, many electric presses are equipped with a laser beam and an adjustable stop.
Using an electric press for eyelets has many advantages, the main ones being high quality and speed of installation. The high cost of this type of equipment makes it practically inaccessible for small companies.
Manual
Manual installation of eyelets on fabrics and canvases is used when organizing handicraft industries with a small volume of manufactured awnings. To implement it, two simple devices are used:
- punch - a steel tube of suitable diameter, pointed at the working end, working in tandem with any impact tool;
- a manual press consisting of a matrix and a punch, also requiring a hammer or half-sledge hammer.
The technology for installing eyelets manually involves performing the following steps in the described sequence:
- along the edge of the canvas, using simple measuring instruments, marking the installation location of the fittings for threading the cords;
- at the indicated points, using a punch, round holes are cut out with such a diameter that the cylindrical part of the half-eyelet fits tightly through it;
- the eyelets are inserted into the hole and a counter ring is put on the tubular shank;
- using a hand press and a hammer or half-sledge hammer, the protruding cylindrical part is crimped, placing the matrix at the bottom, and a mandrel with a hemispherical working surface is installed at the top.
The advantages of this method are simplicity, accessibility, and low cost. The disadvantages are the low speed of installation of eyelets and the low quality of work.