Installation of cladding, facade or decorative panels without drilling holes, non-destructive fastening of lining - a large number of such tasks can arise for a finisher or repairman. There are many methods for performing such work, but most of them require experience and high qualifications. At the same time, it is impossible to guarantee a positive result - “surprises” may arise at any moment in the form of broken pieces, broken edges and other troubles.
However, there is a simple and very reliable way to fasten such materials using clamps. They are almost completely free of problems and allow even completely untrained people to carry out high-quality installation. Let's take a closer look at these elements.
What it is
A kleimer, or mounting clip, is a fastening element designed for the hidden installation of sheathing or cladding of various types.
The name “kleimer” comes from the German word “klammer”, meaning “bracket, clamp, clamp.” Based on the spelling of the word, another variant of the name is often found - “clammer”. This does not change the meaning; as a rule, there are no fundamental disputes about terminology.
Externally, it looks like a stamped plate, in the center of which there is a mounting element in the form of a bracket. The plastic has holes for screws with which the clamp is attached to the supporting surface (wall, sheathing, other planes).
The protruding bracket engages with the end part of the attached element (usually from the side of the longitudinal groove) and securely holds the skin. The next element is inserted into the groove and, in turn, secured with a clamp - etc. No fasteners are visible from the outside, the sheathing fabric looks very neat, without irregularities or protrusions.
There are other types of clamps designed for mounting certain materials. They have different shapes and number of staples, but the general principle is always the same.
Clamps are made of spring steel or (more often) of galvanized sheet steel with a thickness of 0.5-0.8 mm. Of all the hardware, these parts are the least known to users, although everyone has encountered them at least once in their lives. For example, attaching mirrors to support plates made of thick plywood or woodworking panels are also clamps specialized specifically for this task.
Most users know this type of fastening, but have no idea what it is called.
Working with such a mount is very simple and convenient. You just need to select suitable screws or nails that match the diameter of the holes in the plates. The easiest way is to buy sets (usually 100 pieces), where the hardware is equipped with suitable nails or screws.
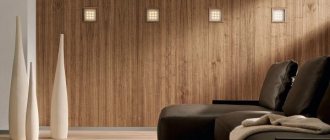
MDF panels in the renovation of a private house
MDF panel is a finishing material made from wood chips pressed under high pressure. The panels have the following advantages:
- a high-quality MDF panel does not contain phenolic compounds and resins, and wood chips are glued together by the substance lignin, which is released by wood;
- the material is more resistant to liquid and moisture than natural wood;
- panels provide additional insulation from noise and temperatures;
- the material is easy to process, install on the ceiling and dismantle;
- the panels do not require painstaking care and are easy to clean;
- the cost of MDF ceiling panels is lower than the cost of panels made of natural wood;
- the appearance of this material completely imitates real wood.
The disadvantages of the panels include:
- relatively low strength and resistance to mechanical damage;
- fire hazard;
- the need to hide electrical wiring in a metal sheath in case of its possible contact with the panels after their installation.
Advantages and disadvantages
The advantages of clampers include:
- high installation strength. Each element is capable of carrying a load of up to 25 kg;
- high attractiveness of the finished canvas - hidden elements are absolutely not visible from the outside, the covering looks clean and neat;
- cladding elements are not subject to destruction. Conventional fasteners often rust, chip off pieces of the edge, or develop cracks in the face. Kleimers are completely devoid of these shortcomings;
- The manufacturing material is galvanized steel, which allows the use of hardware even in wet rooms (baths or saunas);
- simplicity, ease of installation;
- the covering on the clamps easily tolerates mechanical loads;
- reuse is possible - if necessary, the casing can be disassembled and the clamps can be used in another place.
Flaws:
- a wooden support system (lathing or solid flooring) is required for use;
- each type of cladding or attached elements requires its own type of hardware;
- searching for suitable clamps does not always give successful results.
Despite some disadvantages, clamps are highly rated by specialists and home craftsmen. Installation of sheathing or cladding with their help is quick and efficient, which makes you put up with a certain number of negative qualities.
Installation
In order to install the clamps you will need the following tools:
- marker;
- hammer;
- screwdriver;
- roulette;
- level;
- square;
- screwdriver
At the first stage, the base is prepared, which consists of leveling the surface. Evenness is checked using a level or laser. Protrusions are removed, and depressions and cracks are sealed with suitable material. As a rule, sheathing is installed to simplify leveling. When constructing it, wooden blocks or metal profiles are used, the spacing between which should not exceed half a meter.
Next, the surface is treated with an antiseptic composition and the time is waited until it dries completely. After the antiseptic has dried, they begin to mark the places where the clamps will be installed. In the case of a vertical arrangement of the finishing material, the hardware is attached, retreating from the adjacent wall by the width of the lamella.
Fastening lining to clamps Source ingushetia.org
Kinds
There are several groups of clamps designed for fastening different materials:
for installation of lining, siding (block house) and other types of cladding;
for plastic elements;
special types designed for fastening panels made of solid materials. For example, facade porcelain stoneware plates, mirror panels, glass elements, etc.
The second and third groups are used mainly by professionals, since working with them takes place in difficult conditions or requires high qualifications. At home, clamps are most often used for lining and other types of wooden cladding. They are available in different sizes.
A total of 6 groups are used, which differ in numbers:
No. 1 - for elements up to 5 mm thick (thin vinyl panels, siding);
No. 2 - sheathing up to 8 mm thick (laminate, MDF panels);
No. 3 - chipboard, OSB;
No. 4 - standard eurolining lamellas;
No. 5 - moisture-resistant reinforced lining;
No. 6 - block house.
Only hardware for wood sheathing is listed. However, there are many more of them in the range of manufacturers. For some materials (for example, decking boards), clamps are included as component materials. But such equipment is not always found; often the necessary clips have to be found separately.
There are roofing clamps that are used when installing self-locking seam roofs. These elements have a specific shape; it is difficult to confuse them with other products due to the large height of the bracket.
The abundance of fasteners allows you to choose the best option for any material. At the same time, often the required varieties are not on sale - there are too many of them, and retail chains are not always able to provide the full range of necessary products.
Expert opinion
Torsunov Pavel Maksimovich
Often you have to use clamps that are close in size. Their staples are bent a little, and sometimes the elements are cut in half and installed with staples in different directions, obtaining a starting type of hardware.
Application
Hardware is used in matters of construction and finishing, where it is impossible or undesirable to use nails, due to the fact that the appearance can be spoiled. Before use, you need to assemble a wooden or metal structure in the form of guides, which are installed level in the same plane.
The number of guides for fastening must be at least 3 pieces, where the material will be fixed in the center and along the edges. It is recommended to use at least 5 guides per length of three meters.
Claymer for lining
Place the hardware evenly. When using self-tapping screws and screwing them into wood, it is recommended to drill to prevent cracking of the guide.
The scope of application is such that gluers are used by private individuals in matters of finishing, as well as by professional builders. For example, it is used when finishing a bathhouse with clapboards made from any type of wood. It is used for installing MDF panels in hallways and kitchens, for lining ceilings, and for arranging floors in gazebos and loggias by laying decking boards.
How to choose
Selecting suitable clamps is not a difficult task if you have some experience in handling such products. However, for an unprepared person, making the right choice of hardware is not easy. There may be a lot of options on sale that look quite suitable for the existing purposes.
Therefore, it is necessary to understand the selection criteria that will guide you:
clip number . This is the main parameter, which is often sufficient to resolve the issue (the passport of some materials directly indicates the number of the clamper);
quality of steel, presence of protective coating and its condition . As a rule, galvanized hardware is sold. It is necessary to inspect several pieces and check the integrity of the galvanization, the absence of peeling or rusty areas;
for some materials (vinyl panels, regular lining, MDF or OSB up to 14 mm thick), the usual type of hardware is suitable . Thicker sheathing will require reinforced products suitable for laying floor laths, thick sheet materials or sheathing elements;
it is necessary to measure the dimensions of several elements and make sure that they correspond to each other . This is an important point, since during storage the remains of different hardware that are similar to each other are often dumped into one box. Externally they are identical, and only checking the sizes will make it possible to verify the differences.
When purchasing fasteners, it is necessary to have accurate data on the dimensions of the sheathing or other materials to be attached. The best option is to have a sample with you, to which you can try on different types of hardware to determine the most successful option.
It must be remembered that all types of cladding are produced by different manufacturers and may have deviations from standard sizes. Therefore, the opportunity to try clamps on a sample will help eliminate mistakes and buy elements of the correct size.
Clamps for lining
Clamps for lining are brackets made of stainless or galvanized steel. The fasteners are rigid, so the connection remains reliable for a long time. The lining has a longitudinal groove, on the other side there is a longitudinal rib. The design features ensure ease of installation, so you can handle the installation of the planks without anyone else’s help.
First you need to install the first lamella in a horizontal or vertical position, and then secure it with self-tapping screws. Then the clamping hooks are installed in the groove of the plank and mounted on the sheathing. In this case, it is necessary to observe a step of 50 cm. The next lamella is placed in the groove of the previous one. The position is checked by the building level. If there is no unevenness, then you can fasten the next board. This method of installing the lining allows you to get a strong and reliable canvas that will not experience mechanical damage during installation. Clippers for PVC and other materials are used in a similar way.
In addition to lining, a block house is often used for finishing, which is of high quality. Solid wood is used to make the block house. The plank on both sides has a groove and an edge for a reliable connection, so installation is carried out according to the same pattern. At the same time, the dimensions of the clamps for cladding a block house differ from the hardware for lining.
How to calculate the required quantity
Before purchasing mounting clips, you need to determine their quantity so that you do not have to stop work and go to the store for the missing elements.
The necessary calculation is based on determining the length of the sheathing elements and the sheathing pitch.
Procedure:
- the length of the panels (beams or other sheathing elements) is measured;
- the pitch of the sheathing planks is determined (it is necessary to take into account the distance between the axes of the planks, and not between their edges);
- the length of the panels is divided by the sheathing pitch (rounded to whole numbers) and one is added to the resulting value.
After this, all that remains is to multiply the resulting value by the number of panels. This is how the number of clamps for the sheathing installed on the subsystem (sheathing) is calculated.
However, continuous flooring is often sheathed. In this case, the procedure is simpler - the length of the panel is divided into equal parts (you need to focus on 50-60 cm). This gives the number of clips on one panel. After this, you need to multiply the resulting number by the number of panels, which will give the total number of hardware.
It is necessary to have a small supply of clamps - in some areas, plane transitions or places of longitudinal connection, an increased number of fasteners will be required. Therefore, the total quantity is increased by 10% to ensure the required supply.
Practical advice
In order to increase the service life of the lining and preserve its original appearance, it is advisable to follow a few simple rules:
- The purchase of clasps must be carried out only in stores that have the appropriate specialization. This will allow you to buy high-quality fasteners that will not suffer from corrosion or fail.
- It is not recommended to use liquid sealants to form joints. This negatively affects the hardware and leads to their rapid corrosion.
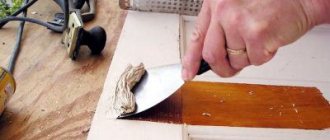
- Upon completion of installation work, it is advisable to take measures aimed at protecting the lining. For this purpose, it is coated with varnish or other protective honeycomb. This coating also improves the appearance of the finishing material. Also, impregnation of the lining with paints and varnishes helps protect it from exposure to dampness and direct solar radiation.
The final stage of finishing Source www.owatroldirect.co.uk
- During finishing work, it is advisable to exclude direct contact of the lining with the base. This can lead to rotting and fungal damage as it will impair the ventilation of the walls. To solve the problem, vapor barrier substrates are used.
- Holes for sockets and switches are made after completion of installation work and before applying paint and varnish coatings. This can be done using a special flared saw or a drill attachment.
- All spaces remaining near the walls or floor are covered with skirting boards that match the color of the lining.
These simple rules help not only speed up the progress of work, but also increase the service life of the finishing material.
Questions and answers
Almost all inexperienced people have some questions.
We will answer them in advance so that users do not waste time searching for the necessary information:
If the number of panels is unknown, but the sheathing area is known, how to calculate the number of clamps?
In such cases, average indicators are used. The accepted consumption is 100 pieces per 5 m2 (for regular clips) or 150 pieces per 7.5 m2 (for reinforced hardware). It must be remembered that these are average values and provide only an approximate result. In addition, the increased consumption of elements at the transition points of planes is not taken into account here.
Is it possible to change the size of the clamps yourself if you couldn’t find the right number?
In principle, it is possible. However, you will have to spend some time with each element separately. This job can be done if only a few fasteners are needed. However, for large sheathing panels this solution to the problem is not suitable; you need to look for clamps of the required size.
What is the best way to attach clips, with screws or nails?
Nails are faster, screws are stronger. If you have to work with small screws, you will first have to find bits that ideally fit the cross-shaped slot of the head, otherwise each screw will have to be screwed in for a long time and not always successfully.
Is it possible to reduce the number of clips per panel if the paneling is quite light and rigid?
Can. However, the determining factor here is the pitch of the sheathing. If you skip one strip, you may find that the trim is not securely attached. You can install the clamps in a checkerboard pattern - for example, one panel is attached to all even planks, and the next to all odd ones, etc.
How long does it take to install using clamps?
It is impossible to give a definite answer here. In each case, the duration of the work is influenced by several factors - the quality of materials, the availability of skills, working conditions, etc. it is necessary to take into account that hidden installation may require more time than through installation. The goal here is not to speed up the work, but to achieve a better result.
Choice
The main condition that must be observed when choosing hardware is that the size must correspond to the type and width of the lining being fixed. If the clamps are made of galvanized steel, the integrity of the protective coating is checked. If it is damaged, the anti-corrosion resistance of the fastener drops sharply.
Self-tapping screws or other fastening accessories are purchased at the rate of at least 2 pieces per bracket. Installing the clamp on one self-tapping screw is unacceptable - such savings will inevitably lead to deformation of the finishing material in the future.
Self-tapping screws for clamps Source lesobirzha.ru
Calculating the required number of staples is quite simple. On average, about 20 hardware is required per square meter of surface to be finished. It is worth considering that on flat areas the step between them is 45 centimeters. In the extreme zones it is reduced to 35 centimeters, and in the corners to 25 centimeters. The longer the form factor of the finishing material, the larger the step between the staples and, accordingly, their consumption decreases.
Advantages
The hidden method of fastening lining using clamps has gained increased popularity not without reason. Thanks to its use, the finishing process has significantly accelerated. In addition, the use of clamping hardware reduces to zero the risk of damage to the material, the appearance of splits and cracks, which often happens when using standard fasteners made of nails and self-tapping screws.
Claypers are selected individually for the type of lining used in the work. The high degree of fixation of such hardware guarantees that in the future the boards secured with such staples will be motionless, will not give play and will not become loose.
The use of clamps does not require the use of any additional components. For installation, the staples themselves and nails or self-tapping screws are sufficient to complete the fixation.
All products of this type have an anti-corrosion coating or are made of stainless steel. Due to this, the reliability and service life of parts increases many times over.
Installing the lining and dismantling it in this way is done quite quickly. The clamps are practically invisible, so the structure has a complete appearance, without gaps or indentations, any damage or protruding fasteners such as nail heads and screw heads.
Installation using such hardware is simple and does not require the use of special tools.
Peculiarities
The clamp is ideal for fastening lining. Its configuration and design are made in such a way that the lining is securely fixed to the sheathing. The fastening form factor is perfectly combined with the shape of the lamellas, which have a special tongue-and-groove system.
The bracket is attached to the sheathing or rough base using two holes. To fix it on different surfaces, different types of fasteners are used:
- self-tapping screws;
- screws;
- nails.
Deep hooks on the brackets help strengthen the board. There are models that are additionally equipped with spike hooks. They serve to strengthen the fixation of the material and give additional strength to the fasteners.
Today, all kinds of clamps for lining are produced: sizes, models, materials can be different. This allows you to select hardware building materials for different types of work.
Assembly technology
Typically, prefabricated furniture purchased in a showroom, store, or market, or ordered from a factory, is delivered to consumers in disassembled form. If the installation of furniture is not specified in the contract, the craftsmen will not assemble it, so the owner needs to do the entire amount of work with his own hands. On the one hand, if you have a drawing, components, and tools, installation is not difficult. But high-quality assembly requires the presence of certain skills and a minimum understanding of the technology of assembly and installation of cabinet furniture. Main stages of the technological process:
- unpack furniture parts, fasteners and accessories supplied in the kit. It is imperative to check that the units comply with the declared quantity, quality and color;
- You should check the availability of instructions, diagrams, detailed drawings according to which the furniture is assembled. If some elements are missing, you can purchase additional fasteners or contact the manufacturer;
- it is required to select and prepare fasteners, mounting fittings, connecting elements, drills, electrical and mechanical tools, hardware and other consumables;
- checking that the holes for fixing the fasteners correspond to the attached drawing. The assembly diagram must contain clear instructions for installing the furniture structure;
- if you have no assembly experience, it is recommended to first mount something small, for example, a furniture box, and then proceed with the installation of large furniture, as shown in the picture;
- furniture assembly is carried out in the following order: installation of shelf holders, hinges, strips, ties, connection of frame elements, installation of doors, gluing mirrors, installation of handles, legs;
- complete design with shelves, drawers, decorative fittings. It is convenient if during assembly you can position the model using adjustable legs;
- built-in furniture is fixed to the wall, and a sliding system is first installed under the sliding wardrobe. Stationary furniture is completely assembled and then installed in the chosen location;
- adjustment of facades - use a screwdriver to loosen or strengthen the bolts of furniture hinges. It is necessary to ensure that there is no gap between the doors;
- checking the plane of the kitchen countertop, clearly hanging the upper sections of the upper cabinets, installing household appliances.
Hidden fastening of furniture parts. (kitchen cupboard)
How to connect the parts so that the fasteners do not ultimately spoil the appearance of the product?
Of course, glue them together, according to the classics, on dowels/chops.
Yes, for laminated chipboard parts this method is also allowed, but it is not used due to the increased assembly time. Previously, I remember such glued cabinets were delivered as ready-made sets from Italy, somewhere in the Moscow region.
According to the technology, for high-quality gluing and the absence of an adhesive seam, the parts must be tightened with special large clamps
I didn't have this goodness. Buying it is quite expensive.
I got out of it the best I could:
the result of such perversions was a kitchen without visible fasteners and plugs.
A few more photos of this kitchen
Duplicates found
@pardonche, @cblpop, @Maxviduoka, @Kowareta, I would like to sincerely thank you for your comments. You are all right, the work is far from a standard and a demonstration of “skill”.
You helped me look at my business differently.
The tape with the switch is of course poorly made
agree. Please advise how the external design could be improved?
in a profile like this.
Oh, instead of a switch you can use a dimmer.
Now there are LED lamps with motion sensors on sale. Turns on and off when you bring your hand to a distance
15 cm from the sensor. Unfortunately, I couldn’t find these sensors for sale separately. For a “wet” kitchen, I think this option is optimal.
It seems to be more beautiful, but fucked.
Who cares if you open a drawer and you can see some kind of eccentric or fastener inside the drawer?
PS why didn’t you go for Euro? these slats on the tables are so 90s
PSS I dare to assume that if you have to disassemble the boxes, it will be a big problem
customer initiative. The owner didn’t want to see the fasteners. no. Euro saw, like many other things, was replaced in the project for the purpose of overall savings and final customer satisfaction
Eurozapil involves European-quality renovation, as I was once told)
Have you tried to explain to her what kind of collective farm this will create?
PS I wouldn’t dare take on this, in view of the dubious adequacy of the customer, who knows what to expect from such people.
Methods for attaching laminate
For all methods there are certain rules so that the finish after installation retains its original appearance and no unraveling seams appear. Wall laminate in a pack is kept for a week or two in the conditions of the room where it will be installed, to adapt to temperature and humidity.
Mount the frame:
- They mark the slats on the wall, usually the step between them is taken to be half the length of the lamella.
- The galvanized profile is cut to size, fixed vertically to the surface (horizontal lamellas), using a level and stretching the marking threads and cords.
- If the stripes are assembled vertically, the frame elements are placed horizontally.
- A horizontal cross member is strengthened from below so that it serves as a support for the first panel.
Staples are placed on the bottom bar to conveniently position the first row. The next lamellas are joined into a groove and secured with clamps and nails. The seams can additionally be coated with sealant. Temperature gaps should remain along the edges of the assembled coating for possible expansion, so that stress does not arise in the layer.
For clamps
The devices are used only on surfaces in which you can screw in a self-tapping screw, drive a nail, or a staple with a stapler. The clamp has holes for fixing to the frame and a clamp for the laminate shelf. Sometimes the shape of the clamp does not fit a particular laminate lock. Then grind off the threshold or cut off the protrusion using a chisel.
The first row is placed with wedges placed to ensure the strip is horizontal. Clippers are fixed to its upper part at equal distances. When installing laminate, make sure that there are no gaps.
Marking the base
The markings should be applied depending on the direction in which the lining will be located. Directionality can have both a decorative and practical function. For example, in baths and steam rooms it is recommended to give preference to the vertical cladding method, so that moisture settling in the seams between the boards does not accumulate and is able to flow down freely.
Horizontal markings should ensure that the bracket is located so close to the floor as to create access for a hammer to attach the clamp. To enhance the decorative effect of the finishing, diagonal laying is also used, or several methods of installing lining are combined to obtain unusual patterns on walls or ceilings. These methods are typical for residential premises. In this case, the work is difficult to complete without experience and training. The sheathing is usually installed perpendicular to the direction of the boards.