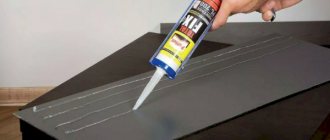
Today, many furniture and doors are not made from solid wood, since the material is quite expensive and is not always functional for the manufacture of such structures. Wood is replaced by fiberboard and chipboard. These materials are based on wood fibers and shavings. Due to the use of such materials, the products are light and hollow, so often with a careless movement you can touch the canvas and make a dent or hole in it. Even with the most careful handling of such a design, scratches and chips are still inevitable. But this problem can be fixed. In this material we will tell you how to quickly and easily repair a hole in a fiberboard door.
Possible causes of damage
Interior door blocks, for the production of which fiberboard, chipboard, MDF and other lightweight wood materials are used, which are weakly resistant to various damages. High air humidity and poor disinfection treatment lead to smoldering of the material. Distortions of hinges and displacement of the box can cause rubbing, loosening and chipping on the structure. Peeling of the top layer of the fabric can occur if the lining is incorrect.
But the most common damage is cracks, dents and holes. Most often, such shortcomings appear during powerful mechanical or shock overload. For example, when moving furniture or household appliances, the door structure may be damaged. What to do in a similar situation, and how to fix a hole in the door on your own?
Decoupage
The latest fashion boom is decoupage. The very essence is that ornaments and appliqués are glued to the surface. Often the material for drawing is simply napkins.
You can use decoupage cards purchased in specialized stores.
Materials
- Applications.
- Sandpaper.
- Putty.
- Varnish.
Before starting work, it is necessary to clean the surface of the doors, prime them and paint them with white enamel. The next stage involves applying miniatures to the door surface. The drawings are soaked in water and glued with light movements. You need to make sure that no air bubbles remain. Remove the air by stroking and leave until the applications are completely dry.
The edges of the drawings must be puttied. After drying, sand with fine-grained sandpaper and then coat with clear varnish. You can use other colors of varnish, depending on the project.
Yacht varnish is more durable and gives the coatings some dullness.
Preparation of tools and materials
First, you need to figure out how to seal the hole in the door if it is interior. So, the following materials and tools will be useful in the process:
- construction knife;
- medium width spatula;
- brush for applying varnish;
- sandpaper of different grain sizes (or a sander);
- construction tape;
- polyurethane foam;
- solvent;
- putty;
- polyester or epoxy;
- paint and varnish composition for working with wood;
- primer for wood.
If you need to fill a hole under a door or repair a frame, you will need a building level, a pencil, a tape measure and lubricant for the hinges.
How to make a passage for pets with your own hands
Cats are very freedom-loving animals and love free movement. Installing a passage for the animal will help solve the problem of leaving the house. You can install a cat door yourself, while saving a significant amount on its purchase.
Materials for production
Tree. The frame for the manhole and the door itself are mainly made from wood.
Plastic
This is one of the cheapest materials used to make a cat hole.
Rubber
Rubber can be used to improve sound insulation. To do this, it is placed in the doorway. You can also use it to avoid loud door knocking.
How to fix a hole in an interior door: step-by-step {instructions}
Repair work is carried out in a horizontal position. The door system must be removed from its hinges and placed on a level and clean surface.
Before closing the hole in the interior door, straighten the edges of the hole with a construction knife and fill the inside with newspapers, paper or cardboard. Such measures allow the system to be slightly heavier, give it strength and reduce the consumption of polyurethane foam. Then we proceed to fill the hole with foam.
After complete drying, we begin to clean the canvas. We remove the remaining construction foam protruding outward with a knife. Please note that only huge pieces of foam can be removed with a knife. Small residues can be removed with solvent. Otherwise, new scratches and cracks may appear on the door surface.
To increase the strength of the structure, apply a layer of epoxy. Apply putty on top. Any subsequent layer is applied only after the previous one has completely dried. We process the dry putty with a grinder or fine-grain sandpaper. Cover with primer and paint materials. Now you understand how to seal a hole in a door made of fiberboard, chipboard or other wood material.
Stained glass
When decorating glass door elements, stained glass compositions are used. This type of decor can be used to enliven a space in your home. Applying a design to glass is a somewhat labor-intensive process. You need to be patient to implement this idea.
Materials
- Stained glass paints.
- Sketch of the drawing.
- Marker for drawing a diagram on glass.
- Liquid for degreasing surfaces.
The glass surface is cleaned and degreased. The drawing is carefully applied. Afterwards, the process of applying the ornament to the glass occurs. After the design is completely completed, the stained glass window dries, only then the door can be hung in its original place.
For a simpler design of glass surfaces, stained glass self-adhesive films are used. Before use, the glass is wiped and the film is applied from top to bottom.
Important! When fastening, do not allow the formation of air bubbles.
How to seal a hole in an MDF door without an open gap
A wooden door does not always have open damage, but the presence of dents and other defects also require repair.
To evenly fill the internal space and prevent the structure from twisting, drills and drills are useful. We drill the wood panel in several places. We insert the tube of the cylinder with polyurethane foam into the resulting holes. Fill the inner space with foam. We work carefully to prevent deformation of the structure.
The next step is smoothing the door leaf. You can use construction foam. Such a work plan requires certain abilities, since the application of the material must be uniform. The upcoming method of action is no different from the previous option.
Selection of decor options
There are many ways to decorate and update a door. Even without any artistic skills, you can turn some of your ideas into reality.
The easiest way to decorate an old door is to repaint the door with new paint. In the modern building materials market, in addition to ordinary enamel, there is a large selection of different paints.
The best option at this time to decorate an old door yourself is to use acrylic paints. When using them, you will definitely be convinced of the ease of working with them, the absence of odor, and a wide color palette. To paint doors, you can use not just one color, but several - the main thing is to combine them correctly so that the result will only please you.
As an option, you can use latex paint, which is water-resistant, to decorate the door. This option is more suitable for doors to the bathroom and children's room. Latex paint is odorless, the drying speed is very fast, and in the end the whole job can be completed in about an hour. By painting the door to the children's room, you can attract the children themselves and come up with a unique design with them.
Using stencils
Even if you are not a professional artist, you can use a variety of stencils to create a beautiful interior door. Using them is quite simple: you just need to attach the stencil to the door and apply paint. As soon as the paint has dried, the stencil should be carefully peeled off from the door leaf.
And if you have the skills of a painter and artist, you can get an incredibly attractive drawing. If the resulting pattern does not suit you in some way, you can always fix it - repaint it again.
Decorating the door leaf
Finally, let’s look at the question of how to decorate the damage. We figured out how to repair an MDF door with a hole. Decorating does not require any special skills or abilities. The most common options:
- cover the treated space of the hole with a mirror or any other decoration;
- glue self-adhesive decorative film;
- hang a poster or collage with your favorite photographs.
The tips and advice discussed in this publication will help you remove damage to the interior door structure with your own hands. Now you understand how to cover and how to decorate a hole in the door.
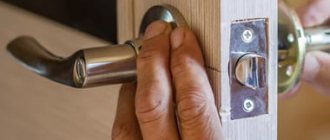
how to close the hole from the door handle and install another smaller one
help me find a solution to my problem. Chinese-made handles were installed on the door, the holes for them were drilled at 56 mm, and a year later they were out of order. Now I want to install more fashionable handles, but the holes do not close with the new solid door handles
09.24.2011 at 14:19
418ghbjhf Without a photo and without a sketch, it’s difficult to give specific advice, but most likely you need a turner. Cut a die out of brass, polish it, varnish it, and drill the necessary holes according to the corresponding ones.
09.24.2011 at 15:37
thanks for the advice. only the handle is chrome. here is a photo
09.24.2011 at 15:48
Use a chisel to make the recesses 3.5 mm deep rectangular and glue the plywood onto PVA or epoxy and varnish to match. Suitable for the end
09/24/2011 at 16:01 09/24/2011 at 16:11
deletear wrote: You need a turner. Cut a die from brass
418ghbjhf wrote: only the handle is chrome. Here is a photo
Maybe then put a D60 stainless steel washer under the handle? Theoretically, you can drown out the answer. a round boss made of wood, glue the veneer to match the color and patch it, but this work will cost exactly as much as your door costs
09.24.2011 at 16:16
Has anyone seen a handle with an overlay. How beautiful is it?
09.24.2011 at 16:20
418ghbjhf wrote: thanks for the advice. only the handle is chrome. here is a photo
Where is the photo? If it’s chrome, then you need to visit a store that sells bathroom accessories. Perhaps you will come across some suitable reflector. Even if it’s not round, but elliptical or rectangular. Or a cap from some bottle. Sometimes a targeted search brings unexpected results.
09.24.2011 at 16:43
418ghbjhf, take a D60 wood bit and cut out 2 circles of D58 from plywood approximately. Using the same crown, trim the edges of D60 to the depth of the thickness of the plywood. Glue the plywood circles to wood glue. Putting the handles exactly in the middle will be fine in my opinion
09.24.2011 at 16:51
and how to decorate plywood to match the color of the door
09.24.2011 at 17:24
Samar wrote: 418ghbjhf, take a D60 wood bit and cut out 2 circles of D58 from plywood approximately. Using the same crown, trim the edges of D60 to the depth of the thickness of the plywood. Glue the plywood circles to wood glue. Putting the handles exactly in the middle will be fine in my opinion
The crown is centered with a drill. So, if you can cut plywood, there is a problem with the door - there is no support for the centering drill. That hole - wow!
09.24.2011 at 17:27
418ghbjhf wrote: how to decorate plywood to match the color of the door
Decorate and select colors. If you don’t have experience, it’s better not to take it on. There you need a lot of test parts, processing, drying, selecting color intensity - it’s a complete mess.
Easy methods on how to seal holes in fiberboard doors using ordinary methods
Nowadays, many furniture and doors are not made from solid wood, since the material is quite expensive and is not always functional for the production of such structures. Wood is replaced by fiberboard and chipboard. These materials are based on wood fibers and shavings. Due to the use of such materials, the products are light and hollow, so often with a careless movement you can touch the canvas and create a dent or hole in it. Even with the most careful handling of such a design, scratches and chips are still inevitable. But this problem can be fixed. In this material we will tell you how to quickly and easily repair a hole in a fiberboard door.
Glue + sawdust
The solution is as old as time, and it should be noted that it works well. Perfect if you have a piece of chipboard torn out.
The idea is simple - we take sawdust (you can take it from a chipboard, a piece of which has been torn out), or find it near furniture factories, next to large construction supermarkets (usually there are pieces lying around that no one needs), crush them, mix them with glue (previously we used PVA) this Apply the mixture to the broken areas and let dry. And that’s it, tighten the “screws”. It's holding up well.
However, now there are a large number of adhesives; on the Internet I even saw a guy pouring a lot of glue from a glue gun into broken places. And everything seems to be holding up
I used to repair hinges in the kitchen a long time ago. BUT due to the fact that the sash was used often, it broke quite quickly.
So this is again an option for a while, for constant use (10 - 15 openings per day), this is not the best way.
Repair tools and materials
Before you repair a hole in a wooden door or fiberboard structure, you need to acquire certain tools and materials.
The following materials will be required:
- polyurethane foam;
- putty;
- primer;
- sandpaper;
- polyester or epoxy;
- paints and varnishes.
In addition to the materials mentioned above, in order to repair a fiberboard door with your own hands, stock up on the following tools:
- construction knife;
- varnish/paint brush;
- spatula of suitable width.
magSpace.ru
Open registration
Useful tips
Live
Related Posts
IDA November 20, 2012, 6:34 pm
gennaddii November 17, 2015, 02:41
Axelerator February 26, 2015, 08:16
Awant 23 August 2014, 15:59
Skiminok 11 July 2013, 18:00
Top rated
Blogs
- Jokes and humor179367.98
- Interesting143442.27
- Unknown98305.46
- And again NEWS93635.13
- proGames69492.58
Sequence of repair actions
When you have the necessary tools and materials, you can get to work. Next, we’ll look at how to repair the door if you’ve punched a hole in a fiberboard door.
We offer you an alternate method of action:
- Before filling a hole in a fiberboard door, remove it from its hinges and place it on a horizontal, level and stable surface.
- Armed with a construction knife, we make a hole. To do this, you need to move a certain distance away from the edge and make a cut with a confident and powerful movement.
- Now you need to place paper, newspapers, sections of fiberboard, chipboard, wood, and shavings inside the door leaf. This manipulation will allow the structure to gain strength. In addition, filling the space can reduce the consumption of polyurethane foam.
- Construction foam must be laid on top of the filling materials.
- When the mounting compound is one hundred percent dry and hardened, its excess should be removed by cutting off with a knife. If there is a huge amount of traces of foam on the surface of the door that are unrealistic or impractical to remove with a sharp object, use a solvent.
- The next step in repairing a hole in a fiberboard door is to coat the area where the hole was with epoxy. When performing this manipulation, be sure to wear gloves. This substance coats the foam, forming a dense protective crust on its surface. If the resin gets on the skin, it is necessary to remove it as quickly as possible with a solvent.
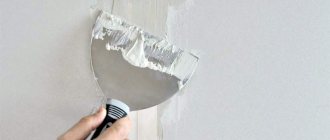
- After hardening, the surface of the door is covered with putty. The required amount of material is collected onto the tool, after which it is moderately distributed into the cracks.
- When the putty dries, you need to walk over the area to be treated with a small sandpaper to clean and level the surface.
- We complete the repair of the fiberboard door by applying 3 layers of primer to the surface. When it dries, you can completely cover the door with varnish or paint.
Repairing the box
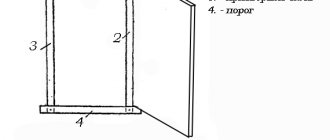
The most undesirable problem is the destruction of the box, but you can deal with this yourself if you carry out repairs in time and seal all the cracks. To do this, you will need to temporarily remove the fabric from the loops. Assess the extent of structural damage and identify the most vulnerable areas. Distortions are easy to notice if you use a building level, plumb lines and a square. Make the appropriate notes and get to work.
To eliminate the distortion, it is necessary to align the door frame at the level
First you need to remove the trim and level the loot. If the foam crumbles, scrape off the old layer and re-foam. For additional strengthening, the side strips are equipped with dowels. To do this, drill several holes in them along the entire length and drive them into the wall. If we are talking about a load-bearing wall, the repair becomes somewhat more complicated. You will have to carefully disassemble the box, drill holes with a hammer drill, and then reinstall it. Afterwards you need to seal up the traces of intervention with a special mastic.
In some cases, it may be necessary to re-foam the door frame
Individual damage repairs without obvious gaps
Sometimes there is no obvious hole, but there is a dent. In this case, the question also asks for an immediate solution and does not differ in complexity.
The repair is done in several steps:
- Before repairing the dent in the fiberboard door, armed with a drill, we begin to create holes around the warped area.
- We take a drill of such a diameter that it is slightly larger than the tube of the foam package. The more holes you make, the better the problem will be corrected.
- Next, we place a small amount of foam in each hole. She doesn't have to crawl out of the holes. We act very carefully, because if there is a lot of foam, it can inflate the door. Do not allow this to happen, otherwise you will have to remove both the entire top coating and the foam underneath.
- If imperfections and cracks run along the perimeter of the canvas or across the entire area, you should very carefully fill the area with foam. In addition, it must be blown out not only under the crack itself, but also further from its ends by 10 cm.
- When the mixture hardens, again using a construction knife, remove all excess and sand it with sandpaper.
- The next step is applying putty. When it dries, the surface is coated with a primer. We apply 3-4 layers of this substance, each ball dries for about half an hour.
- After this, you can begin finishing the door.
- Apply paint onto the canvas using a small paint brush.
Recovery process
First you need to lubricate the door at the damaged area with a brush with PVA glue. This is a kind of primer that increases the adhesion of the restoration layer. Afterwards you need to prepare the putty. It is made by mixing PVA, wood dust and sawdust.
In the absence of the last two components, they can be easily made in a couple of minutes. To do this you will need to take any dry wooden plank. When cutting it with a hand hacksaw, you will get sawdust of the required fraction. If you sand the wood with sandpaper or a file, you can create wood dust. The ratio of sawdust and dust should be approximately the same; glue is added in such an amount that a paste-like thick mass is obtained.
Well-mixed putty is applied with a spatula to the torn surface of the door. You need to try to press it in to ensure good adhesion. After puttying you need to wait for it to dry.
After about a day or more, depending on the characteristics of the glue and the ambient temperature, the surface will completely harden. In this case, the putty will shrink strongly, so a depression will appear. To remove it you will need to putty again. It is made only from a mixture of PVA and wood dust. This will be the finishing layer, so you need to be more careful. The mass is also pressed with a spatula. This putty is made of small particles, so it will not shrink as much.
After final drying, a loop is placed. The new surface allows you to tighten the self-tapping screw without pre-drilling. Of course, you shouldn’t tighten the fasteners too much to avoid tearing them out.
This method of repairing a torn door allows you to do everything very reliably. As for the unsightliness of the restored surface, this is not so critical, because it is hidden inside the cabinet. If you wish, you can always paint over the putty stain with a matching wax paint pencil to improve the appearance a little.
How else can you disguise a hole in a door?
It happens that a person does not have the ability to repair, and does not have the ability to purchase the latest system or call a specialist.
Then you should listen to the following advice:
- You can disguise a hole in the door, provided that it is not very deep, by gluing a decorative film. At the moment, there are a lot of colors of such products on sale: wood, imitation of other materials, drawings, abstraction and much more. But before you decorate a hole in a fiberboard door, decide on the design of the material.
- Another option is to cover the hole with a mirror. You can choose a huge mirror model, or you can hang a small one, designed only for the face.
- The mirror can be replaced with a painting, a calendar, or a cute trinket. They will close the hole, distract attention to themselves, and decorate the interior.
- An interesting option is borders around the perimeter and in the center of the door. You can also add elements made of colored or single-color glass.
- Another option to repair a hole in a wooden door is to hang a framed photo or collage. You can also attach a decorative sticker or applique.
We have offered you several options on how to repair an interior door made of fiberboard. Use your own imagination and come up with something original and beautiful that will definitely fit into the interior design and meet its purpose. The big advantage of a door made of fiberboard is the ease of working with it, as well as the huge number of repair and finishing options. We hope that our tips on how to fix a hole in a fiberboard door will help you close the hole and remove the crack in the door leaf.
Regular matches
Everything is simple here, if your broken holes are not large, say, a piece of chipboard has not fallen out, then you can use ordinary matches.
How it works? Just hammer a match into the hole (great if the diameter is not large). And then we screw the screw in there. The match is pressed against the wall and thus the fastening is restored.
However, it is not suitable for heavily loaded doors that you rarely use. If you constantly open or close the sash, it will not last long . BUT as a temporary solution, why not?
How to repair a hole in an interior door: {instructions} in 7 steps
If a hole or crack has formed in the interior door, you can fix it if you can overcome two tasks:
- Firstly, if your doors are hollow, for example, made of MDF or chipboard, then there is nothing under the canvas that could delay the patch or provide support, preventing its next cracking.
- Secondly, almost all doors have a wood texture. A smooth spot of a patch on such a door will stand out simply because the sketch does not match.
You can repair a hole or crack in a door if you have two of the problems listed above by creatively using means that were originally intended for something else.
This guide describes how to use foam to fill the void behind the warped area, silicone for molds, and casting resin to replicate the wood grain of your patch. Below I will share a detailed summary.
Correcting the magnet
Another problem that you may encounter is that the closet door constantly opens and cannot be closed. Previously, people took a piece of newspaper, rolled it up and put it under the door. Now you can solve the problem yourself by first determining the type of structure:
If the cabinet door is on a small magnet and is held closed by a metal strip, then it is enough to adjust the magnetic fastening using a screwdriver. Procedure:
- Loosen the screws holding the magnet (do not remove).
- Move it forward a little.
- Tighten the screws back.
- Completely replace the fastening if the desired result is not achieved.
How to fix a hole in a door: main steps
- Fill the empty space behind the warped area with foam to make it easier to attach the patch to the hole and provide it with strength and support so it won't crack as the door is used.
- Use epoxy filler to fill the warped area and bring it flush with the whole surface.
- Create a silicone texture for the surface of the door (in our example it will be a faux wood texture).
- Use mold silicone and casting resin to replicate the surface texture of the filled and sanded area.
- Attach the patch and paint the door.
And now everything is detailed step by step. Repeat after me and your door will look like new!
Decorate with wallpaper
When covering a door with wallpaper, you can, of course, use classic options, but fabric wallpaper will look much more aesthetically pleasing.
Before you start gluing, you need to properly prepare the surface of the door, eliminating all irregularities. Remove the paint and sand the door thoroughly, then coat it with a coat of primer. Now you can proceed directly to decorating with wallpaper. An alternative option may well be ordinary matter, which will first need to be prepared. It is not necessary to decorate the entire door in this way - it is enough to disguise only the location of the defect using stencils, stickers, stickers with the designs and shapes you like. A door like the one in the next photo will undoubtedly become a bright accent in the interior.
