The undeniable advantage of plasterboard is that it is a universal building material.
It allows you to realize the most incredible ideas in terms of room design, and if something doesn’t work out or you don’t like it, you can start all over again without causing the slightest damage to the main building structures or other interior elements.
Advantages of decorating from gypsum plasterboard
This material has many positive characteristics that make it a favorite among all finishing materials for creating beautiful interiors:
Arched opening of a complex shape made of plasterboard
- fireproof material;
- is an excellent heat insulator;
- additionally, the walls are provided with additional sound insulation;
- the ability to mount any structure, both polygonal and round;
- the ability to disguise communications and wiring under drywall.
All decorative elements made from plasterboard can be functional. If you build a frame from a metal profile correctly, they will withstand a considerable load.
How to decorate gypsum plasterboard decor
- Painting the surface of drywall is the most economical finishing option, which requires preliminary puttying and sanding.
- The use of decorative film, which can be glued to the decor of plasterboard walls. The film is thin and self-adhesive, so the surface must be well prepared and primed in several layers.
- You can stick decorative stone onto the gypsum plasterboard - this finishing option cannot be called very economical, but the decorative effect is chic.
Options for finishing plasterboard decor - Venetian plaster, which imitates natural stone. This mixture can be bought in dry or ready-made form in the store.
- Ceramic tile. An excellent option for decorating a plasterboard surface. It is enough to prepare an adhesive composition and stick the tiles onto the reinforced gypsum plasterboard structure.
Advice! When finishing plasterboard decor with tiles or mosaics, there is no need to thoroughly prepare the surfaces. But experts advise sticking a plaster mesh on the wall for reinforcement. Polyurethane stucco molding adds nobility and sophistication to any design. The elements are glued either with liquid nails or with a special composition that can be purchased ready-made.
Polyurethane stucco molding
As you can see, there are a lot of options. You can come up with your own finishing option, for example, by using materials of different textures and properties.
Marking
The room must be marked to determine installation points. For marking, it is advisable to use a laser level to accurately maintain the evenness of the planes.
- But, you can get by with a ruler with a cord for beating.
- First, markings are applied to the floor, the partition itself and the area under the doorway are marked.
- Using the drawn lines using a plumb line or a laser plane builder, markings are applied to the ceiling and walls.
What is meant by decor
The interior of the apartment can be decorated with any plasterboard elements.
Arches
Unusual curvilinear elements that can be used to delimit space, making it attractive and varied. You can use a combined structure that serves as an opening, and part of it runs along the wall in beautiful relief.
Drywall arch
You can use a false arch in the bedroom. If you install it above the bed and equip it with shelves, you can do away with bedside tables, freeing up useful space.
Niches
This decorative element is multifunctional and can be used to store things. If you use an open niche for a TV and arrange several small elements nearby for flower pots, you can enliven the interior of a small room.
Plasterboard niche
The headboard of the bed, framed by a niche with lighting, looks original and unusual.
Shelves and cabinets
Drywall cabinets look original, especially if you install lighting on them and decorate them with various materials, such as metal, decorative stone or glass.
Plasterboard shelves
Various shelves made of plasterboard and decorated with mosaics or mirrors look impressive, while visually increasing the space.
Wall openings
Designers are working to make the interior of apartments varied and attractive.
One know-how worth noting is decorative wall openings. These are intricate figured designs that are decorated with shelves for plants.
You can arrange plasterboard shelves on which you can place toys or books.
Wall openings made of plasterboard
Such an opening can be used if it is necessary to zone the space in a room where there is only one window.
Curtain rods
This design of a niche for gypsum plasterboard curtains is often used in apartments with high ceilings. When installing this structure, a cable for lighting is laid.
Drywall curtain rod
An LED strip is laid and when the backlight is turned on, the curtain “flows” from the ceiling.
Installation of racks and sheathing
Having finished with the power circuit, install vertical racks. They are installed every 50 - 60 cm. The profile is fastened together with a cutter. The tool punches a hole in the metal and moves apart parts of the profile, fastening it together.
Some craftsmen attach the profile to each other with self-tapping screws, which is not acceptable. With this type of fastening, the heads of the screws protrude above the surface, preventing a tight fit of the drywall sheet and the surface turns out to be uneven.
Decorating with plasterboard
To decorate a room, you can use not only interior partitions, niches, and plasterboard arches, but also create decorative elements with your own hands.
Decorative elements made of plasterboard
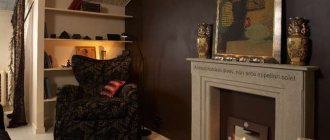
Portal for a fireplace made of plasterboard
Of course, a false fireplace made of gypsum plasterboard is just a prop. But despite this, the interior of the apartment will become romantic. You cannot light a fire in it, but you can build an electric fireplace into it. Corner designs will help diversify the interior, making it cozy and attractive. It will be very pleasant to sit in such a room on a winter evening. Portal construction algorithm:
- draw a sketch;
- transfer it to the wall where the structure is supposed to be installed;
- build a frame from a profile;
- install plasterboard sheathing;
- the inside of the portal must be lined with heat-resistant material or reflective foil;
- install an electric fireplace;
- the outer side of the portal can be decorated with artificial stone or tiles;
Portal for a fireplace made of plasterboard;
portal for a fireplace made of plasterboard... fireplace plasterboard - Place a forged grille on the opening.
Important! If you plan to install an electric fireplace, then it is worth taking measurements of the electrical appliance.
Framework
If you want to highlight a certain element in the apartment, you can build a frame from plasterboard.
Drywall frame
Columns
These are universal elements that are often used to disguise communications, while they create a unique interior in the room. It is easy to set up such a structure using plasterboard. Cut out a fragment of the required size, on which slits are made every 10 cm.
plasterboard column
Then carefully bend it and secure it to the profile. A plasterboard column will turn out to be multifaceted; it is enough to putty and paint it.
Useful materials. Table of color and texture combinations. Video
| Color/Texture | Successful combination | Influence in the interior |
| Red | White, black, orange | Relieves depression, warms and increases activity |
| Orange | Red, white, beige | Creates a feeling of cheerfulness, contributes to the establishment of a sincere and welcoming atmosphere |
| Yellow | White, red, brown | Promotes activity, but recommended for use only in limited quantities |
| Green | White, light green, mint, beige | Reduces fatigue, increases performance - it is recommended to dilute with lighter shades |
| Blue | White, gray, cream | Creates a feeling of spaciousness and pleasant coolness |
| Black | White Red | Visually reduces the volume of rooms, emphasizes nobility and chic, in excessive quantities can cause headaches and discomfort, definitely requires combination with contrasting white |
| Beige | Brown | Creates a classic homely atmosphere |
| Gloss | With matte surface | In the solo version, it increases the volume due to the mirror image of the floor surface, allows you to diversify the light pattern through the use of glare of light; in a duet with a matte surface it participates in the functional zoning of the room |
| Matte coating | Glossy | Hides ceiling unevenness, creates a calm and cozy ceiling background |
| Stucco molding | With matte surface | Directly involved in the creation of a classic interior, also helps to create a concept in the fashionable shabby chic style |
| Decorative plaster | Apply to the prepared surface, beige color, stucco | Gives solidity, works well in conjunction with stucco, helps fill the room with a homely atmosphere and unique warmth |
An excellent video for those who want to learn the entire process of installing plasterboard structures on the ceiling - from the very first step to installing the lamps. It will be useful if you want to do everything yourself!
And one more visual video demonstrating what can happen if you tackle the installation of a plasterboard ceiling wisely.
How to install gypsum plasterboard decor
For a person who has at least once covered walls with plasterboard, recreating the ceiling decor with plasterboard will not be difficult. The construction principle is the same:
- the frame is mounted on the ceiling made of metal profiles;
- plasterboard covering is carried out;
- The cladding of the structure is installed.
The only difference is that the measurements must be more accurate, and the markings are made strictly according to the sketch.
Design for a plasterboard ceiling
When performing decoration, the design must be rigid if there is a load on it, for example:
- when arranging a portal to match the decor of the fireplace, do not forget that one of the guests may lean on it;
- On a shelf in a niche you can store things that have a considerable specific weight.
Professionals recommend not only using a solid profile whenever possible, but also connecting structural elements with jumpers.
Curvilinear structures
Many people are now trying to move away from straight lines and make rounded corners or beautiful wavy decor. Often the children's room is decorated with flowers or hearts, plasterboard columns are erected, and arches are made to divide the space. The frame for a curved decor, for example a wave on the ceiling, is mounted using a certain technology:
- the profile from which the wave is to be made is cut on the sides with metal scissors;
- then fix the structure to the wall using dowels and nails;
- for structural rigidity, jumpers are installed;
- cut sheets of drywall;
- sew the material elements onto the frame, securing them with drywall screws;
- for greater rigidity, you can sew up drywall in two layers.
Frame for curved decor
Anyone can do this if they approach the work correctly and plan everything.
Box
Drywall boxes in apartments are created to hide ugly objects. In the kitchen there is a hood, in the toilet and in the bathroom there is a plasterboard box for pipes. Hiding communications can also be done using a box. To create the box design you will need a set of tools and materials. There must be a galvanized profile, moisture-resistant drywall, and self-tapping screws for drywall. Depending on the location of the box, a frame base is made.
An example of a frame base for a box. This base consists of guide profiles. Then the frame is covered with plasterboard and the decor is created. The main factor here is evenness. Everything should be done clearly and to a building level.
How to bend a plasterboard sheet
A small bending radius can be done quite simply using the “dry” method. You need to start screwing the element from the highest point of the structure. Then gradually bend the drywall, trying not to break it and screwing in the screws every 15 cm.
Dry method for bending drywall
If during work there is a possibility that at some point the element may break, then this place is moistened with water. To do this, you can use a spray bottle or a regular brush moistened with water. Then continue to secure the fragment.
Wet method
If it is clear that it will not be possible to bend drywall without breaking, then you should perform the following steps:
- cut the element to the required size;
- place it on a flat surface;
- roll with a needle roller on both sides;
- wet the element with a roller; Wet method of bending drywall for decoration
- as soon as the material is wet, it is carefully fixed to a pre-prepared template and left to dry for about 24 hours.
After drying, you can screw the finished element onto the frame of the structure. If you look at it, making decorative elements from plasterboard is a creative and exciting process that can interest any owner. The video shows in detail how to bend drywall.
Sheathing and sound insulation
The next step is installation of drywall. The sheets are attached to self-tapping screws, the length of which should be 1 cm greater than the total thickness of the gypsum board sheet and the profile. Shorter screws will not create the required force.
An important point: the head of the screw is recessed into the sheet by 1 mm. If you screw it deeper, there is a high risk of crumbling the drywall, which leads to a loss of strength of the entire structure. To make this task easier, you can use a special screwdriver attachment.
Having sheathed the frame on one side, fill the space between the posts with sheets of mineral wool to improve sound insulation and sheathe the second side.
The finished wall is puttied with gypsum putty, filling the joints of the sheets and marks from the screws, and the finishing is carried out.
