After installing the stretch ceiling, a technological gap remains between the canvas and the wall. The easiest way to cover the gap is to insert masking tape. A minimum of skill is required, no glue or special tools are needed, you only need a stationery knife and a small spatula. Let's take a closer look at the types of decorative inserts, their purpose, as well as the pros and cons compared to ceiling plinths.
What is masking tape
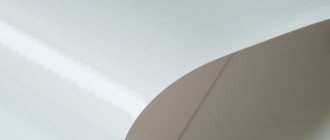
Masking tape is a durable elastic strip 1-2 cm wide, which is installed around the perimeter of the room to hide the technological gap after installing the stretch ceiling. It is also called: elastic band, decorative insert, wall corner, rubber plug, etc. The tape is made from PVC and polymer materials. There are many color shades available to match the stretch ceiling. It is mounted without the use of glue - it is simply inserted into the groove of the baguette and secured by the teeth located on the back wall of the profile. Thanks to this connection, installation is very easy and does not take much time. If necessary, the plug can be pulled out and reinstalled.
Masking tape is specially designed as an alternative to baseboards to quickly eliminate the technological gap between the wall and the suspended ceiling. In addition, decorative inserts are used when connecting canvases of different textures using a separating baguette, as well as to mask the gap between levels in multi-tiered structures.
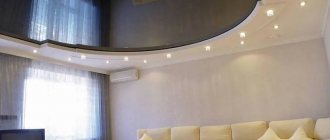
Photo and video
How to choose and install an insert (plinth) for suspended ceilings? Advice from the company Asta M
Did you like the article? Tell your friends about it:
3
Types of decorative inserts for stretch ceilings
Colors
The surface of the edging tape can be glossy or matte. In the first case, the molding reflects light well and is a shiny material. Matte inserts do not create glare. Manufacturers offer caps in a wide variety of colors and shades, making it easy to choose the edging to match the stretch ceiling. Additionally, products can be painted. You can order the cap to be painted in any color.
Form options
Depending on the purpose and method of fastening the tension fabric, ceiling tapes have different profile sections:
- T-shaped - designed for a harpoon mounting system. Product width 14 mm. Made from hard PVC, equipped with teeth for better fixation in the profile. Recommended for smooth walls.
- L-shaped (corner) - universal, super-elastic insert. Suitable for any profile with a harpoon fastening system. Tape width 13 mm. It is made from soft PVC, which means it does not require cutting to join corners and effectively hides uneven walls. After installation, the appearance of the edging is practically no different from the ceiling plinth.
- F-shaped - used mainly with a plastic profile. Width 10.5 mm. Mainly used to mask the gap in the niche under the cornice.
- SL-shaped - the widest (16 mm). Thanks to the elongated lower part, it creates a smooth transition from the ceiling to the wall and hides surface unevenness well.
- P-shaped - used for the glazing bead fastening method. Product width 20 mm. Allows you to close cracks up to 10 mm thick.
Special inserts for two-level ceilings
In two-tier structures, the gap between the levels is masked with special-purpose inserts:
- oval - the most aesthetic appearance and reliable fixation in the profile;
- tube - has increased flexibility and is well suited for curved shapes;
- fungus - produced mainly in white.
All three types are also suitable for masking the gap in dividing baguettes, which are used in single-level structures when connecting canvases of different colors or textures.
But there are also alternative, rarely used types of elastic:
-SL, for those with iron fingers. It’s a joke, of course, but it’s worth getting used to installing such a tape. Its design differs from popular inserts; rather, it is close to a separating tape. Not suitable for all wall moldings, you need to select them.
- wall corner. This is also a rather specific type of plug. It should only be installed on perfectly prepared walls and a high-quality screwed profile.
- Christmas tree. An alternative to the SL tape is the herringbone plug; it is much easier to install, looks nicer, and costs more.
It’s impossible to say unequivocally that corner, herringbone and SL are bad ribbons. They’re just not that common, I solve my own specific problems, and sometimes they help out a lot.
For example, when the back shelf of a baguette is puttied or pressed tightly into the wall insulation, then the herringbone is simply irreplaceable.
But for everyday editing I still prefer TL and TLP.
How to choose a decorative plug
A huge range of inserts allows you to choose a product of any shade. As a rule, masking tape is chosen in the same color and texture as the stretch ceiling. The white edging goes well with any light surface. Colored inserts, depending on the color scheme, allow you to achieve different visual effects:
- Edging to match the tension fabric will visually increase the ceiling area and create the impression of spaciousness. This technique is effective in small rooms.
- Decorative tape to match the walls will visually make them taller and suitable for low rooms.
- A contrasting insert will turn the ceiling into a framed picture. But the walls must be perfectly smooth, otherwise the defect will become more noticeable. Contrasting edging will look great if there is an item of the same color in the room. If there is an image on the stretch fabric, the plug is selected to match the painted details in dark shades.
- For a two-color ceiling, it is better to use inserts of different colors. This solution will help to visually divide the room into zones for different purposes.
When choosing a decorative insert, in addition to the visual component, it is important to take into account the type of profile and the condition of the walls. When fastening a stretch ceiling with beads, it is possible to install only a P-shaped plug; other types are used with a harpoon system. For two-level structures and connecting sheets, special dividing inserts are used. If the surface of the walls is not very smooth, it is better to give preference to a wide SL plug, which will hide this drawback.
As for the cost, the most budget option is white matte plugs. Colored ones will cost more, and the price of custom painting is 2-3 times higher than the finished tape. However, the high costs will be justified by the possibility of creating an original interior.
Important! You should not purchase products with a strong smell, this indicates poor quality materials. Vapors may be harmful to health.
Bottom line
Modern ceiling technologies do not stand still, and ceiling fastening systems have long appeared that do not require decorative plugs. This is a shadow profile, and the Stock system, and Lumpher came up with something of his own. But all these new technologies are noticeably more expensive, and therefore the classic elastic band will be in demand for a very long time.
Use only good tape that is easy to install, do not save these 1-2 rubles per meter. Use special tools for installation: various inserters, rollers, corner scissors for PVC. Measure the room using a laser tape measure.
Share with friends:
Installing masking tape on a suspended ceiling
Step-by-step installation instructions using the example of a T-shaped decorative plug:
- The starting point of work is selected - one of the corners.
- The tape is pressed forcefully into the technological gap with your hands until you hear a slight click. For convenience, you can use a small spatula, but you need to work carefully so as not to damage the canvas.
- Installation continues in a straight line until the next corner.
- Having reached the corner, the tape is cut and joined at 45 degrees. This is done with a stationery knife. The outer corner is simply folded around in one piece without making a cut.
- The process is repeated around the entire perimeter of the room.
High-quality joining of strips can be practiced on a small piece of tape - a probe. A 45° cut is made on it; after fitting in the corner, it is adjusted with a knife until it matches perfectly. Then the probe is used as a template - it is applied to the tape and the edge is cut off along it.
After finishing work, you need to run your hand over the entire surface of the plug. If it is smooth and you don’t feel any bends or protrusions, then the installation was done correctly.
Depending on the type, the masking plug is positioned differently: T and F - the teeth are attached to the back wall of the profile and snap into it; G (corner) - installed in a baguette so that the recessed groove faces outward; SL - the wider part is located on the wall. Otherwise, the installation process is no different and is performed the same for all types of plugs.
Note! L-shaped and other types of super-elastic inserts can not be cut, but simply wrapped in the corners.
It is worth noting that there is a special device that facilitates the installation of masking tape. It's called an "inserter" and is something like a plastic spatula with rounded corners that slides along the surface of the tape and tucks it into the baguette. This device allows you to speed up the process significantly without the risk of damaging or scratching the canvas, which is very important for professional installers.
Advice from professionals
The cost of a meter of masking tape averages from 20 to 30 rubles. This is not so much that instead of simply replacing it, try to paint or seal the insert with adhesive PVC film. This kind of homemade product turns out to be very clearly visible against the background of the ceiling decoration, so nothing good will come of such experiments.
If you had to repaint the vinyl covering, then during the work you can seal the surface with masking tape; there is no harm in painting along with the canvas. It is better to have the ceiling decor done professionally and install an updated cap.
Which is better: ceiling plinth or masking tape
You can also close the technological gap using a ceiling plinth. Let's look at the advantages and disadvantages of this decor compared to masking tape.
Advantages of ceiling plinth:
- allows you to install additional lighting; for this, it is glued just below the ceiling, and an LED strip is placed on top;
- able to hide wide gaps;
- it is possible to create a stucco effect.
Minuses:
- installation requires special tools and adhesives, which increases the cost and time of work;
- does not have sufficient flexibility, and therefore is not suitable for finishing curved areas;
- it is attached only to the wall, so it is necessary to choose light and wide fillets, otherwise the fixation will be unreliable;
- when dismantling, it will not be possible to reuse the product, and if the plinth was glued to wallpaper, they will also suffer;
- if it is necessary to remove the tension fabric, for example, to access communications on the ceiling, the fillets will have to be torn off.
Advantages of masking tape:
- installation does not require special skills, tools or adhesives; installation is quick and dirt-free;
- thanks to the locking fastening, the tape can be easily removed and reinserted;
- Available in a large number of shades, can be painted to order in any color;
- high elasticity allows the plug to be used on rounded and curved areas;
- moisture resistance ensures easy care and can be used in the bathroom.
Flaws:
- does not allow installation of additional lighting;
- does not hide noticeable wall unevenness and wide cracks.
Reasons for the formation of a gap near the wall
Upon completion of the installation work, the question immediately arises about the correctness of the measurements taken and the installation technology, if as a result of the work a gap has formed between the ceiling and the walls. In fact, the reason for its appearance is that the canvas is not attached directly to the walls, but on a special connecting profile that has certain parameters of thickness and width. Therefore, it will not be possible to install it close to the wall. In addition, the profile strips have a cavity into which the tension covering edging is inserted during installation.
This is why a gap forms at the wall. However, it can be hidden using a special masking tape for stretch ceilings. The need to use such an element is also due to the aesthetic side. After all, with a decorative plug the room becomes much more attractive.
To install the ceilings yourself or entrust it to professionals is, of course, your business. Only specialists have much more knowledge and experience in this field. You will also be able to demand a refund for the work or redo it if an error occurred and you were unhappy with the result.
What is it for?
Ceiling plinth, as all masters say, is an excellent addition to a stretch ceiling, which helps to mask all the flaws. You can use both a full-fledged finishing element and simple masking tapes. Both types of finishing have their advantages and disadvantages.
The plinth is the finishing element that can ruin everything. It cannot be glued directly to the ceiling, since this may cause the surface of the material to ripple, and in cold weather it may even come off.
It is also worth noting that PVC fabric can react very negatively to the composition of the glue. Some types of adhesive even corrode the foam.
But simple masking tapes have many advantages:
- This material is as easy as possible to install. Even a person who is making repairs at home for the first time can cope with attaching such material. The tape is self-adhesive, so there is no need to buy additional glue.
- Compactness. The fact is that stretch ceilings are quite massive on their own, so they should not be supplemented with wide and dense tapes along the edges. But thin masking tape does not weigh down the structure. It is almost invisible and also serves as a visual continuation of the ceiling surface.
Versatility
It doesn’t matter what manufacturer the ceiling is from, it can be supplemented with any masking tape you have on hand.
Huge variety. There are many different colors and shapes of ribbons, which allows you to experiment with interior design and arrange everything the way you want
However, if the desired shade is not found in the store or on the website, the tape can be painted. The material does not repel paint and looks good after this treatment.
Multiple uses. The advantage is that masking tapes can be used several times at once. If you fail to secure the insert the first time, you can peel it off and try again. And when the suspended ceiling is dismantled and a new one is installed, it can be supplemented with the same inserts.
- Ease of use. It is flexible and can be installed even where it is difficult to reach. At the same time, the material adheres equally tightly to surfaces everywhere: both the ceiling and the wall. This is convenient not only from an aesthetic point of view, but also because dust does not accumulate in the gap.
- Low cost. Compared to expensive moldings and baseboards, this option is cheaper. The difference in price does not affect the quality in any way. Plus, the tape is applied without the use of glue, which also saves money.
- Reliability. The tape is made of an elastic material that does not stretch over time, so it does not fall off, even if there is high humidity or sudden temperature changes in the room.
Masking tape is used by craftsmen to ensure that the junction of the ceiling and the wall is invisible, and the structure as a whole looks more aesthetically pleasing. The insert allows you to hide the seam that remains, as well as all kinds of irregularities. And if you choose a wide masking tape, it will allow you to hide even such defects as poorly hung wallpaper or poorly painted walls.
In addition, thanks to the sizing of such tape, dust will not accumulate in the space between the ceiling and the wall. This kind of pollution always spoils the appearance of the room.
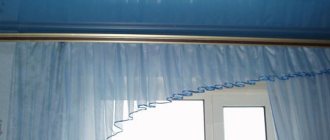
Cords
In recent times, cords were used to decorate curtains and furniture; today they are actively used to create edging for ceiling coverings. This finishing option is ideal for masking gaps between the fabric covering and the wall, provided that the wall is level. The cord must touch the ceiling base and the wall tightly, otherwise it will not be able to completely close the gap and will not stay in place.
The structure of the cords can be different; today, options with colored braiding, inserts of metal or rubber threads, as well as with various patterns are used. They can be different in thickness, for example, the standard is 10 millimeters, but thinner ones (8 millimeters) and thicker ones, reaching up to 20 millimeters, are used.
With the help of such a decorative element you can also decorate the joints formed during the installation of multi-level ceilings. But it also has a drawback associated with excessive accumulation of dust, but it is not difficult to get rid of it, since no difficulties arise in the process of cleaning it. Installation is carried out only by hand; the use of a spatula and other tools is not allowed due to the risk of tears and punctures in the coating.