A mirror, the basis of which is glass, is a delicate and fragile material. Any careless action with him can end in disaster. Therefore, it is very important to think about mounting a mirror on the wall - it should have increased strength and reliability. To do this, you need to know some installation features. The method of fastening depends on the size of the canvas, the surface of the wall and the temperature of the room. Considering all these nuances, you can easily fix the mirror without outside help.
Features of mounting a mirror on the wall
When attaching a mirror sheet to a wall, it is important to take into account all the features of this process. After all, the further use of the mirror for its intended purpose or its aesthetic appearance will depend on the correct installation. The fastening for a mirror on the wall must be made so that the canvas adheres well to the wall, and also so that the owners of the home can comfortably use the mirror.
The fastening for a mirror on the wall must be made so that the canvas adheres well to the wall, and also so that the owners of the home can comfortably use the mirror.
At what altitude
An important feature of installing a mirror surface is its height. Typically, the height of the mirror depends on the room in which it is installed. The height of the owners also plays an important role.
It is acceptable for a bathroom mirror to be mounted so that its middle is at eye level. Of course, not all residents are the same height. Therefore, the average value is taken. It corresponds to 160-165 centimeters from the beginning of the wall.
It is acceptable for a bathroom mirror to be mounted so that its middle is at eye level.
In corridors and hallways the mirror is usually elongated. It reflects a person in his full height. Therefore, the mirror sheet is mounted at a height of 168-170 centimeters from the floor.
In corridors and hallways the mirror is usually elongated.
If the reflective surface is hung on a cabinet door, then focus on its upper edge. If the wardrobe has a large height, the mirror is hung at a height of 170 centimeters. Thus, it turns out that the mirror surface is installed several centimeters above the heads of the owners of the house.
If the reflective surface is hung on a cabinet door, then focus on its upper edge.
Features of attaching mirrors to different surfaces
Mirror sheets are installed on various surfaces and the installation method is connected precisely with this. Therefore, you need to know about the features of attaching mirrors to different types of walls. Popular installation options and rules will be discussed below.
Mirror sheets are installed on various surfaces and the installation method is connected precisely with this.
Concrete
A concrete wall is a fairly common construction material. Of course, there is no point in mounting a mirror on bare concrete walls. First, such a surface is puttied and plastered, and then coated with a primer. Only after this can the reflective sheet be glued to the wall. But that rarely happens. Usually, a hole is first made in the wall using a hammer drill, and then the mirror is screwed in using dowels.
Usually, a hole is first made in the wall using a hammer drill, and then the mirror is screwed in using dowels.
Drywall
How to hang a mirror on a plasterboard wall? Plasterboard panels are an unreliable and fragile facing material. Therefore, when attaching a mirror sheet to them, it is important to know its weight. You cannot screw a mirror that weighs more than 20 kilograms onto drywall.
If we talk about average values, then for every square meter of mirror surface there are from 5 to 15 kilograms.
Typically, in this case, a butterfly dowel or glue along with masking tape is used as a fastening for the mirror.
You cannot screw a mirror that weighs more than 20 kilograms onto drywall.
PVC panels
Attaching a mirror sheet to a wall lined with plastic panels should only be done using silicone glue. After all, you cannot drill holes in this material. Otherwise it will crack and become deformed.
Attaching a mirror sheet to a wall lined with plastic panels should only be done using silicone glue.
Tile
The mirror is usually glued or screwed to the tile using special holders (hardware). If the first method was chosen, then a silicone compound should be used as glue. Before this, ceramic tiles must be thoroughly degreased and cleaned. In the case of hardware, they are attached to the space between the tiles, in the so-called seams.
The mirror is usually glued or screwed to the tile using special holders (hardware).
Painted wall
The mirror is screwed onto painted walls using dowels and screws. In hardware stores you can now find a hidden mount that looks like an interior detail. Before fastening, the wall is marked and holes are made in it for metal fastenings.
The mirror is screwed onto painted walls using dowels and screws.
Work technology
A mirror is glued to a concrete wall like this:
- Turn the mirror back.
- Glue pieces of thick double-sided tape onto it.
- Remove the protective shell/film from it.
- Apply adhesive to the back side along the contour. It is advisable to do this in small pyramids.
- Next, the glue is applied to the surface in equal stripes - 15-20 cm.
- After the adhesive has already been applied, the mirror is pressed tightly against the wall.
- It is advisable to support the canvas with something from below, since the glue will set firmly only after 30-40 minutes. Double-sided tape performs the same function. Until the glue hardens, there is no need to tear off the tape; it will maintain a stable position of the canvas.
If the mirror is small, then only the contours are processed with a “liquid nail”. Some craftsmen advise using special holders for a while until the sealant hardens.
Methods for attaching mirrors
As mentioned above, each surface has its own options for attaching a mirror sheet. Each mounting method will be discussed below.
On glue
If the master decides to mount the mirror with glue, then he must choose a special adhesive composition for mirror surfaces. Typically, such compositions have good adhesion to walls made of different materials. Therefore, it will be reliable to glue heavy mirror products onto them.
Before starting work, the side on which the glue is applied is well cleaned and degreased with an alcohol solution. Then, after thorough drying, you can apply glue. This is done in the form of a snake strip or dotted in a checkerboard pattern. After this, the canvas is firmly pressed against the wall and held for several seconds.
With such fastening, it will not be possible to remove the mirror from the wall in one piece. You will have to break it, remove it piece by piece, and then clean the glue from the surface.
If the master decides to mount the mirror with glue, then he must choose a special adhesive composition for mirror surfaces.
For liquid nails
The mirror product is attached to liquid nails in almost the same way as to glue. Before starting the process, the surface is also degreased and the adhesive composition of liquid nails is applied to it. This is done in such a way that the glue does not come out over the edges when gluing.
It is important to first glue the mirror to the surface, then slowly tear it off and re-glue it. This method will help the mirror surface to better adhere to the wall surface.
It is important to first glue the mirror to the surface, then slowly tear it off and re-glue it.
For hangers, loops and hooks
If the owner plans to remove the mirror in the future or replace it with a new one, you can attach it to the wall using all kinds of holders, loops and hooks. These fasteners come in through and regular types. Conventional hangers are installed directly on the wall surface. The 4 edges of the mirror are inserted into them. Before installing the hangers, the wall is marked with a pencil. It is taken into account that the holders should be located 3 millimeters further than the mirror itself.
When there are holes in the mirror sheet, through fastening is used. In this case, self-tapping screws and dowels act as holders, which are then decorated with caps and overlays. Before installing them, you also need to correctly mark the wall and make holes in it for the dowels.
You can also use special hooks as fastenings. To do this you will need thread, the hooks themselves and 2 screws.
If the owner plans to remove the mirror in the future or replace it with a new one, you can attach it to the wall using all kinds of holders, loops and hooks.
On tape
If the mirror is relatively light in weight, it can be attached to a special 3M adhesive tape. The thickness of this tape ranges from 0.8 to 1.5 millimeters, and the width of the tape itself reaches 25 millimeters.
First, the backing is wiped with a degreasing compound. Next, small pieces are cut out of the tape and glued to the canvas in a chaotic manner. The distance between the pieces should not exceed 10 centimeters. At the end, the film protecting the adhesive is removed from the tape, and the mirror is installed in the right place. If necessary, it can be corrected.
If the mirror is relatively light in weight, it can be attached to a special 3M adhesive tape.
Drilling holes
You need to drill holes in the wall when the mirror product is heavy. At the same time, a hole is also drilled in the mirror to install the holder on it. In some cases, the mirror already has hooks or loops for hanging.
They also drill holes in the wall when, in addition to mounting hardware, it is impossible to attach a mirror to the wall. For example, in the bathroom with glue or mounting tape.
You need to drill holes in the wall when the mirror product is heavy.
Using plates
Construction stores sell special plates that hold the mirror sheet on the wall. They are also called hidden mounts. The plates themselves are glued to the glass using an adhesive on the plate. Next, the mirror product is attached to the wall using a self-tapping screw and a hole in the plate.
Construction stores sell special plates that hold the mirror sheet on the wall.
Other possible options
You can also attach the mirror to the surface using staples sold at a hardware store. The brackets have a through fastening into which a self-tapping screw is threaded and secured to the wall. The bracket itself supports the mirror and prevents it from falling.
The staples will be very useful for those who do not want to drill holes in the glass.
You can attach the mirror to the surface using staples sold at a hardware store.
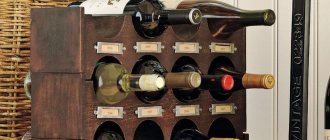
Glue selection
The main criterion that should be used when choosing an adhesive is ideal adhesion
of the composition to the surface. If you don’t know how to glue a mirror, then most likely you won’t be able to make the right choice of adhesive for installation. So, the best ones for this operation are:
- liquid nails for mirrors
- you should choose from those options that are not capable of damaging the amalgam on the mirror surface; - silicone sealant
- preference should be given to a neutral composition that does not contain vinegar and is not capable of harming the mirror; - aquarium glue
is an excellent option for the bathroom; it not only has ideal adhesion, but also, due to antiseptic additives, prevents the appearance of pathogenic flora.
In specialized stores there are now enough names for each item - and sometimes it can be very difficult to understand even for a trained person. If you don’t know what and how to glue a mirror, use our table to select the best option. We have included all popular brands with descriptions, prices and recommendations for use.
| Name | Type of composition | Characteristic | Price |
| SOUDAL 47A | synthetic rubber | equally good for any type of surface, may damage amalgam due to the small amount of solvent in the composition, careful use is recommended | 190 rubles for 310 ml. |
| Moment Installation Liquid Nails | synthetic rubber | does not harden, recommended for use in contact with plaster, metals, wood, remains elastic and holds light weight mirrors well | 160 rubles for 310 ml |
| Tytan | synthetic rubber + resin | sets very quickly, does not harm amalgam, is ideal for working with uneven and porous surfaces | 170 rubles for 300 ml |
| Penosil MirrorFix H1296 | synthetic rubber | universal use - with any surface, not recommended for mounting mirrors thicker than 0.6 cm | 260 rubles for 310 ml |
| Loclite | glue + activator | dries quickly, reliable fixation, mandatory combination of adhesive and activator, does not spoil the amalgam, average consumption | from 350 rubles for 285 ml |
| Bostik 2750MS | synthetic rubber | perfect adhesion, no effect on amalgam, dries quickly, universal use, only positive recommendations | from 310 rubles for 310 ml |
The nuances of mounting large mirrors on the wall
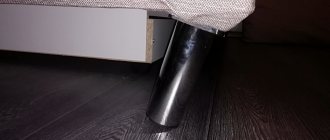
It is advisable to attach large mirrors to the surface using hardware or decorative screws. After all, only they can withstand such a huge weight. Scotch tape and glue will not be reliable here.
Before installing a large mirror sheet, it is important that the wall is level and prepared. To do this, it is checked for differences, leveled, if necessary, and primed. Next, the wall is marked so that the fastenings are installed proportionally. Some craftsmen make a hidden stand from a wooden or metal block so that the mirror has additional support.
It is advisable to attach large mirrors to the surface using hardware or decorative screws.
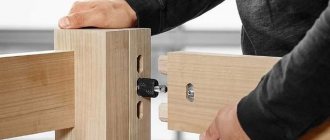
Cut the board you need
When choosing a board from which to cut a tenon, consider the size and location of the mirror. Very heavy mirrors may require 2 cm thick boards. However, most mirrors can be secured using 1.5 cm thick boards. The board should be wide enough to accommodate several rows of screws.
For my mirror, I chose a board 15 cm wide. To cut it, you need to set the blade at an angle of 45 degrees, position the fence so as to cut out the center and saw the board. Use a table saw to cut pieces to the width of the mirror.
French tenons can be made by cutting the board at a 45-degree angle with a circular saw, but this method is much more complicated. The table saw makes extremely precise cuts to ensure a straight and stable installation. If you're using a circular saw, clamp a straight edge along the length of the board to create a fence that will help ensure precision and safety when cutting.
Rospotrebnadzor warned of restrictions after COVID vaccination
The robbers took the car. The church community gave the mother of 4 children another
“It’s always difficult to find people”: Averbukh about the difficulties in recruiting participants for the show
Options for mounting mirrors on bathroom walls
There is high humidity in the bathroom and there is always a lot of fumes. Therefore, the mirror product must be securely attached to the wall. How then to glue a bathroom mirror to the wall? For this you can use:
- Adhesive sealant;
- Either metal through and conventional fastenings;
- Hidden plates are also used in bathrooms;
- Butterfly dowels.
It is worth remembering that if there are tiles in the bathroom, the fasteners should not be located on it, but in the seams. If the cladding is made of plastic panels, the mirror is glued. But its weight should not be very large.
The mirror product must be securely attached to the wall.
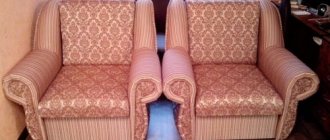
Spectacular examples in the interior
The design should be selected to suit a specific interior style. At the same time, the accessory can be luxurious, which is appropriate for the Baroque style, as well as laconic, which is characteristic of the minimalism trend.
If your home has a narrow or long entrance area, you can make one wall mirrored as decoration. This will visually increase the space.
Art Nouveau and avant-garde styles welcome extraordinary solutions. It is worth decorating the space of the rooms with models of unusual mirrors.
A cabinet with a framed mirror can be purchased as an alternative to a regular wall mirror.
How to glue mirror tiles on walls
Mirror tiles look very impressive and aesthetically pleasing in any interior. But how to glue beveled mirror tiles to the wall? First of all, you need to know that the base under such cladding must be perfectly level. If it has been determined that there are differences on the wall, the surface is plastered. When it comes to large differences, you cannot do without plasterboard sheets. Next, the installation of beveled mirror tiles proceeds as follows:
- The entire required surface is treated with a primer and the wall is allowed to dry completely.
- Next, you need to draw a line on the wall and mark where the tiles will be located. When marking, the location for grouting is taken into account.
- After this, special mirror glue is applied to each tile. She presses herself tightly against the wall for several minutes. The installation itself must be done from floor to ceiling.
- After 4-5 hours you can grout the seams. This is done with the same glue that was used to glue the tiles. However, you can use another grout.
- At the end, excess grout is removed from the seams.
If the mirror tile does not fit, it is cut with a glass cutter.
Mirror tiles look very impressive and aesthetically pleasing in any interior.
Screeds with platform
It is a dowel with a thread and a platform (square or rectangular) to which a tie is attached. These fasteners (KSP) are convenient for quick installation. Made from non-flammable plastic.
KSP - screed with mounting platform for dowels
Initially, a dowel is installed, onto which the platform with the screed is screwed. After this, the wires are attached. Installation is suitable for wooden, brick and concrete walls and ceilings. With the help of such platforms you can attach several cables at once.
Dowel clamp
Used for quick fastening of one cable. The clamp is very easy to install. Using a hammer drill (if the wall is concrete), a hole of the required length and diameter is drilled. After this, the clamp is carefully opened, the cable is placed in it and the sharp end is inserted into the hole. The clamp will not fall out of it thanks to the double-sided notches on its sides.
The shape of the clamp must match the cross-sectional shape of the cable. Basically it is either round or rectangular. These installation elements are low cost and reliable in installation.
Tips and recommendations for choosing ways to mount mirrors on walls
To install a mirror sheet in any room correctly, it is important to take into account the recommendations of professional craftsmen. They will be given below:
- You can glue a mirror to tape only if it weighs up to 2 kilograms;
- Before installing the mirror using any of the proposed methods, it is recommended to stick a special anti-fragmentation film on it. Even if it breaks, it will not shatter into small pieces;
- When attaching a mirror to a tile, the fasteners should be screwed into the seams and not onto the tile;
- If the room is small, it is better to install a mirror opposite the window. This will visually increase the space;
- Before installing a mirror product in the bathroom, you must treat its edges with silicone sealant to prevent the development of mold;
- It is better to attach two sconce lamps on the sides near the mirror in the hallway. This way you can increase the space and create the effect of diffused light.
It is better to attach two sconce lamps on the sides near the mirror in the hallway.
All these tips will help you install the mirror safely, competently, and also aesthetically.
"Golden rules" of installation
To make the mirror really shine in the interior, follow the basic rules when installing:
- in a room where there is little light, the reflective surface should be installed opposite the window. The room will become brighter;
- A very large mirror will help to visually expand the space;
- do not place the product near the stove in the kitchen;
- In the children's room, cover the structure with protective film. If the reflective part breaks, young family members will not be hurt;
- In the corridor, install a full-length canvas - it’s convenient;
- Do not direct the light from the lamp directly into the reflective part, it will quickly dim;
- do not forget about degreasing,
- Hang mirrors that are too large on different types of fasteners - combine, for example, self-tapping screws and “silicone glue.”