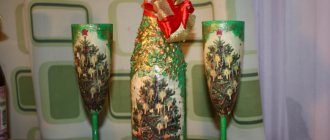
4.8/5 — (21 votes)
Greetings!
Glad to see everyone again. How are you feeling, friends? You are probably still looking for the right ideas, because you don’t have to wait long at all. Very soon, matinees will begin in schools and kindergartens dedicated to the most beloved holiday - the New Year. Always preparing for this event, we put up a large Christmas tree, or we make it from scrap materials. And on it we hang balls, toys and, of course, garlands. They can be purchased, but they are exorbitantly expensive. Therefore, I would like to suggest making them yourself.
Take the template you need, print it or follow the step-by-step instructions and you will succeed. The most popular craft is, of course, a paper garland, but it can also be made using different techniques. This outfit looks great on a forest beauty made from snowflakes, angels or real pine cones.
All options are good, so today in the article we will look at them all. Choose your favorite composition.
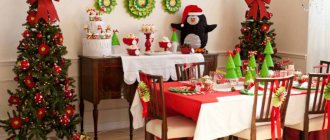
Among other things, you can decorate walls and windows with a garland. Such charming decor will lift your spirits and bring the right festive atmosphere to your home.
How to make a garland for the New Year from improvised materials
I am sure that in childhood you all loved making garlands from paper. But, you know, I think this is very banal, and therefore I want to suggest that you will never guess what to make this craft from.
Tadam, I present to you a product made from cotton pads. The kids will really like it.
We will need:
- cotton pads
- scissors
- PVA glue
- white thread
- colored paper
Stages:
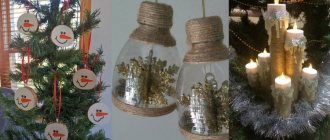
1. Get everything ready to go. Take a pack of cotton pads. Cut out eyes, noses and mouths from colored paper.
2. Glue all the parts onto the disks. You will get the faces of snowmen.
3. Using a needle, thread the thread through the discs. For a change, write Happy New Year on the discs!
The next awesome idea is to make a stretch using thread and PVA glue.
Do you want to make a garland so that it looks cozy and at the same time bright? Let's then build it from available materials, take wool. And roll them into balls.
Wet the wool and soap it with soap under running water; if it is difficult to roll into a ball, then change the water temperature.
After a while, such a ball will dry out and become hard.
This kind of work can easily be entrusted to children, and after rolling or felting, put the balls on a thread. The result is a brilliant creation that will decorate both the house and the Christmas tree.
Perform the following work from any cotton paper or linen.
Tie these colored stripes onto a ready-made electric garland.
Everyone will enjoy this activity, especially if you have a large family.
The next option is quite simple - it’s a garland made of paper strips, see all the stages of work in this picture:
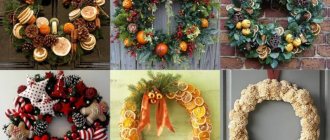
And if you want to create a very unusual craft, then make this kind of work from the peels of oranges or tangerines. Cut the skins into stars and thread a thread through them.
Next, I can offer you a masterpiece made of buttons. Look how great this garland looks on the Christmas tree. Moreover, it can be placed on a street forest beauty.
Or register a class or group in a kindergarten or school.
If you are a good housewife, then make a garland of gingerbread cookies. You can find the recipe here for testing.
Garlands made from ordinary wool pompoms look wonderful and cool.
The most unexpected option might be this knitted craft made from snowflakes. It looks beautiful and gentle.
Here's a diagram for you young needlewomen:
You can also create something original from old unnecessary postcards by threading a red satin ribbon into them.
And you won’t believe it, even small creations are made from foil, they look cool, and most importantly, such works also sparkle.
Here are a couple more creative ideas.
It turns out that you can also collect a souvenir from ordinary pop food, which will decorate, for example, the facade of a house or a New Year's tree.
It’s also incredibly cool to create a stretcher out of sweets and mesh.
But what you definitely wouldn’t think of making from paper cups is paper cups. Here's a new idea for you).
Remember the last time we learned how to make toys from plywood, I suggest you tell them a story too. Color as you wish.
Idea N1. The simplest DIY garland
The simplest option for a garland is lighting made from LED strips. They are suitable both as New Year's decorations and for highlighting the outline of a showcase or interior elements. Their advantage is their flexible design, so you don’t need to solder anything, just glue them to a supporting surface or structure. But moving it like the classic option won’t work.
The simplest models are 220 V - for them you need to solder an electrical plug and install it in the right place. Most often they are used for outdoor installation.
To illuminate Christmas tree decorations indoors, 12 V LED strips are used. These are safer models, but a power supply must be used to connect them.
It is much more difficult to make a garland from RGB tape, since connecting it requires the use of a large number of mechanisms.
The process will include the following steps:
- Calculate the total length of the garland, since the length of the ribbon cannot exceed 5 m. Everything above 5m must be connected from a separate power supply system.
- Install the power supply - it is necessary to lower the voltage to 12V.
- Connect the controller for the RGB strip to the power supply - this device will allow you to select the color of the glow and operating mode.
- If the length is more than 5 m, install the amplifier on the next tape or supply power from another power supply / controller set.
- Attach the RGB strip to the surface and connect to the controller.
You can find out more about the principles of connecting an RGB strip in the corresponding article -
Garlands for kindergarten and school for competition
Well, now let’s look at a couple more ideas that you can take and calmly implement with your children. For example, girls will like the idea with diamonds. They can be made from paper or cardboard, or use plywood.
Use paper muffin tins to create a Christmas tree shape like this.
A completely unusual option, made of paper using fan technology. The sheet is folded like an accordion, and then where the middle is folded and glued together. You can take a closer look right now:
Here is another version of this craft, just a different author:
Garlands made from ordinary juice straws look really cool.
Look at these creations, just like beads).
A fun and fun activity can bring the whole team together in a classroom or group in kindergarten. I wish luck!
And here’s another unusual job: making a garland from plastic plates or disposable tableware. Look with what pleasure the children perform it.
Well, the most popular option would be to work from New Year's balls. Like?
Also create stars and Christmas trees from the salt dough, and then glue them onto a thread.
From walnuts, if you have a lot of them and felt, you can also build the following masterpiece:
What is attractive about creating paper garlands?
In addition to the fact that colorful decorations perfectly decorate the space, this type of leisure has many advantages.
- There is an opportunity to usefully spend your free time with your family by involving both children and grandmothers in the decor making process.
Moreover, such activities are extremely useful for children, helping them develop various skills. If there are enough people willing to take part in the event, it becomes possible to break into teams and add a competitive aspect to the exciting pastime. Making decor is a very exciting process. - Making your own jewelry requires virtually no financial investment.
The main material is various papers: colored, office, packaging, tissue or even newspapers. In addition, you will need scissors, glue and twine. Some models made of white material are best colored with felt-tip pens or paints. Garlands can be made from paper, wallpaper, corrugated sheets, as well as newspapers, magazines and other materials - Handmade crafts bring much more positive emotions than purchased items.
Homemade garlands can be even more beautiful than store-bought ones - Paper garlands look very attractive, often not inferior in aesthetics to factory-made products.
The main thing is to do the work carefully, then the result will be amazing
The decorated area will create a festive mood not only for children, but also for adults.
Paper Christmas tree garland (templates inside)
Now let's move on to probably the simplest method, now you will learn how to make garlands from ordinary paper. Perhaps you have some ideas of your own, please share them below the article. I will be very grateful.
So, first you need to print the template.
Then cut it along the outline as shown in this photo:
Make cuts along the dotted line by folding the sheet in half. Then unfold it, pull it a little to make holes and put all the pieces on the thread.
Oh, yes, here are the finished stencils for you, take them and run them through the printer.
There is another option that is just as charming. Here are the blanks, print them out, then fold each triangle in the shape of a herringbone in half and make cuts.
Afterwards, glue the two blanks together. And this is what happens in general.
Moving on, using regular circles or ovals, do the following:
And here’s another idea, I think everything from childhood was done using such a simple technology, they folded the sheet with an accordion and traced the drawing on a stencil:
One of the popular types of such decorations for walls, windows or halls is a snowman banner.
There is another craft where you take strips and join them together with glue to form a ring or a heart.
A garland of lantern balls looks very nice, beckoning you to touch them.
In addition, since it is the year of the tiger, I suggest doing stretches with this symbol. Draw on a stencil and do it, like you did for the type: Pig.
The next option is also made of circles, but each of them is glued to another one, take these instructions and follow them.
You can build another craft in the form of lanterns.
Next, you can also create such cute things from ordinary colored paper:
If you want a more voluminous product, then take it and perform it as shown in this video.
Or use this step guide:
Make balls from the strips. Choose any method.
Here's another idea, watch carefully and repeat step by step.
And if you love origami techniques, then take advantage of this master class.
Among other things, you can take note of these toys:
Any ready-made garland, where very small light bulbs can be decorated, put paper stars on it.
You can also take snowflakes as a basis, cut them out according to any template, and then put them on a thread. By the way, you can get the stencils from here. Or use this option.
What do you need to know about the garland?
Factory models are presented in a wide range, but the quality of many garlands leaves much to be desired. By making it yourself, you can choose all the component materials, in addition to saving on manufacturing and delivery costs.
Before making a Christmas tree garland or other lighting decoration, you need to decide on the following parameters:
- Type of light bulbs - there are LED, incandescent, fluorescent, and halogen bulbs.
- The method of connecting light bulbs is through parallel or serial connection in a circuit.
- Supply voltage - depending on the type of lighting fixture, a voltage of 220V, 24V, 12V, 3V or other ratings can be used for the garland.
- Current collection method - depending on the design of the light bulb, it can be done through a base, plug, soldering or connector.
In view of the fact that all points determine the operating parameters of the finished garland, they need to be thought through at the stage of purchasing or procuring materials. Let's look at these points in more detail.
Bulb type
Incandescent light bulbs are a fairly common type for creating lighting effects, but this characteristic is due to their relative cheapness and unpretentiousness. Incandescent light bulbs have a relatively low ratio of the luminous flux produced to the power consumed from the network. The design itself is quite fragile and is susceptible to mechanical stress; due to depressurization of the bulb, the light bulb immediately fails.
LED light bulbs - such lighting elements are the most modern and are increasingly crowding out all other types of equipment from the market. Such popularity of LED lamps is due to their significantly greater reliability and benefits for the garland. The glow of the LEDs in the light bulb produces the most favorable luminous flux in relation to the power consumed in comparison with other types of lamps, but they significantly react to the mains voltage parameters. Along with light bulbs for LED garlands, separately installed LEDs or strips with already assembled elements are used.
Fluorescent light bulbs are much more efficient in terms of the ratio of the generated luminous flux to the power consumption; they are superior to the glow of incandescent lamps, but are significantly inferior to LED lamps. But their operation is ensured by vapors of mercury and other gases, which, when depressurized, evaporate from the flask and can be harmful to health. In addition, such light bulbs require a certain time to warm up and fail at low temperatures, so they are not used for outdoor garlands operating in winter.
Halogen light bulbs are a convenient low-power option for making garlands. But, they have a relatively low ratio of lamp glow to power consumed from the network. But, unlike all the above-mentioned light bulbs, they are afraid of touching with hands; this model of garland can only be taken through a special glove or must be placed in a tube.
The most popular options for garlands are incandescent and LED bulbs. The element parameters are selected in accordance with the connection method.
Connection method
According to the method of connecting light bulbs, there are serial and parallel connections. Each of the schemes has its own characteristics in the power supply, which must be taken into account at the stage of designing the garland.
The serial connection of light bulbs in an electric garland is a connection in which the end of one element is connected to the beginning of the next. In this case, the current flowing through the garland will be the same for all light bulbs.
An example of a diagram of such a garland is shown in the figure below:
Rice. 1. Series connection of light bulbs
Here, mains voltage is applied to the garland, but each individual bulb experiences a voltage drop proportional to its resistance. Accordingly, it is necessary to calculate the voltage value for each element. If the applied voltage exceeds the rated voltage, a resistor is soldered into the circuit. If the voltage is less than the rated voltage, less current will flow through the network, resulting in a decrease in the glow intensity.
A parallel connection is the connection of the same terminals of LEDs or light bulbs to one point.
Rice. 2. parallel connection of light bulbs
Look at Figure 2 for an example of a parallel circuit. A feature of this connection option is the application of input voltage to each element, but the current flowing through the light bulb will depend on its resistance.
For both connection schemes, the power of the power source plays a role. For example, a garland for a New Year tree, powered from an electrical network, is limited only by the rating of the machine at the input. And the power supply that receives from the power supply will be limited by its factory capacity.
It should be noted that when connecting the legs of diodes or light bulbs in series, the burnout of one of the elements will lead to failure of the entire garland. But in a parallel circuit there is no such problem; if one light bulb burns out, the rest in the garland will continue to light.
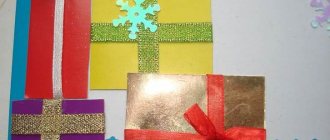
Flags in the form of a garland for decorating a room - printable templates
Now I present to your attention a long-forgotten idea in the form of flags. After all, this is the most common way to decorate a Christmas tree or rooms. You can also decorate doorways or windows with them.
You will need:
- textile
- stencils
- threads
- rope
Print the templates on a piece of paper or draw them yourself, attach them to the fabric and cut out the desired image.
Sew all the blanks onto a strip of fabric or rope. And then iron the flags.
You can also use felt, since it does not crumble and it will be easy for you to complete this craft.
Or also make a garland out of cardboard or paper.
Take the templates and print them out:
Then apply glue, place a string and glue the two halves together.
Take the next masterpiece to your collection.
I also really like this job. Bravo to the master!
Application in the interior
You can choose different types of paper garland to decorate your room.
It is worth considering the most successful examples.
- Such wall decor can become a decoration for a romantic photo zone.
- This is an original and unusually delicate decoration for any room.
- The decoration can be stylish even if it is made from ordinary newspapers.
- A garland of thread hearts can bring a sense of romance into your home.
- Leaves and vegetation themes give a feeling of freshness and immerse you in the atmosphere of summer.
- Confetti mugs look simple, but at the same time stylish, filling the space with a festive atmosphere.
- Volumetric flower balls made of corrugated paper can decorate any celebration, be it a children's birthday or a wedding.
- A garland of colorful postcards looks unusual and beautiful.
- An original solution for decorating a dacha makes the day feel special everywhere.
- Even a covered notebook can become a special decoration if your soul requires creativity.
New Year's garland of snowflakes (step-by-step instructions)
I found a master class on the Internet that I am happy to share. The needlewomen are about to exclaim! Super cute idea.
Well, let's move on. We cut out snowflakes using any technique. And then collect them on a string.
You can use the punch out technique for cutting.
Video: Making pompoms from corrugated paper and napkins
You can captivate your child for a long time by inviting him to decorate white ping-pong balls. Here you can safely show your imagination - paste stickers, draw pictures, cover them with a pattern of sparkles or beads. The finished balls then need to be carefully pierced with a hot needle and strung on a fishing line or thin ribbon.
A simpler version of a garland for the New Year with your own hands can be made from cotton wool by collecting ready-made balls or disks on a string.
Garlands made of cotton wool
A very beautiful garland can be made from paper balls made using the origami technique. You will learn how to do this in the following video.
Master class on making felt garlands for the New Year
Everyone's favorite felt can also be useful. Handicrafts love it because it is not expensive and unpretentious to work with, just like foamiran.
Well, take leaves of different colors.
Also prepare glue and decorative things, rhinestones, etc.
Cut out any New Year's toys, you can take the same shapes, you can take different ones.
Decorate the samples as you wish.
Use your imagination or find something similar on the Internet.
You can also make a craft from stars and circles and use a sewing machine to fasten all the parts together.
It is also quite easy to create a banner from Christmas trees or triangles that will imitate spruce trees.
And tinsel will only emphasize the winter theme and festive mood.
Using strips (each should be 5 cm long and 0.5 cm wide), create the lightest and simplest garland together with schoolchildren or students for a street Christmas tree, just tie these strips to a thread.
Fabric flags
Flags can be different: square, triangular. Paper and soft. Glued or stitched. Today I will focus on the idea of fabric. Because there are three ways to connect elements.
Secure the pieces with tape or bias tape. For this you definitely need a sewing machine. Otherwise it won't work out neatly.
The second option is to sew pockets for the cord.
The third option is to simply make slits into which the thread is inserted.
Well, for inspiration, an idea with burlap. It looks simply amazing.
You think you now understand that there are absolutely no limits to creativity.
Garlands of pine cones and light bulbs
Already in one of the articles, when we were making souvenirs for the New Year, I showed how you can quickly and beautifully decorate pine cones. And here, too, you can use this product. Dip a pine or fir cone into PVA glue and then let it dry. This is the first option, you can use acrylic paints.
But the second one, dip it in PVA, and then in semolina or glitter. Let the natural material dry.
Then tie a red thread to the cone, after a couple of centimeters again and so on.
Alternatively, you can sprinkle artificial snow on PVA or regular salt.
In general, use your imagination and act!
Here's another idea using wire.
You can make a garland of light bulbs, dip each one in paint and let it dry upside down. Then tie it on tinsel. And voila, the shining multi-colored composition is ready.
Garland chain
Make a chain of multi-colored rings, adding color to your New Year's decor.
Or dazzling white, recreating a snowy atmosphere in a warm house.
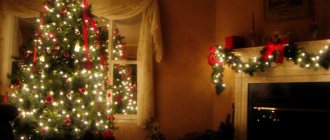
How to decorate a window with garlands (ideas)
Finally, I want to show you a bunch of other ideas that you can also take note of. Wonder, please, it’s so great when windows and walls and even doors are decorated in a winter theme, you immediately feel the holiday, and your mood lifts.
Here they are droplets of cheerful mood from beads.
Use music CDs or regular cardboard rings wrapped in thread.
Make naughty bunnies or tops.
A product made from fir branches and twinkling lights looks very beautiful.
Here is another children's delight, a garland of pine cones in the shape of owls.
In the West you can often find shoes or mittens.
Necessary materials
The name and quantity of the material depends on what type of paper garland will be made and in what volume. There are simplified options with minimal costs of material and time, and there are more complex ones that also require intelligence and skills.
The most commonly used materials are:
- sweet wrappers;
- congratulatory letters, cards;
- pages of colorful magazines;
- colored paper (usually double-sided);
- cardboard (white, colored single-sided, double-sided);
- foil, corrugated paper;
- foamiran;
- regular, curly scissors;
- glue, stapler, double-sided and regular tape;
- satin ribbon, thread, rope;
- beads, sequins, buttons, etc.
It often happens that during preparation, new ideas for craftsmanship come and you have to resort to additional preparation of the material.
Video on how to do an angel stretch
I specially selected a video on this topic from YouTube, I hope it will help many people create a stunning hangout for the upcoming holiday, and below you will find other templates. So, let's go have a look first.
Now the promised stencils:
Method 1
Geometric
Take colored paper. You will need about 12 sheets of 15/15 cm. Double-sided origami paper is perfect for this.
Thick colored paper
Fold each sheet into a triangle. Start by folding the sheet in half. Then fold the triangle in half to make an even smaller triangle.
Fold it several times
Consider making small cuts along the edges to make your garland more interesting. Do not make any cuts along the folded edges.
We do not make cuts completely
Staple the two triangles together in the middle. Do the same for the remaining triangles so that you have six triangle shapes held together.
Cut out the required amount
Pin the two triangle shapes together at the corners. Take two triangles and overlap the dots 1/2 inch (1.27 cm). Sew the corners down.
We fasten all the circles together
Pin the molds together to hold them in place. If you don't want the staples to show, you can only staple the inner layers and leave the top layers free.
Method 3
How to make a garland of flags
Step 1
Prepare 20/30 cm scrapbooking paper. You can use any color or pattern you want. To make your flags more interesting, consider using multiple colors, shades, or patterns. For example:
- If the garland is for a child's room, use pink, blue and white paper with pink/blue polka dots.
- If the garland is for an ocean-themed party, consider using blue and blue color schemes.
Step 2
Fold in half lengthwise. If the paper has a pattern or is single-sided, make sure the design is on the outside of the fold. The empty/white part should be inside.
Fold the paper in half
Step 3
Cut in half down the middle along the fold line. You should get two copies of the folded sheet of the same size.
Step 4
Cut a triangle out of each sheet. To do this, fold the rectangle with the colored side up twice at right angles. Then cut the corner to create a diamond shape on the spread. The middle of the triangle should be at the angle of two folds:
On the spread it turns out to be a diamond
Step 5
Measure the cord on which the flags will hang; in addition to the space for the garland, it should have a margin of at least 30 cm at each end for ties, so that you can easily hang the finished product where required.