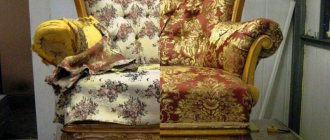
Is old furniture not pleasing to the eye at all? Do you dream of a beautiful and unique kitchen? Do-it-yourself decoupage of kitchen furniture will give used items a new life!
Dilapidated stools, kitchen cabinets and tables are all old and unattractive things that you either need to come to terms with or put in a little effort and give them an original appearance. The decoupage technique will add a touch of sophistication to your kitchen interior! All you need for this is just a little imagination and time.
Decoupage furniture in Provence style
Note! Of course, having purchased new kitchen furniture, you shouldn’t do this to it. After all, it already corresponds to all your preferences and wishes. Do-it-yourself decoupage is more suitable for already aged furniture.
New kitchen with your own hands
Regardless of the reasons that dictate the desire to decorate the surface of furniture in the kitchen, the decoupage technique will help to realize bold ideas, bring elegance and sophistication, novelty and unusual stylistic notes to the environment.
Decoupage of kitchen furniture is carried out by gluing onto the surface images that are applied to any paper products (napkins, newspaper and magazine clippings, posters), decoupage cards and even fabrics. The main rule for using different patterns in the interior is that they must suit the overall style of the room and match the color scheme.
Before you begin the process of updating furniture, you need to determine what style the resulting item will correspond to and indicate the acceptable color scheme. Then carefully study the steps and nuances of how to make decoupage on a kitchen or dining room set.
Finishing
Agree, a kitchen using the decoupage technique looks cozy, beautiful and greatly domesticates the room. It can be used on almost any plane - but the technique is slightly different. We suggest considering the following points:
- The floor needs to be prepared. It’s easier if you have laminate or linoleum - they are already smooth. But wood and parquet will have to be sanded first. Additionally, you will need to cover the surface with masking tape. And then it’s time for creativity - paints, graffiti spray cans, paper and decor for gift wrapping. Be sure to cover the result with two layers of durable varnish, otherwise the repair will not last long.
- Wallpaper that imitates decoupage is now sold for walls. But there is little point in them - achieving the same appearance, only original and created especially for you, is extremely simple. Combine different materials, look for a beautiful color combination.
- Various photos and small paintings placed in a chaotic order look impressive. In fact, there are no restrictions in the choice of technology, the main thing is that you are satisfied with the result.
- The decoupaged ceiling looks stylish. Use newspapers, books, napkins. The design using color magazines looks very bright - however, if you are not bothered by the abundance of shades. Most likely, various templates or stencils will come in handy if you want to make an ornament or a complex pattern.
- By the way: In the kitchen-living room you can use this technique for zoning. To do this, make two patterns that are similar in style, but different, or limit yourself to decorating a certain part of the room.
- Decoupage also looks great on tiles. What do you think of this idea of a painted apron?
Idea: A fashionable modern technique - decoupage with fabric. Try to create an imitation of a rug or a completely textile floor - non-standard and original.
All this decorates the kitchen, but if you need a truly cozy and extraordinary design in an apartment or private house, think about decoupage of kitchen appliances and furniture.
Selecting pictures for the interior
In creating an interior concept, every detail, even the smallest one, plays a big role. It is impossible to imagine a high-tech kitchen with images of flowers or animals on the facades of the kitchen unit. Funny advertising posters on chairs in the middle of Victorian decoration will also look ridiculous.
Design trends in the interiors of which the decoupage technique is used:
- Provence. The style came from a provincial French town. It is imbued with the simplicity of rural life, successfully combined with noble, discreet antiquity and grace. The Provence style is characterized by pastel shades, whitened surfaces with irregularities and abrasions. Light pictures are suitable for decoupage, the kitchen is decorated in delicate lavender shades, the storyline reflects floral and wine themes, and images of small houses.
- Shabby chic (shabby or shabby chic) appeared at the end of the last century in England and was immediately identified as a separate design branch of decoupage. Often products made using this technique are used in other classical styles. Drawings of roses, angels, palaces and birds are used for decoration. The facades of kitchen units are decorated with ornaments of large and small flowers. Subtle tones and intentionally blurred images are used as background colors.
- Simple City. The style reflects the democracy and immediacy of city life. The furniture is decorated with newspaper clippings and pages from glossy magazines. At the same time, torn edges and a certain carelessness of execution are welcome.
- Victorian style. Another bright representative of aristocratic England with all its solidity and subtlety of taste, intertwining classics and luxury. Features are rich and saturated shades of gold, red and green, the presence of checks and stripes in the decor. When choosing pictures, they give preference to roses, animals, oak leaves, still lifes, and hunting scenes.
- Vintage style is expressed in the display of memorable elements belonging to a selected period of time. Vintage pictures for decoupage can be originals or exact copies of popular postcards, inscriptions, advertising posters, portraits of well-known personalities, made in an avant-garde style.
- The ethnic style combines a reflection of the traditions of different countries. The use of ornaments in the form of animal skins, landscapes and exotic fruits is popular.
- To create furniture in the Print room style, they use copies of 19th-century drawings, images of flowers made in black and white and pasted onto pale pastel colors, framed in a frame of black curls.
How to use self-adhesive film for decoupage
One of the most effective and at the same time cheap ways to give furniture a second life is to cover it with film. There is a huge range of colors and patterns on sale, even designs and ornaments. In addition, self-adhesive vinyl film can be matte, shiny or translucent. Self-adhesive does not need to be varnished - the material itself is resistant to moisture and temperature changes.
Kitchen set: decoupage in Provence style
To work with film, you will additionally need a ruler. The gluing process is very meticulous. The material is quite capricious and sensitive - one awkward movement can negate the result of the work:
- Remove the fronts and place them on the floor. Measure surfaces accurately. Buy film with a reserve.
- Choose a color and pattern. Designers recommend using at least two types of films that combine with each other for a kitchen set. For example, decorate the top in light colors and the bottom in dark colors. The inside sides of the cabinets do not need to be covered.
- Fill cracks, level surfaces, clean and dry them. Degreasing will also be required.
- The film has a layer of paper that protects the adhesive side. Peel off a small part and apply to the surface. Smooth out, getting rid of all bubbles and wrinkles. Repeat the procedure until you have covered the entire required area.
- In hot pursuit, unevenness can be corrected. The material will finally set only after a couple of hours.
- Replace all removed elements and install fittings.
Advice. Small bubbles can be pierced with a needle. It’s better not to do this with large ones. Even if you release the air, you won’t be able to completely smooth them out.
Ethnic, country, classic, hi-tech, minimalism and other styles - all this can be opened up for your kitchen by the simple and imagination-stimulating decoupage technique. Turn on your creativity, involve your family in the process and create a mini-masterpiece based on an old kitchen set.
Methods and techniques
There are 5 decoupage methods:
| Classic (straight) | gluing the picture directly onto the surface of the furniture. |
| Back | securing the motif on the reverse side of the transparent material, face down. |
| Volume | creating protruding paintings from fabric, pastes, stones, shells as separate elements or as a continuation or framing of images created by other methods. |
| Art | adding strokes to pasted elements, blurring the boundaries between the picture and the background. |
| Decopatch | pasting the entire surface with small pieces of paper or fabric simulating the patchwork sewing technique. |
Decoupage of old wooden kitchen furniture is completed using special effects that give the piece of furniture an aged look:
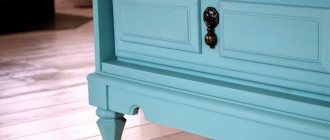
- Patination, or imitation of abrasions, is created by applying several shades of paint or removing the background color in separate areas to the surface of the material.
- Craquelure is the application of a special varnish that, after drying, forms cracks.
- Shading is the creation, using watercolor paints, of a smooth transition from the drawing to the shade of the base.
- Toning is adding color accents in some places on the pasted image.
- Potal - gluing thin foil of gold and silver colors to imitate precious inlay.
What is decoupage and when is it needed?
Decoupage is one of the methods of decorating furniture and other objects using fabric, glass, paper, magazine clippings, photographs, napkins, wood, self-adhesive film, etc. Within the chosen pattern, pieces of materials are glued to the surface, the pattern is decorated on top and secured with varnish. As a result, the kitchen can be turned into a romantic, sophisticated one, filled with drive or comfort. Of course, such decoration is rarely relevant for a new interior. But for furniture that has served you for a certain time and needs updating, this is what you need. The main advantages of decorating a headset:
- savings on replacing furniture modules;
- simplicity of execution technique;
Updated kitchen set
- availability of materials;
- creation of exclusive design;
- an opportunity to be creative and strengthen family ties through joint activities to create beauty.
Advice. Of course, you can’t master decoupage at once. If you want to create a harmonious space and high-quality decor, then be patient and diligent.
It’s easy to understand that your furniture needs such restoration:
- Presence of other mechanical damage: deeply ingrained grease and fumes, peeling and wear of working surfaces, cracks and scratches.
- Obsolescence typeface. Often the interior becomes boring after many years of use, even if the appearance and functionality are preserved.
- When rearranging. Instead of buying a new set, sometimes owners change the position of cabinets, countertops and built-in appliances. This reveals the unsightly sides of the modules that were previously hidden from view.
- Due to wear and tear of the fittings.
Materials for work
To restore a kitchen table set and decoupage other pieces of furniture (and even a set of cabinets and cabinets), you will need the simplest tools and materials. They can be found in every home or can be purchased for fairly little money.
Decoupage cards
If fabric, napkins and wallpaper are things that are understandable to everyone, then decoupage cards are something unusual for beginners of this technique.
The highest quality cards are made from rice paper. There are products made from a thin, almost transparent base and more dense ones, on which rice fibers are clearly visible; after gluing them, the surface of the furniture acquires a structure. Experienced craftswomen, when using a separate motif, do not cut them out of the general fabric, but tear them out. This allows you to create a smooth border.
Cards on a denser base are difficult to use for decorating individual areas - the edges will be visible and it is impossible to level them with the surface of the furniture. It is better to use such cards for pasting the entire facade, placing them end to end.
Thin cards look elegant and sophisticated, covering furniture with their help creates a single whole. The use of shading and drawing of some accents create an imitation of artistic painting.
The cheapest decoupage cards, which are most often used to decorate furniture with your own hands, are applied to a paper base. The elements are cut out using scissors with sharp tips.
Since the paper is thick, gluing must be preceded by a thinning process. Several layers of acrylic varnish are applied to the front surface and allowed to dry completely. Then they are soaked in water and the excess layers are carefully rolled off, leaving only a thin layer of paper with the image.
Glue
Decoupage glue is a special composition that combines the properties of glue and water-based varnish. After drying, it forms a durable, transparent film. There are universal compositions that are used for gluing to any material, and special ones with a narrow focus.
Depending on the surface to be decorated, special glue is used:
- For candles. It contains wax, which melts during combustion.
- For fabrics. It is used for decoupage of tablecloths, napkins and other textiles. Activated by ironing.
- For glass. A special solution that requires heat treatment.
- The decorated product is placed in a cold oven. After heating to a temperature of 130°C, bake for 90 minutes, allow to cool completely and then remove.
Varnish
To protect furniture from damage, it is coated with several layers of varnish. In a kitchen environment, it is necessary to ensure that the coating is resistant to steam and water. Therefore, it is best to use construction acrylic varnish instead of a water-based product.
Tips from experts on performing decoupage
Decoupage, although a simple task, requires perseverance and creative thinking. Masters of decorative and applied arts give advice so that your process is productive and without headaches:
- When pasting the doors, first unscrew them and place them on a hard horizontal surface.
- For beginners, it is best to avoid overly fine work and choose simple geometric shapes with smooth edges and right angles. It is worth moving on to experiments after gaining minimal experience.
- It is better not to use patterns that are too large or small in comparison with the overall dimensions of the surface.
- To decorate glass doors, you must first degrease the surface with special products.
- Special glue for decoupage is used for dense materials, and napkins can also be glued with PVA.
Master Class
Let's consider the process of decoupage of a kitchen set step by step:
- Before gluing, the undamaged surface is washed and degreased. If the facade is being restored, the furniture is sanded, removing the old coating. Large cracks are sealed with putty. If necessary, paint with acrylic compounds.
- The prepared elements are covered with glue, placed in the place of fastening and smoothed with a painting brush with soft bristles. If you plan to cover the entire facade, first apply glue to its surface and allow it to set.
- After the glue has dried, decoupage effects are applied: aging or gilding.
- The final stage is coating with acrylic transparent varnish in several layers at intervals of 2 hours.


