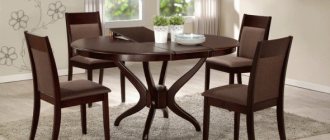
Furniture made from chipboard can be found in every home or apartment. The reasons are significant: favorable low price and practicality. Like any other household item, it becomes outdated over time. Buying new furniture is often not possible. And updating chipboard furniture with your own hands and restoring its lost beauty is exactly what can be done without harming your wallet. Moreover, updating old pieces of furniture will only take about two to three hours.
Types of furniture edges
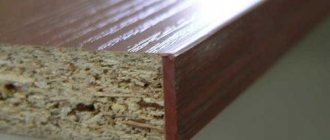
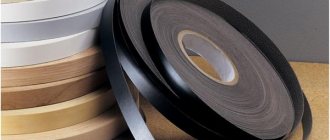
One of the most popular materials for making furniture is chipboard. Its disadvantage is the unsightly edges that remain when cutting the part. These edges are masked by the furniture edge. It is made from different materials, and accordingly, it has different properties and prices.
You can also get this edge yourself
Paper or melamine edges
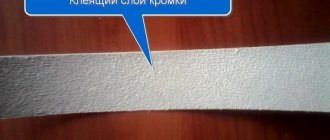
The cheapest option is melamine-impregnated paper edges. The paper is taken of high density, impregnated with melamine to increase strength and glued to papyrus paper. Papyrus can be single-layer (cheaper) or double-layer. To prevent the melamine coating from wearing off, everything is covered with a layer of varnish. To make it more convenient to edge the parts, an adhesive composition is applied to the back side of the melamine furniture edge. When working, you just need to slightly warm up this composition and press it well against the end.
Paper or melamine edge is the cheapest, but also the most short-lived option for finishing the ends of furniture
The thickness of paper edge tapes is small - 0.2 mm and 0.4 mm are the most common. There is no point in making it thicker, and it will be expensive.
This type of edges is distinguished by the fact that it bends very well and does not break when bent. But its mechanical strength is very low - the edge quickly wears out. Therefore, if it is used, it is only on those surfaces that are not subject to load. For example, on the back of shelves, table tops, etc.
PVC
Polyvinyl chloride, which has recently become widespread, is also used in the production of edges for furniture. A ribbon of a certain width and thickness is formed from a mass painted in a certain color. Its front surface can be smooth, monochromatic, or it can be textured - with imitation of wood fibers. The number of colors is large, so it’s easy to choose the right one.
PVC furniture edging is the most popular material used by both home craftsmen and professionals. This is due to the relatively low price and good performance properties:
- High mechanical resistance.
- Withstands exposure to chemicals (household chemicals, for example).
- Waterproof material protects the ends of the product from moisture.
- PVC is an elastic material, which allows you to process curved surfaces.
- It can be processed well using simple tools, which allows you to get good results even at home.
Different edge thickness looks different
PVC furniture edging is available in different thicknesses and widths. Thickness - from 0.4 mm to 4 mm, width from 19 mm to 54 mm. The thickness is chosen depending on the expected mechanical load or external appearance, and the width is slightly larger (at least 2-3 mm) than the thickness of the workpiece. There is a furniture PVC edge with an adhesive applied, and there is one without. Both can be glued at home (more on that below).
This type of edge material also has disadvantages: not a very wide temperature range: from -5°C to +45°C. For this reason, furniture cannot be left outside in winter, and when pasting with heat, you must be careful so as not to melt the polymer.
Made from ABS plastic
This polymer does not contain heavy metals and is characterized by high strength and durability. The disadvantage can be considered the high price, therefore it is used extremely rarely, although it has excellent properties:
- It is resistant to high and low temperatures, so when gluing you can use glue with any melting point. Small shrinkage when heated - about 0.3%.
- High mechanical stability.
Several options for edge tape made of ABS plastic
This type of edge can be matte, glossy or semi-gloss. There are also options that imitate various types of wood. In general, this material is more convenient to use and more durable to use.
Veneer edge
Veneer is a thin section of wood, colored and shaped into a strip. This furniture edge is used in production for gluing sections of veneered products. Working with this material requires certain skills, and the material is expensive.
Veneer is not the most popular material for edging
Acrylic edge or 3D
Made from transparent acrylic. A design is applied to the reverse side of the strip. The layer of polymer on top gives it volume, which is why it is called a 3D edge. Used in the production of unusual furniture.
Acrylic gives the picture volume
Main questions
What is "chipboard"?
Chipboard stands for “chipboard.” From the name you can understand that this is not a separate type of wood, but a mixture of wood shavings, held together with glue and placed under a press. This material is inexpensive and is used instead of scarce wood, it is easy to work with and durable, which is what arouses interest. Thanks to modern decorating techniques, chipboard will become a worthy replacement for expensive wood, the extraction of which, moreover, causes enormous harm to our environment.
ADVICE! Laminated chipboard can be immediately purchased at the factory, it can be made to order, but you can independently process a regular pressed board using laminating agents.
Why laminate chipboard?
Looking at a product made from chipboard, it becomes clear why it is recommended to laminate the raw material. Firstly, it does not look very beautiful, its decorative qualities leave much to be desired. Secondly, lamination will smooth the surface, make it more pleasant to the touch and help avoid the danger of splinters, scratches or snags on thin fabric. Thirdly, the procedure will significantly improve the quality of the product, making it more moisture resistant, which is very useful for kitchen furniture.
Profiles for processing furniture edges
You can trim the edge of furniture not only with edge tape. There are also furniture profiles that are attached mechanically. They are available in two sections - T-shaped or U-shaped (also called C-shaped).
For T-shaped furniture profiles, a groove is milled in the edge being processed. The profile is hammered into it with a furniture (rubber) mallet. The edges are cut at 45° to make the angle look attractive. It is brought to perfect condition with fine sandpaper. This type of profiles is produced from PVC and aluminum; with the same installation method, they look very different, and the differences are significant.
In width they are available for laminated chipboards of 16 mm and 18 mm. There are also wide ones, but they are much less common, since they work less with such material.
C- or U-shaped profiles are most often mounted with glue. They coat the edge with it, then put on a plastic profile, press it well and fix it. These PVC profiles are soft and hard. Hard ones are harder to bend and it’s difficult to paste them over curved edges. But they have great strength.
Gluing C-shaped furniture profiles does not cause problems
If you still need to “fit” a rigid C-shaped furniture profile onto a bend, it is heated with a hair dryer, then given the desired shape and secured with masking tape until the glue dries.
What types of furniture plastics are there?
The article would be incomplete if we did not, as usual, conduct a small educational program.
What is used for cladding?
Currently used for cladding:
- homogeneous plastics based on PVC, ABS (and their mixtures)
- laminates of several varieties.
Single layer films
Single-layer films are divided into films with a finish effect, that is, coated with varnish during the production process and without a finish effect.
Sometimes melamine resins are used to impregnate papers in such films, so their common technical name is melamine films
Multilayer plastics
Laminates are divided into low pressure plastics (CPL) and high pressure plastics (HPL). The common technical name for these materials is laminate.
HPL plastics can have a finishing layer of veneer - reconstructed or even natural, varnished.
| Rice. 1. HPL plastics |
Homogeneous plastics based on PVC
To clad figured facades using membrane presses, as a rule, homogeneous plastics (since they are thermoplastic) based on PVC are used.
These materials have low heat resistance; during operation, they may shrink at elevated temperatures.
| Rice. 2. Films for cladding MDF facades |
We glue furniture edges with our own hands
There are two technologies for gluing furniture edge tape. The first is for those that have glue applied to the back. In this case, an iron or a hair dryer is needed. The second is for gluing tapes without glue. In this case, you need a good universal glue that can glue plastics and wood products and a furniture roller, a piece of felt or a soft rag so that you can press the edge well against the cut.
It’s possible to get such an edge at home
A little about what thickness of edge to glue on which parts. Those edges that are not visible, according to GOST, do not need to be glued at all, but basically they try to treat them so that less moisture is absorbed into the chipboard, and also to reduce the evaporation of formaldehyde. Melamine tape or 0.4 mm PVC is glued to these edges. The edges of the drawers (not the fronts) are also processed.
It is better to use 2 mm PVC on the front ends of the facade and drawers, and 1 mm PVC on the visible sections of the shelves. The color is chosen either to match the main surface or “in contrast”.
How to glue edging yourself with glue
The adhesive composition is applied to the melamine edge; it can be applied to PVC. If you choose PVC, it’s easier to start with thin ones - they are easier to process, any melamine is easy to glue.
We take an iron and a fluoroplastic nozzle on it. If there is no nozzle, thick cotton fabric will do - so as not to overheat the tape, but to melt the glue. A hair dryer is also suitable for this purpose. We set the iron to about “two”, while it is heating up we cut off a piece of tape. The length is a couple of centimeters longer than the workpiece.
Place the edge tape on the part
We apply the edge to the part, level it, smooth it out. There should be small pieces hanging off both sides. We take an iron and, using a nozzle or a rag, iron the edge, heating it until the glue melts. It is necessary to heat evenly over the entire surface. After the entire edge is glued, let it cool. Then we start processing the edges.
Warm up with an iron
The edge can be cut with a knife, both with the sharp and blunt sides. Some people use a regular metal ruler, while others find it more convenient to use a stainless steel spatula.
So, take the tool you have chosen and cut off the hanging edges of the edge. They are cut close to the material. Then cut off the excess along the part. Melamine and thin plastic are easily cut with a knife. If the PVC edge is thicker - 0.5-0.6 mm or more, difficulties may arise. Such edges can be processed with a hand router, if you have one. This guarantees good results in a short time. The processing will take longer if you use sandpaper, but the result may not be worse.
You can even use a spatula with a hard blade
One important point: when gluing thin edges, the cut of the part must be smooth, without protrusions and depressions. The material is plastic, which is why all defects are visible. Therefore, first go over the cuts with sandpaper, then thoroughly remove dust and degrease. Only after this can you glue.
Edging with PVC tape (no glue on the back side)
With this method of gluing PVC edges yourself, you need universal glue and a piece of felt or rag. We read the instructions for the glue and carry out all the steps as recommended. For example, for Moment glue, you need to apply the composition to the surface and distribute it, wait 15 minutes, and firmly press the surfaces to be glued.
Apply glue and wait - no problem. To press the edge tightly to the cut, you can use a wooden block wrapped in felt. Instead of a block, you can take a construction float and also attach felt to its sole. As a last resort, you can roll up thick fabric in several layers and press the tape to the surface.
Press firmly, leaning with all your weight
The selected tool is pressed against the laid edge, pressed with all its weight, pressing it to the surface of the chipboard. The movements are stroking. This is how they iron the entire edge, achieving a very tight fit. The part is left in this form for some time - so that the glue “seizes.” Then you can start processing the edges.
see also
Comments 23
I use Abet laminati plastic and Wilsonart 800 or 801 glue. I apply the glue with a spray gun in 2 layers. According to the instructions for this glue (found in the public domain), the main thing is the pressing force of the parts being glued, and not the time. The first layer dries in about 10 minutes, the second becomes dry in 10 minutes or even less, but continues to set for some time,
10 minutes - plastic glued during this period of time, then even with a knife it is cut off with great difficulty. According to the instructions for the glue, the plastic can be milled immediately after gluing the parts and immediately proceed to the next stage of processing the part. The final processing is done with an angular cutter 15 - 25 ° and sandpaper 100
where can I get this kind of plastic?
2 points: as my friend says, “the sandpaper is in your pants, but this is sandpaper” - but these are minor things. The second point is that the glue does not need to be cured after gluing; the compression force is more important than time. If you tap the glue with a mallet, then this is quite enough, and by the sound it will be clear where it is glued and where you still need to knock.
You are doing everything right. But it is better to warm up the gluing areas to 80 degrees, the glue will activate. But screws for plastic are not good! In this case, you need to additionally glue the joined elements together. If the chipboard is rough, then use good PVA glue.
This plastic can be used for marker boards by the way))
It is better to process overhangs with a finger cutter with a bearing. We usually do this.
It is advisable to wait 24 hours before processing plastic overhangs. It happens that over time the plastic shrinks and gaps remain along the contour.
Take MDF thinking it will fit better and it is moisture resistant
There is no time to switch to MDF. It must be made from what is intended. Yes, and as today’s practice shows, everything sticks perfectly to chipboard))
I don’t know what kind of glue this is, I used kleiberite. Plastic can also be cut with a stationery knife, along the front side, it is not cut through and bends along the cut line, it breaks off clearly along the cut line if you get used to it. You can glue it without clamps, because the glue is contact. I just use a roller. When the plastic is applied to the surface to be glued, it is necessary to roll the entire surface with a roller, evenly, as if expelling air. Well, like wallpaper glue... For high-strength gluing, I do this: apply glue on both sides, wait until it dries completely, apply another layer, when the glue dries you can glue and roll, warming the surface with a hairdryer alternately, warm-roll, warm-roll. I process the edges (overhangs) with a triangular file, cut off the corner, and smoothly grind off the remaining edges, but I also use a router when there is a lot of work.
Thanks for the technology. I didn’t even think about the second layer, I’ll have to try it. The file is good, but I have a special machine for this. I process all overhangs quickly and accurately. I still have to glue the table top, size 1400x800, I'm saving it for the last minute until I get the technology working out, while I glue the short parts. So, as for the tabletop, it seems to me that rolling with a roller will not be enough, you either need to put something heavy on top and let it sit overnight. It seems to me that there will be tubercles along a large plane. Dispel my doubts))
What tubercles? Air bubbles? I remembered: when I didn’t have a roller at hand, I rubbed it in with a piece of board. 20 by 8 cm, wrapped it with a rag in one or two layers and with both hands vigorously rubbed it with the end of the piece of wood. The main thing is not to slap and smooth the whole piece in a chaotic manner when you paste it on. You need to let the air escape and therefore rub in with great force and gradually, layer by layer, strip by strip. When you rub half the table like this, you can see the difference. One half seems to be raised. The rag washes off very quickly and don’t smear it, otherwise you might end up with scratches. Lumps from the fact that there is a speck inside are treated. You need to hit this place with a hammer through a metal ruler and the speck will be pressed into the chipboard. If the surface is laminated, it won’t press in very much.
Thanks for the advice. Any experience is interesting.
You spread the glue with a piece of plastic. And everything is correct.
I cut all my hands with this damn plastic) Still, it’s more convenient to use a piece of fiberboard, even than with a scraper))
How and how to update chipboard furniture with your own hands
- Updating chipboard furniture with your own hands
- How to cover chipboard furniture with self-adhesive
- Painting furniture chipboard
Furniture made from chipboard can be found in every home or apartment. The reasons are significant: favorable low price and practicality. Like any other household item, it becomes outdated over time. Buying new furniture is often not possible. And updating chipboard furniture with your own hands and restoring its lost beauty is exactly what can be done without harming your wallet. Moreover, updating old pieces of furniture will only take about two to three hours.
Laminate countertops: 4 simple and affordable ways to update their design
The countertop is by far the most visible component of a kitchen environment, fortunately or not. Some people are lucky enough to be able to chop garlic on a custom island with a marble slab as a countertop that fits perfectly into their idea of an ideal interior. Others have to be content with an unsightly kitchen set from the distant 80s (or even earlier).
Due to their cheapness and durability, laminated paper-laminated plastic or chipboard countertops are very popular among homeowners, but, unfortunately, after a while they still lose their attractiveness and, in our opinion, require replacement.
Of course, purchasing and installing another countertop will cost a considerable amount. But you can try to update the old one yourself, giving it the desired look. Thin layer concreting Using special materials, you can make your old laminated countertop look new and concrete. This is a real trend of recent years, which goes well with both classic and modern interiors.
The resulting surface will be glossy and even more durable. In addition, the presence of countertops of different types and textures in one space makes the kitchen design voluminous and interesting.
Imitating painting to look like granite An amazingly high-quality imitation of a granite surface can be made using quite affordable methods. Using acrylic paints, sponge-painting techniques, and a special resin compound like Envirotex Lite, you can transform a boring, colorless tabletop into an incredibly luxurious and realistic one (using a blow torch helps increase the elasticity of the finish).
The advantage of this method is that it allows you to give the surface any color and apply grooves and spots on it, which are usually present in the structure of natural granite.
Imitating painting like natural stone To give the surface the appearance of a stone slab (which looks harder than granite), you will need the same paint, transparent glitter (that is, sparkles) and a transparent coating.
The “before” and “after” options presented here are almost the same in color, but the overall impression differs enormously. The glossy finish itself looks more professional and sophisticated. It's hard to believe that this is just a laminated countertop.
Coating with tiles If the surface is damaged quite badly or the painting option is simply not suitable for you, you can resort to another simple but effective way to update the design.
Compared to completely replacing the countertop, tiling does not seem like such an expensive undertaking. In addition, the variety of shapes and colors of this material on the market allows you to create almost any image.
The installation process, as with other surfaces, is quite simple. Just remember that to cover the side edges of the countertop you need to choose tiles with rounded chamfers.
Don’t rush to judge your old countertop, because there are many ways to bring it into perfect shape. We were pleased to tell you about the simplest and most interesting ones today.
I think that any owner of a laminated countertop will find this article useful. Sooner or later, all materials deteriorate, but we don’t know how to restore them. Thanks to the detailed description, you will be able to choose the restoration method to suit your taste and end up with a completely new item. The result looks truly exquisite.
Before reading the article, I didn’t even suspect that the countertop is almost the most noticeable component of the kitchen environment. But it’s true that our gaze often falls on her. A useful article, especially for those who want to change something. Take note.
Lamination currently saves worn-out countertops so much that I would never have thought about the simplicity and price of such a service. Of course it is easier to restore than to replace marble. The resulting view is simply stunning.
So that's it! So here's how to remodel your kitchen table! So here's how you can update your kitchen table with your own hands. Very useful article, everything turned out to be so simple. You can make beautiful tabletops with your own hands. And you don't necessarily need a stone for this. Very useful article!
Very good ideas to update an old kitchen. The countertop is the most frequently used part in the kitchen, so it wears out very quickly. Replacing an old countertop with a new and good one is not always possible, but simply updating the surface is an economical option for many.
Updating chipboard furniture with your own hands
First of all, you need to decide exactly how to update old pieces of chipboard furniture. There are two simplest options:
- Painting,
- Pasting self-adhesive onto the surface.
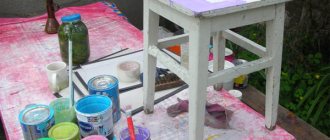
The main thing is to prepare in advance, namely: calculate and buy the necessary materials, prepare the necessary tools.
The main tools are a stationery knife, scissors and a household iron, that is, the most simple “helpers” available in every home.
The update takes place in three stages:
- disassemble the case for ease of operation;
- applying a new layer to the surface;
- assemble an updated body.
At the first stage, you need not only to disconnect the facade from the base, but also to clean the peeling fittings. Further work takes place depending on the selected update method.
Installation procedure
You can only glue melamine tape and U-shaped PVC edging yourself. Let's consider the technology of how to glue the edge. This method will help restore old furniture or decorate new ones.
- Unwind the roll of melamine border. Apply to the end of the surface to be treated. Mark the length with any additional trimming allowance. The standard self-adhesive edge has a width of 2.1 cm, and the width of the chipboard is 1.6-1.8 cm.
- Apply tape, align edge along one edge, iron.
- Iron in small sections of 10-20 cm.
- Roll over heated areas with a roller or felt.
- Depending on the chosen material, you need to glue the edge using an iron at a certain temperature. With a properly heated iron, the adhesive base will evenly adhere to the end without swelling.
- After the tape has cooled, begin trimming and rubbing the protruding edge with sandpaper or a file.
You can see all the stages of work more clearly in the video below:
The stage of pasting the end surface is completed. The tape allows you to decorate edges of various configurations. If you follow all the recommendations, the end will be of high quality, without scratches, minor defects and glue.
Edge tape for furniture is used not only by craftsmen who make furniture, but also for the restoration of wooden structures by home craftsmen. Any type of edge that is applied to the end of the chipboard independently or by furniture manufacturers gives the product an aesthetic appearance. It also protects the structure from moisture, microorganisms, and insects that can destroy the internal or wood structure of the product, so gluing the edges to the chipboard is simply necessary.
Source: vseprikleim.ru
How to cover chipboard furniture with self-adhesive
Before covering furniture chipboard with self-adhesive film, the surfaces must be degreased with a rag soaked in vinegar and then cleaned. Measure the required amount of material taking into account its tightening. It’s better to take it with a reserve and then cut off the excess.
In order for the film to spread over the surface without problems, it is recommended to spray its adhesive side with water from a spray bottle. When moisturized, it will move well in the right direction.
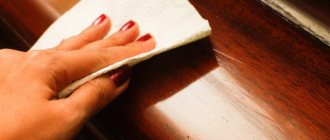
The self-adhesive film is stretched and straightened on a piece of chipboard furniture, after which it is leveled from the center to the edge with a dry cloth. This technique will expel the air along with any remaining moisture.
For complete adhesion, you can use a warm iron. You need to act carefully with a rag so as not to “burn” the self-adhesive.
Painting furniture chipboard
To update chipboard furniture with paint, you will need a sprayer, rollers or a foam sponge, paintwork materials, a primer and the paintwork itself. Typically cover furniture with chipboard
Oil-based paint after painting gives a beautiful glossy look, the surface is smooth to the touch. Apply in stages.
After complete drying, the next layer is applied until the desired result is obtained. The disadvantage is toxicity and an unpleasant pungent odor. After applying the substance, be sure to ventilate the room.
Water-based paints are acrylic. Best proven to be safe and quick-drying. They are most suitable for updating chipboard furniture.
It is convenient to work with paints in spray cans. It is appropriate to color the veneer with stain. You can also use varnish when updating furniture.
In order to get really high-quality painted panels after updating chipboard furniture with your own hands, you need to carry out a number of preparatory measures:
- The facades are removed or the furniture is completely disassembled. It all depends on the plans.
- If you have no experience in carrying out such work, it is better to number the facades and fittings so that you don’t have to look for parts during the assembly process.
- The fittings are removed or unscrewed very carefully so as not to break or lose them.
- All unnecessary items are removed from the area where the painting work will take place.
The part is placed horizontally, processed with a sanding block, and the first layer is removed. Dust is removed.
Apply a primer over the resulting roughness twice. Each layer is applied after the previous one has completely dried.
Before application, the paint is stirred and tinted, if necessary. Apply the mixture with a roller from the middle of the part, rolling over the entire surface, avoiding layering.
To avoid drips when working with a paint sprayer, it is better to carry out several trials to select the desired distance.
If you follow these simple recommendations, you will end up with modern furniture, restored on your own, at minimal cost.
Method 1: Painting the kitchen with chalk paint
Do you want to update your kitchen set beyond recognition with your own hands? The best way to do this is to repaint the facades with chalk (mineral) paint. Why chalk?
- The fact is that this type of paint has a thicker consistency and increased adhesive properties, due to which it fits perfectly on any surface - even on laminated chipboard/MDF. Moreover, chalk paints eliminate the need for tedious sanding and sometimes even without primer.
Chalk paints are also good because they give the painted surface a texture similar to that obtained when painting a wooden surface. Therefore, even the most ordinary kitchen with film facades will look much more noble after such an “update”.
- In Russia and the CIS countries, you can buy chalk paints from designer Daria Geiler, foreign manufacturer Annie Sloan, Kazakh Vernenskaya Manufactory, etc. You can also make chalk paints yourself using recipes that are easy to find on the Internet.
Here are some photo examples of kitchens before and after restoration.
Photo of a kitchen with film facades before and after painting with Daria Geiler paint. Here the author of the alteration restored the peeling film on the facade near the stove, and then painted the furniture without removing or sanding the film
Old kitchen with veneer cabinets before and after painting with Annie Sloan paint. By the way, in this kitchen even the tiled floor was painted with chalk paint, and the patterns on it were painted using a homemade stencil
Inspired? Then it's time for a master class.
To paint the kitchen you will need:
- Primer (special for chalk paints or alkyd if the furniture was painted with oil stain);
- Chalk paints (preferably with a 10% margin);
- Matte moisture-resistant varnish (acrylic or polyurethane).
- Material consumption is calculated following the manufacturers' recommendations. It is especially important to correctly calculate paint consumption. If there is not enough of it, you will have to repaint the remaining areas with paint from another batch, which, due to the nature of production, will be slightly different in tone.
- Which varnish is better - polyurethane or acrylic? To ensure that the kitchen coating can withstand extreme loads, it is safer to use polyurethane varnish. However, if you rarely cook and do not have pets, acrylic varnish is perfect, especially since it dries faster, does not have a strong odor and is cheaper.
- Brushes: two synthetic brushes for primer and varnish, as well as one natural or synthetic brush about 4 cm wide (a natural brush gives a more pronounced texture);
- Degreaser, such as white spirit;
- Sandpaper with a grain of 100–180 microns;
- Ladder;
- Film and masking tape (to protect non-paintable parts);
- Screwdriver;
- Gloves.
How to paint a kitchen set:
Step 1. Preparation
First you need to remove the handles from the facades. The floor, walls, splashback, countertop, glass inserts, fittings and other surfaces that you do not want to paint should be covered with film and masking tape. Next, clean all parts from grease (preferably with a degreaser), stains and dust.
- Do the facades need to be removed? It is not necessary to do this, but it is more convenient to paint this way.
Step 2: Primer and/or sanding
It is not necessary to sand the old paintwork, film or lamination, but it is necessary to treat it with a primer in 2 layers. In this case, each layer of primer must be allowed to dry, and then the primed surfaces must be sanded to even out the coating and enhance paint adhesion.
- However, if the lamination has a strong gloss, then it is advisable to remove its top shiny layer with fine-grained sandpaper - this will make the coating even stronger.
- If you are not too picky about the result (for example, if the kitchen is temporary, very old or got for free), then you can do without a primer. All you need to do is: wash the facades from grease, then paint them in 2-3 layers and finally cover them with 1 layer of varnish.
- Do you want to achieve the most even and durable coating? Then it’s worth sanding the surfaces after each layer of primer, paint and varnish (except for the finishing layers).
- Before starting work, test the paint on any object.
- If you want to save money, paint only the fronts and visible parts of the frame, and the interior walls and shelves of the cabinets can be painted cheaper or left unchanged.
Step 3. Coloring
Once the primer is dry, begin applying 2-3 coats of paint, allowing each layer to dry completely (one coat of chalk paint only takes about 30 minutes to dry).
- It may take 5-6 coats to cover a dark finish with white paint.
Changing the color
The easiest way to change the style and appearance of old furniture is to paint it. The work will go quickly and accurately if you prepare the necessary tools in advance: sandpaper, primer, brushes, roller, acrylic paints.
Algorithm of actions:
- furniture is disassembled into its component parts, fittings are removed;
- all surfaces are thoroughly sanded and then treated with a primer;
- Using a wide brush or roller, the prepared furniture elements are painted with acrylic paints.
Secret: you can speed up the painting process if you use spray paint.
- After the painted surface has completely dried, it is coated with colorless varnish (two or three layers).
A modern look for old chipboard furniture can be created using the idea of contrasting paint in several colors. For example, the body of the chest of drawers is painted in a dark shade, and the inner surface of the sections is painted in light shades. For those who master artistic painting techniques, the idea of painting with a gradient transition will help create a new style for old furniture.
Wardrobe pasting
The process of updating furniture using film is not difficult, but it requires patience and knowledge of how to cover a cabinet and what tools will be needed.
Required tools and materials
To start updating your cabinets, in addition to adhesive tape, you will need a number of available tools:
- ruler or tape measure;
- pencil or marker;
- scissors, stationery knife;
- silicone spatula or dry rag;
- spray bottle with soapy water;
- hairdryer
Preparation
Gluing a polished cabinet with self-adhesive film begins with preparing the surface. From the very beginning, all removable fittings are removed. For convenience, you can remove the doors from their hinges.
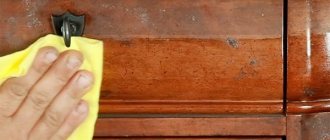
All furniture must be carefully inspected for protruding fasteners, chips and cracks in the coating, since all these defects will appear in the future. Self-tapping screws and bolts can be easily tightened with a screwdriver or wrench, but unevenness will be more difficult to deal with. You will have to level the surface with putty and then sand it with sandpaper.
After leveling, begin cleaning and degreasing using any detergent and ethyl alcohol.
If the cabinet is made of wood, MDF or chipboard without additional coating, you can apply a thin layer of furniture primer and let it dry to enhance adhesion.
Source: vseme.ru
We use self-adhesive film
Self-adhesive film will help quickly renew shabby tables and worn-out kitchen units made of chipboard. The variety of textures and colors of the material will allow you to create a new style of furniture and fit it into the modern interior of your home.
For work you need to prepare: self-adhesive film, knife, soft rag.
Algorithm of actions:
- furniture unwinds into its component parts;
- surfaces are thoroughly cleaned and degreased.
- Secret: water with the addition of liquid dishwashing detergent will help clean surfaces. A solution with vinegar will help degrease furniture;
- the prepared surfaces are covered with self-adhesive film.
- Important: film cutting is carried out taking into account 10 mm allowances. Before pasting, the furniture is lightly moistened with water from a spray bottle. This will help you easily correct folds and distortions during operation;
- The pasted surfaces are smoothed with a soft cloth. If a bubble remains under the film, puncturing it with a needle will help remove it.
Selection of self-adhesive film
To choose a self-adhesive film for decorating an old cabinet, you need to familiarize yourself with the properties and characteristics of this coating, pay attention to the structure, base material, type of surface, decorative design and purpose.
All films are based on polyester, propylene and polyvinyl chloride. Additionally, plasticizers, stabilizers, pigments, paper, natural and synthetic fabrics can be added.
Self-adhesive film consists of three main parts:
- The surface is made from paper, polymer film or metallized foil.
- Acrylic or rubber adhesive base.
- Protective backing made of siliconized paper. Retains the adhesive side of the film and peels off before gluing.
There are calendered films that can stretch under the influence of high temperatures and shrink during the cooling process. They are best used to cover cabinets with even, smooth fronts. If you need to decorate rough or corrugated facades with self-adhesive film, or hide existing protrusions, preference is given to injection molded materials.
The surface fabric differs in structure, it can be:
| Single layer: | All the constituent components, including resins, plasticizers, stabilizers and pigments, are mixed together and formed into a thin film by hot roll rolling or extrusion. |
| Double layer: | It is produced by applying polyvinyl chloride resin to a fabric or paper base. The result is a plastic material. Its technical characteristics are slightly lower than those of a single-layer one. |
If all quality characteristics affect durability and scope of application, then the appearance of the furniture depends on the type of surface. The following types are distinguished:
- Glossy film – has high reflectivity. It can be used to cover the façade in dark and small rooms.
- Matte – has a soft surface. The canvas is used in good lighting.
- Mirror.
- Transparent coating - excellent for treating glass elements in facades.
- Holographic material.
Using a stencil
A small detail - a drawing through a stencil - can radically change the appearance of outdated furniture. As a stencil you can use prints and patterns, drawings printed on a printer, lace.
- the selected area on which the design is planned to be applied is thoroughly cleaned and degreased;
- using a sponge dipped in acrylic paints, apply a dotted pattern onto the furniture with gentle movements;
- the resulting result can be corrected using a thin brush;
- After the paint has completely dried, the decorated surface is coated with a colorless protective varnish.
Decoupage technique
Drawings and patterns drawn on paper will help change the appearance of outdated furniture and fit it into the interior in the Provence and classic style.
For work you need to prepare: two-layer napkins with the desired pattern, PVA glue, a brush made of natural materials, varnish (acrylic or alkyd).
- a pattern cut from napkins is laid out on a thoroughly cleaned, degreased surface (the top layer of the napkin is used);
- PVA glue is diluted with water to the consistency of liquid sour cream;
- the desired area is smeared with glue, after which a cut-out pattern from a napkin is laid out on it;
- Using gentle movements, the napkin is ironed with a brush dipped in glue. All movements must be extremely careful, since a thin napkin tears very quickly;
- After the glue on the pattern has dried, the decor must be coated with colorless varnish. Layers are applied several times.
Important: each subsequent layer is applied only after the previous one has dried.
Updating old chipboard furniture is not only a good way to save money on purchasing new interior items, but also an opportunity to demonstrate creative and artistic potential.
How to paint chipboard. How to paint a chipboard table with your own hands (1 video)
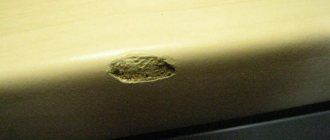
cover the bare end of the chipboard - with what?
I assemble modular furniture, not expensive. There are a lot of “bare”, uncoated chipboard ends (invisible edges of shelves, bottom edges of walls, etc.). What could be so simple to cover them with so that the phenolic muck doesn’t evaporate from them? Nothing comes to mind.
Paint. (it turns out to be a collective farm)
What fumes? What phenol?! How did we still survive in such a time?! Coat the ends with PVA glue, twice, rubbing the glue into the cut, with intermediate drying, and the air in the apartment becomes cleaner and easier to breathe.
Shikhael Muma wrote: How to cover them up with something so simple
The cheapest is melamine edge, you can glue it yourself at home.
if the edge does not fit, then use silicone or impregnate with wax
What's the point of reducing the area? anything, even plasticine, PVA, putty (better than acrylic), paint, even toothpaste... as long as it lasts. I varnished the ends in the kitchen 4 times, with intermediate drying, just to protect them from moisture..
Well, it’s probably better to paint it thicker than thread. Paint is not a problem, with a brush, just like that.
Shikhael Muma wrote: I am collecting modular furniture, not expensive. There are a lot of “bare”, uncoated chipboard ends (invisible edges of shelves, bottom edges of walls, etc.). What could be so simple to cover them with so that the phenolic muck doesn’t evaporate from them? Nothing comes to mind.
Stick the melamine edge
Nina EA wrote: Glue the melamine edge
How realistic is it to use an iron on your knee at home?
I tried to rub the end of the chipboard with a candle, and then use a hairdryer - the paraffin was absorbed like water. Simply and easily. I'm wondering if once is enough.
Shikhael Muma wrote: How realistic is it to use an iron on your knee at home?
Exactly at home and with an iron or just glue. Note the melamine edge and not the PVC edge. Or just veneer + PVA + iron + sandpaper + varnish
Nina EA wrote: Please note the melamine edge
Please note, beauty is not needed, no one will see. How do you like paraffin?
Nina EA wrote: melamine edge, not PVC edge.
The edges, although slightly, will distort the size of the chipboard. The connection may be disrupted.
Shikhael Muma wrote: How do you like the paraffin?
Are you sure there won’t be any gas leaking through it? Is it harder to cover the ends with paint?
iale wrote: are you sure that there will be no gas through it?
iale wrote: Is it harder to cover the ends with paint?
easier, but longer. Are you sure that there will be no gas leaking through it?
Shikhael Muma wrote: Are you sure that there will be no gas leaking through it?
Not 100%, but after coating the ends of the chipboard with alkyd Pesto in the new cabinet, the smell of “chemicals” became much weaker. It’s hard to say what the contribution of F-F is, there was no GA at hand
Shikhael Muma wrote: How do you like the paraffin?
Grouting with paraffin is an option, cheaper waxing, and as we know, nothing better than wax has yet been invented.
iale wrote: The edges, although a little, will distort the size of the chipboard. The connection may be disrupted.
+5 Two layers of edge, that's + 1.5 mm
Ded_Mazay wrote: either silicone or impregnated with wax
+5 I wouldn’t bother with paraffin, but would apply and rub in silicone sealant.
If required, the chipboard surfaces adjacent to the walls may not be treated with anything at all. Well, if you have the urge, then the varnish is water-based - it dries quickly and does not smell much.
WEREG wrote: I wouldn't bother with paraffin, but would apply and rub in silicone sealant.
The paraffin melted under the hairdryer and was instantly absorbed into the sawdust. And now the end feels paraffin. What about the sealant in terms of rubability and adhesion to chipboard - won’t the film come off?
Uncle Syoma wrote: the chipboard surfaces that are adjacent to the walls need not be treated with anything at all.
And the lower edges are the floors.
Uncle Syoma wrote: the varnish is water-based - it dries quickly and doesn’t smell much.
And the end of the chipboard is saturated with water
Shikhael Muma wrote: What about the sealant in terms of rub-in and adhesion to the chipboard - won’t the film come off?
Shikhael Muma wrote: And the lower edges are the floors.
And the lower ones - just like I was impatient - with water-based acrylate varnish.
Danuna, is the experiment going to boom?
Can you imagine what water-based acrylate varnish turns into after polymerization? And those 5 grams of water that may penetrate into the chipboard will not make any difference.
Shikhael Muma wrote: invisible edges of shelves, bottom edges of walls, etc.).
Uncle Syoma° wrote: According to the requirements, the chipboard surfaces that are adjacent to the walls can not be treated with anything at all. Well, if you have the urge, then the varnish is water-based - it dries quickly and does not smell much.
I puttyed and sanded under the varnish, the end turned out to be what I needed
Shikhael Muma wrote: Please note, beauty is not needed, no one will see. How do you like paraffin?
I melt the open ends with hot melt glue and take the remnants from the glue sticks to the hot-melt gun. I crumble, put glue crumbs on the end of the chipboard and melt them with an ordinary electric soldering iron, and level them with the side surface of the tip and pass through.
The surface is smooth, flush with the edges. The glue squeezed out onto the edges can be easily cut off with an “office” knife with a retractable blade.
WEREG wrote: Danuna, is the experiment going to boom?
It’s a matter of business You can even “stir up” a whole study - brand, type of sealant, national, imp. Chipboard, type of glue that binds chipboard, density and strength of chipboard, surface roughness, etc.
Uncle Syoma° wrote: Can you imagine what water-based acrylate varnish turns into after polymerization?
I imagine there are different types of water-based varnish, often in the form of a thick emulsion, for which deep penetration is possible in the case of strong dilution with water to a consistency a la Celco Sauna, respectively, the dry residue there will hardly be more than 20%.
What is chipboard? Features of the technology
Cabinets, cabinets, kitchen sets of middle and economy classes are made from chipboards that have undergone the stage of surface lamination with decorative and protective materials at the factory. These are the so-called chipboards.
The variety of colors and textures of laminated chipboard is amazing
Cladding is one of the final stages of chipboard manufacturing. This uses:
- paper film impregnated with thermosetting synthetic resins;
- laminated paper plastic containing impregnating resin compositions.
For the production of laminated chipboards, short-cycle or conveyor belt presses are used. At temperatures up to 250°C and under the influence of a pressure of 25-30 MPa (25-30 kg/cm 2 ), a physical and chemical process occurs: the resin seems to spread over the surface, seals it and forms a durable single canvas.
The production capacities of large factories make it possible to achieve a complete imitation of the texture of wood, stone, fabric, etc. Often, for individual collections of furniture or decorative finishing works, slabs with gloss, embossing, varnished or with a 3D effect are produced.
Lamination is often understood as another process - lamination. The technologies are similar, the difference is in the fastening composition. If in the first case synthetic resins are first melted and then pressed, then in the second case gluing is used. An adhesive composition is applied to the base plate, then a thermoplastic polymer film or hardened laminate is applied and rolled. This type of coating is weaker to tear off and can swell and get wet. A laminated board is actually a single whole and practically cannot be divided into components.
The next process, similar to lamination, is veneering. Veneer is a thin section of valuable wood with a thickness of at least 2 mm. Glued with special one- or two-component adhesive compounds, the surface turns out beautiful and unique, since there are no two identical layers of wood, and it is this fact that adds attractiveness and beauty to the veneer. The coating requires care and protection from moisture and mechanical damage. HDSP can be painted, varnished, waxed, oiled or impregnated. When peeling off elements, it is recommended to use carpentry or universal adhesives.
Marketers have coined a new term - synthetic veneer. A sheet of textured paper with a decor that imitates wood pores is impregnated with urea resins and dried. Often the surface is varnished. The resulting material is called synthetic veneer, and is glued to the surface of the chipboard under pressure and at high temperature. The coating turns out to be quite hard, dense, identical to natural veneer even to the touch.
Thus, lamination is the process of “welding” paper with decor using a melt of synthetic resins. This is the most reliable and durable method of cladding chipboard. The surface is durable, resistant to elevated temperatures and water, and mechanical damage.
Chipboard edge: how to process the ends yourself
After cutting the chipboard with your own hands, you will be faced with the need to process the visible ends of the future product. When compiling a list of parts, seeing the drawing in front of you, it is better to immediately mark the sides that will need to be covered with a special edge in order to hide the bare cut of the chipboard. The edge of chipboard can be different, let's look at the three most common options.
- PVC edge is the best option for cladding the ends of chipboard
- Wraparound overlay profile - an option for hiding chips and unevenness
- Melamine chipboard edge: how to glue it with an iron at home
Features of chipboard lamination
In industrial settings, belt or conveyor presses are used to bond the base and coating. They not only press the laminate tightly to the base, but also heat it up greatly. As a result, the impregnation melts and spreads, and the coating is connected to the base as tightly and evenly as possible. Laminated chipboard is made by gluing the cladding to the surface. Pasting films at home is partially similar to both of these methods, but due to the lack of special conditions, the applied coating is not as durable as an industrial one.
PVC edge is the best option for cladding the ends of chipboard
The term PVC (Polyvinyl chloride) is quite well known; it refers to a thermoplastic that is used in various ways in furniture production and decoration.
PVC furniture edge is a rigid tape of different thicknesses, from 0.5mm to 2mm, with a decorative coating applied in contrast or “to match the color” of the chipboard texture. An edge of this type is very resistant to mechanical damage and perfectly protects the ends of the chipboard from moisture penetration and chipping. But there is one important thing. It is impossible to glue a PVC edge to the end at home, without special tools, glue and skill.
Therefore, an excellent option would be to order edging of PVC parts immediately after cutting. The cost of the thinnest PVC tape with a thickness of 0.5 mm is almost equivalent to melamine tape (excluding gluing work). And the type of furniture and its durability characteristics will increase significantly. In addition, on visible ends (countertops, open shelves, facades) a PVC edge with a thickness of 1-2mm looks much more solid and beautiful. Don't forget to take its thickness into account when calculating the dimensions of the parts!
Features of obtaining laminated chipboard
Chipboard (chipboard) is used for the manufacture of furniture in the “medium” and “economy” classes. If the surface is covered with a decorative and protective material, then we are talking about laminated chipboard (LDSP).
For cladding laminated chipboards the following is used:
- The plastic is laminated paper, impregnated with a resin composition.
- Paper film impregnated with synthetic thermosetting resins.
When producing chipboard in a factory, a conveyor or short-cycle belt press is used. Under conditions of high pressure and temperature, the resin spreads over the surface and forms a durable, solid web.
How to choose coffee sets for the garden?Features of purchasing custom-made kitchen furniture
- Choosing the perfect sofa
Important! Modern equipment used in enterprises makes it possible to achieve a realistic imitation of the texture of wood, textiles, and ornamental stone. Laminated chipboard is produced with a glossy, embossed surface, as well as with a 3D effect.
Alternative technologies:
- Another technology for decorating chipboard is often confused with the lamination process: lamination. In classic lamination, the resin is melted and then pressed. Laminating involves gluing. An adhesive is applied to the base, then a polymer thermoplastic film or laminated paper is applied.
Important! This material is less durable and can swell and deform. As for the laminated board, it is a single inseparable whole.
- There is another technology reminiscent of lamination - veneering. Veneer is the thinnest layer of noble wood. The veneer thickness is from 2 mm. Gluing to the veneer surface is carried out using adhesive compounds: one- or two-component.
Important! The surface doesn't just look beautiful. It is truly unique, since the natural grain of the wood is preserved. Veneer is quite demanding to maintain. It can be painted, varnished, impregnated or waxed. If the coating comes off, experts recommend using universal or carpenter's adhesive.
- Sometimes you can find such a definition as synthetic veneer. This is a paper canvas with a texture that imitates the unevenness of wood, impregnated with urea resin. Sometimes the surface is varnished.
Important! The material is durable, hard, and feels identical to wood veneer.
Lamination, therefore, is a technology of “welding” decorated paper to a base using synthetic molten resins. The resulting surface is resistant to high temperatures, moisture and mechanical stress.
Wraparound overlay profile - an option for hiding chips and unevenness
If you purchased ready-made Leroy furniture panels or sawed chipboard yourself with a jigsaw, then most likely the quality of the cut is not very good. You can probably see chips along the edge, and the cut itself is not entirely even along the length, with a blocked horizon. If the parts are used to assemble a dressing room or wardrobe and the design itself is a combination of shelves and standing ones, then to hide the flaws you can use the so-called “hammered” edging (profile).
The wraparound overlay profile is a rigid or flexible U-shaped edging made of plastic or PVC, which fits tightly onto the edge of the chipboard.
With its edges, such an edging extends onto the front sides of the chipboard, enveloping it to a depth of 2-3mm. Thus, all chips and unevenness of the end become invisible.
Before “putting on” the U-shaped PVC profile, it is advisable to treat the ends of the chipboard with sealant and apply glue in spots for fastening strength.
Don't forget to take into account the thickness of the overlay edging when calculating! For example, in shelving structures it is better to deepen the shelves by 5 mm relative to the vertical sides.
The disadvantage of this option is that it is not suitable for processing the ends of facades, drawers and other elements.
Melamine chipboard edge: how to glue it with an iron at home
Melamine (or, as they also say, paper) edge for chipboard is a tape with a decorative coating on one side and glue on the other.
The process of gluing it to the end of a chipboard at home is extremely simple and understandable:
- We install the chipboard part vertically, with the processed end facing up.
- We apply the melamine edge evenly to it.
- Gently run the heated iron several times.
- After gluing, wait until it cools down and cut off the excess with a stationery or shoe knife.
- After cutting the edges, additionally sand with fine sandpaper.
It is better to first determine the optimal heating temperature of the iron experimentally, on a small piece of tape. If the temperature is insufficient, the glue will not melt completely; if it is too high, it will be “absorbed” into the chipboard, and the tape will also not stick well. You need to be careful with the selection of temperature and with dark melamine edges (wenge, black) - whitish spots may appear on the surface.
To make it easier to hold the chipboard workpiece in a vertical state, you can use clamps or construct a kind of “groove” from scraps into which the part can be inserted and fixed.
That's all the tricks for independently processing the ends of chipboard and gluing with melamine tape at home.
Required Tools
To edge edges, it is not necessary to use professional equipment or seek help from craftsmen. If you need to update old items, you can cover the surface yourself with multi-colored tape. The question arises: how to glue the edge to the chipboard? It is enough to have the essential tools at hand at home:
- iron;
- sandpaper (fine fraction);
- file (optional);
- stationery knife or scissors;
- rubber roller (optional);
- felt or other dense material.
By adhering to some rules, the product will turn out neat. To trim excess tape, use a stationery knife, and to glue it, use an iron.
When the edge on the furniture has come off, you can use a hot iron to glue it back on, and if that doesn’t work, then remove the old edge tape with the same movements of the iron and replace the old one with a new one.